Herunterladen Inhalt Inhalt Diese Seite drucken
Klarstein Vinsider 36 Bedienungsanleitung
Vorschau ausblenden Andere Handbücher für Vinsider 36:

Werbung

Verfügbare Sprachen
  • DE

Verfügbare Sprachen

  • DEUTSCH, seite 1
Vinsider 36
Weinkühlschrank
Wine Cooler
Cave à vin
Vinoteca
Frigorifero per vino
10033682

Werbung

Inhaltsverzeichnis
loading

Inhaltszusammenfassung für Klarstein Vinsider 36

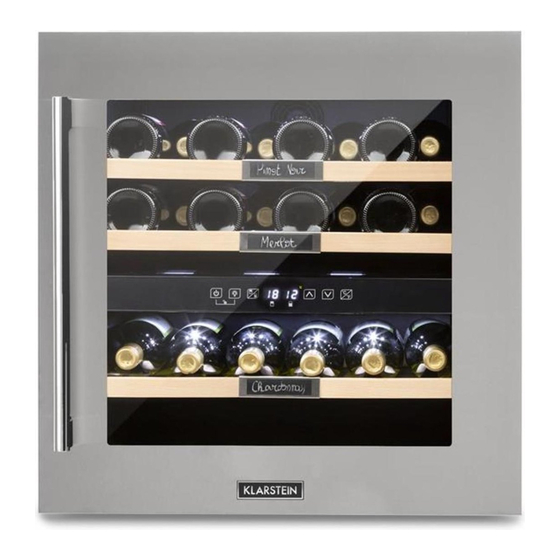
  • Seite 1 Vinsider 36 Weinkühlschrank Wine Cooler Cave à vin Vinoteca Frigorifero per vino 10033682...
  • Seite 3: Inhaltsverzeichnis

    Sehr geehrter Kunde, wir gratulieren Ihnen zum Erwerb Ihres Gerätes. Lesen Sie die folgenden Hinweise sorgfältig durch und befolgen Sie diese, um möglichen Schäden vorzubeugen. Für Schäden, die durch Missachtung der Hinweise und unsachgemäßen Gebrauch entstehen, übernehmen wir keine Haftung. Scannen Sie den folgenden QR-Code, um Zugriff auf die aktuellste Bedienungsanleitung und weitere Informationen rund um das Produkt zu erhalten.
  • Seite 4: Sicherheitshinweise

    SICHERHEITSHINWEISE • Prüfen Sie vor der Benutzung die Spannung auf dem Typenschild. Schließen Sie das Gerät nur an Steckdosen an, die der Spannung des Geräts entsprechen. • Kinder ab 8 Jahren, physisch und körperlich eingeschränkte Menschen dürfen das Gerät nur benutzen, wenn sie vorher von einer für Sie verantwortlichen Aufsichtsperson ausführlich mit den Funktionen und den Sicherheitsvorkehrungen vertraut gemacht wurden.
  • Seite 5 Dieses Gerät enthält das Kältemittel Isobutan (R600a), ein Naturgas mit hoher Umweltverträglichkeit, aber brennbar. Obwohl es brennbar ist, schädigt es nicht die Ozonschicht und verstärkt nicht den Treibhauseffekt. Die Verwendung dieses Kältemittels führt zu einer etwas höheren Geräuschentwicklung des Gerätes. Zusätzlich zum Kompressorgeräusch können Sie den Fluss des Kältemittels hören.
  • Seite 6: Installation

    INSTALLATION Vor dem ersten Betrieb Lassen Sie das Gerät vor dem ersten Betrieb 24 Stunden lang stehen, damit sich das Kühlmittel verteilen kann. Lassen Sie die Tür in dieser Zeit offen, damit sich produktionsbedingter Geruch verflüchtigen kann. Standort Der Ort, an dem Sie das Gerät aufstellen, sollte: •...
  • Seite 7 In heißen Klimazonen müssen außerdem Schlitze mit einer Mindestabmessung von 40 mm x 200 mm oben an der Rückseite oder oben an beiden Seiten des Gehäuses angebracht werden, damit kühle Luft einströmen kann. Zur Rückwand des Rahmens muss mindestens 30 mm Platz gelassen werden. Der Belüftungsschlitz sollte nicht an einer Seite angebracht werden, an der bereits ein anderes Gerät, wie beispielsweise ein Ofen, steht.
  • Seite 8: Geräteübersicht

    GERÄTEÜBERSICHT 10. Oberes Scharnier 1. Gehäuse 9. Türdichtung 2. Ablagebrett 8. Griff 3. Bedienfeld 7. Tür 4. Abdeckung 5. Beschriftungsleiste 6. Unteres Scharnier Hinweis: Ablagebretter, Türrahmen, Griff und andere Zubehörteile können je nach Modell und Zusammenstellung abweichen. Die Abbildungen in dieser Anleitung dienen lediglich der Veranschaulichung. Das von Ihnen erworbene Gerät entspricht gegebenenfalls nicht exakt dem hier abgebildeten Modell.
  • Seite 9: Betriebsgeräusche

    3. Anschalten Das Gerät kann nun angeschaltet werden und sollte nach einer Stunde ausreichende Kühlung erzeugt haben. Anderenfalls überprüfen Sie die Stromzufuhr. Stecken Sie den Stecker in die Steckdose und schalten Sie das Gerät ein, indem sie die POWER-Taste einige Sekunden gedrückt halten. Wenn Sie das Gerät zum ersten Mal (oder nach längerer Zeit wieder) benutzen, gibt es eine Differenz zwischen der von Ihnen eingestellten Temperatur und der Temperatur, die im Display angezeigt wird.
  • Seite 10: Temperatureinstellungen

    Während dieser Zeit scheint sich die LED-Anzeige unregelmäßig zu verändern. Das ist normal und dieser Vorgang tritt immer dann ein, wenn eine Einstellung geändert wird oder wenn eine große Menge Weinflaschen neu hinzugefügt wird. Temperatureinstellungen Hinweis: Die LED zeigt standardmäßig die aktuelle Innentemperatur an. Die elektrische Platine aller Modelle verfügt über eine Speicherfunktion.
  • Seite 11 ZONE WECHSELN • Drücken Sie die Taste, um bei der Temperatureinstellung zwischen der oberen und unteren Zone zu wechseln und wählen Sie aus, für welche Zone die Temperatur eingestellt werden soll. • Drücken Sie die Taste ein Mal und die LED-Anzeige der gewählten Zone blinkt regelmäßig.
  • Seite 12: Alarmsignal

    Hinweise: 1. Sowohl für die obere als auch für die untere Zone kann die Kühltemperatur auf Werte zwischen 5 und 22 °C eingestellt werden. Die Temperatur der unteren Zone kann jedoch nur gleich oder höher eingestellt werden als die der oberen Zone.
  • Seite 13: Zusammenbau

    • Bretter mit Rollschienen können teilweise ausgezogen werden, um die Handhabung zu erleichtern. • Öffnen Sie die Tür vollständig, bevor Sie die Ablagebretter herausziehen. • Wenn der Weinkühlschrank für einen längeren Zeitraum nicht verwendet wird, sollten Sie ihn ausschalten, vorsichtig reinigen und die Tür zur Belüftung geöffnet lassen.
  • Seite 14 2. Auswechseln des Türanschlags Bei Lieferung ist die Tür des Weinkühlschranks von links nach rechts zu öffnen. Um die Öffnungsrichtung umzukehren: 1. Öffnen Sie die Tür um 90° und halten Sie sie fest. 2. Lösen Sie die M5 x 16-Schrauben (2), nehmen Sie das rechte obere Türscharnier heraus und entfernen Sie die Tür (siehe Abbildung 1).
  • Seite 15 5. Setzen Sie die Kappe (1) ein. Abbildung 4 6. Montieren Sie das rechte obere Türscharnier (3) und schrauben Sie es mit M5 x 16-Schrauben (2) fest. Abbildung 5 Drehen Sie Tür (4) um 180° und setzen Sie das rechte untere Türscharnier (5) ein. Schrauben Sie es mit M5 x 16-Schrauben (2) fest (siehe Abbildung 6).
  • Seite 16: Reinigung Und Wartung

    REINIGUNG UND WARTUNG Reinigung • Ziehen Sie den Netzstecker vor dem Reinigen aus der Stromquelle. • Reinigen Sie das Gerät mit einem weichen Tuch oder Schwamm und Wasser. • Verwenden Sie keine organischen Lösungsmittel, alkalische Reiniger, kochendes Wasser, Waschmittel oder säurehaltigen Flüssigkeiten usw. •...
  • Seite 17: Fehlersuche Und Fehlerbehebung

    FEHLERSUCHE UND FEHLERBEHEBUNG Problem Mögliche Ursache und Lösungsansatz Das Gerät ist sehr laut. Bitte stellen Sie den vorderen Standfuß richtig ein, um das Gerät waagerecht auszurichten. Lassen Sie etwas Abstand zwischen dem Gerät und den Wänden. Aus dem Gerät ist Flüssigkeit Das Kältemittel ist im Umlauf.
  • Seite 18: Hinweise Zur Entsorgung

    Problem Mögliche Ursache und Lösungsansatz Das Licht funktioniert nicht. Überprüfen Sie die Stromversorgung. Kontaktieren Sie den Kundendienst, wenn das Licht defekt ist HINWEISE ZUR ENTSORGUNG Befindet sich die linke Abbildung (durchgestrichene Mülltonne auf Rädern) auf dem Produkt, gilt die Europäische Richtlinie 2012/19/EU.
  • Seite 19: Technical Data

    Dear Customer, Congratulations on purchasing this equipment. Please read this manual carefully and take care of the following hints to avoid damages. Any failure caused by ignoring the items and cautions mentioned in the instruction manual is not covered by our warranty and any liability. Scan the QR code to get access to the latest user manual and other information about the product: CONTENT...
  • Seite 20: Safety Instructions

    SAFETY INSTRUCTIONS • Check that the voltage of the power supply in your home is the same as the voltage shown on the rating label of this product. • This appliance can be used by children aged from 8 years and above and persons with reduced physical, sensory or mental capabilities or lack of experience and knowledge if they have been given supervision or instruction concerning use of the appliance in a safe way and understand the hazards involved.
  • Seite 21 This appliance contains the coolant isobutane (R600a), a natural gas which is environmentally friendly. Although it is fl ammable, it does not damage the ozone layer and does not increase the greenhouse effect. The use of this coolant has,however,led to a slight increase in the noise level of the appliance. In addition to the noise of the compressor,you might be able to hear the coolant fl owing around the system.
  • Seite 22: Installation

    INSTALLATION Before first use Allow 24 hours before switching on the wine cooler. During this time we recommend that you leave the door open to clear any residual odours. Location The location you have selected for your wine cooler should: •...
  • Seite 23 • In hot climate zone, an air vent or grid, with a minimum ventilation size of 200 mm x 40 mm MUST be cut out at the rear top of the back partitioning or at the top of either side of the partitioning, allowing cool fresh air full access to flow into the 30 mm gap located at the rear of the cabinet.
  • Seite 24: Product Overview

    PRODUCT OVERVIEW 10. Upper hinge 1. Housing 9. Door seal 2. Shelf 8. Handle 3. Display panel 7. Door 4. Cover board 5. Label strip 6. Lower hinge Note: Shelves, door frame, handle and other accessories could be different according to different models and configuration. All photos in this manual are for reference. The appliance you buy might not be exactly the same as shown here. Please refer to the actual product.
  • Seite 25 3. Power on The appliance can now be switched on and will have sufficiently cooled down inside after 1 hour, otherwise you should check the power connection. Plug in and switch on the cooler by pressing on the power button for a few seconds. When you use the wine cooler for the first time (or restart the wine cooler after having it shut off for a long time), there will be a few degrees variance between the temperature you have selected and the one indicated on the LED readout.
  • Seite 26: Control Panel And Functions

    Notes on temperature regulation Please note that depending on the loading and settings chosen it takes about 24 hours for the wine cooler to see the temperature stabilizing. During this time LED seems to move erratically in particular,It is normal and this process occurs whenever the setting is modified and/or whenever a large amount of bottles are added to the cooler.
  • Seite 27 LIGHT • Press the button to turn the LED lights inside the appliance on or off. In standby mode, this button will not work. ZONE SWITCH • Press the button to switch between the upper zone and lower zone when choosing which zone to set the temperature for. •...
  • Seite 28 Notes: 1. For both the upper and lower zones, the cooling temperature can be set between 5 and 22 °C. The temperature of the lower zone can only be set equal to or higher than that of the upper zone. 2. Alarm sound: If a system malfunction occurs and the alarm sounds, press any key on the control panel to cancel the alarm sound.
  • Seite 29: Assembly

    • If the wine cooler is not going to be used for an extended period of time, it is recommended that you power it off, clean it carefully and open the door for ventilation. • The table below shows the recommended temperature for storing and drinking different types of wine: Red wine 15-18 °C...
  • Seite 30 2. Reversing the door Our wine cooler is delivered with the door opening from left to right. To reverse the opening direction: 1. Open the door at 90° and keep it steady. 2. Unscrew the M5 x 16 screws (2), dismantle the right upper hinge and remove the door (see figure 1).
  • Seite 31 5. Install the germinal lid (1). Figure 4 6. Install the right upper hinge (3) and screw tight the M5 x 16 screws (2). Figure 5 Turn the door (4) 180° uand insert the right lower hinge (5). Screw tight with the M5 x 16 screws (2) (see figure 6).
  • Seite 32: Cleaning And Maintenance

    CLEANING AND MAINTENANCE Cleaning • Disconnect the appliance from the power source before cleaning. • Clean the appliance with a soft cloth or sponge and water. • Do not use organic solvents, alkaline detergents, boiling water, washing powder or acidic liquids etc. •...
  • Seite 33: Troubleshooting

    TROUBLESHOOTING Problem Possible Cause and Suggested Solution The appliance makes lots Adjust the front foot, keeping the appliance level. of noise. Leave some space between the appliance and the walls. Liquid flowing can be heard The refrigerant is circulating. Noises caused by this are from inside the appliance.
  • Seite 34: Hints On Disposal

    HINTS ON DISPOSAL According to the European waste regulation 2012/19/EU this symbol on the product or on its packaging indicates that this product may not be treated as household waste. Instead it should be taken to the appropriate collection point for the recycling of electrical and electronic equipment.
  • Seite 35 Chère cliente, cher client, Toutes nos félicitations pour l’acquisition de ce nouvel appareil. Veuillez lire attentivement et respecter les instructions de ce mode d’emploi afin d’éviter d’éventuels dommages. Nous ne saurions être tenus pour responsables des dommages dus au non-respect des consignes et à...
  • Seite 36: Consignes De Sécurité

    CONSIGNES DE SÉCURITÉ • Vérifiez la tension sur la plaque signalétique avant utilisation. Branchez l‘appareil uniquement aux prises correspondant à la tension de l‘appareil. • Les enfants de plus de 8 ans et les personnes limitées physiquement ou mentalement ne doivent utiliser l‘appareil que s‘ils ont été familiarisés au préalable avec les fonctions et les mesures de sécurité...
  • Seite 37 Cet appareil contient du liquide réfrigérant Isobutane (R600a), un gaz naturel très respectueux de l’environnement mais infl ammable. Bien qu’il soit infl ammable, il ne détruit pas la couche d’ozone et ne renforce pas l’effet de serre. L’utilisation de ce liquide réfrigérant provoque toutefois un niveau sonore de l’appareil légèrement plus élevé.
  • Seite 38: Installation

    INSTALLATION Avant la première utilisation Laisser l‘appareil reposer pendant 24 heures avant la première utilisation pour permettre au liquide de refroidissement de se répartir. Laissez la porte ouverte pendant ce temps pour permettre à l‘odeur d‘appareil neuf de s‘évaporer. Emplacement Le lieu d‘emplacement de l‘appareil doit : •...
  • Seite 39 Dans les climats chauds, des fentes d‘une dimension minimale de 40 mm x 200 mm doivent également être installées sur le haut du dos ou sur le haut des deux côtés du boîtier pour permettre à l‘air frais de pénétrer. 30 mm au moins doivent être laissés sur la paroi arrière du cadre.
  • Seite 40: Aperçu De L'appareil

    APERÇU DE L‘APPAREIL 10. Charnière supérieure 1. Boîtier 9. Joint de porte 2. Clayette 8. Poignée 3. Panneau de commande 7. Porte 4. Cache 6. Charnière inférieure 5. Barre de titre Remarque : Les clayettes, cadres de portes, poignées et autres accessoires peuvent différer selon le modèle et la composition. Les illustrations de ce manuel sont fournies à...
  • Seite 41 3. Démarrage L‘appareil peut maintenant être allumé et devrait avoir produit un froid suffisant au bout d‘une heure. Sinon, vérifiez l‘alimentation. Branchez la fiche dans la prise et allumez l’appareil en maintenant le bouton POWER pendant quelques secondes. Lorsque vous utilisez l‘appareil pour la première fois (ou après une longue période), il y a une différence entre la température que vous avez réglée et la température affichée à...
  • Seite 42: Panneau De Commande Et Fonctions

    Pendant ce temps, l‘affichage à LED semble changer de façon irrégulière. Ceci est normal et ce processus se produit chaque fois qu‘un paramètre est modifié ou lorsque vous ajoutez une grande quantité de bouteilles de vin. Réglages de la température Remarque : la LED affiche par défaut la température interne actuelle.
  • Seite 43 POUR CHANGER DE ZONE • Appuyez sur la touche pour basculer entre les zones supérieure et inférieure pour régler de la température et sélectionnez la zone à régler. • Appuyez une fois sur la touche et le voyant de la zone sélectionnée clignote régulièrement.
  • Seite 44 Remarques : 1. La température de refroidissement peut être réglée entre 5 et 22 °C pour les zones supérieure et inférieure. Cependant, la température de la zone inférieure ne peut être réglée que sur une valeur supérieure ou égale à celle de la zone supérieure.
  • Seite 45: Assemblage

    • Les clayettes avec coulisses peuvent être partiellement sorties pour faciliter la manipulation. • Ouvrez complètement la porte avant de sortir les clayettes de rangement. • Si la cave à vin n‘est pas utilisée pendant une période prolongée, éteignez-la, nettoyez-la soigneusement et laissez la porte ouverte pour permettre sa ventilation. •...
  • Seite 46 2. Modification du sens de fermeture Lors de la livraison, la porte de la cave à vin s‘ouvre de gauche à droite. Pour inverser le sens d‘ouverture : 1. Ouvrez la porte à 90° et tenez-la fermement. 2. Dévissez les vis M5 x 16 (2), retirez la charnière supérieure droite et retirez la porte (voir figure 1).
  • Seite 47 5. Placez le capuchon (1). Figure 4 6. Montez la charnière supérieure droite de la porte (3) et serrez-la à l‘aide des vis M5 x 16 (2). Figure 5 Tournez la porte (4) à 180° et insérez la charnière inférieure droite (5).
  • Seite 48: Nettoyage Et Entretien

    NETTOYAGE ET ENTRETIEN Nettoyage • Débranchez le cordon d‘alimentation de la prise avant de nettoyer l‘appareil. • Nettoyez l‘appareil avec un chiffon doux ou une éponge et de l‘eau. • N‘utilisez pas de solvants organiques, de nettoyants alcalins, d‘eau bouillante, de détergents, de liquides acides, etc.
  • Seite 49: Identification Et Résolution Des Problèmes

    IDENTIFICATION ET RÉSOLUTION DES PROBLÈMES Problème Cause possible et solution L'appareil est très bruyant. Veuillez ajuster le pied avant correctement pour mettre l'appareil de niveau. Laissez un peu d'espace entre l'appareil et les murs. On entend un écoulement Le réfrigérant est en circulation. Le bruit qui en résulte de liquide à...
  • Seite 50: Informations Sur Le Recyclage

    Problème Cause possible et solution L'éclairage ne fonctionne Contrôlez l'alimentation. pas. Contactez le service client si l'éclairage est défectueux INFORMATIONS SUR LE RECYCLAGE Vous trouverez sur le produit l’image ci-contre (une poubelle sur roues, barrée d‘une croix), ce qui indique que le produit se trouve soumis à...
  • Seite 51 Estimado cliente, Le felicitamos por la adquisición de este producto. Lea atentamente el siguiente manual y siga cuidadosamente las instrucciones de uso con el fin de evitar posibles daños. La empresa no se responsabiliza de los daños ocasionados por un uso indebido del producto o por haber desatendido las indicaciones de seguridad.
  • Seite 52: Indicaciones De Seguridad

    INDICACIONES DE SEGURIDAD • Antes de utilizar el aparato, compruebe la tensión en la placa técnica del mismo. Conecte el aparato solamente a tomas de corriente que se adecuen a la tensión de este. • Los niños mayores de 8 años y las personas con discapacidades físicas o psíquicas solamente podrán utilizar el aparato si han sido previamente instruidas sobre su uso y conocen las indicaciones de seguridad.
  • Seite 53 Este aparato contiene refrigerante isobutano (R600a), un gas natural que no es nocivo para el medioambiente, pero sí infl amable. Aunque sea infl amable, no es perjudicial para la capa de ozono ni aumenta el efecto invernadero. La utilización de este refrigerante provoca un aumento de ruido del aparato. Además del ruido del compresor, podrá...
  • Seite 54 INSTALACIÓN Antes del primer uso Deje el aparato en posición vertical durante 24 horas antes de ponerlo en marcha por primera vez para que el líquido refrigerante pueda distribuirse correctamente. Deje la puerta abierta durante este periodo para que los olores del proceso de fabricación desaparezcan.
  • Seite 55 • En las zonas de climas cálidos también deben contar con ranuras con unas dimensiones mínimas de 40 mm x 200 mm en la parte superior trasera o en la parte superior en ambos lados de la carcasa para que el aire pueda circular correctamente.
  • Seite 56: Visión General Del Aparato

    VISIÓN GENERAL DEL APARATO 10. Bisagra superior 1. Carcasa 9. Junta de la puerta 2. Balda 8. Asa 3. Panel de control 7. Puerta 4. Cubierta 6. Bisagra inferior 5. Tira de etiquetado Nota: La balda, el marco de la puerta, el tirador y otros accesorios pueden variar en función del modelo y del diseño. Las ilustraciones de este manual se utilizan solamente como orientación.
  • Seite 57 3. Encender Ahora puede encenderse el aparato y en una hora debe haberse generado suficiente frío. De lo contrario, compruebe la red eléctrica. Conecte el enchufe a la toma de corriente y encienda el aparato pulsando el botón POWER algunos segundos. Si utiliza el aparato por primera vez (o lo utiliza después de un periodo prolongado de tiempo), existe una diferencia entre la temperatura que ha seleccionado y la temperatura que aparece en el display.
  • Seite 58: Panel De Control Y Funciones

    Durante este tiempo, es posible que los indicadores LED cambien de manera irregular. Se trata de un fenómeno normal y este proceso siempre se produce si ha cambiado un ajuste o si ha añadido una gran cantidad de botellas de vino. Ajustes de temperatura Nota: El LED muestra la temperatura interior actual.
  • Seite 59 CAMBIAR DE ZONA • Pulse el botón para elegir entre la zona inferior o superior a la hora de seleccionar la temperatura y escoja para qué zona desea regularla. • Pulse una vez el botón y la pantalla LED de la zona seleccionada parpadea de manera constante.
  • Seite 60 Observaciones: 1. Tanto para la zona superior como la inferior, la temperatura de refrigeración puede regularse entre 5 y 22 °C. La temperatura de la zona inferior solo puede regularse a un valor igual o superior que la zona superior. 2.
  • Seite 61 • Las baldas con rieles se pueden extraer parcialmente para facilitar el manejo. • Abra completamente la puerta antes de extraer las baldas. • Si la vinoteca no se utiliza en un periodo de tiempo prolongado, debe apagarla, limpiarla cuidadosamente y dejar la puerta abierta para que se airee. •...
  • Seite 62 2. Cambio de la bisagra de la puerta La vinoteca se entrega con el sentido apertura de la puerta de izquierda a derecha. Para revertir la dirección de apertura de la puerta: 1. Abra la puerta 90° y sujétela. 2. Suelte los 16 tornillos M5 (2), retire la bisagra superior derecha de la puerta y desmonte la puerta (véase ilustración 1).
  • Seite 63 5. Coloque la tapa (1). Ilustración 4 6. Monte la bisagra superior derecha de la puerta (3) y apriete los 16 tornillos M5 (2). Ilustración 5 Gire la puerta (4) 180 ° y coloque la bisagra inferior derecha (5). Atorníllela con los 16 tornillos M5 (2) (véase ilustración 6).
  • Seite 64: Limpieza Y Mantenimiento

    LIMPIEZA Y MANTENIMIENTO Limpieza • Desconecte el enchufe antes de limpiar el aparato. • Limpie el aparato con un paño suave o una esponja y un poco de agua. • No utilice productos orgánicos para la limpieza ni tampoco limpiadores alcalinos, agua hirviendo, detergente en polvo ni ácidos.
  • Seite 65: Detección Y Resolución De Problemas

    DETECCIÓN Y RESOLUCIÓN DE PROBLEMAS Problema Posible causa y solución El aparato emite demasiados Ajuste las patas delanteras de tal modo que el ruidos aparato quede recto. Deje un poco de distancia entre las paredes y el aparato. Se escucha fluir líquido en El líquido refrigerante está...
  • Seite 66: Retirada Del Aparato

    Problema Posible causa y solución La luz no funciona. Compruebe el suministro eléctrico. Contacte con el servicio de atención al cliente si la luz está averiada. RETIRADA DEL APARATO Si el aparato lleva adherida la ilustración de la izquierda (el contenedor de basura tachado) entonces rige la normativa europea, directiva 2012/19/UE.
  • Seite 67 Gentile Cliente, La ringraziamo per aver acquistato il dispositivo. La preghiamo di leggere attentamente le seguenti istruzioni per l’uso e di seguirle per evitare possibili danni tecnici. Non ci assumiamo alcuna responsabilità per danni scaturiti da una mancata osservazione delle avvertenze di sicurezza e da un uso improprio del dispositivo.
  • Seite 68: Avvertenze Di Sicurezza

    AVVERTENZE DI SICUREZZA • Controllare la tensione sulla targhetta prima dell’utilizzo. Collegare il dispositivo solo a prese di corrente con tensione corrispondente a quella del dispositivo. • Bambini a partire da 8 anni e persone con limitate capacità fisiche e psichiche possono utilizzare il dispositivo solo se sono stati istruiti in modo esaustivo da una persona responsabile del loro controllo sulle funzioni e sulle procedure di sicurezza.
  • Seite 69: Avvertenze Particolari

    Questo dispositivo contiene il refrigerante isobutano (R600a), un gas naturale con elevata sostenibilità ecologica, ma infi ammabile. Sebbene sia infi ammabile, non rovina lo strato di ozono e non incrementa l’effetto serra. L’utilizzo di questo refrigerante comporta una maggiore rumorosità del dispositivo. Oltre al rumore del compressore, è...
  • Seite 70 INSTALLAZIONE Prima della messa in funzione Lasciare in posizione il frigorifero per 24 ore prima di metterlo in funzione, in modo che il refrigerante si possa distribuire. Lasciare lo sportello aperto durante questo tempo, in modo che gli odori legati al processo produttivo possano scomparire. Luogo di posizionamento Il luogo in cui si posiziona il dispositivo deve avere le seguenti caratteristiche: •...
  • Seite 71 In aree climatiche calde è necessario realizzare fessure con una dimensione minima di 40 mm x 200 mm sulla parte alta del lato posteriore e su entrambi i lati dell’alloggiamento, in modo che possa entrare aria fresca. Lasciare almeno 30 cm di spazio sul retro del telaio. Non realizzare la fessura di ventilazione su un lato che è...
  • Seite 72: Descrizione Del Dispositivo

    DESCRIZIONE DEL DISPOSITIVO 10. Cerniera superiore 1. Alloggiamento 9. Guarnizione sportello 2. Ripiano di appoggio 8. Maniglia 3. Pannello di controllo 7. Sportello 4. Copertura 6. Cerniera inferiore 5. Display Nota: ripiani di appoggio, telaio dello sportello, maniglia e altri accessori possono variare in base a modello e composizione. Le immagini in questo manuale sono solo indicative.
  • Seite 73 3. Accensione Ora è possibile accendere il dispositivo e dopo un’ora dovrebbe essersi raffreddato a sufficienza. Se non è così, controllare il collegamento all’alimentazione. Collegare la spina alla presa elettrica e accendere il dispositivo tenendo premuto POWER per qualche secondo. Se si utilizza il dispositivo per la prima volta (o dopo un lungo periodo di non utilizzo), c’è...
  • Seite 74: Pannello Di Controllo E Funzioni

    Durante questo tempo, lo schermo LED sembra cambiare indicazione in modo irregolare. Questo è normale e si ripete ogni volta che si modifica un’impostazione o si inserisce una grande quantità di nuove bottiglie di vino. Aggiustare la temperatura Nota: il LED mostra la temperatura interna attuale. La scheda elettronica di tutti i modelli è...
  • Seite 75 CAMBIARE ZONA • Premere il tasto per cambiare tra zona superiore e inferiore nell’impostazione della temperatura e selezionare per quale zona impostare la temperatura. • Premere il tasto una volta e lo schermo LED della zona selezionata lampeggia regolarmente. • Utilizzare AUMENTARE e DIMINUIRE per impostare la temperatura.
  • Seite 76 Avvertenze: 1. La temperatura può impostata tra 5 e 22 °C per la zona superiore e per quella inferiore. La temperatura della zona inferiore può essere impostata solo su un valore uguale o superiore a quello della zona superiore. 2. Segnale di allarme: Se si verifica un errore di sistema viene emesso un segnale acustico.
  • Seite 77 • Ripiani con guide a rotelle possono essere parzialmente tirati fuori per facilitare la gestione delle bottiglie. • Aprire completamente lo sportello prima di tirare fuori i ripiani. • Se il frigorifero non viene utilizzato per tempi prolungati, spegnerlo, pulirlo e lasciare lo sportello aperto per garantire una buona ventilazione.
  • Seite 78 2. Cambiare la direzione di apertura dello sportello Al momento della consegna lo sportello del frigorifero si apre da sinistra a destra. Per invertire la direzione: 1. Aprire lo sportello di 90° e tenerlo saldamente. 2. Svitare le viti M5 x 16 (2), togliere la cerniera superiore destra e staccare lo sportello (v.
  • Seite 79 5. Mettere il tappo (1). Figura 4 6. Montare la cerniera superiore destra (3) e avvitarla saldamente con le viti M5 x 16 (2). Figura 5 Ruotare lo sportello (4) di 180° e inserire la cerniera inferiore destra (5). Avvitarla saldamente con le viti M5 x 16 (2) (v.
  • Seite 80: Pulizia E Manutenzione

    PULIZIA E MANUTENZIONE Pulizia • Spegnere il dispositivo e staccare la spina. • Pulire il dispositivo con un panno morbido o una spugna e acqua. • Non utilizzare solventi organici, detergenti alcalini, acqua bollente, detersivo o liquidi contenenti acidi, ecc. •...
  • Seite 81: Ricerca E Risoluzione Dei Problemi

    RICERCA E RISOLUZIONE DEI PROBLEMI Problema Possibile causa e soluzioni Il dispositivo è molto Regolare correttamente il piede d’appoggio rumoroso. anteriore, in modo che il dispositivo sia perfettamente in bolla. Lasciare un po’ di spazio tra dispositivo e pareti. Si sente rumore di liquido Il refrigerante è...
  • Seite 82: Smaltimento

    Problema Possibile causa e soluzioni La luce non funziona. Controllare l’alimentazione. Contattare il servizio di assistenza ai clienti se la luce è guasta. SMALTIMENTO Se sul prodotto è presente la figura a sinistra (il bidone dei rifiuti con le ruote), si applica la direttiva europea 2012/19/ UE.

Inhaltsverzeichnis