
Verwandte Anleitungen für Celestron SKYPRODIGY-Serie


Inhaltszusammenfassung für Celestron SKYPRODIGY-Serie
- Seite 1 COMPUTERIZED TELESCOPE SkyProdigy 70 ITEM #22089 SkyProdigy 90 ITEM #22091 INSTRUCTION MANUAL...
-
Seite 2: Inhaltsverzeichnis
INSTRUCTION MANUAL TABLE OF CONTENTS INTRODUCTION Warning SkyProdigy Models ASSEMBLY Assembling SkyProdigy Attaching the Hand Control Holder Attaching the Fork Arm to the Tripod Attaching the Telescope to the Fork Arm The Star Diagonal The Eyepiece Focusing Attaching the Hand Control Powering SkyProdigy The StarPointer Finderscope StarPointer Installation... - Seite 3 Advanced Level Menu Items Database Setup Telescope Setup Tracking Slew Limits Direction Buttons Cordwrap Backlash Compensation StarSense Camera SKYPRRODIGY MENU TREE TELESCOPE BASICS Focusing Image Orientation Calculating Magnification Determining Field of View General Observing Hints CELESTIAL OBSERVING Observing the Moon Lunar Observing Hints Observing the Planets Planetary Observing Hints...
-
Seite 4: Introduction
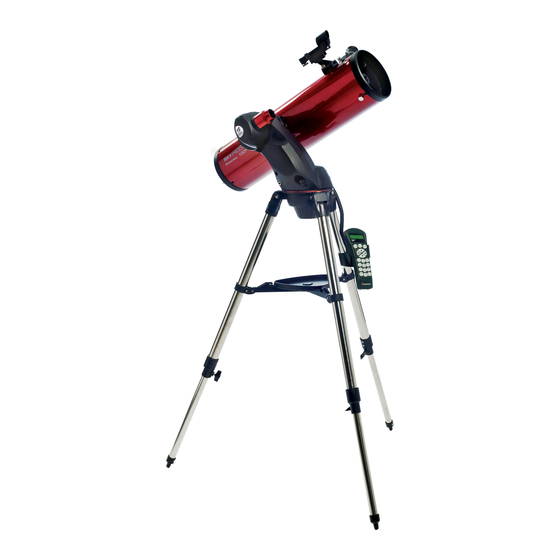
*Celestron’s SkyProdigy telescope uses an integrated imaging camera and patented StarSense Technology to automatically align itself with the night sky and determine where the telescope is currently pointing.The camera automatically captures an image of the sky, which is processed internally to positively identify the stars in the image. - Seite 5 SkyProdigy 70 Telescope 1. Objective Lens Tripod Coupling Screw 2. Fork Arm Focus Knob 3. On/Off Switch Star Diagonal 4. Computerized Hand Control Eyepiece 5. Tripod 12. StarPointer Finderscope (not shown) 6. Tripod Leg Extension Clamp 13. StarSense Camera 7. Accessory Tray 14.
- Seite 6 INSTRUCTION MANUAL SkyProdigy 90 Telescope 1. Corrector Lens Tripod 2. StarSense Camera Accessory Tray 3. Fork Arm Star Diagonal 4. On/Off Switch 10. Eyepiece 5. Tripod Coupling Screw 11. StarPointer Finderscope 6. Computerized Hand Control 12. Telescope Tube...
- Seite 7 SkyProdigy 130 Telescope 1. Eyepiece Tripod Leg Extension Clamp 2. Secondary Mirror Accessory Tray 3. Fork Arm Tripod Coupling Screw 4. On/Off Switch StarSense Camera 5. Computerized Hand Control 11. Telescope Tube 6. Tripod 12. StarPointer Finderscope...
-
Seite 8: Assembly
INSTRUCTION MANUAL [Continued] aSSEMBLY 2. Slide the inner portion of each leg down 6” to 8” inches. SkyProdigy comes partially assembled and can be operational in 3. Adjust the tripod height until the bubble level on the tripod a matter of minutes. SkyProdigy is conveniently packaged in one leg is centered (See figure 2-2). -
Seite 9: Attaching The Telescope To The Fork Arm
attaching the Telescope to the Fork arm not obstruct the inner diameter of the eyepiece end of the diagonal. Your telescope optical tube has a built on dovetail mounting bar Remove the protective dust cap from the star diagonal’s used to attach the tube to the fork arm. To attach the telescope barrel. -
Seite 10: Focusing
INSTRUCTION MANUAL attaching the Computerized Hand Control 3. Tighten the thumbscrew to hold the eyepiece in place. To remove the eyepiece, loosen the thumbscrew on the eyepiece SkyProdigy’s hand control has a phone jack type connector at the barrel and slide the eyepiece out. end of its cord. -
Seite 11: Starpointer Installation
diode (LED); it is not a laser beam and will not damage the glass 1. Slide the StarPointer bracket into the dovetail mounting window or your eye. The StarPointer comes equipped with a vari- platform on top of the focuser assembly (see figure 2-14). able brightness control, two axes alignment control and mount- 2. -
Seite 12: Hand Control
1. Liquid Crystal Display (LCD) Window: Has a four-line, 18 others. character display screen that has red backlighting for 7. Option (Celestron Logo): Can be used in combination comfortable viewing of telescope information and scrolling with other keys to access more advanced features and text. - Seite 13 Tips for Aligning SkyProdigy Remember the following alignment guidelines to make using SkyProdigy as simple and accurate as possible. • Be sure to level the tripod before you begin alignment. A level tripod will help the telescope better match the images it takes with the actual sky and give you a more accurate determination of your location.
-
Seite 14: Manual Starsense Alignment
INSTRUCTION MANUAL Solar System Alignment SkyProdigy also provides two other alignment methods that can be used instead of the StarSense Auto Alignment. To access Solar System Align is designed to provide good tracking and the additional alignment methods, Press and hold the OPTION GoTo performance by using solar system objects (Sun, Moon Key and press the ALIGN button. -
Seite 15: Refine Alignment
Refine Alignment brightest stars, double (Binary) stars, variable stars, and selected asterisms. Once the telescope is aligned using Solar System Align, you • Deep Sky –The Deep Sky catalog displays a list of all the have the option of adding additional alignment objects (either best Galaxies, Nebulae and Clusters, as well as the complete other planets or stars from the Named Star Catalog) in order to Messier and select NGC objects. -
Seite 16: Identify Button
INSTRUCTION MANUAL coordinates of the object. Press it again to display the text description. Press BACK to return to the previous screen. The hand control has a “double button” feature that allows you - To slew to the object displayed, press ENTER. to instantly speed up the motors without having to choose a - To see the next tour object, press the DOWN key. -
Seite 17: Basic Level Menu Items
The Basic functions, which are displayed on the hand control Get Version Info – Selecting this option will allow you to see when initially powered on, are the commonly used functions the current version and build number of the hand control, camera that you may need to use every time you use your telescope. -
Seite 18: Telescope Setup
INSTRUCTION MANUAL displayed when the IDENTY button is pressed. This will not only Cordwrap – Cordwrap safeguards against the telescope slewing allow you to set the brightness of the object you want SkyProdigy more than 360º in azimuth and wrapping cables around the to identify but also the distance away from its current location. - Seite 19 SkyProdigy will then take an image of the sky and calibrate the center of the camera sensor with the star seen in the eyepiece. Note: In order to manually slew the telescope and center a bright star in the eyepiece it may be necessary to first align the StarPointer finderscope with the eyepiece.
-
Seite 20: Skyprrodigy Menu Tree
INSTRUCTION MANUAL SKYPRODIgY MENU TREE The following figure is a menu tree showing the sub-menus associated with the MENU functions. MENU DATABASE SETUP SKYTOUR FILTERS CATALOG FILTERS IDENTIFY FILTERS ALLOW SUN TELESCOPE SETUP TRACKING SLEW LIMITS DIRECTION BUTTONS CORDWRAP BACKLASH COMP STARSENSE CAMERA CALIBRATE CAPTURE SETTINGS... -
Seite 21: Telescope Basics
Reversed from left to right, as Inverted image, as viewed with apparent field of each eyepiece that Celestron manufactures is found Reversed f rom l eft t o Inverted i mage, a s ... -
Seite 22: Celestial Observing
This can damage the telescope and/or any accessories attached to the telescope. For safe solar viewing, use a Celestron solar filter (see Optional Accessories section of manual) that reduces the intensity of the Sun’s light, making it safe to view. With a filter you can see sunspots as they move across the solar disk and faculae, which are bright patches seen near the Sun’s edge. -
Seite 23: Seeing Conditions
urban areas washes out most nebulae making them difficult, if not impossible, to observe. Light Pollution Reduction filters help reduce the background sky brightness, thus increasing contrast. Seeing Conditions Seeing conditions directly affect image quality. These drawings represent a point source (i.e., star) under bad seeing conditions Viewing conditions affect what you can see through your telescope (left) to excellent conditions (right). -
Seite 24: Telescope Maintenance
If your telescope is out of collimation, the best way to re-collimate any remaining debris. Apply the solution to the tissue and then it is with a good collimation tool. Celestron offers a Newtonian apply the tissue paper to the lens. Low pressure strokes should Collimation Tool (#94182) with detailed instructions that makes go from the center of the corrector to the outer portion. -
Seite 25: Appendix A - Technical Specifications
aPPENDIX a - TECHNICaL SPECIFICaTIONS Optical Specification SkyProdigy 70 mm SkyProdigy 90 mm SkyProdigy 130 mm Design Refractor Maksutov-Cassegrain Reflector Aperture 70 mm 90 mm 130 mm Focal Length 700 mm 1250 mm 650 mm F/ratio of the Optical System Optical Coatings Fully Coated Fully Coated... -
Seite 26: Appendix B - Glossary Of Terms
INSTRUCTION MANUAL aPPENDIX B - gLOSSaRY OF TERMS Absolute Magnitude The apparent magnitude that a star would have if it were observed from a standard distance of 10 parsecs, or 32.6 light-years. The absolute magnitude of the Sun is 4.8. at a distance of 10 parsecs, it would just be visible on Earth on a clear moonless night away from surface light. - Seite 27 Declination (DEC) The angular distance of a celestial body north or south of the celestial equator. It may be said to correspond to latitude on the surface of the Earth. Ecliptic The projection of the Earth’s orbit on to the celestial sphere. It may also be defined as “the apparent yearly path of the Sun against the stars”.
- Seite 28 INSTRUCTION MANUAL Parallax is the difference in the apparent position of an object against a background when viewed by an Parallax observer from two different locations. These positions and the actual position of the object form a triangle from which the apex angle (the parallax), and the distance of the object can be determined if the length of the baseline between the observing positions is known, and the angular direction of the object from each position at the ends of the baseline has been measured.
-
Seite 29: Appendix C - Time Zone Map
aPPENDIX C - TIME ZONE MaP... - Seite 30 INSTRUCTION MANUAL...
- Seite 32 2835 Columbia Street Torrance, CA 90503 Tel. (310) 328-9560 Fax. (310) 212-5835 Web site at http://www.celestron.com Copyright 2011 Celestron All rights reserved. (Products or instructions may change without notice or obligation.) This device complies with Part 15 of the FCC Rule. Operation is subject to the following two conditions: 1) This device may not cause harmful interference, and 2) This device must accept any interference received, including interference that may cause undesired operations.
- Seite 33 TELESCOPE NUMERIQUE SkyProdigy 70 Article #22089 Article #22091 SkyProdigy 90 INSTRUCTIONS MANUEL...
- Seite 34 MANUEL D'INSTRUCTIONS SOMMAIRE INTRODUCTION ..................................................Avertissements ................................................Modèles SkyProdigy ..............................................ASSEMBLAGE ..................................................Assembler le SkyProdigy ............................................Fixer le bloc de commande ............................................. Fixer la monture à fourche au trépied ......................................... Fixer le télescope à la monture à fourche ......................................La diagonale en étoile .............................................. L'oculaire ..................................................
- Seite 35 Éléments de Advanced Level Menu ........................................Database Setup ................................................Configuration du télescope ............................................ Alignement ................................................. Limites de pivot ..............................................Boutons de direction ............................................Gaine de câbles ..............................................Système de compensation de saccades ....................................Caméra StarSense ..............................................ARBORESCENCE DU MENU SKYPRODIGY ....................................... BASES DU TELESCOPE ..............................................
-
Seite 36: Introduction
*Le télescope SkyProdigy de Celestron utilise une caméra intégrée et la technologie déposée StarSense pour effectuer l'alignement automatiquement dans le ciel nocturne et pour déterminer vers où le télescope est aligné. La caméra capture automatiquement une image du ciel, qui est traitée pour identifier sans erreur les étoiles contenues dans l'image. - Seite 37 Télescope SkyProdigy 70 1. Lentille de l'objectif Vis de fixation du trépied 2. Monture à fourche Molette de mise au point 3. Bouton d'allumage Diagonale en étoile 4. Bloc de commande électronique Oculaire 5. Trépied Lunette de recherche StarPointer (non illustré) 6.
- Seite 38 Télescope SkyProdigy 90 1. Lentille de correction 7. Trépied 2. Caméra StarSense 8. Rangement pour accessoires 3. Monture à fourche 9. Diagonale en étoile 4. Bouton d'allumage 10. Oculaire 5. Vis de fixation du trépied 11. Lunette de recherche StarPointer 6.
- Seite 39 Télescope SkyProdigy 130 1. Oculaire 7. Pince d'extension de pied de trépied 2. Miroir secondaire 8. Rangement pour accessoires 3. Monture à fourche 9. Vis de fixation du trépied 4. Bouton d'allumage 10. Caméra StarSense 5. Bloc de commande électronique 11.
-
Seite 40: Assemblage
MANUEL D'INSTRUCTIONS [Suite] ASSEMBLAGE SkyProdigy est livré partiellement assemblé et peut être opérationnel en l'espace de quelques minutes. SkyProdigy est commodément emballé dans un carton réutilisable contenant les accessoires suivants : • Oculaires de 25 mm et 9 mm – 1¼” •... -
Seite 41: Fixer Le Télescope À La Monture À Fourche
Fixer le télescope à la monture à fourche Glissez la partie chromée de l'oculaire 25 mm basse puissance dans la diagonale en étoile. Serrez la vis à main pour fixer l'oculaire en place. Le tube de votre télescope possède une barre de montage en queue d'aronde intégrée utilisée pour la fixation du tube à... -
Seite 42: Mise Au Point
MANUEL D'INSTRUCTIONS Les oculaires sont en général désignés par leurs caractéristiques dans la prise situé à la base de la monture à fourche. Poussez le connecteur de distance focale et de diamètre de tube. La distance focale est jusqu'au déclic d'enclenchement et placez le bloc de commande dans son imprimée sur le tube de l'oculaire. -
Seite 43: Installation Du Starpointer
Utilisation du StarPointer Compartiment Tube de visée Allumage de piles (non Contrôle de StarPointer est alimenté par une pile au lithium longue vie de 3 v illustré) luminosité (#CR2032) situé sous la partie avant du StarPointer. Comme toutes les lunettes de recherche, StarPointer doit être correctement aligné Contrôle avec le télescope principal avant de pouvoir être utilisé. -
Seite 44: Bloc De Commande
7. Option (Logo Celestron) : Peut être utilisé en combinaison avec d'autres touches pour accéder à des fonctions et 2. Align : Pour que SkyProdigy lance la séquence d'alignement fonctionnalités plus avancées. - Seite 45 Astuces pour l'alignement de SkyProdigy Gardez les conseils d'alignement suivants à l'esprit pour assurer une utilisation de SkyProdigy aussi simple et précise que possible. • Assurez-vous que le trépied est à niveau avant de commencer le processus d'alignement. Si le trépied est à niveau, le télescope pourra effectuer des identifications avec une meilleure chance de succès au sein des images prises du ciel et effectuera votre localisation avec une plus grande précision.
-
Seite 46: Manual Starsense Alignment
MANUEL D'INSTRUCTIONS Alignement Solar System SkyProdigy offre aussi deux autres méthodes d'alignement qui peuvent être utilisées au lieu de l'alignement auto de StarSense. Pour accéder aux méthodes d'alignement supplémentaires, Solar System Align est conçu pour offrir un bon suivi et appuyez longuement sur la touche OPTION et appuyez sur ALIGN. -
Seite 47: Affiner L'alignement
Affiner l'alignement • Deep Sky (Ciel profond) – Listes personnalisées des meilleures galaxies, nébuleuses et amas ainsi que la totalité du catalogue Messier et objets de la liste NGC. Vous trouverez aussi Une fois le télescope aligné à l'aide de Solar System Align une liste alphabétique des objets du ciel profond selon leur (Alignement Système Solaire), vous avez la possibilité... -
Seite 48: Bouton D'identification
MANUEL D'INSTRUCTIONS - Pour pointer vers l'objet affiché, appuyez sur ENTER. vous voulez déplacer le télescope. Tout en maintenant ce bouton - Pour voir le prochain objet de la visite, appuyez sur BAS. appuyé, pressez la direction opposée. Ceci accélérera le pivot à la vitesse maximum. -
Seite 49: Éléments Du Menu De Base
Les Basic functions (Fonctions de base), affichées au BAS pour augmenter la valeur numérique de 0 (le plus clair) à 31 lancement sur le bloc de commande, sont les fonctions les plus (le plus sombre). communément utilisées, qui vous seront certainement utiles à chaque utilisation du télescope. -
Seite 50: Configuration Du Télescope
MANUEL D'INSTRUCTIONS Identify Filters (Filtres d’identification)- Vous permet de définir Cordwrap (Enroulage du câble) – Cette fonction est une sécurité la limite de magnitude minimum (luminosité) des objets ainsi que empêchant le télescope de pivoter à plus de 360° en azimut et donc la zone de recherche des objets qui serviront de affichées lorsque d'éviter que les câbles ne s'enroulent autour de la base du télescope. - Seite 51 SkyProdigy prendra alors une image du ciel et calibrera le centre du capteur à l'aide de l'étoile centrée dans l'oculaire. Remarque : Pour pouvoir faire pivoter le télescope et effectuer le centrage sur une étoile brillante, il pourrait être nécessaire d'aligner la lunette de recherche de StarPointer au préalable.
-
Seite 52: Arborescence Du Menu Skyprodigy
MANUEL D'INSTRUCTIONS ARBORESCENCE DU MENU SKYPRODIGY Le schéma suivant illustre l'arborescence des sous-menus associés aux fonctions de MENU. MENU DATABASE SETUP (Configuration de base de données) SKYTOUR FILTERS (Filtres SkyTour) CATALOG FILTERS (Filtres de catalogue) IDENTIFY FILTERS (Filtres d'identification) ALLOW SUN (Activer le Soleil) Configuration du télescope TRACKING (Suivi) -
Seite 53: Bases Du Telescope
Celestron est décrit dans le catalogue des accessoires Celestron (#93685-11). right, a s v iewed w ith a viewed w ith t he e yepiece ... -
Seite 54: Observation Du Ciel
Ceci pourrait endommager le télescope et/ou tout accessoire attaché. Pour assurer une observation du Soleil sûre, le filtre solaire Celestron (voir la section Accessoires facultatifs du manuel) permettra de réduire l'intensité de la lumière du Soleil. Avec un filtre, vous pourrez observer les tâches solaires se déplacer sur la surface et faculae, qui... -
Seite 55: Facteurs De Visibilité
Facteurs de visibilité Les facteurs de visibilité affectent ce que vous pouvez voir au travers du télescope durant une session d'observation. Ces facteurs incluent la transparence, la luminosité du ciel et la vision. Comprendre ces facteurs et leur effets sur l'observation vous aidera à tirer le meilleur Les conditions de vision affectent directement la qualité... -
Seite 56: Entretien Du Telescope
Si votre télescope est désaligné, la meilleure manière d'effectuer pour optiques et un mouchoir blanc pour retirer tout débris la collimation est d'utiliser un bon outil de collimation. Celestron éventuellement restant. Imbibez le mouchoir d'abord puis nettoyez offre un outil de collimation Newtonien (#94182) avec instructions la lentille. -
Seite 57: Annexe A - Caracteristiques Techniques
ANNEXE A - CARACTERISTIQUES TECHNIQUES Caractéristiques optiques SkyProdigy 70 mm SkyProdigy 90 mm SkyProdigy 130 mm Conception Réfracteur Maksutov-Cassegrain Réflecteur Ouverture 70 mm 90 mm 130 mm Distance focale 700 mm 1250 mm 650 mm F/ratio du système optique Revêtement optique Revêtement total Revêtement total Aluminium... -
Seite 58: Annexe B - Glossaire
MANUEL D'INSTRUCTIONS ANNEXE B - GLOSSAIRE Aller à Terme utilisé comme référence à un télescope assisté par ordinateur ou l’acte de faire pivoter (déplacer) un télescope assisté par ordinateur. Une unité d’angle correspondant à 1/60 de degré. Altitude En astronomie, l’altitude des objets célestes est la distance angulaire de l’objet au dessus ou au dessous de l’horizon. - Seite 59 Lune croissante La période du cycle de la Lune entre pleine et nouvelle, lorsque la région illuminée décroît. Lune décroissante La période du cycle de la Lune entre pleine et nouvelle, lorsque la région illuminée s’accroît. Magnitude La magnitude est une mesure de luminosité émise par un corps céleste. Les étoiles les plus brillantes se voient assigner une magnitude de 1 et ensuite de 2 à...
- Seite 60 MANUEL D'INSTRUCTIONS Planètes joviennes N’importe laquelle des quatre géantes gazeuses situées à une distance plus grande du Soleil que les planètes terrestres. Point Source Un objet qui ne peut être identifié dans une image car il est trop éloigné ou trop petit est appelé point source. Une planète est éloignée, mais peut être identifiée comme un disque.
-
Seite 61: Annexe C - Carte Des Fuseaux Horaires
ANNEXE C - CARTE DES FUSEAUX HORAIRES... - Seite 62 MANUEL D'INSTRUCTIONS...
- Seite 64 2835 Columbia Street Torrance, CA 90503 Tel. (310) 328-9560 Fax. (310) 212-5835 Page Web : http://www.celestron.com Copyright 2011 Celestron Tous droits réservés. (Les produits ou instructions pourraient changer sans préavis.) Ce dispositif respecte l'article 15 de FCC Rule. L'utilisation de ce dispositif est soumise à deux conditions : 1) Cet appareil ne peut pas causer d'interférences nuisibles, et 2 ) cet appareil doit accepter toute...
-
Seite 65: Computerunterstütztes Teleskop
COMPUTERUNTERSTÜTZTES TELESKOP SkyProdigy 70 ARTIKEL NR. 22089 SkyProdigy 90 ARTIKEL NR. 22091 BEDIENUNGS ANLEITUNG... - Seite 66 BEDIENUNGSANLEITUNG INHALTSVERZEICHNIS EINFÜHRUNG ..................................................Warnung ..................................................SkyProdigy-Modelle ..............................................ZUSAMMENBAU ................................................. Aufbau des SkyProdigy-Teleskops ........................................Anbringung des Handsteuerungshalters ......................................Aufsatz des Gabelarms am Stativ ......................................... Aufsatz des Teleskops am Gabelarm ........................................Zenitspiegel .................................................. Okular ..................................................... Fokussierung ................................................Anschluss der Handsteuerung ..........................................Stromversorgung des SkyProdigy ........................................
- Seite 67 Fortgeschrittene Menüebenenoptionen........................................Datenbank-Setup ............................................... Teleskop-Setup ................................................Nachführung ..............................................Slew Limits (Schwenkgrenzen) ........................................Richtungstasten ..............................................Cordwrap (Kabelschutz) ..........................................Getriebespielausgleich ........................................... Starsense-Kamera ..............................................SKYPRRODIGY-MENÜBAUM ............................................GRUNDLAGEN ZUM TELESKOP ............................................ Fokussierung ................................................Bildorientierung ................................................Berechnung der Vergrößerung ..........................................Ermittlung des Gesichtsfelds..........................................Allgemeine Hinweise zur Beobachtung ......................................HIMMELSBEOBACHTUNG ..............................................
-
Seite 68: Einführung
Teleskope, die heute für Amateurastronomen auf dem Markt erhältlich sind. *Das SkyProdigy-Teleskop von Celestron verwendet eine integrierte Bildkamera und die patentierte StarSense-Technologie zur eigenständigen, automatischen Ausrichtung am Nachthimmel und zur Feststellung, wohin das Teleskop aktuell zeigt. Die Kamera nimmt automatisch ein Bild des Himmel auf, das intern verarbeitet wird, um erfolgreich die Sterne im Bild zu identifizieren. - Seite 69 SkyProdigy 70 Teleskop 1. Objektivlinse 8. Stativ-Verbindungsschraube 2. Gabelarm 9. Fokussierknopf 3. Ein-/Ausschalter 10. Zenitspiegel 4. Computerisierte Handsteuerung 11. Okular 5. Stativ 12. StarPointer Sucherfernrohr (nicht abgebildet) 6. Klemme fur Stativbeinverlangerung 13. Starsense-Kamera 7. Zubehörablage 14. Teleskoptubus...
- Seite 70 BEDIENUNGSANLEITUNG SkyProdigy 90 Teleskop 1. Korrekturlinse 7. Stativ 2. Starsense-Kamera 8. Zubehörablage 3. Gabelarm 9. Zenitspiegel 4. Ein-/Ausschalter 10. Okular 5. Stativ-Verbindungsschraube 11. StarPointer-Sucherfernrohr 6. Computerisierte Handsteuerung 12. Teleskoptubus...
- Seite 71 SkyProdigy 130 Teleskop 1. Okular 7. Klemme fur Stativbeinverlängerung 2. Zweitspiegel 8. Zubehörablage 3. Gabelarm 9. Stativ-Verbindungsschraube 4. Ein-/Ausschalter 10. Starsense-Kamera 5. Computerisierte Handsteuerung 11. Teleskoptubus 6. Stativ 12. StarPointer-Sucherfernrohr...
-
Seite 72: Zusammenbau
BEDIENUNGSANLEITUNG [Fortsetzung] ZUSaMMENBaU Das SkyProdigy wird partiell zusammengebaut geliefert und ist in Minutenschnelle betriebsbereit. Das SkyProdigy-Teleskop ist in einem wiederverwendbaren Versandkarton verpackt, der die folgenden Zubehörteile umfasst: • 25 mm und 9 mm Okulare - 1¼ Zoll • 1¼ Zoll Zenitspiegel (nur SkyProdigy 70 und 90) •... -
Seite 73: Aufsatz Des Teleskops Am Gabelarm
aufsatz des Teleskops am Gabelarm Entfernen Sie die Staubabdeckung von der Steckhülse des Zenitspiegels. Schieben Sie das Chromteil des 25 mm-Okulars mit geringer Der optische Tubus Ihres Teleskops besitzt eine Schwalbenschwanz- Vergrößerungsleistung in den Zenitspiegel. Montagestange zur Befestigung des Tubus am Gabelarm. Anbau des Ziehen Sie die Rändelschraube fest, um das Okular festzuhalten. -
Seite 74: Fokussierung
BEDIENUNGSANLEITUNG anbringung der computerisierten Um das Okular zu entfernen, drehen Sie die Rändelschraube an der Okularsteckhülse los und schieben das Okular heraus. Handsteuerung Okulare werden in der Regel durch Angabe ihrer Brennweite und Die SkyProdigy-Handsteuerung besitzt am Ende des Kabels einen des Durchmessers der Steckhülse charakterisiert. -
Seite 75: Installation Des Starpointers
(Leuchtdiode) erzeugt. Es handelt sich nicht um einen Laserstrahl 1. Schieben Sie die StarPointer-Halterung in die Schwalbenschwanz- und das Glasfenster oder das Auge des Betrachters werden durch Montageplattform oben an der Fokussiereinheit (siehe Abb. 2-14). ihn nicht beschädigt. Der StarPointer ist mit einer variablen 2. -
Seite 76: Handsteuerung
Anfänger die Funktionsvielfalt in nur ein paar viele weitere. Beobachtungssessions meistern. Nachstehend finden Sie eine kurze Beschreibung der einzelnen Komponenten der SkyProdigy- 7. Option (Celestron-Logo): Kann in der Kombination mit Handsteuerung: weiteren Tasten verwendet werden, um auf erweiterte Features und Funktionen zuzugreifen. -
Seite 77: Tipps Zum Ausrichten Des Skyprodigy
Tipps zum Ausrichten des SkyProdigy Die folgenden Ausrichtungs-Richtlinien machen die Benutzung des SkyProdigy so einfach und präzise wie möglich. • Achten Sie darauf, dass das Stativ vor Beginn der Ausrichtung ausbalanciert ist. Ein ausbalanciertes Stativ ist besser beim Überprüfen der Bilder auf Übereinstimmungen, die es am aktuellen Himmel aufgenommen hat und liefert eine präzisere Festlegung Ihres Standorts. -
Seite 78: Manuelle Starsense-Ausrichtung
BEDIENUNGSANLEITUNG Solar System Alignment (Sonnensystemausrichtung) Das SkyProdigy bietet auch zwei weitere Ausrichtungsmethoden, die anstelle der automatischen Starsense-Ausrichtung verwendet werden Solar System Align (Sonnensystemausrichtung) liefert eine gute können. Um auf die zusätzlichen Ausrichtungsmethoden zuzugreifen, Nachführung und GoTo-Perfomance, indem Sonnensystemobjekte halten Sie die Tasten OPTION gedrückt und drücken Sie die ALIGN- (Sonne, Mond und Planeten) zur Ausrichtung des Teleskops mit Taste. -
Seite 79: Ausrichtung Präzisieren
Ausrichtung präzisieren • Stars (Sterne) - Benutzerdefinierte Listen der hellsten Sterne, Doppel (Binäre-) Sterne, variable Sterne und ausgewählte Nachdem das Teleskop mit Solar System Align Asterismen. (Sonnensystemausrichtung) ausgerichtet wurde, haben Sie • Deep Sky (extrasolar) - Der Deep Sky-Katalogv zeigt die Möglichkeit, zusätzliche Ausrichtungs-Objekte hinzufügen eine Liste der besten Galaxien, Nebel und Cluster, sowie die (entweder andere Planeten oder Sterne aus dem Katalog Sterne... -
Seite 80: Identifizieren-Taste
BEDIENUNGSANLEITUNG anzuzeigen. Drücken Sie die Taste erneut, um die Textbeschreibung Die Handsteuerung besitzt eine „Doppeltasten“-Funktion auf, die anzuzeigen. Kehren Sie mit BACK (Zurückkehren) zum vorherigen Ihnen eine sofortige Beschleunigung der Motoren ermöglicht, Bildschirm zurück. ohne dass eine Geschwindigkeitsrate gewählt werden muss. Zur - Drücken Sie ENTER, um zum angezeigten Objekt zu schwenken. -
Seite 81: Menüoptionen Basisebene
Die Basisfunktionen, die auf der Handsteuerung angezeigt werden, angezeigt. Der erste Satz Nummern zeigt die Softwareversion wenn diese einschalten, sind die am häufigsten verwendeten der Handsteuerung an. Für die Motorsteuerung zeigt die Funktionen, die Sie jedes Mal zur Benutzung Ihres Teleskops Handsteuerung zwei Nummernsätze an: die ersten Nummern sind benötigen. - Seite 82 BEDIENUNGSANLEITUNG • Der Filtergrenzwert kann zwischen 0 (sehr helle Objekte) und Cordwrap (Kabelschutz) - Kabelschutz schützt vor 25,5 (äußerst dunkle Objekte) eingestellt werden. Teleskopschwenkungen von mehr als 360° azimutal und dem • Der Suchradius Filter kann von 0° bis 25,5° eingestellt werden. Aufwickeln von Kabeln um das Unterteil des Teleskops.
- Seite 83 Das SkyProdigy wird danach ein Bild des Himmels aufnehmen und das Zentrum des Kamera-Sensors mit dem im Okular sichtbaren Stern kalibrieren. Hinweis: Um das Teleskop manuell zu schwenken und einen hellen Stern im Okular zu zentrieren, kann es notwendig sein, zunächst das StarPointer-Sucherfernrohr mit dem Okular auszurichten.
-
Seite 84: Uhrzeit Und Ort
BEDIENUNGSANLEITUNG SKYPRRODIGY-MENÜBaUM Die Abbildung zeigt einen Menübaum, der die Untermenüs in Verbindung mit den MENU-Funktionen anzeigt. MENÜ EINRICHTEN DER DATENBANK SKYTOUR-FILTER KATALOG-FILTER ERKENNUNGSFILTER ALLOW SUN (SONNE ERLAUBEN) EINRICHTEN DES TELESKOPS NACHFÜHRUNG SLEW LIMITS (SCHWENKGRENZEN) RICHTUNGSTASTEN CORDWRAP (KABELSCHUTZ) GETRIEBESPIEL-AUSGL. STARSENSE-KAMERA CALIBRATE (KALIBRIEREN) AUFNAHME- EINSTELLUNGEN UHRZEIT UND ORT BEOBACHTEN/MOD ORT... -
Seite 85: Grundlagen Zum Teleskop
52,5. Multiplizieren Sie nun weiter in unserem Beispiel das Winkelfeld von 1° mit 52,5. Das ergibt eine lineare Feldbreite von 52,5 Fuß im Abstand von 1000 Yard. Das scheinbare Gesichtsfeld jedes von Celestron hergestellten Okulars ist im Celestron- Links und rechts sind Bei Beobachtung durch das Okular Reversed ... -
Seite 86: Himmelsbeobachtung
Abschnitt. sehen. Wenn Sie einen kleineren Bereich schärfer einstellen wollen, • Celestron-Okularfilter können zur Steigerung des Kontrasts wechseln Sie zu einem Okular mit höherer Vergrößerung. Wählen und zur besseren Sichtbarmachung von Details auf der Sie unter den Nachführoptionen von SkyProdigy MENU (Menü) die Planetenoberfläche verwendet werden. -
Seite 87: Beobachtungsbedingungen
Nebel ausgewaschen. Dadurch wird ihre Beobachtung schwierig, wenn nicht sogar unmöglich. Filter zur Reduktion der Lichtverschmutzung helfen, die Hintergrundhimmelshelligkeit zu reduzieren und somit den Kontrast zu steigern. Die Sichtbedingungen beeinflussen direkt die Bildqualität. Diese Beobachtungsbedingungen Zeichnungen stell eine Punktquelle (d.h. Stern) unter schlechten Sichtbedingungen (links) bis zu ausgezeichneten Sichtbedingungen Die Beobachtungsbedingungen beeinflussen, was Sie in einer (rechts) dar. -
Seite 88: Pflege Des Teleskops
Neukollimierung mit einem guten Kollimationsinstrument Produkte und einem weißen Papiertuch. Geben Sie die Lösung empfohlen. Celestron bietet ein Newton-Kollimationsinstrument auf das Tuch und reinigen Sie dann die Linse mit dem Papiertuch. (Art.-Nr. 94182) mit detaillierten Anweisungen an, die den Vorgang Reinigen Sie den Korrektor mit geringer Druckanwendung von erleichtern. -
Seite 89: Anhang A - Technische Daten
aNHaNG a - TECHNISCHE DaTEN Optische Spezifikationen SkyProdigy 70 mm SkyProdigy 90 mm SkyProdigy 130 mm Design Refraktor Maksutov-Cassegrain Reflektor Blendenöffnung 70 mm 90 mm 130 mm Brennweite 700 mm 1250 mm 650 mm F/ratio der Optik Optische Vergütung Voll Vergütet Voll vergütet Aluminium Maximale nützliche Vergrößerung... -
Seite 90: Anhang B - Terminologieglossar
BEDIENUNGSANLEITUNG aNHaNG B - TERMINOLOGIEGLOSSaR Abnehmender Mond Der Zeitraum des Mondzyklus zwischen Vollmond und Neumond, wenn sein beleuchteter Teil abnimmt. Absolute Helligkeit (Magnitude) Die scheinbare Helligkeit, die ein Stern hatte, wenn er aus einer Standardentfernung von 10 Parallaxensekunden (Parsec) oder 32,6 Lichtjahren beobachtet wurde. Die absolute Helligkeit der Sonne ist 4,8 aus einer Entfernung von 10 Parsec. - Seite 91 Ekliptik (Sonnenbahn) Die Projektion des Erdäquators auf die Himmelssphäre. Sie kann auch als „scheinbare jährliche Bahn der Sonne gegen die Sterne“ definiert werden. Eine Teleskopmontierung, die zwei unabhängige Rotationsachsen verwendet, die eine Höhen- und Azimutbewegung des Instruments erlauben. GoTo (Gehe zu) Dieser Begriff bezieht sich auf computerisierte Teleskope oder den Vorgang des Schwenkens (Bewegens) eines computerisierten Teleskops.
- Seite 92 BEDIENUNGSANLEITUNG Offener Sternhaufen Eine der Sterngruppierungen, die entlang der Ebene der Milchstraße konzentriert sind. Die meisten haben ein (galaktischer Haufen) asymmetrisches Erscheinungsbild und sind lose Verbindungen. Sie enthalten Dutzende bis viele hundert Sterne. Parallax Parallax ist die Differenz in der scheinbaren Position eines Objekts gegen einen Hintergrund, wenn es von einem Beobachter von zwei verschiedenen Standorten aus betrachtet wird.
-
Seite 93: Anhang C - Zeitzonenkarte
aNHaNG C - ZEITZONENKaRTE... - Seite 94 BEDIENUNGSANLEITUNG...
- Seite 96 2835 Columbia Street Torrance, CA 90503 Tel. (310) 328-9560 Fax: (310) 212-5835 Website unter http://www.celestron.com Copyright 2011 Celestron Alle Rechte vorbehalten. (Produkte oder Anleitung können ohne Mitteilung oder Verpflichtung geändert werden.) Dieses Gerät entspricht Teil 15 der FCC-Bestimmungen. Der Betrieb unterliegt folgenden zwei Einschränkungen: 1) Dieses Gerät darf keine schädlichen Störungen verursachen, und 2) dieses Gerät...
-
Seite 97: Manuale D'istruzioni
TELESCOPIO COMPUTERIZZATO SkyProdigy 70 ARTICOLO N. 22089 SkyProdigy 90 ARTICOLO N. 22091 MANUALE D'ISTRUZIONI... - Seite 98 MANUALE D'ISTRUZIONI INDICE INTRODUZIONE ....................................................Attenzione....................................................Modelli SkyProdigy .................................................. MONTAGGIO......................................................Montaggio di SkyProdigy ..............................................Collegamento del supporto per il Controllo manuale ....................................Collegamento del braccio a forcella al treppiede ......................................Collegamento del telescopio al braccio a forcella ......................................La diagonale stellare ................................................L'oculare .......................................................
- Seite 99 Voci del menu di livello avanzato ............................................Impostazione del database..............................................Impostazione del telescopio ............................................... Tracciatura ..................................................Limiti di rotazione ................................................. Tasti direzionali ................................................Avvolgimento del cavo ............................................... Compensazione contraccolpi ........................................... Fotocamera StarSense ..............................................ALBERO DEL MENU DI SKYPRODIGY ......................................... INFORMAZIONI DI BASE DEL TELESCOPIO ......................................
-
Seite 100: Introduzione
*SkyProdigy di Celestron utilizza una fotocamera di imaging integrata e una tecnologia StarSense brevettata per allinearsi automaticamente con il cielo notturno e determinare la posizione verso la quale il telescopio sta attualmente puntando. La fotocamera acquisisce automaticamente un'immagine del cielo, la quale viene elaborata internamente per identificare positivamente le stelle presenti nell'immagine. - Seite 101 TELESCOPIO SkyProdigy 70 1. Lenti obiettivo 8. Vite di accoppiamento del treppiede 2. Braccio a forcella 9. Manopola di messa a fuoco 3. Interruttore On/Off 10. Diagonale stellare 4. Controllo manuale computerizzato 11. Oculare 5. Treppiede 12. Cercatore StarPointer (non mostrato) 6.
- Seite 102 MANUALE D'ISTRUZIONI TELESCOPIO SkyProdigy 90 1. Lenti del correttore 7. Treppiede 2. Fotocamera StarSense 8. Vassoio portaccessori 3. Braccio a forcella 9. Diagonale stellare 4. Interruttore On/Off 10. Oculare 5. Vite di accoppiamento del treppiede 11. Cercatore StarPointer 6. Controllo manuale computerizzato 12.
- Seite 103 TELESCOPIO SkyProdigy 130 1. Oculare 7. Morsetto di estensione delle gambe del treppiede 2. Specchio secondario 8. Vassoio portaccessori 3. Braccio a forcella 9. Vite di accoppiamento del treppiede 4. Interruttore On/Off 10. Fotocamera StarSense 5. Controllo manuale computerizzato 11. Tubo del telescopio 6.
-
Seite 104: Montaggio
MANUALE D'ISTRUZIONI [Continuato] MONTAGGIO SkyProdigy è fornito parzialmente montato e può essere funzionante in pochi minuti. SkyProdigy è comodamente confezionato in un cartone di spedizione riutilizzabile che contiene i seguenti accessori: • Oculari da 25 mm e 9 mm – 1¼” •... -
Seite 105: Collegamento Del Telescopio Al Braccio A Forcella
Collegamento del telescopio al braccio a Rimuovere il tappo di protezione per la polvere dalla canna della diagonale stellare. forcella Far scorrere la porzione cromata dell'oculare a bassa potenza da 25 mm nella diagonale stellare. Il tubo ottico del telescopio dispone di una barra di montaggio a Serrare la vite di fissaggio per mantenere l'oculare in posizione. -
Seite 106: Messa A Fuoco
MANUALE D'ISTRUZIONI Collegamento del Controllo manuale Agli oculari ci si riferisce comunemente mediante la lunghezza focale e il diametro della canna. La lunghezza focale di ciascun computerizzato oculare è stampata sulla canna dell'oculare stesso. Maggiore è la lunghezza focale (cioè, più alto è il numero) minore sarà la potenza Il controllo manuale di SkyProdigy dispone di un connettore tipo o l'ingrandimento dell'oculare;... -
Seite 107: Installazione Di Starpointer
danneggerà né il vetro né l'occhio. Lo StarPointer è fornito in 1. Far scorrere la staffa dello StarPointer nella piattaforma di dotazione con un controllo di luminosità variabile, un controllo montaggio a coda di rondine posta sulla parte superiore del di allineamento a due assi e staffe di montaggio. -
Seite 108: Controllo Manuale
7. Option (Opzione) (Logo Celestron): Può essere utilizzato in combinazione con altri tasti per accedere alle funzionalità e alle 2. Align (Allinea): Fornisce istruzioni a SkyProdigy per iniziare funzioni più... - Seite 109 Suggerimenti per l'allineamento di SkyProdigy Ricordare di seguire le lineeguida per l'allineamento per rendere l'utilizzo di SkyProdigy il più semplice e preciso possibile. • Assicurarsi di livellare il treppiede prima di iniziare l'allineamento. A treppiede livellato aiuterà il telescopio a meglio corrispondere le immagini scattate con il cielo attuale e a fornire una determinazione più...
-
Seite 110: Allineamento Manuale Di Starsense
MANUALE D'ISTRUZIONI Allineamento del Sistema Solare SkyProdigy fornisce inoltre altre due metodi di allineamento che possono essere utilizzati al posto dell'Allineamento Automatico L'allineamento del Sistema solare è progettato per fornire una StarSense. Per accedere ai metodi di allineamento aggiuntivi, buona tracciabilità e prestazioni GoTo (VaiA) utilizzando gli oggetti premere e tenere premuto il tasto OPTION (OPZIONE) e premere il presenti nel sistema solare (Sole, Luna e pianeti) per allineare il tasto ALIGN (ALLINEA). -
Seite 111: Affinare L'allineamento
Affinare l'allineamento • Profondo cielo – Il catalogo del profondo cielo visualizza un elenco di tutte le migliori Galassie, Nebulose e ammassi Una volta allineato il telescopio utilizzando l'Allinemanto con il stellari, nonché gli oggetti Messier e NGC selezionati completi. Sistema Solare, vi è... -
Seite 112: Tasto Identify (Identifica)
MANUALE D'ISTRUZIONI Per ruotare verso l'oggetto visualizzato, premere ENTER (INVIO). corrisponde alla direzione verso la quale si intende spostare il Per vedere l'oggetto successivo del tour, premere il tasto GIÙ. telescopio. Mentre si preme tale tasto, premere il tasto direzionale opposto. -
Seite 113: Voci Del Menu Di Livello Base
Le Funzioni avanzate offrono la possibilità di personalizzare le Ripristina impostazioni predefinite – Riporta il controllo manuale SkyProdigy alle impostazioni di fabbrica originali. Premere ENTER molte funzionalità del telescopio e il database degli oggetti, così come le funzioni di impostazione del telescipio necessario per (INVIO) per rispristinare le impostazioni predefinite oppure migliorare le prestazioni complessive. -
Seite 114: Impostazione Del Telescopio
MANUALE D'ISTRUZIONI Consenti Sole – Questo menu consente di abilitare il sole come Compensazione contraccolpi – Tutti gli ingranaggi meccanici oggetto da visualizzare nel catalogo degli oggetti del Sistema Solare hanno una certa quantità di contraccolpi o movimenti tra gli e può... - Seite 115 SkyProdigy scatterà quindi un'immagine del cielo e calibrerà il centro del sensore della fotocamera con la stella visualizzata nell'oculare. Nota: Al fine di far ruotare manualmente il telescopio e centrare una stella luminosa nell'oculare, potrebbe essere necessario prima allineare il cercatore StarPointer con l'oculare. Per le istruzioni sull'allineamento del cercatore, vedere il funzionamento dello StarPointer nella sezione Montaggio del presente manuale.
-
Seite 116: Tracciatura
MANUALE D'ISTRUZIONI ALBERO DEL MENU DI SKYPRODIGY La figura seguente rappresenta un albero del menu che mostra i sotto-menu associati alle funzioni del MENU. MENU IMPOSTAZIONE DEL DATABASE FILTRI SKYTOUR FILTRI DI CATALOGO FILTRI DI IDENTIFICAZIONE CONSENTI SOLE IMPOSTAZIONE DEL TELESCOPIO TRACCIATURA LIMITI DI ROTAZIONE... -
Seite 117: Informazioni Di Base Del Telescopio
Immagine invertita, come Reversed f rom l eft t o Inverted i mage, a s prodotto da Celestron si può trovare nel Catalogo degli accessori come osservata con una osservata con l'oculare right, a s v iewed w ith a ... -
Seite 118: Osservazione Celeste
Ciò può danneggiare il telescopio e/o eventuali accessori collegati al telescopio. Per un'osservazione solare sicura, utilizzare un filtro solare Celestron (vedere la sezione Accessori Opzionali del manuale) che riduce l'intensità della luce del Sole, rendendolo sicuro da osservare. Con un filtro è... -
Seite 119: Condizioni Di Visibilità
Condizioni di visibilità Le condizioni di visibilità influenzano ciò che è possibile vedere mediante il telescopio durante una sessione di osservazione. Le condizioni includono la trasparenza, l'illuminazione del cielo e la visibilità. Comprendere le condizioni di visualizzazione e l'effetto Le condizioni di visibilità influenzano direttamente la qualità che queste possono avere sull'osservazione contribuirà... -
Seite 120: Manutenzione Del Telescopio
è quello di utilizzare un buon strumento rimuovere eventuali detriti rimanenti. Applicare la soluzione al di collimazione. Celestron offre uno Strumento di collimazione tessuto e quindi applicare il tessuto alle lenti. Colpi a bassa pressione Newtoniano (n. 94182) con istruzioni dettagliate che rendono la devono andare dal centro del correttore verso l'esterno. -
Seite 121: Appendice A - Specifiche Tecniche
APPENDICE A - SPECIFICHE TECNICHE Specifiche ottiche SkyProdigy 70 mm SkyProdigy 90 mm SkyProdigy 130 mm Design Refrattore Maksutov-Cassegrain Riflettore Apertura 70 mm 90 mm 130 mm Lunghezza focale 700 mm 1250 mm 650 mm Rapporto focale del sistema ottico Rivestimenti ottici Interamente rivestito Interamente rivestito... -
Seite 122: Appendice B - Glossario Dei Termini
MANUALE D'ISTRUZIONI APPENDICE B - GLOSSARIO DEI TERMINI Altezza I n astronomia, l’altezza di un oggetto celeste è la sua Distanza Angolare sopra o sotto l’orizzonte celeste. Apertura Il diametro delle lenti o dello specchio principali di un telescopio, più grande è l’apertura, maggiore sarà la potenza di raccolta di luce del telescopio. - Seite 123 Lunghezza focale La distanza tra una lente (o specchio) e il punto in cui l’immagine di un oggetto all’infinito è portato alla messa a fuoco. La lunghezza focale divisa per apertura dello specchio o della lente e denominata rapporto focale. Magnitudine Il magnitudo è...
- Seite 124 MANUALE D'ISTRUZIONI Riflettore Un telescopio in cui la luce è raccolta mediante uno specchio. Risoluzione L’angolo minimo rilevabile che un sistema ottico è in grado di rilevare. A causa della diffrazione, vi è un limite alla risoluzione dell’angolo minimo. Più grande è l’apertura, migliore sarà la risoluzione. Secondo d’arco Un’unità...
-
Seite 125: Appendice C - Mappa Dei Fusi Orari
APPENDICE C - MAPPA DEI FUSI ORARI... - Seite 126 MANUALE D'ISTRUZIONI...
- Seite 128 2835 Columbia Street Torrance, CA 90503 Tel. (310) 328-9560 Fax. (310) 212-5835 Sito internet all'indirizzo http://www.celestron.com Copyright 2011 Celestron Tutti i diritti riservati. (I prodotti o le istruzioni possono cambiare senza previa notifica o obbligo). Il presente dispositivo è conforme alla Parte 15 della Normativa FCC. Il funzionamento è soggetto alle seguenti due condizioni: 1) Il presente dispositivo può...
- Seite 129 TELESCOPIO INFORMATIZADO SkyProdigy 70 ELEMENTO #22089 SkyProdigy 90 ELEMENTO #22091...
- Seite 130 MANUAL DE INSTRUCCIONES ÍNDICE INTRODUCCIÓN ................................................... Advertencia ................................................. Modelos de SkyProdigy............................................MONTAJE ....................................................Montaje de SkyProdigy ............................................Fijación del soporte del mando manual ......................................Fijación del brazo en horquilla al trípode ......................................Fijación del telescopio al brazo en horquilla ....................................Diagonal estelar .................................................
- Seite 131 Elementos de menú de nivel avanzado ........................................Configuración de base de datos .......................................... Configuración de telescopio ..........................................Seguimiento ..............................................Límites de deslizamiento ..........................................Botones de dirección ............................................Enrollado de cable ............................................Compensación de retroceso ........................................Cámara StarSense ..............................................ÁRBOL DEL MENÚ DE SKYPRODIGY ......................................... FUNDAMENTOS DEL TELESCOPIO ..........................................
-
Seite 132: Introducción
*El telescopio SkyProdigy de Celestron usa una cámara integrada y la tecnología patentada StarSense para alinearse automáticamente con el cielo nocturno y determinar la orientación actual del telescopio. La cámara captura automáticamente una imagen del cielo, que se procesa internamente para identificar las estrellas de la imagen. - Seite 133 TELESCOPIO SkyProdigy 70 1. Lente objetivo 8. Tornillo de fijación del trípode 2. Brazo en horquilla 9. Mando de enfoque 3. Interruptor de encendido/apagado 10. Diagonal estelar 4. Mando manual informatizado 11. Ocular 5. Trípode 12. Localizador StarPointer (no ilustrado) 6.
- Seite 134 MANUAL DE INSTRUCCIONES TELESCOPIO SkyProdigy 90 1. Lente correctora 7. Trípode 2. Cámara StarSense Bandeja de accesorios 3. Brazo en horquilla Diagonal estelar 4. Interruptor de encendido/apagado Ocular 5. Tornillo de fijación del trípode Localizador StarPointer 6. Mando manual informatizado Tubo del telescopio...
- Seite 135 TELESCOPIO SkyProdigy 130 1. Ocular 7. Abrazadera de extensión de la pata del trípode 2. Espejo secundario 8. Bandeja de accesorios 3. Brazo en horquilla 9. Tornillo de fijación del trípode 4. Interruptor de encendido/apagado 10. Cámara StarSense 5. Mando manual informatizado 11.
-
Seite 136: Montaje
MANUAL DE INSTRUCCIONES [Continuación] MONTAJE SkyProdigy se entrega montado parcialmente y puede estar operativo en minutos. SkyProdigy está embalado en una caja de transporte reutilizable que contiene los accesorios siguientes: • Oculares de 25 mm y 9 mm - 1¼” •... -
Seite 137: Fijación Del Telescopio Al Brazo En Horquilla
Fijación del telescopio al brazo en horquilla Deslice la sección cromada del ocular de baja potencia de 25 mm en la diagonal estelar. Fije el tornillo para aguantar el ocular en su lugar. El buto óptico de su telescopio tiene una barra de montaje de mariposa integrada que se usa para fijar el tubo al brazo en horquilla. -
Seite 138: Enfocado
MANUAL DE INSTRUCCIONES Fijación del soporte del mando manual Los oculares se indican habitualmente por la longitud focal y el diámetro del cañón. La longitud focal de cada ocular está impresa informatizado en el cañón. Cuanto mayor sea la longitud focal (es decir, cuanto mayor sea el número) menor será... -
Seite 139: Instalación De Starpointer
de cristal ni su vista. StarPointer incluye un control de brillo variable, 1. Deslice el soporte del StarPointer en la plataforma de montaje control de alineación de dos ejes y soportes de montaje. Antes de con mariposa sobre la estructura de enfoque (ver figura 2-14). que se pueda usar StarPointer, debe fijarse al tubo telescópico y 2. -
Seite 140: Mando Manual
18 caracteres con iluminación roja para ver cómodamente la información del telescopio y el texto 7. Opción (Logo Celestron): Puede usarse junto con otras teclas en movimiento. para acceder a funciones más avanzadas. - Seite 141 Recomendaciones para alinear SkyProdigy Recuerde las siguientes recomendaciones de alineación para que usar SkyProdigy sea tan sencillo y preciso como sea posible. • Asegúrese de nivelar el trípode antes de iniciar la alineación. Un trípode nivelado ayudará al telescopio a hacer coincidir mejor las imágenes que tome con el firmamento real y ofrecerle una determinación más precisa de su ubicación.
-
Seite 142: Alineación De Starsense Manual
MANUAL DE INSTRUCCIONES Alineación del sistema solar SkyProdigy también ofrece dos otros métodos de alienamiento que pueden usarse en lugar del alineamiento automático StarSense. Para acceder a los métodos de alineación adicionales, presione y La alineación del sistema solar está diseñada para ofrecer un buen mantenga la tecla OPCIÓN y pulse el botón ALINEAR. -
Seite 143: Refinar La Alineación
Refinar la alineación • Espacio profundo - El catálogo Espacio profundo muestra una lista de las mejores galaxias, nebulosas y grupos, así como el Messier completo y objetos NGC seleccionados. También Cuando el telescopio esté alineado usando la alineación del dispone de una lista alfabética de todos los objetos del espacio sistema solar, puede añadir objetos de alineación adicionales (sean profundo ordenados por su nombre. -
Seite 144: Botón Identificar
MANUAL DE INSTRUCCIONES - Para desplazarse al objeto mostrado, pulse ENTER. El mando manual tiene una función de "doble botón" que le - Para ver el siguiente objeto del tour, pulse la tecla ABAJO. permite acelerar inmediatamene los motores sin tener que elegir una velocidad. -
Seite 145: Elementos De Menú De Nivel Básico
Las Funciones básicas, que se muestran en el mando manual de números indica la versión de software del mando manual. Para al encenderse inicialmente, son las funciones habitualmente el mando del motor, el mando manual mostrará dos grupos de usadas que puede tener que usar cada vez que use el telescopio. números;... -
Seite 146: Configuración De Telescopio
MANUAL DE INSTRUCCIONES • El filtro de identificación puede establecerse entre 0 (objetos Puede producirse un momento en el que el telescopio no muy brillantes) y 25,5 (objetos extremadamente tenues) se desplace a un objeto desde la distancia más cercana, sino •... - Seite 147 SkyProdigy realizará una imagen del cielo y calibrará el centro del sensor de la cámara con la estrella observada en el ocular. Nota: Para deslizar manualmente el telescopio y centrar una estrella brillante en el ocular puede ser necesario alinear primero el localizador StarPointer con el ocular.
-
Seite 148: Seguimiento
MANUAL DE INSTRUCCIONES ÁRBOL DEL MENÚ DE SKYPRODIGY La imagen siguiente es un árbol del menú que muestra los submenús asociados con las funciones del MENÚ. MENÚ CONFIGURACIÓN DE BASE DE DATOS FILTROS SKYTOUR FILTROS DE CATÁLOGO FILTROS DE IDENTIFICACIÓN PERMITIR SOL CONFIGURACIÓN DEL TELESCOPIO... -
Seite 149: Fundamentos Del Telescopio
52,5. Así se obtiene una amplitud de campo lineal de 52,5 pies a una distancia de mil yardas. El campo aparente de cada ocular fabricado por Celestron se puede encontrar en el Catálogo de Accesorios Celestron (#93685-11). -
Seite 150: Observación Celeste
óptico. Ésta puede dañar el telescopio y/o los accesorios fijados a éste. Para una observación solar segura, use un filtro solar Celestron (consulte la sección de Accesorios Opcionales del manual) que reduce la intensidad de la luz solar, haciendo que sea seguro verlo. -
Seite 151: Condiciones De Observación
de nebulosas, haciendo que sean difíciles, sino imposibles, de observar. Los filtros de reducción de contaminación lumínica ayudan a reducir el brillo de fondo del cielo, aumentando el contraste. Condiciones de observación Las condiciones de observación afectan directamente a la calidad de la imagen. -
Seite 152: Mantenimiento Del Telescopio
Si su telescopio no está colimado, la mejor forma de volver a alinearlo lente entre dos y cuatro segundos. A continuación, use una solución con una buena herramienta de colimación. Celestron ofrece una limpiadora de ópticas y papel tisú blanco para eliminar cualquier herramienta de colimación newtoniana (#94182) con instrucciones... -
Seite 153: Apéndice A - Especificaciones Técnicas
APÉNDICE A - ESPECIFICACIONES TÉCNICAS Especificaciones ópticas SkyProdigy 70 mm SkyProdigy 90 mm SkyProdigy 130 mm Diseño Refractor Maksutov-Cassegrain Reflector Apertura 70 mm 90 mm 130 mm Longitud focal 700 mm 1250 mm 650 mm Relación F del sistema óptico Recubrimiento de óptica Totalmente cubierta Totalmente cubierta... -
Seite 154: Apéndice B - Glosario De Términos
MANUAL DE INSTRUCCIONES APÉNDICE B - GLOSARIO DE TÉRMINOS Altitud En astronomía, la altitud de un objeto celeste es su distancia angular por encima o por debajo del horizonte celeste. Año luz (ly) Un año luz es la distancia que la luz recorre en el vacío en un año a una velocidad de 299,792 km/ sec. Con 31,557,600 de segundos en un año, el año luz equivale a una distancia de 9.46 X 10¹² km (5.87 X 1 billón de millas). - Seite 155 Estrellas binarias Las estrellas binarias (dobles) son parejas de estrellas que, debido a su atracción gravitatoria mútua, orbitan alrededor de un centro de masa común. Si un grupo de tres o más estrellas se orbitan mutuamente, se llama sistema mútiple. Se cree que aproximadamente el 50 por ciento de las estrellas pertenecen a sistemas binarios o múltiples.
- Seite 156 MANUAL DE INSTRUCCIONES Nebulosa Nube interestelar de gas y polvo. También se refiere a cualquier objeto celeste con aspecto nebuloso. Nova Aunque significa en latín “nuevo”, indica una estrella que se convierte súbitamente en explosivamente brillante al final de su ciclo vital. Parallax El parallax es la diferencia entre la posición aparente de un objeto contra un fondo cuando es observado desde dos ubicaciones distintas.
-
Seite 157: Apéndice C - Mapa De Zonas Horarias
APÉNDICE C - MAPA DE ZONAS HORARIAS... - Seite 158 MANUAL DE INSTRUCCIONES...
- Seite 160 2835 Columbia Street Torrance, CA 90503 Tel. (310) 328-9560 Fax. (310) 212-5835 Sitio web en http://www.celestron.com Copyright 2011 Celestron Todos los derechos reservados. (Los productos o las instrucciones pueden cambiar sin previo aviso ni obligación). Este dispositivo cumple con el Apartado 15 de las Normas FCC. Su uso está sujeto a las dos condiciones siguientes: 1) Este dispositivo no puede causar interferencias dañinas, y 2) Este dispositivo debe...