Inhaltsverzeichnis
Werbung
Verfügbare Sprachen
Verfügbare Sprachen
Quicklinks
IT
MANUALE DI INSTALLAZIONE USO E MANUTENZIONE
EN
INSTALLATION, USER AND MAINTENANCE MANUAL
DE
INSTALLATIONS, BEDIENUNGS UND WARTUNGSANLEITUNGEN
FR
NOTICE D'INSTALLATION
MANUAL DE INSTALACIÓN, USO Y MANTENIMIENTO
ES
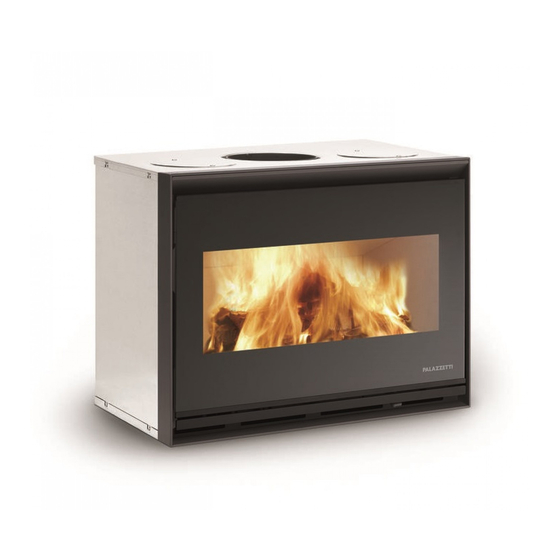
ECOPALEX T "Glass"
Il presente manuale è parte integrante del prodotto.
Si raccomanda di leggere attentamente le istruzioni prima
dell'installazione, manutenzione o utilizzo del prodotto.
This manual is an integral part of the product.
Read the instructions carefully before installing, servicing or
operating the product.
Die vorliegende Anleitung ist fester Bestandteil des Produkts.
Vor der Installation, Wartung und Verwendung die Anleitungen
stets aufmerksam durchlesen.
Le présent manuel fait partie intégrante du produit.
Il est conseillé de lire attentivement les consignes
avant l'installation, l'entretien ou l'utilisation du produit.
Este
manual
es
parte
Se recomienda leer detenidamente las instrucciones antes
de la instalación, el mantenimiento y el uso del producto..
integrante
del
producto.
Werbung
Inhaltsverzeichnis

Verwandte Anleitungen für Palazzetti ECOPALEX T Glass


Inhaltszusammenfassung für Palazzetti ECOPALEX T Glass
- Seite 1 MANUALE DI INSTALLAZIONE USO E MANUTENZIONE INSTALLATION, USER AND MAINTENANCE MANUAL INSTALLATIONS, BEDIENUNGS UND WARTUNGSANLEITUNGEN NOTICE D’INSTALLATION MANUAL DE INSTALACIÓN, USO Y MANTENIMIENTO ECOPALEX T “Glass” Le présent manuel fait partie intégrante du produit. Il presente manuale è parte integrante del prodotto. Il est conseillé...
- Seite 2 Gentile cliente, desideriamo innanzitutto ringraziarLa per la preferenza che ha voluto accordarci acquistando il nostro prodotto e ci congratuliamo con Lei per la scelta. Per consentirLe di utilizzare al meglio il suo nuovo inserto a legna, la invitiamo a seguire attentamente quanto descritto nel presente manuale.
- Seite 3 INDICE PREMESSA SIMBOLOGIA DESTINAZIONE D’USO SCOPO E CONTENUTO DEL MANUALE CONSERVAZIONE DEL MANUALE AGGIORNAMENTO DEL MANUALE GENERALITÀ PRINCIPALI NORME ANTINFORTUNISTICHE RISPETTATE E DA RISPETTARE GARANZIA LEGALE RESPONSABILITÀ DEL COSTRUTTORE 1.10 CARATTERISTICHE DELL’UTILIZZATORE 1.11 ASSISTENZA TECNICA 1.12 PARTI DI RICAMBIO 1.13 CONSEGNA DEL CAMINETTO AVVERTENZE PER LA SICUREZZA AVVERTENZE PER L’INSTALLATORE...
-
Seite 4: Aggiornamento Del Manuale
INDICAZIONE: Indicazioni concernenti il corretto utilizzo da PALAZZETTI carenti o inadeguate a seguito di del caminetto e le responsabilità dei preposti. ATTENZIONE: Punto nel quale viene espressa una nota tecnologie su apparecchi di nuova commercializzazione. -
Seite 5: Principali Norme Antinfortunistiche Rispettate E Da Rispettare
PRINCIPALI NORME ANTINFORTUNISTICHE 1.11 ASSISTENZA TECNICA RISPETTATE E DA RISPETTARE Palazzetti è in grado di risolvere qualunque problema Direttiva 2006/95/CE: “Materiale elettrico destinato ad tecnico riguardante l’impiego e la manutenzione nell’intero essere adoperato entro taluni limiti di tensione”. ciclo di vita del prodotto. -
Seite 6: Avvertenze Per La Sicurezza
AVVERTENZE PER LA SICUREZZA parte di un tecnico specializzato. • In caso d’incendio al camino cercare di spegnere AVVERTENZE PER L’INSTALLATORE il fuoco nella stufa chiudendo tutta l’aria primaria n e c e s s a r i a a l l a c o m b u s t i o n e e c h i a m a r e •... -
Seite 7: Movimentazione E Trasporto
CARATTERISTICHE E MOVIMENTAZIONE E TRASPORTO DESCRIZIONE Il caminetto viene consegnato in un imballo adeguato ai lunghi trasporti. DESCRIZIONE Consigliamo di disimballare il caminetto solo quando è L’apparecchio è un caminetto da inserimento, costituito giunto sul luogo di installazione. da un monoblocco metallico dalla struttura autoportante. Il caminetto viene consegnato completo di tutte le parti È... -
Seite 8: Preparazione Del Luogo Di Installazione
PREPARAZIONE DEL LUOGO DI INSTALLAZIONE SCHEMA DI MONTAGGIO (Fig. 5.1) A) Per una corretta installazione la conduttura fumi tra caminetto e canna fumaria va fatta a tenuta stagna sigillando tutti i giunti di unione. B) Presa aria esterna posteriore, garantire una distanza minima di 5 cm tra rivestimenti e tubo entrata aria comburente. - Seite 9 • L ’ a p p a r e c c h i o n o n p u ò e s s e r e u t i l i z z a t o individuali e personali, siano integri e perfettamente u n a c a n n a f u m a r i a...
-
Seite 10: Operazioni Preliminari
OPERAZIONI PRELIMINARI 5.4.1 Interventi di adattamento Prima di tutto è opportuno verificare le dimensioni dello spazio disponibile nel caminetto preesistente e confrontarle con quelle dell’apparecchio e della scheda tecnica. Nel caso si renda necessario un intervento di del caminetto preesistente, si ponga attenzione a non comprometterne la stabilità. - Seite 11 5.4.3 Alloggiamento kit ventilazione 680 m³/h opzionale Per i caminetti esistenti predisporre un vano tecnico sotto la base dell’apparecchio per alloggiare il ventilatore, di 5.5 - 5.5.1). 5.4.4 Prese d’aria con kit di ventilazione da 680 m³/h. >50 5.6) è necessario eseguire le seguenti prese d’aria per il ventilatore: : ripresa dell’aria ambiente (interna alla stanza) al >35...
- Seite 12 CANALIZZAZIONE SU DOPPIO CONDOTTO (-5.11A-). Installare una bocchetta nella stanza stessa del caminetto, la seconda conduttura potrà essere utilizzata per portare l’aria calda in altre stanze della casa. - 5.11A - CANALIZZAZIONE SU UNICO CONDOTTO (-5.11B-). In alternativa collegare entrambe le mandate dell’aria calda con un tubo flessibile fino all’imboccatura degli opportuni canali di distribuzione.
-
Seite 13: Inserimento In Un Caminetto
INSERIMENTO IN UN CAMINETTO Appoggiare innanzitutto l’apparecchio sul piano fuoco del caminetto. Stendere sul fondo del collare a bicchiere (posto nella parte superiore) un cordone di pasta sigilla- fuoco (sigillante che resiste a 800°C). Fare poi scorrere l’apparecchiatura nella posizione definitiva. Si può facilitarne lo scorrimento utilizzando due guide di lamiera dello spessore di 2/3 mm poste sotto l’apparecchio, che verranno tolte a posizionamento avvenuto (-5.15-). -
Seite 14: Messa In Servizio Ed Uso
MESSA IN SERVIZIO ED USO APERTURA DELL’ANTA Per aprire l’anta è necessario utilizzare la mano fredda (A) in dotazione. Inserire l’attrezzo nell’apposito gancio laterale con cautela per non rischiare di danneggiare il vetro, e ruotare verso l’alto per aprire e verso il basso per chiudere. -
Seite 15: Controllo Della Combustione
ACCENSIONE 6.5.2 LA COMBUSTIONE SECONDARIA: si ottiene immettendo nel focolare aria preriscaldata • Pulire il focolare dall’eventuale presenza di cenere; attraverso i fori posti sulla parte superiore della parete • aprire al massimo la regolazione dell’aria primaria di fondo. Entrando nel focolare I’ aria incendia il gas incombusto (monossido di carbonio) formatosi dalla •... -
Seite 16: Manutenzione E Pulizia
6.5.9.1 6.5.9.2 MANUTENZIONE E PULIZIA PRECAUZIONI DI SICUREZZA Prima di effettuare qualsiasi operazione di manutenzione o di pulizia adottare le seguenti precauzioni: A) Assicurarsi che tutte le parti del caminetto siano fredde. B) Accertarsi che le braci siano completamente spente. C) Utilizzare i dispositivi di protezione individuale previsti - 6.4 - dalla direttiva 89/391/CEE. -
Seite 17: Pulizia Del Vetro
PULIZIA DEL VETRO Durante il funzionamento del caminetto è possibile favorire la pulizia del vetro ceramico attraverso il nottolino senza dover aprire la porta Questo normalmente deve essere posizionato verso favorendone la pulizia. Per effettuare la pulizia completa del vetro è necessario attendere lo spegnimento ed il raffreddamento del caminetto ed effettuare la pulizia a freddo. - Seite 18 INFORMAZIONI PER LA DEMOLIZIONE E LO SMALTIMENTO L a d e m o l i z i o n e e l o s m a l t i m e n t o dell’apparecchio sono ad esclusivo carico e responsabilità del proprietario. Smantellamento e smaltimento possono essere affidati anche a terzi, purché...
- Seite 20 INDEX GENERAL SYMBOLS USE OF THE WOOD INSERT PURPOSE AND CONTENTS OF THE MANUAL KEEPING THE MANUAL MANUAL UPDATE GENERAL INFORMATION MAIN ACCIDENT PREVENTION REGULATIONS TO COMPLY WITH LEGAL GUARANTEE MANUFACTURER’S LIABILITY 1.10 USER CHARACTERISTICS 1.11 TECHNICAL ASSISTANCE 1.12 SPARE PARTS 1.13 DELIVERY OF THE WOOD INSERT SAFETY PRECUATIONS...
- Seite 21 ESPONSIBILITY FOR INSTALLATION The indicated use of the wood insert is applicable It is not PALAZZETTI’s responsibility to carry out the works only for wood inserts in full structural, mechanical and needed to install the wood insert. Such works are entirely...
-
Seite 22: Legal Guarantee
Do not let children near the wood insert to play with it when it is working. 1.11 TECHNICAL ASSISTANCE PALAZZETTI is able to solve any technical problem concerning the use and maintenance of the product’s whole life cycle. assistance centre. -
Seite 23: Safety Precuations
SAFETY PRECUATIONS emergency assistance. INSTRUCTIONS FOR THE INSTALLER PRECAUTIONS FOR THE MAINTENANCE • Make sure that the place of installation of the wood ENGINEER insert meets all local, national and European rules • Comply with the indications given in this manual. and regulations. -
Seite 24: Handling And Transport
CHARACTERISTICS DESCRIPTION HANDLING AND TRANSPORT The wood insert is delivered with an assembled metal DESCRIPTION structure . The wood insert is a wood insert to recess and comprises It is advisable to wait until the wood insert arrives at the an en-bloc metal bearing structure. -
Seite 25: Preparing The Place Of Installation
PREPARING THE PLACE OF INSTALLATION ASSEMBLY DIAGRAM (Fig. 5.1) A) For proper installation, the smoke ducting between of 5 cm between cladding and combustion air intake pipe. C) UNI standards require the installation of a heat recovery grille as close as possible to the ceiling. aluminium foil stove Fig. -
Seite 26: Flues And Chimney Caps
working order; he must wear accident prevention gloves; he must wear safety shoes; he must make sure that the area he is working in for assembling/dismantling the wood insert is free from obstacles. • FLUES AND CHIMNEY CAPS The chimney must be dimensioned in compliance with EN 13384-1. -
Seite 27: Preliminary Operations
PRELIMINARY OPERATIONS 5.4.1 Adapting First of all you must check the space available in the wood insert and the technical data sheet. If it needs adapting by either cutting or altering the inside walls of its stability. must be suitably insulated (or placed outside the area of radiation of the wood insert), and must be at a distance form the wood insert of at least 1 cm to guarantee free 5.4.2... -
Seite 28: Air Circulation
5.4.4 Air intakes with optional ventilation kit 680 m³/h. following air intakes must be provided for the fan: Room air intake to heating circuit fan, located laterally to the cladding (diameter 15 cm) with grille. Room air intake (connected as ( (-5.6-)), or alternatively connected to an adjacent room (with the >50... -
Seite 29: Connection To The Flue
DOUBLE DUCT PIPING (-5.11A-).. pipe can be used to carry hot air to the other rooms of the house. SINGLE DUCT PIPING (-5.11B-). - 5.11A - pipe up to the opening of the appropriate distribution channels. The air distribution pipes must have an inside cross section and insulated with a 30 mm thick layer of glass wool to prevent noise and the loss of heat. - Seite 30 removed once the device is positioned (-5.15-). 5.10 TELESCOPIC TUBE CONNECTION 5.10.1 Firstly open the door (A), and sequentially remove the cements: B-front frontal, C-bottom wall, D-lateral side 5.10.2 positioned on the front wall of the support by at least 5.10.3 5.10.4 - 5.8-...
-
Seite 31: Commissioning And Use
COMMISSIONING AND USE DOOR OPENING Open the door using the handle (A) supplied. Carefully insert the tool in the appropriate side seat paying attention not to damage the glass and twist it upwards to open the door and downwards to close it. The door should be opened gradually so the smoke can it should burn for a few minutes with the door ajar so that the condensation that forms on the glass can evaporate. -
Seite 32: Then Proceed As Shown In Fig
LIGHTING 6.5.2 SECONDARY COMBUSTION: • This is obtained by letting preheated air through the holes at the top of the back panel. As it enters the wood insert • • formed during primary combustion and transforms them • carefully place the wood pieces inside the combustion chamber;... -
Seite 33: Maintenance And Cleaning
6.5.9.2 Cements: D- lateral side, C-bottom wall, B-front frontal MAINTENANCE AND CLEANING SAFETY PRECAUTIONS Before carrying out any maintenance or cleaning, take the following precautions: A) Ensure that all parts of the wood insert are completely cold. C) Use individual safety gear as set forth by directive 89/391/EEC. -
Seite 34: Cleaning The Flue
CLEANING THE FLUE every 40 quintals of wood burnt or at least every two years, unless regulated differently. At any rate, clean at least once a year. When cleaning we suggest removing the smoke diaphragm from the smoke outlet to enable the soot to fall, to be replaced once cleaned. -
Seite 35: Information For Demolition And Disposal
INFORMATION FOR DEMOLITION AND DISPOSAL Demolition and disposal of the wood insert is the sole responsibility of the owner. Dismantling and disposal may be entrusted to a third party provided we are talking about a company authorised to salvage and eliminate said materials. In all cases you must abide by the laws in force in the country of installation as regards the disposal of materials and, if... -
Seite 36: Inhaltsverzeichnis
INHALT EINLEITUNG SYMBOLE ANWENDUNGSZWECK ZWECK UND INHALT DES HANDBUCHS AUFBEWAHRUNG DES HANDBUCHS ERWEITERUNG DES HANDBUCHS ALLGEMEINES GRUNDLEGENDE EINGEHALTENE UND EINZUHALTENDE UNFALLVERHÜTUNGSNORMEN GEWÄHRLEISTUNG HAFTBARKEIT DES HERSTELLERS 1.10 EIGENSCHAFTEN DES BENUTZERS 1.11 TECHNISCHER KUNDENDIENST 1.12 ERSATZTEILE 1.13 LIEFERUNG DES HOLZ KAMIN EINSATZ VORBEUGENDE SICHERHEITSMASSNAHMEN HINWEISE FÜR DEN INSTALLATEUR HINWEISE FÜR DEN BENUTZER... -
Seite 37: Einleitung
EINLEITUNG ist integrierender Gerätebestandteil. ERSCHLEISS ODER ERLUST Keinesfalls vorgehen, wenn Sie nicht alle Hinweise des Falls nötig, bei der Fa. PALAZZETTI eine Ersatzkopie Handbuchs verstanden haben; im Zweifelsfall immer den anfordern Eingriff von Fachpersonal der anfordern. ERKAUF DES AMIN INSATZ Die Firma Palazzetti behält sich das Recht vor,... -
Seite 38: Grundlegende Eingehaltene Und Einzuhaltende Unfallverhütungsnormen
GRUNDLEGENDE EINGEHALTENE UND 1.11 TECHNISCHER KUNDENDIENST EINZUHALTENDE Die Fa. PALAZZETTI ist in der Lage, jedes technische UNFALLVERHÜTUNGSNORMEN Problem bezüglich der Benutzung oder der Wartung Richtlinie 2006/95/CE: „Elektrisches Material, das während der gesamten Lebensdauer des Produkts zu innerhalb bestimmter Spannungsgrenzen eingesetzt lösen. -
Seite 39: Vorbeugende Sicherheitsmassnahmen
VORBEUGENDE • Bei mangelhafter Funktionsfähigkeit des Holz Kamin Einsatz aufgrund eines nicht optimalen Rauchabzugs SICHERHEITSMASSNAHMEN ist eine sorgfältige Reinigung des Schornsteins durch Fachpersonal zu veranlassen. HINWEISE FÜR DEN INSTALLATEUR • Im Falle eines Kaminbrandes, versuchen den • Sicherstellen, dass die Vorbereitungen für die Holz Heizkamin durch Schließen der für die Verbrennung Kamin Einsatzinstallation den örtlichen, nationalen notwendige Primärluft und dem Löschen der... -
Seite 40: Merkmale Und Gerätebeschreibung
MERKMALE UND HANDLING UND TRANSPORT GERÄTEBESCHREIBUNG Der Holz Kamin Einsatz wird mit montierter Metallstruktur geliefert. BESCHREIBUNG Es ist empfehlenswert, den Holz Kamin Einsatz erst am Das Produkt ist ein Einbau-Holz Kamin Einsatz, Installationsort auszupacken. bestehend aus einem Metallblock mit selbsttragender Das Gerät wird mit allen vorgesehenen Teilen geliefert. -
Seite 41: Vorbereitung Des Installationsorts
VORBEREITUNG DES INSTALLATIONSORTS MONTAGESCHEMA (Fig. 5.1) A) F ÜR EINE KORREKTE NSTALLATION MUSS DIE AUCHGASLEITUNG ZWISCHEN AMIN UND AUCHABZUGSROHR ABGEDICHTET WERDEN INDEM MAN ALLE NSCHLUSSSTÜCKE VERSIEGELT B) Hinterer externer Lufteinlass, einen Mindestabstand von 5 cm zwischen Verkleidungen und Rohr für die Zufuhr der Verbrennungsluft gewährleisten. -
Seite 42: Rauchfänge Und Schornsteine
zu beachten: Brandgefahr zu vermeiden, die auf Grund der an den Innenflächen des Rauchfangs abgelagerten, Nicht bei ungünstigen Bedingungen vorgehen; unverbrannten Rückständen entstehen können. Es Unter einwandfreien psychophysischen Bedingungen wird empfohlen, die Reinigung bei einem normalen arbeiten und sicherstellen, dass die individuellen Betrieb mindestens einmal pro Jahr durchzuführen. -
Seite 43: Einleitende Massnahmen
EINLEITENDE MASSNAHMEN 5.4.1 Anpassungsarbeiten Zuerst die im bereits bestehenden Kamin vorhandenen Maße prüfen und mit denen das Gerät auf dem technischen Datenblatt vergleichen. Sollten Anpassungsarbeiten nötig sein, bei denen die Innenwände der Feuerstelle zugeschnitten oder geändert werden, darauf achten, dass die Stabilität des Kamins nicht beeinträchtigt wird. -
Seite 44: Luftzirkulation
5.4.4 Lüftungsklappen mit zusätzlichem Bausatz Belüftung 680 m³/h. Zusätzlich zur Öffnung für die Verbrennungsluftzufuhr (“C” - Abb. 5.6) müssen folgende Belüftungsöffnungen für den Lüfter angebracht werden: Öffnung Raumluft am Ventilator des Wärmekreislaufs, seitlich an der Verkleidung (Durchmesser 15 cm), mit Gitter. -
Seite 45: Kanalisierung Auf Doppelter Leitung (-5.11A-)
KANALISIERUNG AUF DOPPELTER LEITUNG (-5.11A-). Einen Anschlussstutzen im selben Raum des Kamins installieren, die zweite Leitung kann verwendet werden, um die heiße Luft in andere Räume der Wohnung zu bringen. - 5.11A - KANALISIERUNG AUF EINZIGER LEITUNG (-5.11B-). Andernfalls beide Anschlüsse der Heißluft mit einem Schlauch bis zur Öffnung der entsprechenden Verteilerkanäle verbinden. -
Seite 46: Einsatz In Einen Kamin
Falls im bereits bestehenden Kamin ein Balken oder andere Holzteile in einem Abstand von weniger als 16 cm von der Oberkante des Gerätes vorhanden sein sollten, ist es notwendig, die Teile aus brennbarem Material mit einem Isolierpaneel vom Typ Zementspanplatte oder anderem geeigneten Material zu schützen (-5.14c-). -
Seite 47: Inbetriebnahme Und Gebrauch
INBETRIEBNAHME UND GEBRAUCH ÖFFNUNG DER TÜRE Um die Türe zu öffnen, ist es notwendig, die kalte Hand (A) aus der Ausstattung zu verwenden. Das Werkzeug in den entsprechenden seitlichen Haken vorsichtig einsetzen, um das Glas nicht zu beschädigen, und zur Öffnung nach oben und zur Schließung nach unten drehen. -
Seite 48: Brennstoffbefüllung
ZÜNDUNG 6.5.2 DIE SEKUNDÄRE VERBRENNUNG: erhält man durch Zufuhr von vorgeheizter Luft durch • In der Feuerkammer eventuell vorhandene Asche die auf dem oberen Teil des Unterbodens des Ofens entfernen; • Die Regulierung der Primärluft maximal öffnen (Abb. entzündet durch ihren Eintritt in die Feuerstelle das 6.2 a/b);... -
Seite 49: Der Wiedereinbau Erfolgt In Umgekehrter Reihenfolge
6.5.9 Der Wiedereinbau erfolgt in umgekehrter Reihenfolge: 6.5.9.1 Die Rauchleitplatte “B” wieder mit ihrer Halterung (C) positionieren, und die Schrauben von (A) festziehen (Abb. 6.4.1. 6.5.9.2 Betonelemente: D-Seitenwand, C- Bodenplatte, B-Vorderfront (Abb. 6.4). INSTANDHALTUNG UND REINIGUNG VORBEUGENDE SICHERHEITSMASSNAHMEN Vor dem Durchführen von beliebigen Wartungs- o d e r R e i n i g u n g s m a ß... -
Seite 50: Reinigung Des Rauchfangs
7.2). Manchmal kann dieses Verfahren nicht genug sein: Sie können dann die Verwendung von speziellen Reinigungsmittel, vorsichtig, um das Produkt auf einem trockenen Tuch sprühen und nicht direkt auf dem Kaminglas oder die lackierten Teile der Umgebung. In normalen Bedingungen neigt das Glas während der Zündung zu verdunkeln und während des Betriebs zu erleichtern. -
Seite 51: Informationen Für Den Abriss Und Die Entsorgung
INFORMATIONEN FÜR DEN ABRISS UND DIE ENTSORGUNG Der Abriss und die Entsorgung des Holz Kamin Einsatz geht ganz und gar zu Lasten des Eigentümers. Mit dem Abriss und der Entsorgung können auch Firmen beauftragt werden, die für die Sammlung und Entsorgung der betroffenen Materialien zugelassen sind. - Seite 52 INDEX AVERTISSEMENT SYMBOLES UTILISÉS DANS LE MANUEL UTILISATION PRÉVUE BUT ET CONTENU DU MANUEL CONSERVATION DU MANUEL MISE À JOUR DU MANUEL INFORMATIONS GÉNÉRALES PRINCIPALES NORMES DE SÉCURITÉ RESPECTÉES ET À RESPECTER GARANTIE LÉGALE LIMITES DE RESPONSABILITÉ DU FABRICANT 1.10 CARACTÉRISTIQUES DE L’UTILISATEUR 1.11 ASSISTANCE TECHNIQUE...
-
Seite 53: Symboles Utilisés Dans Le Manuel
ENTE DU INSERT A BOISE Palazzetti se réserve le droit de modifier, à tout En cas de vente du insert a boise, l’utilisateur est également tenu de remettre au nouveau propriétaire le présent caractéristiques techniques et/ou fonctionnelles de son... -
Seite 54: Limites De Responsabilité Du Fabricant
PRINCIPALES NORMES DE SÉCURITÉ 1.11 ASSISTANCE TECHNIQUE RESPECTÉES ET À RESPECTER PALAZZETTI est en mesure de résoudre tout problème Directive 2006/95/CE: «Matériel électrique destiné à être utilisé en respectant les limites de tension pendant toute sa durée de vie. prévues». -
Seite 55: Consignes De Sécurité
CONSIGNES DE SÉCURITÉ pas jeter d’eau sur le feu) et appeler les urgences. • Ne pas utiliser de la cheminée comme incinérateur CONSIGNES POUR L’INSTALLATEUR de déchets. • • En cas de dysfonctionnement du poêle dû à un tirage insert a boise sont conformes aux règlements locaux, non optimal du carneau, s’adresser à... -
Seite 56: Déplacement Et Transport
CARACTÉRISTIQUES ET DÉPLACEMENT ET TRANSPORT DESCRIPTION insert a boise montée. DESCRIPTION L’unité est un insert a boise constitué d’un monobloc Le insert a boise est livré avec toutes les parties prévues. être installé dans une cheminée existante ou dans une cheminée neuve. Il donne un fonctionnement optimal et un rendement du plus haut niveau. -
Seite 57: Préparation Du Lieu D'installation
PRÉPARATION DU LIEU D’INSTALLATION SCHÉMA DE MONTAGE (Fig. 5.1) A) Pour installer correctement le tuyau entre la cheminée et le conduit de fumée doit être étanche avec le scellage de tous les joints de raccordement. B) Prise d’air extérieure arrière, garantir une distance minimale de 5 cm entre les revêtements et le tuyau d’admission de l’air comburant. - Seite 58 ramoner au moins une fois par an. • L’appareil ne peut pas Être utilisé dans un conduit individuelle sont intacts et en parfait état; partagé avec autres appareils. il doit porter des gants de sécurité; il doit porter des chaussures de sécurité; le démontage de l’appareil soit libre de tout obstacle.
-
Seite 59: Opérations Préalables
OPÉRATIONS PRÉALABLES 5.4.1 Intervention d’adaptation Il est avant tout nécessaire de contrôler les dimensions de l’espace disponible dans la cheminée existante et de les comparer à celles du insert a boise Dans le cas où serait nécessaire une intervention du insert a boise), veiller à ne pas en compromettre la stabilité. - Seite 60 5.4.4 Outre la prise d’air comburant (“C” - fig. 5.6), il est nécessaire d’effectuer les prises d’air suivantes pour le ventilateur: Reprise de l’air ambiant (interne à la pièce) au ventilateur du circuit de chauffage, installée sur le côté de l’habillage (Ø15 cm) avec grille. >50 Reprise de l’air ambiant (reliée comme ( (-5.6-)) ou bien...
- Seite 61 CANALISATION SUR DOUBLE CONDUIT (-5.11A-). Installer une bouche dans la même pièce de la cheminée, le deuxième tuyau pourra être utilisé pour amener l’air chaud dans les autres pièces de la maison. - 5.11A - CANALISATION SUR UN SEUL CONDUIT (-5.11B-).
- Seite 62 N’insérer sur le raccord aucune vanne à papillon pour le réglage du tirage). . INSTALLATION DANS UNE CHEMINÉE Poser tout d’abord l’appareil sur le foyer de la cheminée. Étaler sur le fond du collier (placé dans la partie supérieure) de la pâte d’obturation (pâte résistante à la chaleur - 800°C). faciliter l’introduction, utiliser deux guides de tôle de 2 à...
-
Seite 63: Mise En Service Et Utilisation
MISE EN SERVICE ET UTILISATION OUVERTURE DE LA PORTE Pour ouvrir la porte, utiliser la poignée (A) prévue à cet effet. Insérer l’outil dans le crochet latéral avec précaution le haut et vers le bas pour fermer. Ouvrir progressivement la porte pour permettre aux fumées du foyer d’être aspirées par le conduit de fumée en évitant ainsi de les propager dans la pièce. -
Seite 64: Contrôle De La Combustion
ALLUMAGE 6.5.2 LA COMBUSTION SECONDAIRE: La combustion secondaire s’obtient en introduisant • Enlever les cendres éventuellement présentes dans le dans le insert a boise de l’air préchauffé à travers foyer ; les trous situés en haut de la paroi du fond. En •... -
Seite 65: Entretien Et Nettoyage
6.5.9 Remonter les composants dans le sens inverse : 6.5.9.1 6.5.9.2 ENTRETIEN ET NETTOYAGE RECOMMANDATIONS DE SÉCURITÉ Avant d’effectuer toute opération de maintenance ou de nettoyage, adopter les précautions suivantes : bien froides. - 6.4 - D) utiliser toujours les outils adaptés aux opérations d’entretien. - Seite 66 non pas directement sur la vitre de la cheminée ou sur les parties peintes adjacentes. En conditions normales, la vitre tend à noircir en phase le fonctionnement. La vitre en vitrocéramique résiste tes bien aux hautes températures, mais elle est fragile: ÉVITER LES CHOCS.
- Seite 67 Toutes les opérations de démontage en vue de la démolition doivent s’effectuer alors que le insert a boise est arrêté. Mettre au rebut le produit du insert a boise en la remettant à une société agréée. L’abandon du insert a boise dans une zone accessible expose personnes et animaux à...
- Seite 68 ÍNDICE PREÁMBULO SIMBOLOGÍA DESTINO DE USO OBJETO Y CONTENIDO DEL MANUAL CONSERVACIÓN DEL MANUAL ACTUALIZACIÓN DEL MANUAL INFORMACIONES GENERALES PRINCIPALES NORMAS PARA LA PREVENCIÓN DE ACCIDENTES CON QUE SE CUMPLE Y SE DEBE CUMPLIR GARANTÍA LEGAL RESPONSABILIDAD DEL FABRICANTE 1.10 CARACTERÍSTICAS DEL USUARIO 1.11 ASISTENCIA TÉCNICA...
-
Seite 69: Destino De Uso
El producto objeto del presente manual es una inserción ESPONSABILIDAD de madera para el calentamiento doméstico de interior, Con la entrega de este manual PALAZZETTI no se con hogar cerrado, y alimentada exclusivamente con leña responsabiliza, tanto civil como penalmente, de los con carga manual. - Seite 70 PRINCIPALES NORMAS PARA LA 1.11 ASISTENCIA TÉCNICA PREVENCIÓN DE ACCIDENTES CON QUE SE PALAZZETTI es capaz de solucionar cualquier CUMPLE Y SE DEBE CUMPLIR problema técnico sobre el uso y mantenimiento Directiva 2006/95/CE: «Material eléctrico destinado en el entero ciclo de vida del producto.
-
Seite 71: Advertencias Para El Mantenedor
PRECAUCIONES PARA LA de residuos. SEGURIDAD • En caso de mal funcionamiento de la estufa, debido a un tiro no óptimo del conducto de salida de humos, se debe realizar una atenta limpieza por parte de un ADVERTENCIAS PARA EL INSTALADOR técnico especializado. -
Seite 72: Características Ydescripción
CARACTERÍSTICAS Y DESPLAZAMIENTO Y DESCRIPCIÓN TRANSPORTE La inserción de madera se entrega con la estructura DESCRIPCIÓN metálica montada. El dispositivo está constituido por una inserción de Se aconseja desembalar la inserción de madera sólo madera para encastrar, que consta de un mono bloque cuando haya llegado al lugar de destino. -
Seite 73: Preparación Del Lugar De Instalación
PREPARACIÓN DEL LUGAR DE INSTALACIÓN ESQUEMA DE MONTAJE (Fig. 5.1) A) Para una instalación correcta la tubería de humos entre chimenea y humero se debe realizar con estanquidad sellando todas las juntas de unión. B) Toma de aire externa posterior, garantizar una distancia mínima de 5 cm entre revestimientos y tubo de entrada aire comburente. - Seite 74 y funcionan debidamente; de humo se debe realizar al menos una vez al año. llevar los guantes para la prevención de accidentes; • No se puede utilizàr el aparato en canòn compartido. llevar el calzado para la prevención de accidentes; comprobar que la zona donde se van a realizar las operaciones de montaje y desmontaje no tiene obstáculos.
-
Seite 75: Operaciones Previas
OPERACIONES PREVIAS 5.4.1 Operaciones de adaptación Antes de todo es oportuno comprobar las dimensiones del espacio disponible en la inserción de madera existente y de que fuera necesaria una operación de adaptación, cortando o modificando las paredes interiores de la inserción de madera, se debe tener cuidado para no afectar a la estabilidad de la inserción de madera. -
Seite 76: Circulación Del Aire
5.4.4 Tomas de aire con kit de ventilación a elegir de 680m 5.6), es necesario realizar las siguientes tomas de aire para el ventilador: Toma de aire ambiente (dentro de la habitación) al ventilador del circuito de calefacción, situada al lado del revestimiento (Ø... - Seite 77 CANALIZACIÓN EN DOBLE CONDUCTO -5.11A- Instalar una boca en la habitación misma de la chimenea, el segundo conducto se podrá utilizar para llevar aire caliente a otras habitaciones de la casa. CANALIZACIÓN CON UN SOLO CONDUCTO - 5.11A - (-5.11B-). Como alternativa conectar ambos envíos del aire caliente canales de distribución.
- Seite 78 INTRODUCCIÓN EN UNA CHIMENEA Apoyar en primer lugar el aparato en el plano de fuego de la chimenea. Extender en el fondo del collar en forma de vaso (colocado en la parte superior) un cordón de pasta para sellar el fuego (selladora que resiste a 800°C). Luego facilitar el desplazamiento utilizando dos guías de chapa de 2/3 mm de espesor colocadas debajo del aparato, que se quitarán una vez realizada la colocación (-5.15-).
-
Seite 79: Puesta En Funcionamiento Y Uso
PUESTA EN FUNCIONAMIENTO Y ABERTURA DE LA PUERTA Para abrir la puerta es necesario utilizar la mano fría (A) en dotación. Introducir la herramienta en el adecuado gancho lateral con precaución para no causar el daño del vidrio, y girar hacia arriba para abrir y hacia abajo para cerrar. La abertura de la puerta se debe realizar gradualmente para permitir a los humos del fogón ser aspirados por el humero evitando de esta manera salidas de humo en... -
Seite 80: Control De La Combustión
ENCENDIDO 6.5.2 LA COMBUSTIÓN SECUNDARIA: Se consigue inyectando en el hogar aire pre • Limpiar el fogón de la eventual presencia de cenizas; • arriba de la pared de fondo. Entrando en el hogar el • abrir la puerta; aire incendia los gases ino quemados (monóxido de •... -
Seite 81: Mantenimiento Y Limpieza
6.5.9 Volver a montar de manera inversa los componentes: 6.5.9.1 6.4.1). 6.5.9.2 Cementos: D- costado lateral, C-pared de fondo, MANTENIMIENTO Y LIMPIEZA PRECAUCIONES DE SEGURIDAD Antes de efectuar cualquier tipo de operación de mantenimiento o de limpieza, adopte las siguientes precauciones: A) Comprobar que todas las piezas de la inserción de - 6.4 -... -
Seite 82: Limpieza Del Vidrio
LIMPIEZA DEL VIDRIO Durante el funcionamiento de la inserción de madera se puede favorecer la limpieza del vidrio cerámico mediante Generalmente ésta debe estar situada a caudal cerrado. Si se desplaza la palanca, se abre un caudal de aire que limpieza. -
Seite 83: Informaciones Para El Desguacey La Eliminación
INFORMACIONES PARA EL DESGUACE Y LA ELIMINACIÓN El desguace y la eliminación del equipo corren a cargo y están bajo la responsabilidad exclusiva del propietario. El desguace y la eliminación se pueden confiar también a terceros, con tal que se utilicen siempre empresas autorizadas para la recuperación y eliminación de los materiales en objeto. - Seite 84 Palazzetti accepts no liability for any mistakes in this handbook and is free to modify the features of its products without prior notice.