Herunterladen Inhalt Inhalt Diese Seite drucken
Toshiba PDR-M11 Bedienungsanleitung

Toshiba PDR-M11 Bedienungsanleitung

Digital still camera
Inhaltsverzeichnis

Werbung

Verfügbare Sprachen

Verfügbare Sprachen

INSTRUCTION MANUAL
MODE D'EMPLOI
BEDIENUNGSANLEITUNG
PDR-M11
DIGITAL STILL CAMERA
Cover1,2/PDRM11-EFG
1
01.6.21, 9:13 PM

Werbung

Inhaltsverzeichnis

Fehlerbehebung

loading

Inhaltszusammenfassung für Toshiba PDR-M11

  • Seite 1 INSTRUCTION MANUAL MODE D’EMPLOI BEDIENUNGSANLEITUNG PDR-M11 DIGITAL STILL CAMERA Cover1,2/PDRM11-EFG 01.6.21, 9:13 PM...
  • Seite 2 Cover1,2/PDRM11-EFG 01.6.21, 9:13 PM...
  • Seite 3 INSTRUCTION MANUAL To ensure that you use the Toshiba PDR-M11 Digital Still Camera safely and correctly, read this Instruction Manual carefully before you start using the camera. Once you have finished reading this Instruction Manual, keep it handy at all times.
  • Seite 4 00Tobira PDRM11-E 01.6.21, 5:56 PM...
  • Seite 5: Attention

    Attention For customers in the U.S.A. DIGITAL STILL CAMERA PDR-M11 Tested To Comply With FCC Standards FOR HOME OR OFFICE USE FCC Statement This device complies with Part 15 of the FCC Rules. Operation is subject to the following two conditions: (1) This device may not cause harmful interference, and (2) this device must accept any interference received, including interference that may cause undesired operation.
  • Seite 6 Attention (continued) CAUTION If you modify the camera in any way, without getting approval from Toshiba Corporation, your camera may violate FCC regulations. Violation of FCC regulations may cause the FCC to void your right to use the modified camera.
  • Seite 7: Before Reading This Manual

    Before Reading This Manual Thank you for purchasing the Toshiba PDR-M11 Digital Still Camera. To ensure that you use this camera safely and correctly, read this Instruction Manual carefully before you start using the camera. Once you have finished reading this Instruction Manual, keep it handy at all times.
  • Seite 8: Inhaltsverzeichnis

    Contents The name in parentheses ( ) is the function name on the PDR-M11. LCD Monitor Display ..........34 Preface In Photography Mode ........... 34 Attention ..............1 In Playback Mode ..........35 Before Reading This Manual ......... 3 Basic Photography Contents ..............
  • Seite 9 Contents (continued) The name in parentheses ( ) is the function name on the PDR-M11. Playing Back/Erasing Images Additional Information Playing Back Photographed Images Specifications ............78 (Single-Frame Playback) ........56 Warnings and Messages Displayed Enlarging Photographed Images on LCD Monitor ........... 82 (Zoom Playback) ..........
  • Seite 10: Safety Precautions

    Safety Precautions Read these safety precautions carefully before using the PDR-M11. These instructions contain valuable information on safe and proper use that will prevent harm and damage to the operator and other persons. Make sure that you fully understand the following details (indications) before proceeding to the main descriptions in this manual.
  • Seite 11 Safety Precautions (continued) Exemption Clauses DANGER • Toshiba Corporation bears no responsibility in the case of damages arising from earthquakes, fire not liable to Do not heat, disassemble or throw the Toshiba Corporation, operating by third parties, other batteries into fire or water.
  • Seite 12 Safety Precautions (continued) WARNING WARNING (continued) Should you ever notice smoke, a strange Do not place the camera on wobbly, odor or excessive heat coming from the inclined or unstable surfaces. camera, immediately turn OFF the power This might cause the camera to fall or tilt over. and remove the batteries and AC adapter.
  • Seite 13 Safety Precautions (continued) WARNING WARNING (continued) (continued) Keep the batteries out of the reach of Do not disassemble, change or repair the children. camera. If a child swallows a battery, this might result in This might cause fire or electric shock. For poisoning.
  • Seite 14 Safety Precautions (continued) CAUTION CAUTION (continued) If you want to use the camera on an Before you move the camera, disconnect airplane, consult with the airline and follow cords and cables. their instructions. Failure to do this might damage cords and cables, resulting in fire or electric shock.
  • Seite 15 Safety Precautions (continued) CAUTION CAUTION (continued) (continued) Do not subject the status display to impact. Do not look at the sun through the camera viewfinder. If the status display is impacted, the glass on the screen may be broken and internal fluid may This may cause injury of the eyes.
  • Seite 16: Using Your Camera Correctly

    • Places contacting chemicals such as pesticides or next to rubber or vinyl products for long periods Do not expose the camera to sand. The PDR-M11 is particularly sensitive to sand. If the camera comes into contact with sand, not only will the camera become damaged, it will also no longer be repairable.
  • Seite 17: Recommended Battery Options For Maximum Performance And Enjoyment

    Using Your Camera Correctly (continued) Recommended Battery Options for Maximum Performance and Enjoyment To extend the use of the camera, we strongly recommend that you only use the following types of batteries: - Nickel Metal Hydride [NiMh] (Extended Life, Rechargeable) - Lithium (Extended Life, Not Rechargeable) - Alkaline (Not Rechargeable) Battery performance in general (especially Alkaline) may vary depending on individual brand, length of...
  • Seite 18 Using Your Camera Correctly (continued) Notes On Handling the AC Adapter Be sure to use only the specified AC adapter (sold separately). Using a different AC adapter might cause the camera to malfunction. When you use the AC adapter, carefully read and strictly observe the Safety Precautions from page 6 onwards and the notes described below.
  • Seite 19: Features

    Features 2X Digital zoom USB interface compatible High definition 1.3 million pixels Extensive photographic functions • Auto/Flash/Self-timer • Sequential Image photography (taking 4 separate images at approx. two frames per second) • Color/Black-and-white photography etc. Image size and quality easily selectable •...
  • Seite 20: The Function Map

    The Function Map It is suggested that you look at the function map below before using the PDR-M11. Read these pages first. Changing the photography settings. Let's get ready to use the PDR-M11. You can change the settings for the image that you are going to take according to your particular requirements, (P.17 –...
  • Seite 21: Accessories

    Accessories Make sure that you have all of the items below before you start using your camera. USB cable (1) Hand strap (1) Batteries (4) (size AA) Alkaline SmartMedia™ CD-ROM (1) • Instruction Manual (this manual) (4MB, 3.3V) (1) • Software application •...
  • Seite 22: Names Of Parts

    Names of Parts Image Quality button Mode dial P. 43) For enlarged view P. 20) Flash button P. 48) Strap attachment Self-timer button P. 22) P. 47) Shutter button P. 37) Flash Viewfinder window Self-timer Indicator Photo sensor Lens Connect cover P.
  • Seite 23 Names of Parts (continued) LCD monitor P. 34) ENTER button Press the center of the button. Viewfinder lamp P. 39) (Use this button to fix a selection.) (cross pad) button Viewfinder Press the button on the required side. (Use these buttons to select an item or an image.) Erase button P.
  • Seite 24: Mode Dial

    Names of Parts (continued) Mode dial SET-UP mode Photography mode Sets basic camera settings Takes photos, sets photography (language, sound, auto-off time, settings. timer, time and reset). PC mode Power OFF Transfers images to a PC. Switches the power OFF. For details, refer to the Manual for the Software Application.
  • Seite 25: Status Display

    Names of Parts (continued) Status display This display indicates the camera’s status. You can verify the camera’s status even if the LCD monitor is not on. The text, numbers and icons that are displayed in the status display vary according to the setting. Remaining battery power Example of counter display (The display varies according to the mode dial setting.)
  • Seite 26: Attaching The Strap

    Attaching the Strap This strap is handy for carrying your camera around. To prevent your camera from dropping during photography, hang the strap around your wrist. Slip the small loop at the end of the hand strap Strap attachment through the strap attachment. Pass the other end of hand strap through the small loop.
  • Seite 27: Installing The Batteries

    Installing the Batteries This camera uses four (4) size AA batteries. Loading the Batteries IMPORTANT • Before you load or remove the batteries, be sure to turn the camera OFF. • The camera may not start normally if you load batteries not on the power off status. In this case, turn the mode dial to OFF, then turn on again.
  • Seite 28 Installing the Batteries (continued) Load the batteries in the battery compartment making sure they are loaded in their correct direction as shown in the figure on the right. Close the battery cover 1 , slide the release latch in the direction of the arrow 2 and press until it clicks shut.
  • Seite 29: Removing The Batteries

    Installing the Batteries (continued) Removing the Batteries Reverse the procedure for “Loading the Batteries” and remove the batteries. IMPORTANT • When removing the batteries, take care not to drop the camera or the batteries by mistake. - 25 - 17-26 PDRM11-E 01.6.21, 5:57 PM...
  • Seite 30 Installing the Batteries (continued) Battery Wear When the power is ON, the remaining battery power is displayed on the LCD monitor and the status display. Status Display Remaining Battery Power LCD Monitor Sufficient battery power, or the AC adapter is connected.
  • Seite 31: Using The Power Outlet

    Using the Power Outlet If you use the AC adapter (sold separately) in a room with a power outlet, you can take photographs for an extended period of time. This also prevents failed photographs due to battery wear or failed transfer of data to a PC.
  • Seite 32: About Smartmedia

    • Never remove the SmartMedia™ or switch the camera OFF during data recording or during data erasing (SmartMedia™ formatting). These actions might damage the SmartMedia™. • Use only the SmartMedia™ specified for use with the PDR-M11. The use of other SmartMedia™ could damage the camera.
  • Seite 33: Loading Smartmedia

    About SmartMedia™ (continued) • Take care not to touch the SmartMedia™’s electrodes (metal contacts) or allow the electrodes to become soiled. Use a dry lint-free cloth to wipe away any dirt. • To avoid damage caused by static electricity during transportation or storage, always use the special static-free case provided.
  • Seite 34: Removing Smartmedia

    About SmartMedia™ (continued) Gently insert the SmartMedia™ as far as it can go with the SmartMedia™ electrodes (metal contacts) facing the front of the camera. Close the battery cover 1 , slide the release latch in the direction of the arrow 2 and press until it clicks shut.
  • Seite 35 About SmartMedia™ (continued) To open the battery cover, slide the release latch in the direction of the arrow 1 and open the cover 2 . Pull SmartMedia™ out with your fingers. Close the battery cover 1 , slide the release latch in the direction of the arrow 2 and press until it clicks shut.
  • Seite 36: Write Protection

    About SmartMedia™ (continued) Write Protection To prevent valuable data from being erased inadvertently, attach the write-protect sticker at the write-protect area. Data can no longer be recorded or erased from SmartMedia™. To write or erase data from Write-protect SmartMedia™, peel off the sticker. area Sticker IMPORTANT...
  • Seite 37: Turning The Power On/Off

    Turning the Power ON/OFF Turning the Power ON Make sure that the SmartMedia™ is correctly loaded. ( Page 29) Set the mode dial to the desired mode. When the camera is turned ON, the Auto Power OFF function starts to work. IMPORTANT •...
  • Seite 38: Lcd Monitor Display

    LCD Monitor Display The text, numbers and icons that are displayed on the LCD monitor vary according to the current settings. In Photography Mode ( [ Mode dial setting Digital zoom photography ( P. 45) Possible number of shots Self-timer photography ( P.
  • Seite 39: In Playback Mode

    LCD Monitor Display (continued) In Playback Mode ([ Slideshow ( P. 62) Zoom playback ( P. 57) Folder number Mode dial setting ( P. 20) Image number Protected image ( P. 59) NO IM G A E Message ( P. 82) Date ( P.
  • Seite 40: How To Hold Your Camera

    How to Hold Your Camera When taking a photograph, hold the camera firmly and prevent your finger or hand strap from covering the lens, flash or flash sensor. Right Wrong Camera held with both hands with your arms Fingers held over the lens firmly held against the sides of your chest - 36 - 36-50 PDRM11-E...
  • Seite 41: How To Press The Shutter Button

    How to Press the Shutter Button The shutter button can be pressed down in two stages: halfway down and fully down. When pressed halfway down, AF (auto-focus) and AE (auto exposure) are carried out. When pressed fully down, the camera takes a picture. Press the shutter button down halfway 1 .
  • Seite 42 Moving the camera as you press the shutter button will result in a blurred image. • The PDR-M11 uses an accurate auto focus mechanism. However, the PDR-M11 may have difficulty focusing or not be able to focus at all for subjects and situations such as the following:...
  • Seite 43: About The Viewfinder Lamp

    About the Viewfinder Lamp The viewfinder lamp indicates the state of the camera. The meaning of the lamp color may differ according to the mode dial setting. Set the mode dial to the desired mode. Viewfinder Lamp When the camera is turned ON, the Auto Power OFF function starts to work.
  • Seite 44: Photography (Auto Photography)

    Photography (Auto Photography) This is the most commonly used photography mode. In this mode, exposure (combination of shutter speed and aperture) is automatically controlled to facilitate photography. There are two ways of taking photographs in this mode: using the viewfinder and using the LCD monitor.
  • Seite 45 Photography (Auto Photography) (continued) Press the shutter button down halfway 1 , and press Press down it down fully 2 . halfway. • Pressing the shutter button down halfway adjusts the focus and Press down exposure, and pressing the shutter button down fully takes the fully.
  • Seite 46: Using The Lcd Monitor

    Photography (Auto Photography) (continued) Using the LCD Monitor Get ready to take the photograph. Load the batteries ( Page 23) and the SmartMedia™ ( Page 29) into the camera. Set the mode dial to [ Look at the image on the LCD monitor to compose the picture. Press the shutter button down halfway 1 , and press Press down it down fully 2 .
  • Seite 47: Setting The Image Size And Quality

    Setting the Image Size and Quality Set the size (number of pixels) and quality (compression ratio) of the image to be photographed. Change the setting according to how the image is to be used and the remaining amount of space in the SmartMedia™.
  • Seite 48 Setting the Image Size and Quality (continued) Take the photograph. For details on how to take photographs Page 40 Memo • To make the image smaller, it is more effective to reduce the size and then reduce image quality. • The memory size of the image varies according to the subject. •...
  • Seite 49: Digital Zoom Photography

    Digital Zoom Photography This function enlarges the center of the image displayed on the screen so that it appears that the photographed image is enlarged twice its size. Take pictures while viewing the image in the LCD monitor. Set the mode dial to [ When you take a picture in LCD monitor off, press the MENU button twice to display the image before photography.
  • Seite 50 Digital Zoom Photography (continued) To cancel digital zoom photography, press the button. Memo • Digital zoom photography is automatically canceled by either turning the camera OFF or by activation of the Auto Power OFF function. • If you take a FULL size picture in digital zoom photography mode, the data size becomes large, and the possible number of shots may be decreased.
  • Seite 51: Photography Using The Self-Timer (Self-Timer Photography)

    Photography Using the Self-timer (Self-timer Photography) When the self-timer is used, the shutter automatically closes after the preset time (two or ten seconds). Changing the set time until photography Page 72 Set the mode dial to [ Press the self-timer button to scroll through the modes until you reach the Self-timer mode.
  • Seite 52: Photography Using The Flash (Flash Photography)

    Photography Using the Flash (Flash Photography) In the default setting, the flash will be automatically set to function in dark places. No special setting is needed to set off the flash. The flash firing mode can be set to suit the conditions where the flash is to be fired. The effective firing distance of the flash is approximately 3.0 ft (0.9 m) to 10 ft (3 m).
  • Seite 53 Photography Using the Flash (Flash photography) (continued) AUTO ] Auto In this mode, the flash fires automatically according to the photography conditions. This mode is ideal for general photography where you are not trying to achieve any particular effect. ] Suppressed Flash Use the Suppressed Flash mode when you are taking pictures in indoor lighting at distances too great for the flash to have any effect, such as theater performances or indoor sporting events.
  • Seite 54 Photography Using the Flash (Flash photography) (continued) Memo • If you take a photograph in the [ ] Suppressed Flash mode at a dark place, the shutter speed slows down. We recommend using a tripod to prevent blurred image caused by shaking. •...
  • Seite 55: Sequential Image Photography (Burst Mode)

    Sequential Image Photography (Burst Mode) The sequential shot takes four pictures in sequence with a 1-second (low- light) to 1/30-second (bright-light) interval between each frame. This mode is effective for continuously photographing moving subjects. Set the mode dial to [ Set the REC.
  • Seite 56: Changing The Preset Conditions (Rec Menu)

    Changing the Preset Conditions (REC MENU) This menu is for setting the basic settings to be used for photography in the [ ] photography mode. The settings are not canceled even if the camera is turned OFF or the Auto Power OFF function is activated. Set the mode dial to [ Press the MENU button.
  • Seite 57 Changing the Preset Conditions (REC MENU) (continued) White Balance (W.B.) White Balance Additional Information, Glossary (Page 86) The camera determines the white balance by averaging the various kinds of light that actually enters the lens. This setting allows you to set in advance the white balance when taking photographs under specific lighting conditions.
  • Seite 58: Exposure Compensation)

    Changing the Preset Conditions (REC MENU) (continued) E.X.P. (Exposure Compensation) E.X.P. (Exposure Compensation) Additional Information, Glossary (Page 86) This setting allows you to lighten or darken the entire screen. Use this setting when the optimum brightness (exposure) cannot be obtained, for example, when there is a lot of contrast between the subject and the background or when the subject to photograph occupies only an extremely small part of the screen.
  • Seite 59: Color

    Changing the Preset Conditions (REC MENU) (continued) COLOR Sets the color mode at which the image is to be recorded. [COLOR] : It allows you to take pictures in color. (default) [B.W.] : It allows you to take pictures in black&white. SHARP This setting controls the image detail.
  • Seite 60: Playing Back Photographed Images (Single-Frame Playback)

    Playing Back Photographed Images (Single-Frame Playback) Play back photographed images one image at a time. Set the mode dial to [ The last image frame appears on the LCD monitor. Changing the LCD monitor display. ( Page 69) Press the buttons to move forward and reverse.
  • Seite 61: Enlarging Photographed Images (Zoom Playback)

    Enlarging Photographed Images (Zoom Playback) Enlarges selected portions of images being played back 2 times actual size. Images can be displayed enlarged when being played back one image at a time. Set the mode dial to [ The last image frame appears on the LCD monitor. Use the buttons to select the frame you want to enlarge.
  • Seite 62: Displaying A List Of Images (Thumbnail Display)

    Displaying a List of Images (Thumbnail Display) Nine reduced images are simultaneously displayed on the LCD monitor. This manual calls this display “thumbnail display.” This feature is useful, for example, when there are many images. After you have displayed the thumbnail display, you can select the desired image and display it in the regular display.
  • Seite 63: Protecting Images

    Protecting Images This feature prevents images from being erased. IMPORTANT • Formatting erases all the images on a SmartMedia™, regardless of whether they are protected or not. • To protect the entire SmartMedia™, see “Write Protection” ( Page 32). Protecting an image Set the mode dial to [ The last image frame appears on the LCD monitor.
  • Seite 64 Protecting Images (continued) Use the buttons to select [PROTECT] and MENU press the button. R P ECT The PROTECT menu is displayed. E D AL L O F AT Use the buttons to select [YES], and press the ENTER button. To quit write-protection, select [NO].
  • Seite 65: Removing The Protection

    Protecting Images (continued) Removing the Protection Set the mode dial to [ The last image frame appears on the LCD monitor. Use the buttons to select the desired image to unprotect. Press the MENU button. The PLAY MENU is displayed. Use the buttons to select [PROTECT] and press the button.
  • Seite 66: Auto Playback (Slideshow)

    Auto Playback (Slideshow) Automatically play back one image at a time in order. Set the mode dial to [ The last image frame appears on the LCD monitor. Press the MENU button. The PLAY MENU is displayed. Use the buttons to select [SLIDE] and MENU press the button.
  • Seite 67 Auto Playback (Slideshow) (continued) To quit the slideshow, press the ENTER button. The slideshow is repeated until the ENTER button is pressed. The LCD monitor displays the image when the ENTER button is pressed. Memo • The Auto Power OFF function does not operate during automatic playback. - 63 - 56-69 PDRM11-E 01.6.21, 6:30 PM...
  • Seite 68: Erasing Images (Erase Frame)

    Erasing Images (Erase Frame) Erases one image at a time. Note, however, that images cannot be erased when they are protected ( Page 59) or the SmartMedia™ is write-protected ( Page 32). Set the mode dial to [ ] or [ When [ ] is selected, the last image frame appears on the LCD monitor.
  • Seite 69: Erasing All Images

    Erasing All Images Erases all images within the SmartMedia Note, however, that images cannot be erased when they are protected ( Page 59) or when the SmartMedia™ is write-protected ( Page 32). Set the mode dial to [ The last image frame appears on the LCD monitor. Press the MENU button.
  • Seite 70 Erasing All Images (continued) Use the buttons to select [YES], and press the ENTER button. This erases the images and returns to the PLAY MENU. To cancel erasing of image data, select [NO], and press the ENTER E Y S button.
  • Seite 71: Formatting The Smartmedia

    Formatting the SmartMedia™ Formatting erases all images currently recorded on the SmartMedia™ loaded on your camera. Protected images Page 59) are also erased. SmartMedia™ cannot be formatted if it is write-protected ( Page 32). IMPORTANT • The SmartMedia™ must be formatted on the camera before use. Set the mode dial to [ The last image frame appears on the LCD monitor.
  • Seite 72 Formatting the SmartMedia™ (continued) Use the buttons to select [EXEC], and press the ENTER button. To cancel formatting, select [CANCEL], and press the ENTER button. X E EC A N CEL To reset the image number, use the buttons to select [EXEC], and press the ENTER button.
  • Seite 73: Changing The Display Setting In Playback Mode

    Changing the Display Setting in Playback Mode This setting allows you to switch the on-screen display. Set the mode dial to [ The last image frame appears on the LCD monitor. Press the MENU button. MENU The PLAY MENU is displayed. R P ECT E D AL L O F AT...
  • Seite 74: Basic Photographic Settings (Set-Up Mode)

    Basic Photographic Settings (SET-UP mode) This feature allows you to set up the environment for using your camera in addition to image-related settings. This is called “setup”. The following items can be changed in the SET-UP mode: LANGUAGE/SOUND/AUTO-OFF/ TIMER/TIME/RESET The details set here are held in memory even if the camera is turned OFF. Set the mode dial to [ The SETUP MENU appears.
  • Seite 75 Basic Photographic Settings (SET-UP mode) (continued) Press the button. UP MEN The tab menu is displayed. A L UAGE How to set the time Page 73 O S D N E G Use the buttons to change the setting in - OFF R F N the tab menu, and press the ENTER button.
  • Seite 76: Auto-Off

    Basic Photographic Settings (SET-UP mode) (continued) AUTO-OFF If no operation is carried out for a fixed amount of time (default: about one minute), power consumption is set to its minimum state (power almost turned OFF) to prevent battery wear. This is called the Auto Power OFF mode.
  • Seite 77: Time

    Basic Photographic Settings (SET-UP mode) (continued) TIME Sets the date and time. Seconds cannot be set. If you set [STAMP] to [YES], the date & time information is recorded in the image file when the shutter button is released . Using the buttons to select the item you want DATE...
  • Seite 78: Transferring Images To A Pc

    Transferring Images to a PC You can transfer images photographed on your camera to a PC using the packaged CD-ROM and cable set. Images recorded on SmartMedia™ can also be transferred to a PC using the PC card adapter (sold separately) or floppy disk adapter (sold separately).
  • Seite 79: Installing The Usb Driver

    Install this driver when the USB cable (provided) is used. Insert the CD-ROM supplied with this software package into the CD-ROM drive. The screen for selecting the display language appears. Click “English”. Click “Install PDR-M11 driver”. Follow the on-screen instructions to continue the setup. - 75 - 70-77 PDRM11-E...
  • Seite 80: Separately Sold Accessories

    “Connecting to Other Devices” (page 77) For details on these accessories, refer to the Instruction Manual for the accessory you are using. To purchase above accessories within the United States, please visit our website at http://www.toshiba.com/taisisd/dsc AC Adapter PDR-ACM1A (for U.S.A. and Canada) PDR-ACM1E (for European Continent) PDR-ACM1U (for U.K.)
  • Seite 81: Connecting To Other Devices

    Connecting to Other Devices PC card adapter SmartMedia™ (provided) Floppy disk adapter Printer Software application (CD-ROM) (provided) USB cable (provided) PDR-M11 AC adapter (sold separately) Plug socket - 77 - 70-77 PDRM11-E 01.6.21, 6:31 PM...
  • Seite 82: Specifications

    Specifications Camera Body Model Toshiba Digital Still Camera PDR-M11 Recording medium SmartMedia™ (3.3V) 2/4/8/16/32/64/128MB compatible Compression system JPEG-compliant Image file format Exif Ver.2.1-compliant (TIFF) Number of frames Quality Mode Image Size 16MB 32MB 64MB 128MB (Approx.) TIFF FULL FULL size:...
  • Seite 83 Specifications (continued) Pickup elements 1/2.7" CCD sensor (total number of pixels: approx. 1.3 million) Sensitivity Equivalent to ISO 80 to 320 Lens Single Focus Lens F2.8 / F8.0 Focal length f=6.67 mm (equivalent to 52 mm on a 35 mm camera) Viewfinder Virtual image type finder Auto-focus...
  • Seite 84 Specifications (continued) Date/Time Simultaneously recorded to image data LCD monitor ( 1.8" D-TFD (71,760 pixels) DC IN terminal DC 5 V I/O terminal DIGITAL terminal 4 x AA (Alkaline, Nickel Metal Hydride or Lithium) battery ( ) or AC Power supply adapter (sold separately) Temperature +41°F (+5°C) to +104°F (+40°C) (during operation)/–4°F (–20°C) to...
  • Seite 85 Specifications (continued) AC adapter (PDR-ACM1A) (sold separately) Power supply AC120V 50/60Hz Rated Input Capacity 18VA Rated Output DC5V 1.5A Operating temperature +32°F (0°C) ~ +104°F (+40°C) Storage temperature +14°F (–10°C) ~ 158°F (+70°C) Dimensions ” (48 mm) (W) x 1- ”...
  • Seite 86: Warnings And Messages Displayed On Lcd Monitor

    Warnings and Messages Displayed on LCD Monitor The following warnings, messages and icons are displayed on the LCD monitor and the status display. Display Meaning LCD monitor Status display Half battery power or less Little battery power left. No battery power left. NO CARD No icon is displayed.
  • Seite 87: Troubleshooting

    Troubleshooting First check the warning displayed on the LCD monitor ( Page 82) and the color of the viewfinder lamp ( Page 39). Then check the following items. Problem Causes Remedy See Page No power supply The batteries are exhausted. Replace with new batteries.
  • Seite 88 Troubleshooting (continued) Problem Causes Remedy See Page I cannot use the flash to The mode dial has been changed Set the mode dial to the correct setting. P.33 take pictures. to another setting. The flash is set to Suppressed Set the flash to Auto, Red-Eye Reduction or P.48 Flash mode.
  • Seite 89 Troubleshooting (continued) Problem Causes Remedy See Page Nothing is displayed The camera is in the PC mode. Change the camera to the photography or P.40 even through the LCD playback mode. P.56 monitor is set to ON. The set date and time Both the batteries and AC adapter Set the date and time again.
  • Seite 90: Glossary

    Glossary AF/AE Red-Eye Effect AF (auto-focus) ··· A function for automatically The phenomenon where people’s eyes sometimes focusing your camera. appear red in the picture when you use a flash to AE ··· A function for automatically setting your photograph them in low-light conditions. This is camera’s exposure.
  • Seite 91: Global Contacts

    There are links, updates and notices for special options available to the Toshiba Digital Community, like special adapter mounts for Tele-photo, Wide-angle, and other filters and lenses designed specifically for your digital camera.
  • Seite 92 78-88 PDRM11-E 01.6.21, 6:31 PM...
  • Seite 93 MODE D’EMPLOI Pour vous assurer d’utiliser votre appareil photo numérique Toshiba PDR-M11 correctement et en toute sécurité, veuillez d’abord lire attentivement ce mode d’emploi. Une fois votre lecture terminée, gardez ce mode d’emploi à proximité pour vous y reporter chaque fois que c’est nécessaire.
  • Seite 94 00Tobira PDRM11-F 01.6.22, 3:34 PM...
  • Seite 95: Déclaration De La Fcc

    Attention Pour la clientèle aux États-Unis DIGITAL STILL CAMERA PDR-M11 Tested To Comply With FCC Standards FOR HOME OR OFFICE USE Déclaration de la FCC Cet appareil est conforme à l’article 15 de la réglementation de la FCC. Son utilisation est soumise aux deux conditions suivantes: (1) Cet appareil ne doit pas causer d’interférences nuisibles et...
  • Seite 96: Pour La Clientèle Du Canada

    Si vous modifiez l’appareil photo de quelque façon que ce soit, sans l’autorisation de Toshiba Corporation, votre appareil photo risque d’aller à l’encontre du règlement de la FCC. Aller à l’encontre du règlement de la FCC pourra conduire à...
  • Seite 97 Avant de lire ce mode d’emploi Nous vous remercions de l’achat de l’appareil photo numérique Toshiba PDR-M11. Avant la mise en service de cet appareil photo, veuillez lire attentivement le mode d’emploi pour utiliser l’appareil photo correctement et en toute sécurité. Après avoir lu ce manuel, veuillez le conserver à portée de la main.
  • Seite 98 Le nom entre parenthèses ( ) est le nom de la Table des matières fonction du PDR-M11 Affichage du moniteur LCD ......34 Préface En mode de prise de vues ......34 Attention ............1 En mode de lecture ......... 35 Avant de lire ce mode d’emploi ....
  • Seite 99: Table Des Matières

    Le nom entre parenthèses ( ) est le nom de la Table des matières (suite) fonction du PDR-M11 Lecture/effacement des images Autres applications Lecture des images photographiées Réglages de prise de vue de base (Lecture vue par vue) ......... 56 (mode REGLAGE) ........
  • Seite 100: Précautions De Sécurité

    Précautions de sécurité Veuillez lire attentivement ces précautions de sécurité avant d’utiliser le PDR-M11. Ces instructions contiennent des informations importantes sur l’utilisation sûre et correcte de l’appareil photo pour éviter les accidents dont pourraient être victimes l’utilisateur et les autres personnes.
  • Seite 101: Limites De Responsabilité

    Précautions de sécurité (suite) Limites de responsabilité DANGER • Toshiba Corporation rejette toute responsabilité en cas de dommages causés par un incendie, un tremblement Ne pas chauffer ni démonter les de terre, l’utilisation par un tiers, ou tout autre accident, accumulateurs et ne pas les jeter au feu ou ou par un emploi anormal, erroné...
  • Seite 102 Précautions de sécurité (suite) AVERTISSEMENT AVERTISSEMENT (suite) Si l’appareil photo dégage une fumée, une odeur Ne pas poser l’appareil photo sur une surface étrange ou une chaleur excessive, éteignez-le inégale, inclinée ou instable. immédiatement, enlevez les accumulateurs et L’appareil photo pourrait tomber ou basculer. débranchez l’adaptateur secteur.
  • Seite 103 Précautions de sécurité (suite) AVERTISSEMENT AVERTISSEMENT (suite) (suite) Ne pas démonter, modifier ou réparer Rangez les accumulateurs hors de portée l’appareil photo. des enfants. Il y a risque d’incendie ou d’électrocution. Pour En cas d’ingestion, il y a risque toute réparation ou inspection de l’intérieur de d’empoisonnement.
  • Seite 104 Précautions de sécurité (suite) ATTENTION ATTENTION (suite) Si vous voulez utiliser l’appareil photo dans Avant de déplacer l’appareil photo, un avion, consultez au préalable la débranchez les cordons et les câbles. compagnie aérienne. Les cordons et les câbles pourraient être endommagés, entraînant un risque d’incendie ou En raison des risques d’interférences radio, il d’électrocution.
  • Seite 105 Précautions de sécurité (suite) ATTENTION ATTENTION (suite) (suite) Ne pas soumettre l’afficheur de statut à un Ne pas regarder le soleil à travers le viseur choc. de l’appareil photo. Si l’afficheur de statut est soumis à un choc, le Vous pourriez blesser votre oeil. verre de l’écran risque de se briser et le fluide à...
  • Seite 106: Utilisation Correcte De L'appareil Photo

    Ne pas exposer votre appareil photo au sable. Le PDR-M11 est particulièrement sensible au sable qui peut l’endommager de manière irréversible. Faites surtout attention quand vous utilisez l’appareil photo à la plage ou dans des lieux sablonneux où...
  • Seite 107: Types De Batteries Recommandées Pour Un Fonctionnement Et Un Plaisir Maximum

    Utilisation correcte de l’appareil photo (suite) Nettoyage de votre appareil photo • Pour éviter de rayer la surface de l’objectif, de l’afficheur de statut et du viseur, utilisez un pinceau soufflant pour enlever la poussière et essuyez délicatement avec un chiffon doux et sec. •...
  • Seite 108 Utilisation correcte de l’appareil photo (suite) Remarques sur le maniement de l’adaptateur secteur Utilisez seulement l’adaptateur secteur spécifié (vendu séparément). L’utilisation d’un autre adaptateur secteur pourrait endommager l’appareil photo. Quand vous utilisez l’adaptateur secteur, lisez attentivement et observez strictement les Précautions de sécurité à partir de la page 6 et les remarques indiquées ci-dessous.
  • Seite 109: Caractéristiques

    Caractéristiques Objectif zoom 2X Compatible interface USB Haute définition 1,3 millions de pixels Fonctions photographiques étendues • Automatique/Flash/Retardateur Photographie d’image séquentielle • (nécessitant 4 images séparées à approx. deux trames par seconde)) • Photographie en couleur/noir et blanc, etc. Sélection facile de la taille et de la qualité de l’image •...
  • Seite 110: Diagramme Des Fonctions

    Diagramme des fonctions Nous vous conseillons de consulter le diagramme des fonctions ci-dessous avant d’utiliser le PDR-M11. Lisez d’abord ces pages. Changement des réglages photographiques. Préparez-vous à utiliser le PDR-M11. Vous pouvez changer les réglages pour la photo que vous allez prendre en fonction de vos besoins particuliers, du (P.17 –...
  • Seite 111: Accessoires

    Accessoires Vérifiez si vous avez tous les accessoires suivants avant d’utiliser votre appareil photo. Accumulateurs Câble USB (1) Dragonne (1) (4 de format AA) Alcaline Carte SmartMedia™ Cédérom (1) • Mode d’emploi (ce manuel) (4 Mo, 3,3 V) (1) • Logiciel •...
  • Seite 112: Nomenclature

    Nomenclature Touche de réglage de qualité d'image P. 43) Molette de modes Pour une vue agrandie P. 20) Touche Flash P. 48) Monture de Touche du retardateur P. 47) courroie P. 22) Déclencheur P. 37) Flash Fenêtre du viseur Témoin de retardateur Détecteur de Objectif prise de vue...
  • Seite 113 Nomenclature (suite) Moniteur LCD P. 34) Touche ENTER Appuyez au centre de cette touche. (Utilisez cette touche pour valider une Lampe du viseur P. 39) sélection.) Touche (multipression) Viseur Appuyez sur le côté souhaité de la touche. (Utilisez cette touche pour sélectionner une option ou une image.) Touche d’effacement...
  • Seite 114 Nomenclature (suite) Molette de modes Mode SET-UP (configuration) Mode de prise de vues P. 70) P. 40) Pour régler les paramètres de Pour la prise de vues, l'ajustement base de l’appareil photo (langue, des réglages de la prise de vues. son, temps d'arrêt automatique, retardateur, heure et réinitialisation).
  • Seite 115 Nomenclature (suite) Afficheur de statut Cet afficheur indique le statut de l’appareil photo. Vous pouvez vérifier le statut de l’appareil photo même si le moniteur LCD n’est pas allumé. Le texte, les nombres et les icônes affichés sur l’afficheur de statut varient en fonction du réglage. Exemple d'affichage du compteur Capacité...
  • Seite 116: Mise En Place De La Courroie

    Mise en place de la courroie Cette courroie est pratique pour porter votre appareil photo quand vous vous déplacez. Pour éviter de faire tomber l’appareil pendant la prise de vues, mettez la courroie autour du poignet. Glissez la boucle petite à l’extrémité de la dragonne Monture de courroie dans la monture de courroie.
  • Seite 117: Installation Des Accumulateurs

    Installation des accumulateurs Cet appareil photo utilise quatre (4) accumulateurs format AA (alcaline). Mise en place des accumulateurs IMPORTANT • Avant de mettre en place ou retirer les accumulateurs, veillez à mettre l’appareil photo hors tension. • L’appareil photo ne démarrera pas normalement si vous mettez les accumulateurs en place sans mettre celui-ci hors tension.
  • Seite 118 Installation des accumulateurs (suite) Insérez les accumulateurs dans le logement en veillant à ce qu’ils soient dans le bon sens comme indiqué sur l’illustration à droite. Refermez le couvercle des accumulateurs 1 , glissez le verrou de déclenchement dans la direction de la flèche 2 et appuyez dessus jusqu’à...
  • Seite 119: Retrait Des Accumulateurs

    Installation des accumulateurs (suite) Retrait des accumulateurs Inversez la procédure de “Mise en place des accumulateurs” et enlevez les accumulateurs. IMPORTANT • Quand vous enlevez les accumulateurs, faites attention à ne pas laisser tomber l’appareil photo ni les accumulateurs. - 25 - 17-26 PDRM11-F 01.6.22, 3:36 PM...
  • Seite 120 Installation des accumulateurs (suite) Déchargement de l’accumulateur Quand l’appareil photo est sous tension, la capacité restante de l’accumulateur est indiquée sur le moniteur LCD et l’afficheur de statut. Moniteur LCD Afficheur de statut Capacité restante de l’accumulateur Capacité suffisante, ou l’adaptateur CA est branché.
  • Seite 121: Utilisation D'une Prise Secteur

    Utilisation d’une prise secteur Si vous utilisez l’adaptateur secteur (vendu séparément) dans une pièce avec une prise murale, vous pourrez prendre des photos pendant longtemps. Vous éviterez par la même occasion de rater des prises de vues en raison de l’usure de l’accumulateur ou d’un échec de transfert des données vers un PC. Pour des détails sur la manipulation de l’adaptateur secteur, n’oubliez pas de lire la page 14.
  • Seite 122: À Propos De La Carte Smartmedia

    (formatage de la carte SmartMedia™). Ces actions peuvent endommager la carte SmartMedia™. • Utilisez seulement une carte SmartMedia™ spécifiée pour l’utilisation avec le PDR-M11. L’utilisation d’une autre carte SmartMedia™ peut endommager l’appareil photo.
  • Seite 123: Mise En Place De La Carte Smartmedia

    À propos de la carte SmartMedia™ (suite) • Faites attention à ne pas toucher les électrodes de la carte SmartMedia™ (contacts métalliques) ou laisser les électrodes se salir. Utilisez un chiffon sec ne peluchant pas pour essuyer toute saleté. • Pour ranger ou transporter la carte SmartMedia™ en évitant les dommages provoqués par l’électricité statique, utilisez toujours l’étui spécial antistatique fourni.
  • Seite 124: Retrait De La Carte Smartmedia

    À propos de la carte SmartMedia™ (suite) Insérez délicatement la carte SmartMedia™ aussi profondément que possible avec les électrodes de la carte SmartMedia™ (contacts métalliques) face à l’avant de l’appareil photo. Refermez le couvercle des accumulateurs 1 , glissez le verrou de déclenchement dans la direction de la flèche 2 et appuyez dessus jusqu’à...
  • Seite 125 À propos de la carte SmartMedia™ (suite) Pour ouvrir le couvercle des accumulateurs, glissez le verrou de déclenchement dans la direction de la flèche 1 et ouvrez le couvercle 2 . Retirez la carte SmartMedia™ avec les doigts. Refermez le couvercle des accumulateurs 1 , glissez le verrou de déclenchement dans la direction de la flèche 2 et appuyez dessus jusqu’à...
  • Seite 126: Protection Contre L'écriture

    À propos de la carte SmartMedia™ (suite) Protection contre l’écriture Pour éviter d’effacer par accident des données importantes, attachez l’autocollant de protection contre l’écriture sur la zone de protection contre l’écriture. Les données ne pourront plus être Zone de protection enregistrées ou effacées de la carte SmartMedia™.
  • Seite 127: Mise Sous/Hors Tension

    Mise sous/hors tension Mise sous tension Veillez à ce que la carte SmartMedia™ soit mise en place correctement. ( Page 29) Réglez la molette de modes sur le mode souhaité. Quand l’appareil photo est sous tension, le mode de veille est activé. IMPORTANT •...
  • Seite 128: Affichage Du Moniteur Lcd

    Affichage du moniteur LCD Le texte, les nombres et les icônes affichés sur le moniteur LCD varient en fonction des réglages actuels. En mode de prise de vues ( [ Réglage de la molette de modes Prise de vues avec zoom numérique P.
  • Seite 129: En Mode De Lecture

    Affichage du moniteur LCD (suite) En mode de lecture ([ Diaporama ( P. 62) Lecture avec zoom ( P. 57) Réglage de la Numéro de dossier molette de modes ( P. 20) Numéro d’image Image protégée ( P. 59) S D ' IM G A E Message ( P.
  • Seite 130: Comment Tenir L'appareil Photo

    Comment tenir l’appareil photo Quand vous prenez une photo, tenez l’appareil photo fermement et faites attention à ce que votre doigt ou la dragonne ne recouvre pas l’objectif, le flash ou le capteur du flash. Bien L’appareil photo est tenu à deux mains avec les bras Les doigts recouvrent l’objectif serrés contre les flancs - 36 -...
  • Seite 131: Comment Appuyer Sur Le Déclencheur

    Comment appuyer sur le déclencheur Vous pouvez appuyer sur le déclencheur en deux étapes: à mi-course et complètement. Quand vous appuyez à mi-course, l’autofocus (AF) et l’exposition automatique (AE) entrent en service. Quand vous appuyez à fond, l’appareil photo prend une photo. Appuyez sur le déclencheur à...
  • Seite 132 • Le PDR-M11 utilise un mécanisme de mise au point automatique précis. Néanmoins, le PDR-M11 peut avoir des difficultés à mettre au point ou ne pas pouvoir mettre au point du tout avec des sujets et des situations comme suit : - Sujets se déplaçant à...
  • Seite 133: À Propos De La Lampe Du Viseur

    À propos de la lampe du viseur La lampe du viseur indique le statut de l’appareil photo. La signification de la couleur de la lampe peut varier en fonction du réglage de la molette de modes. Lampe du viseur Réglez la molette de modes sur le mode désiré. Lorsque l’appareil photo est en tension, la fonction de veille s’active.
  • Seite 134: Prise De Vues (Prise De Vues Automatique)

    Prise de vues (Prise de vues automatique) C’est le mode de prise de vues le plus couramment utilisé. Dans ce mode, l’exposition (combinaison de la vitesse d’obturation et de l’ouverture) est contrôlée automatiquement pour faciliter la prise de vues. Il y a deux façons de prendre des photos dans ce mode: en utilisant le viseur et en utilisant le moniteur LCD.
  • Seite 135 Prise de vues (Prise de vues automatique) (suite) Appuyez sur le déclencheur à mi-course 1 , puis à fond 2 . Appuyez à mi-course. • Une pression à mi-course sur le déclencheur permet d’ajuster la Appuyez à mise au point et l’exposition et une pression complète de prendre fond.
  • Seite 136: Utilisation Du Moniteur Lcd

    Prise de vues (Prise de vues automatique) (suite) Utilisation du moniteur LCD Préparez-vous à prendre une photo. Mettez les accumulateurs ( Page 23) et la carte SmartMedia™ ( Page 29) en place dans l’appareil photo. Réglez la molette de modes sur [ Regardez l’image sur le moniteur LCD pour cadrer.
  • Seite 137: Réglage De La Taille Et De La Qualité De L'image

    Réglage de la taille et de la qualité de l’image Réglez la taille (nombre de pixels) et la qualité (taux de compression) de l’image à photographier. Changez le réglage en fonction de l’utilisation future de l’image et de l’espace restant dans la carte SmartMedia™. Réglez la molette de modes sur [ Appuyez sur la touche de réglage de qualité...
  • Seite 138 Réglage de la taille et de la qualité de l’image (suite) Prenez la photo. Pour des détails sur la façon de prendre des photos Page 40. Mémo • Pour diminuer la taille de l’image, il est plus effectif de réduire la taille, puis de réduire la qualité de l’image.
  • Seite 139: Prise De Vues Avec Zoom Numérique

    Prise de vues avec zoom numérique Cette fonction agrandit le centre de l’image affichée à l’écran de telle façon que l’image photographiée paraisse deux fois plus grande. Prenez des photos tout en regardant l’image sur le moniteur LCD. Réglez la molette de modes sur [ Si vous prenez une photo avec le moniteur LCD éteint, appuyez deux fois sur la touche MENU pour afficher l’image avant de photographier.
  • Seite 140 Prise de vues avec zoom numérique (suite) Pour annuler la prise de vues avec zoom numérique, appuyez sur la touche Mémo • La prise de vues avec zoom numérique est annulée automatiquement quand vous mettez l’appareil hors tension ou activez le mode de veille. •...
  • Seite 141: Prise De Vues Avec Le Retardateur

    Prise de vues avec le retardateur Quand vous utilisez le retardateur, l’obturateur se ferme automatiquement après le temps préréglé (deux ou dix secondes). Changement du temps préréglé avant la prise de vues Page 72 Réglez la molette de modes sur [ Appuyez sur la touche retardateur pour défiler à...
  • Seite 142: Prise De Vues Au Flash

    Prise de vues au flash Dans le réglage par défaut, le flash sera réglé automatiquement pour fonctionner dans les endroits sombres. Aucun réglage particulier n’est nécessaire pour déclencher le flash. Le mode de déclenchement du flash peut être réglé en fonction des conditions de prise de vues. La portée effective du flash est de 0,9 m (3,0 pieds) à...
  • Seite 143 Prise de vues au flash (suite) AUTO ] Auto Dans ce mode, le flash se déclenche automatiquement en fonction des conditions de prise de vues. Ce mode est idéal pour la prise de vues normale quand vous n’essayez pas de créer un effet particulier. ] Flash débrayé...
  • Seite 144 Prise de vues au flash (suite) Mémo • Si vous prenez une photo dans le mode de flash débrayé [ ] dans un endroit sombre, la vitesse d’obturation diminuera. Nous vous conseillons d’utiliser un trépied pour éviter les images confuses occasionnées par les secousses.
  • Seite 145: Prise De Vues Séquentielle (Prise De Vues Par Rafale)

    Prise de vues séquentielle (Prise de vues par rafale) La prise séquentielle nécessite quatre images en séquence avec un intervalle de 1 seconde (faible lumière) à 1/30 seconde (lumière intense) entre chaque trame. Ce mode est efficace pour prendre en photo de manière continue des sujets en mouvement. Réglez la molette de modes sur [ Réglez le mode d’enregistrement sur [RAFALE].
  • Seite 146: Changement Des Préréglages (Menu Enreg.)

    Changement des préréglages (MENU ENREG.) Ce menu est utilisé pour régler les paramètres de base pour la prise de vues dans le mode de prise de vues [ Les réglages ne sont pas annulés même si l’appareil photo est mis hors tension ou si le mode de veille est activé. Réglez la molette de modes sur [ Appuyez sur la touche MENU.
  • Seite 147: Mode Enr

    Changement des préréglages (MENU ENREG.) (suite) BAL.BLAN (Balance des blancs) Balance des blancs Informations supplémentaires, Glossaire (Page 86) L’appareil photo détermine la balance des blancs en pondérant les types de lumière variés pénétrant actuellement dans l’objectif. Ce paramètre vous permet de régler préalablement la balance des blancs tout en prenant des photos dans des conditions d’éclairage spécifiques.
  • Seite 148: Correction De L'exposition)

    Changement des préréglages (MENU ENREG.) (suite) I.L. (Correction de l’exposition) (I.L.) Correction de l’exposition Informations supplémentaires, Glossaire (Page 86) Ce paramètre vous permet d’éclaircir ou d’assombrir l’écran tout entier. Utilisez ce paramètre quand la luminosité optimale (exposition) ne peut pas être obtenue, par exemple, quand le contraste entre le sujet et l’arrière-plan est très fort ou quand le sujet à...
  • Seite 149: Couleur

    Changement des préréglages (MENU ENREG.) (suite) COULEUR Pour régler le mode de couleur pour l’image à enregistrer. [COULEU] : Vous permet de prendre des photographies en couleur. (Défaut) [B.W.] : Vous permet de prendre des photographies en blanc et noir. NETTETE Pour contrôler le détail de l’image.
  • Seite 150: Lecture Des Images Photographiées (Lecture Vue Par Vue)

    Lecture des images photographiées (Lecture vue par vue) Pour reproduire les images photographiées une image à la fois. Réglez la molette de modes sur [ La dernière image apparaît sur le moniteur LCD. Changement de l’affichage du moniteur LCD. Appuyez sur la touche pour vous déplacer vers l’avant ou l’arrière.
  • Seite 151: Agrandissement D'images Photographiées (Lecture Avec Zoom)

    Agrandissement d’images photographiées (Lecture avec zoom) Agrandit des parties sélectionnées des images reproduites à 2 fois leur taille d’origine. Les images peuvent être affichées agrandies quand vous les reproduisez une à la fois. Réglez la molette de modes sur [ La dernière image apparaît sur le moniteur LCD.
  • Seite 152: Affichage D'une Liste D'images (Affichage D'images Réduites)

    Affichage d’une liste d’images (Affichage d’images réduites) Cette fonction permet d’afficher en même temps neuf images réduites sur le moniteur LCD. Ce type d’affichage est appelé “affichage d’images réduites” dans ce mode d’emploi. Cette fonction est utile, par exemple, quand il y a de nombreuses images. Après avoir affiché les images réduites, vous pouvez sélectionner l’image souhaitée et l’afficher normalement.
  • Seite 153: Protection Des Images

    Protection des images Cette fonction protège les images contre l’effacement. IMPORTANT • Le formatage efface toutes les images d’une carte SmartMedia™, qu’elles soient protégées ou non. • Pour protéger toute la carte SmartMedia™, voir “Protection contre l’écriture” ( Page 32). Protection d’une image Réglez la molette de modes sur [ La dernière image apparaît sur le moniteur LCD.
  • Seite 154 Protection des images (suite) Appuyez sur la touche pour sélectionner LECTURE [PROTEGER] et appuyez sur la touche R P EGER REGLER Le menu PROTEGER est affiché. REGLER F E CER REGLER O F AT REGLER C E N REGLER Appuyez sur la touche pour sélectionner [EXECUT] et appuyez sur la touche ENTER.
  • Seite 155: Annulation De La Protection

    Protection des images (suite) Annulation de la protection Réglez la molette de modes sur [ La dernière image apparaît sur le moniteur LCD. Appuyez sur la touche pour sélectionner l’image dont vous souhaitez annuler la protection. Appuyez sur la touche MENU. Le menu MENU LECTURE est affiché.
  • Seite 156: Lecture Automatique (Diaporama)

    Lecture automatique (Diaporama) Cette fonction permet de lire les images automatiquement, une à la fois, dans un ordre donné. Réglez la molette de modes sur [ La dernière image apparaît sur le moniteur LCD. Appuyez sur la touche MENU. Le menu MENU LECTURE est affiché. Appuyez sur la touche pour sélectionner LECTURE...
  • Seite 157 Lecture automatique (Diaporama) (suite) Pour quitter le diaporama, appuyez sur la touche ENTER. Le diaporama recommence jusqu’à ce que vous appuyez sur la touche ENTER. Le moniteur LCD affiche l’image quand vous appuyez sur la touche ENTER. Mémo • La fonction de veille ne peut pas être activée pendant la lecture automatique. - 63 - 56-69 PDRM11-F 01.6.28, 2:40 PM...
  • Seite 158: Effacement Des Images (Effacement D'une Image)

    Effacement des images (effacement d’une image) Cette fonction permet d’effacer les images une par une. Notez cependant que les images ne peuvent pas être effacées quand elles sont protégées ( Page 59) ou quand la carte SmartMedia™ est protégée contre l’écriture ( Page 32).
  • Seite 159: Effacement De Toutes Les Images

    Effacement de toutes les images Cette fonction permet d’effacer toutes les images de la carte SmartMedia™. Notez cependant que les images ne peuvent pas être effacées quand elles sont protégées ( Page 59) ou quand la carte SmartMedia™ est protégée contre l’écriture ( Page 32).
  • Seite 160 Effacement des images (effacement d’une image) (suite) Appuyez sur la touche pour sélectionner [EXECUT] et appuyez sur la touche ENTER. Les images sont effacées et l’appareil photo revient au MENU LECTURE. Pour annuler l’effacement des données d’image, sélectionnez X E E U C T [ABANDO] et appuyez sur la touche ENTER.
  • Seite 161: Formatage De La Carte Smartmedia

    Formatage de la carte SmartMedia™ Le formatage efface toutes les images actuellement enregistrées sur la carte SmartMedia™ en place dans l’appareil photo. Les images protégées ( Page 59) sont aussi effacées. La carte SmartMedia™ ne peut pas être formatée si elle est protégée contre l’écriture ( Page 32).
  • Seite 162 Formatage de la carte SmartMedia™ (suite) Appuyez sur la touche pour sélectionner [EXECUT] et appuyez sur la touche ENTER. Pour annuler le formatage, sélectionnez [ABANDO] et appuyez sur la touche ENTER. X E ECUT B A N A O D Pour réinitialiser les numéros d’image, appuyez sur la touche pour sélectionner [EXECUT] et...
  • Seite 163: Modification Du Réglage De L'afficheur En Mode De Lecture

    Modification du réglage de l’afficheur en mode de lecture Ce réglage vous permet de changer l’affichage sur écran. Réglez la molette de modes sur [ La dernière image apparaît sur le moniteur LCD. Appuyez sur la touche MENU. LECTURE Le menu MENU LECTURE est affiché. R P EGER REGLER REGLER...
  • Seite 164: Réglages De Prise De Vue De Base (Mode Reglage)

    Réglages de prise de vue de base (mode REGLAGE) Vous pouvez régler dans ce mode l’environnement d’utilisation de votre appareil photo pour compléter les réglages en rapport avec l’image. Ce mode est appelé “réglage”. Les paramètres suivants peuvent être modifiés dans le mode REGLAGE: LANGUE/SON/ARRET AU/ RETARDA/HEURE/REINITIA...
  • Seite 165: Appuyez Sur La Touche

    Réglages de prise de vue de base (mode REGLAGE) (suite) Appuyez sur la touche R LAGE Le menu d’onglets est affiché. A L UE FRN . Comment régler le temps Page 73 O S N N E G Appuyez sur la touche pour sélectionner R F N R A T AU...
  • Seite 166: Arret Au

    Réglages de prise de vue de base (mode REGLAGE) (suite) ARRET AU Si aucune opération n’a été effectuée pendant une durée fixée (défaut: environ une minute), la consommation d’électricité est réglée au minimum (alimentation presque coupée) pour éviter l’usure de l’accumulateur.
  • Seite 167: Heure

    Réglages de prise de vue de base (mode REGLAGE) (suite) HEURE Permet de régler la date et l’heure. Les secondes ne peuvent pas être réglées. Si vous réglez [STAMP] sur [EXECUT], l’information de date et heure est enregistrée sur le fichier de l’image lorsque vous relâchez la touche du déclencheur.
  • Seite 168: Transfert Des Images À Un Pc

    Transfert des images à un PC Vous pouvez transférer des images photographiées de votre appareil photo à un PC en utilisant le cédérom et le câble l’accompagnant. Les images enregistrées sur une carte SmartMedia™ peuvent aussi être transférées à un PC en utilisant l’adaptateur de carte PC (vendu séparément) ou un adaptateur de disquette (vendu séparément).
  • Seite 169: Installation Du Pilote Usb

    Insérez le CD-ROM fourni avec l’application dans le lecteur de CD-ROM. L’écran de sélection de la langue des affichages apparaît. Cliquez sur “Français”. Cliquez sur “Installer le pilote PDR-M11”. Suivez les instructions qui apparaissent à l’écran pour poursuivre l’installation. - 75 - 70-77 PDRM11-F 01.6.22, 3:41 PM...
  • Seite 170: Accessoires Vendus Séparément

    Accessoires vendus séparément Les articles suivants sont aussi commercialisés séparément. Relation entre votre appareil photo et ses accessoires “Raccordement à d’autres appareils” (page 77) Pour les détails sur ces accessoires, reportez-vous au mode d’emploi de l’accessoire utilisé. Adaptateur secteur PDR-ACM1A (pour les E.E.U.U. et le Canada) PDR-ACM1E (pour l’Europe continentale) PDR-ACM1U (pour le Royaume-Uni) PDR-ACM1J (pour le Japon)
  • Seite 171: Raccordement À D'autres Appareils

    Raccordement à d’autres appareils Adaptateur de carte PC Carte SmartMedia™ (fournie) Adaptateur de disquette Imprimante Logiciel (Cédérom) (fourni) Câble USB (fourni) PDR-M11 Adaptateur secteur (vendu séparément) Prise secteur - 77 - 70-77 PDRM11-F 01.6.22, 3:41 PM...
  • Seite 172: Fiche Technique

    Fiche technique Boîtier de l’appareil photo Modèle Appareil photographique numérique Toshiba PDR-M11 Support d’enregistrement Carte SmartMedia™ (3,3 V) compatible 2/4/8/16/32/64/128 Mo Système de compression Conforme JPEG Format de fichier d’image Conforme Exif Ver.2.1 Nombre d’images Mode de Taille 16Mo 32Mo...
  • Seite 173 Fiche technique (suite) Éléments photosensibles Capteur CCD 1/2,7 pouce (nombre total de pixels : env. 1,3 millions) Sensibilité Équivalente à 80 – 320 ISO Objectif Objectif simple de mise au point F2,8/F8,0 Longueur focale f=6,67 mm (équivalent à 52 mm sur un appareil photo 35 mm) Viseur Viseur de type à...
  • Seite 174 Fiche technique (suite) Date/heure Enregistrées simultanément dans les données d’image Moniteur LCD ( 18 pouces, D-TFD (71 760 pixels) CC 5 V Prise DC IN Entrées/sorties Prise DIGITAL Alimentation 4 x AA (accumulateurs alcalins, d’hydride du métal du nickel ou lithium) ( ) ou adaptateur secteur (vendu séparément) +5 °C (+41 °F) à...
  • Seite 175 Fiche technique (suite) Adaptateur secteur (PDR-ACM1A) (vendu séparément) Alimentation Secteur 120 V 50/60 Hz Capacité d’entrée nominale 18 VA Sortie nominale CC 5,0 V 1,5 A 0 °C (+32 °F) à + 40 °C (+104 °F) Température de fonctionnement –10 °C (+14 °F) à +70 °C (+158 °F) Température de stockage Dimensions 48mm (1...
  • Seite 176: Avertissements Et Messages Affichés Sur Le Moniteur Lcd

    Avertissements et messages affichés sur le moniteur LCD Les avertissements, messages et icônes suivants sont affichés sur le moniteur LCD et l’afficheur de statut. Afficheur Signification Moniteur LCD Afficheur de statut La capacité de l’accumulateur est inférieure à la moitié. Les accumulateurs sont presque déchargés.
  • Seite 177: Guide De Dépannage

    Guide de dépannage Commencez par vérifier l’avertissement affiché sur le moniteur LCD ( Page 82) et la couleur de la lampe du viseur ( Page 39). Puis, vérifiez les points suivants. Problème Causes Solutions Voir page Pas d’alimentation. Les accumulateurs sont déchargés. Mettez des accumulateurs neufs en place.
  • Seite 178 Guide de dépannage (suite) Problème Causes Solutions Voir page Impossible d’utiliser le flash Le réglage de la molette de modes a été Réglez la molette de modes sur la position P.33 pour prendre des photos. changé. correcte. L’appareil photo est en mode de flash Réglez l’appareil sur le mode de flash automatique, P.48 débrayé.
  • Seite 179 Guide de dépannage (suite) Problème Causes Solutions Voir page Aucune image n’est affichée, L’appareil photo est en mode PC. Changez le réglage de l’appareil photo sur le mode P.40 même quand le moniteur LCD de prise de vues ou de lecture. P.56 est allumé.
  • Seite 180: Glossaire

    Glossaire AF/AE Carte PC AF (autofocus)...Une fonction permettant la mise au point Terme générique désignant les cartes conformes à la automatique de l’appareil photo. norme PC Card. AE...Une fonction permettant le réglage automatique de Effet yeux rouges l’exposition. Phénomène par lequel les yeux des gens apparaissent Verrouillage AF/AE...Verrouillage des réglages de mise parfois rouges sur les photos prises au flash dans des au point et d’exposition.
  • Seite 181: Contacts Mondiaux

    Toshiba, comme par exemple des adaptateurs spéciaux pour la prise de photos a distance, à angle large, et autres filtres et objectifs pour votre appareil photo numérique. Il y a également de nombreuses remises et promotions pour les services d’impression, les sacs, les services techniques ;...
  • Seite 182 78-87 PDRM11 F nosaveas! 01.6.22, 3:42 PM...
  • Seite 183 BEDIENUNGSANLEITUNG Bevor Sie die Toshiba PDR-M11 Digitalkamera verwenden, bitte unbedingt die vorliegende Bedienungsanleitung aufmerksam durchlesen, um eine richtige Verwendung der Kamera sicherzustellen. Nachdem Sie die Bedienungsanleitung durchgelesen haben, bewahren Sie diese bitte für spätere Bezugnahme auf. DIGITAL STILL CAMERA PDR-M11 In dem Feld unten tragen Sie bitte das Modell und die Seriennummer Ihrer Kamera ein.
  • Seite 184 00Tobira PDRM11-G 01.6.22, 4:41 PM...
  • Seite 185: Bevor Sie Diese Anleitung Lesen

    Bevor Sie diese Anleitung lesen Herzlichen Glückwunsch zum Kauf der Digitalkamera PDR-M11 von Toshiba. Bitte lesen Sie diese Anleitung zur richtigen Verwendung der Kamera sorgfältig durch. Bewahren Sie die Anleitung nach dem Lesen zum Nachschlagen auf. Konventionen in dieser Anleitung Warenzeichen •...
  • Seite 186 Inhalt Der Name in Klammern ( ) ist der Funktionsname an der PDR-M11. LCD-Monitordisplay ........34 Vorwort Im Fotografie-Modus ........34 Zur Beachtung ..........1 Im Wiedergabemodus ........35 Bevor Sie diese Anleitung lesen ....3 Inhalt ............4 Grundlegende Fotografie Sicherheitsmaßregeln ........
  • Seite 187 Inhalt (Fortsetzung) Der Name in Klammern ( ) ist der Funktionsname an der PDR-M11. Übertragen von Bildern zu einem PC ..74 Wiedergabe/Löschen Installation des USB-Treibers ..... 75 Wiedergabe aufgenommener Bilder ..56 Sonderzubehör ........... 76 Vergrößern von Aufnahmen Anschluß an andere Geräte ....... 77 (Zoom-Wiedergabe) ........
  • Seite 188: Sicherheitsmaßregeln

    Sicherheitsmaßregeln Lesen Sie bitte diese Sicherheitsmaßregeln vor dem Gebrauch der PDR-M11 gründlich durch. Sie geben wichtige Informationen zum sicheren und sachgemäßen Betrieb, um Unfälle mit Sachschäden oder Verletzungen zu vermeiden. Machen Sie sich mit den folgenden Kennzeichnungen (Anzeigen und Symbolen) vertraut, bevor Sie den Hauptteil der Anleitung lesen.
  • Seite 189: Haftungsausschluß

    Bedienung und ähnliche Umstände, entstan- zu Bränden oder Verletzungen führen können. den sind. • Toshiba Corporation kann keine Verantwortung für Niemals mit einem Hammer auf die Folgeverluste oder -schäden (Gewinneinbußen, Batterien schlagen, darauf treten, fallenlas- Geschäftsausfälle, Änderungen oder Verluste von...
  • Seite 190 Sicherheitsmaßregeln (Fortsetzung) WARNUNG WARNUNG (Fortsetzung) Bei Rauchentwicklung, fremden Gerüchen Die Kamera nicht auf einer unebenen, oder starkem Erhitzen der Kamera, die geneigten oder wackeligen Oberfläche Kamera sofort ausschalten (OFF), die aufstellen. Batterie herausnehmen und das Netzteil Dadurch könnte die Kamera herunterfallen oder trennen.
  • Seite 191 Sicherheitsmaßregeln (Fortsetzung) WARNUNG WARNUNG (Fortsetzung) (Fortsetzung) Die Batterien immer außer Reichweite von Nicht versuchen, die Kamera zu zerlegen Kindern halten. oder zu modifizieren. Verschluckte Batterien können zu gefährlichen Dies kann zu Bränden oder elektrischen Vergiftungen führen. Wenn eine Batterie Schlägen führen. Wenden Sie sich für Reparatu- verschluckt wird, sofort einen Arzt rufen.
  • Seite 192 Sicherheitsmaßregeln (Fortsetzung) VORSICHT VORSICHT (Fortsetzung) Vor dem Bewegen der Kamera alle Wenn Sie die Kamera in einem Flugzeug Verbindungskabel abtrennen. verwenden wollen, fragen Sie das Flugper- Wenn dies nicht geschieht, können Kabel sonal um Erlaubnis und befolgen die beschädigt werden. Dies könnte zu Bränden und gegebenen Anweisungen.
  • Seite 193 Sicherheitsmaßregeln (Fortsetzung) VORSICHT VORSICHT (Fortsetzung) (Fortsetzung) Das Betriebsdisplay vor Stößen schützen. Niemals durch den Kamerasucher in die Sonne blicken. Wenn das Betriebsdisplay Stößen ausgesetzt wird, kann das Displayglas brechen und Dies kann zu Sehschäden führen. Displayflüssigkeit austreten. Falls Displayflüssigkeit auf Haut oder Kleidung Den Blitz nicht auf Personen in der Nähe gerät, sofort mit viel Wasser abspülen.
  • Seite 194: Richtige Verwendung Der Kamera

    Produkten. Die Kamera vor Sand schützen. Die PDR-M11 ist besonders gegen Sand empfindlich. Wenn die Kamera in Kontakt mit Sand kommt, kann sie irreparabel beschädigt werden. Dies muß besonders bei Verwendung der Kamera am Strand oder an Orten mit Staub oder Sand beachtet werden.
  • Seite 195: Pflege Der Kamera

    Richtige Verwendung der Kamera (Fortsetzung) Pflege der Kamera • Um Kratzer an Objektiv, Oberfläche des Betriebsdisplays oder Sucher zu vermeiden, immer jeglichen Staub, der sich auf diesen Teilen angesammelt hat, mit einem Blaspinsel abblasen und mit einem weichen Lappen sanft abwischen. •...
  • Seite 196 Richtige Verwendung der Kamera (Fortsetzung) Hinweise zum Umgang mit dem Netzteil Immer nur das vorgeschriebene Netzteil (getrennt erhältlich) verwenden. Bei Verwendung eines anderen Netzteils besteht die Gefahr von Funktionsstörungen. Wenn das unten beschriebene Netzteil verwendet wird, immer die ab Seite 6 aufgeführten Sicherheitsmaßregeln sowie die folgenden Hinweise befolgen.
  • Seite 197: Leistungsmerkmale

    Leistungsmerkmale 2X Zoomobjektiv USB-Schnittstelle Hohe Auflösung von 1,3 Millionen Pixel Betriebsarten • Auto/Blitz/Selbstauslöser • Sequentielle Bildfotografie (Aufnahme von 4 verschiedenen Bildern mit etwa zwei Einzelbildern pro Sekunde) • Farb-/Schwarzweißfotografie usw. Auswahl von Bildformat und Qualität • Format: 1280 x 960 oder 640 x 480 Pixel •...
  • Seite 198: Zusammenfassung Der Funktionen

    Zusammenfassung der Funktionen Probieren Sie den Einsatz der PDR-M11 unter Beachtung der folgenden Zusammenfassung der Funktionen. Lesen Sie diese Seiten zuerst. Ändern der Aufnahmeeinstellungen. Vorbereitung zur Verwendung der PDR-M11. Sie können die Einstellung für die Aufnahme nach Wunsch oder Situation ändern.
  • Seite 199: Zubehör

    Zubehör Überprüfen Sie bitte vor Inbetriebnahme der Kamera, daß die folgenden Teile vorhanden sind. Batterien (4, Größe AA) USB-Kabel (1) Tragegurt (1) Alkalische SmartMedia™ CD-ROM (1) • Bedienungsanleitung (4 MB, 3,3 V) (1) • Software-Applikation (Dieses Buch) • USB-Treiber • Software-Anleitung •...
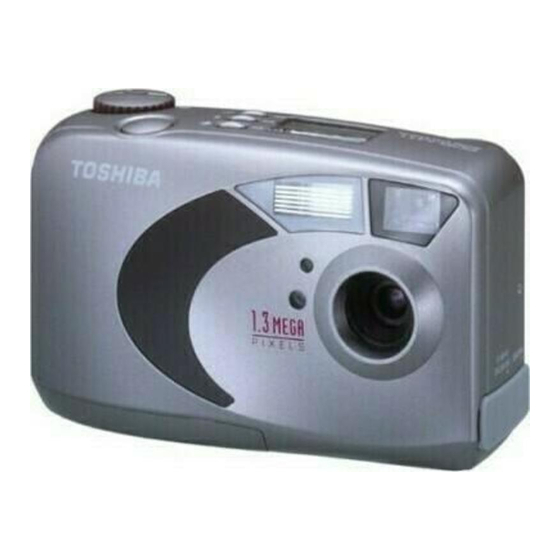
  • Seite 200: Bezeichnung Der Teile

    Bezeichnung der Teile Bildqualität-Taste Modus-Wählrad P. 43) Vergrößerte Abbildung P. 20) Blitz-Taste P. 48) Gurtaufhängung P. 22) Selbstauslöser-Taste P. 47) Auslöser P. 37) Blitz Sucher Selbstauslöser- Anzeige Fotomessfühler Objektiv Anschlußabdeckung P. 27) DC IN 5V-Buchse P. 27) DIGITAL-Buchse - 18 - 17-21 PDRM11-G 01.6.22, 4:42 PM...
  • Seite 201 Bezeichnung der Teile (Fortsetzung) ENTER-Taste (Eingabe) LCD-Monitor P. 34) Die Mitte dieser Taste drücken. (Diese Taste wird zur Bestätigung einer Sucher-Lampe P. 39) Eingabe verwendet.) (Eingabekreuz)-Taste Sucher Diese Taste zur gewünschten Richtung drücken. (Diese Tasten zum Wählen eines Einstellgegenstands oder Bildes betäti- gen.) Löschen-Taste P.
  • Seite 202 Bezeichnung der Teile (Fortsetzung) Modus-Wählrad Auto-Fotomodus SET-UP-Modus Macht Aufnahmen und stellt In dieser Betriebsart werden Kameraeinstellungen. grundlegende Kameraeinstellun- gen (Sprache, Ton, automatische Ausschaltzeit, Selbstauslöser, Zeit und Reset) eingestellt. PC-Modus Im PC-Modus können die Bilder auf einen PC übertragen wer- Aus-Zustand den.
  • Seite 203: Statusanzeige

    Bezeichnung der Teile (Fortsetzung) Statusanzeige Diese Anzeige zeigt den Betriebszustand der Kamera an. Sie können den Kamerastatus überprüfen, auch wenn der LCD-Monitor nicht eingeschaltet ist. Text, Zahlen und Symbole in der Statusanzeige unterscheiden sich je nach Einstellung. Beispiel der Zähleranzeige Restliche Batteriestärke (Die Anzeige unterscheidet sich je nach Einstellung des Wählrads.)
  • Seite 204: Befestigung Des Tragegurts

    Befestigung des Tragegurts Der Tragegurt ist nützlich, um die Kamera unterwegs mitzunehmen. Hängen Sie sich den Tragegurt um den Handgelenk, um ein Fallenlassen der Kamera zu vermeiden. Ziehen Sie die kleine Schleife am Ende des Hand- Gurtaufhängung Gurtes durch die Gurtaufhängung. Das andere Ende des Tragegurts durch die kleine Schleife führen.
  • Seite 205: Vorbereiten Der Batterien

    Vorbereiten der Batterien Diese Kamera arbeitet mit vier (4) Größe AA Batterien. Einlegen der Batterien WICHTIG • Vor dem Einlegen oder Entfernen der Batterien muß die Kamera ausgeschaltet sein. • Es kann sein, daß die Kamera nicht ordnungsgemäß startet, wenn Sie die Batterien außer bei ausge- schalter Kamera eingelegt haben.
  • Seite 206 Vorbereiten der Batterien (Fortsetzung) Die Batterien in das Batteriefach einlegen und sicher- stellen, daß die Polung richtig ist, wie in der Abbil- dung rechts gezeigt. Schließen Sie die Batterieabdeckung 1 , schieben Sie die Freigabe-Lasche in Pfeilrichtung 2 und drücken Sie die Freigabe-Lasche bis sie anklickt und ge- schlossen wird.
  • Seite 207: Entfernen Der Batterien

    Vorbereiten der Batterien (Fortsetzung) Entfernen der Batterien Zum Herausnehmen der Batterien die unter “Einlegen der Batterien” beschriebenen Schritte in umgekehrter Reihenfolge ausführen. WICHTIG • Beim Entfernen der Batterien darauf achten, die Kamera oder die Batterien nicht versehentlich fallenzulassen. - 25 - 22-25 PDRM11-G 01.6.22, 4:43 PM...
  • Seite 208 Vorbereiten der Batterien (Fortsetzung) Batterieverbrauch In eingeschaltetem Zustand wird die restliche Batteriestärke auf dem LCD-Monitor und in der Statusan- zeige gezeigt. Statusanzeige Restliche Batteriestärke LCD-Monitor Ausreichende Batteriestärke, oder das Netzteil ist angeschlossen. Halbe Batteriestärke oder weniger Wenig Batteriestärke übrig Unzureichende Batteriestärke Durch neue Batterien ersetzen.
  • Seite 209: Betrieb Mit Netzstrom

    Betrieb mit Netzstrom Wenn Sie das Netzteil (getrennt erhältlich) in einem Raum mit Steckdose verwenden, können Sie über längere Zeit hinweg Fotos aufnehmen. Mit dem Netzteil können Sie außerdem fehlerhafte Datenübertragungen durch schwache Batterien vermeiden. Einzelheiten zum Netzteil siehe Seite 14. WICHTIG •...
  • Seite 210: Über Smartmedia

    S. 77) zur Übertragung von Bilddaten zu einem PC verwenden. Hinweise zu SmartMedia™ • In den folgenden Situationen können Daten gelöscht (zerstört) werden. Beachten Sie, daß die Toshiba Corporation keine Verantwortung jeglicher Art für den Verlust (die Zerstörung) von aufgezeichneten Daten in diesen Situationen übernimmt:...
  • Seite 211: Einsetzen Von Smartmedia

    Über SmartMedia™ (Fortsetzung) • Keine metallischen Gegenstände in Berührung mit den Kontakten (Anschlußoberfläche) von SmartMedia™ kommen lassen. Zum Abwischen nur ein fusselfreies Tuch verwenden. • Um Schäden durch statische Elektrizität bei Transport oder Lagerung zu vermeiden, immer die mitgelieferte spezielle Antistatik-Schutzhülle verwenden. •...
  • Seite 212: Entfernen Von Smartmedia

    Über SmartMedia™ (Fortsetzung) Vorsichtig SmartMedia™ so weit wie möglich einset- zen, wobei die SmartMedia™-Elektroden (Metall- kontakte) zur Voderseite der Kamera weisen sollen. Schließen Sie die Batterieabdeckung 1 , schieben Sie die Freigabe-Lasche in Pfeilrichtung 2 und drücken Sie die Freigabe-Lasche bis sie anklickt und ge- schlossen wird.
  • Seite 213 Über SmartMedia™ (Fortsetzung) Schieben Sie die Freigabe-Lasche in Pfeilrichtung 1 und öffnen Sie die Batterieabdeckung 2 . SmartMedia™ mit den Fingern herausziehen. Schließen Sie die Batterieabdeckung 1 , schieben Sie die Freigabe-Lasche in Pfeilrichtung 2 und drücken Sie die Freigabe-Lasche bis sie anklickt und ge- schlossen wird.
  • Seite 214: Schreibschutz

    Über SmartMedia™ (Fortsetzung) Schreibschutz Um zu vermeiden, daß wertvolle Daten versehentlich überschrie- ben werden, den Schreibschutzaufkleber an der Schreibschutz- stelle anbringen. Daten können dann nicht länger auf Schreibschutzbereich SmartMedia™ aufgezeichnet oder gelöscht werden. Zum erneuten Lesen oder Löschen von Daten von SmartMedia™ den Schreibschutzaufkleber entfernen.
  • Seite 215: Ein- Und Ausschalten

    Ein- und Ausschalten Einschalten Sicherstellen, daß SmartMedia™ korrekt eingesetzt ist. ( S. 29) Das Modus-Wählrad auf die gewünschte Betriebsart stellen. Wenn die Kamera eingeschaltet wird, beginnt die automatische Ausschaltfunktion zu arbeiten. WICHTIG • Wenn für eine bestimmte Zeit (Vorgabe: ca. eine Minute) die Kamera nicht benutzt wird, schaltet das Gerät aus, um Batterieverbrauch zu vermeiden.
  • Seite 216: Lcd-Monitordisplay

    LCD-Monitordisplay Die im LCD-Monitor erscheinenden Texte, Zahlen und Symbole sind je nach vorhandener Einstellung unterschied- lich. Im Fotografie-Modus ( [ Modus-Wählrad-Einstellung Digital-Zoomfotografie ( P. 45) Anzahl der möglichen Aufnahmen Selbstauslöser-Fotografie ( P. 47) Sequentielle Blitzfotografie ( P. 48) Bildfotografie ( P. 51) : Auto : Unterdrückter Blitz : Erzwungener Blitz...
  • Seite 217: Im Wiedergabemodus

    LCD-Monitordisplay (Fortsetzung) Im Wiedergabemodus ([ Diaschau ( S. 62) Zoom-Wiedergabe ( S. 57) Mode-Wählrad- Ordnernummer Einstellung ( S. 20) Bildnummer Geschütztes Bild ( S. 59) NO IM G A E Meldung ( S. 82) Datum ( S. 73) (Monat/Tag/Jahr) Bildformat Uhrzeit ( S.
  • Seite 218: Halten Der Kamera

    Halten der Kamera Die Kamera beim Fotografieren sicher festhalten und darauf achten, das Objektiv, den Blitz oder Blitzsensor nicht mit den Fingern zu verdecken. Richtig Falsch Die Kamera wird mit beiden Händen gehalten, und Die Finger verdecken das Objektiv. die Arme werden am Oberkörper abgestützt. - 36 - 36-41 PDRM11-G 01.6.22, 4:45 PM...
  • Seite 219: Drücken Des Auslösers

    Drücken des Auslösers Der Auslöser kann in zwei Stufen gedrückt werden: Halb gedrückt und voll gedrückt. Wenn er halb gedrückt ist, werden AF (Autofokus) und AE (Belichtungsautomatik) ausgeführt. Wenn er ganz gedrückt ist, wird die Aufnahme gemacht. Drücken Sie den Auslöser halb ein 1 . Halb drücken.
  • Seite 220 Auslöser voll drücken. Wenn die Kamera beim Drücken des Auslösers noch bewegt wird, wird das Bild verwackelt. • Die PDR-M11 hat einen präzisen Autofokusmechanismus. Es kann aber schwierig sein, bestimmte Motive in bestimmten Situationen scharfzustellen, wie z.B. die folgenden:...
  • Seite 221: Über Die Sucher-Lampe

    Über die Sucher-Lampe Die Sucher-Lampe zeigt den Zustand der Kamera an. Die Bedeutung der Lampefarbe kann je nach Einstellung des Modus-Wählrads unterschiedlich sein. Stellen Sie das Modus-Wählrad auf dem gewünschte Sucher-Lampe Modus. Wenn die Kamera eingeschaltet wurde, fängt die Auto Power OFF- Funktion (Automatisches Ausschalten) an zu aktivieren.
  • Seite 222: Fotografieren (Auto-Fotomodus)

    Fotografieren (Auto-Fotomodus) Dies ist die am häufigsten verwendete Betriebsart zum Fotografieren. In dieser Betriebsart wird die Belichtung (Kombination von Verschluß und Blende) automatisch eingestellt. In dieser Betriebsart kann auf zwei Arten fotografiert werden: mit Sucher und mit LCD-Monitor. Verwendung des Suchers Bereiten Sie die Aufnahme vor.
  • Seite 223 Fotografieren (Auto-Fotomodus) (Fortsetzung) Drücken Sie den Auslöser halb 1 und anschließend Halb drücken. ganz 2 ein. • Wenn der Auslöser halb gedrückt wird, werden Fokus und Voll drücken. Belichtung eingestellt, und wenn er voll gedrückt wird, wird die Aufnahme gemacht. •...
  • Seite 224: Verwendung Des Lcd-Monitors

    Fotografieren (Auto-Fotomodus) (Fortsetzung) Verwendung des LCD-Monitors Bereiten Sie die Aufnahme vor. Legen Sie die Batterien ( S. 23) und die SmartMedia™ ( S. 29) in die Kamera ein. Stellen Sie das Modus-Wählrad auf [ Betrachten Sie das Bild im LCD-Monitor, um den Bildausschnitt zu wählen. Drücken Sie den Auslöser halb 1 und anschließend Halb drücken.
  • Seite 225: Einstellen Von Bildformat Und Qualität

    Einstellen von Bildformat und Qualität Stellt die Größe (Anzahl der Bildpunkte) und die Qualität (Kompressionsverhältnis) des aufzunehmenden Bildes ein. Ändern Sie die Einstellung entsprechend der geplanten Verwendung des Bildes und dem restlichen Platz auf SmartMedia™. Stellen Sie das Modus-Wählrad auf [ Drücken Sie die Taste , um die erforderliche Qualität und Bildformat einzustellen, während das Bild im...
  • Seite 226 Einstellen von Bildformat und Qualität (Fortsetzung) Machen Sie die Aufnahme. Einzelheiten zum Fotografieren S. 40. Zur Beachtung • Um ein Bild kleiner zu machen, ist es effektiver, die Größe zu verringern als die Bildqualität. • Die Speichergröße des Bildes variiert abhängig vom Motiv. •...
  • Seite 227: Digital-Zoomfotografie

    Digital-Zoomfotografie Diese Funktion vergrößert die Mitte des Bildes auf dem Bildschirm so, daß das fotografierte Bild doppelt so groß wird. Fotografieren Sie mit Hilfe des LCD-Monitors. Stellen Sie das Modus-Wählrad auf [ Wenn Sie ein Bild aufnehmen während der LCD-Monitor ausgeschaltet ist, drük- ken Sie die MENU-Taste zweimal vor der Aufnahme, um das Bild anzuzeigen.
  • Seite 228 Digital-Zoomfotografie (Fortsetzung) Zum Ausschalten der Digital-Zoomfotografie-Funktion die Taste drücken. Zur Beachtung • Die Digital-Zoomfotografie-Funktion wird durch Ausschalten der Kamera oder durch Aktivieren der Ausschaltautomatik (OFF) automatisch ausgeschaltet. • Wenn Sie ein FULL-Bild im Digital-Zoomfotografiermodus aufnehmen, wird die Datengröße groß und kann die Anzahl der möglichen Aufnahmen verringert werden.
  • Seite 229: Aufnahmen Mit Selbstauslöser

    Aufnahmen mit Selbstauslöser Wenn der Selbstauslöser verwendet wird, wird der Verschluß automatisch nach Ablauf einer bestimmten Zeit (zwei oder zehn Sekunden) ausgelöst. Ändern der Vorlaufzeit S. 72 Stellen Sie das Modus-Wählrad auf [ Drücken Sie die Selbstauslöser-Taste, um durch die Betriebsarten zu scrollen, bis Sie den Macro-Modus erreicht haben.
  • Seite 230: Aufnahmen Mit Blitz

    Aufnahmen mit Blitz Die Kamera ist werkseitig so voreingestellt, daß der Blitz in dunkler Umgebung automatisch zugeschaltet wird. Zum Auslösen des Blitzlichts ist keine besondere Einstellung notwendig. Der Blitzauslösemodus kann der jeweiligen Aufnahmesituation entsprechend eingestellt werden. Die effektive Blitzreichweite beträgt 0,9 m bis 3 m. Stellen Sie das Modus-Wählrad auf [ Drücken Sie die Blitz-Taste , um den gewünschten Modus einzustellen, während das Bild im LCD-Monitor...
  • Seite 231: Unterdrückter Blitz

    Aufnahmen mit Blitz (Fortsetzung) AUTO ] Auto In dieser Betriebsart wird der Blitz automatisch entsprechend Fotosituation ausgelöst. Diese Betriebsart ist ideal für normale Fotos geeignet, wo kein besonderer Effekt gewünscht wird. ] Unterdrückter Blitz Verwenden Sie den Modus unterdrückter Blitz, wenn Bilder bei Raumbeleuchtung bei Entfernungen aufgenom- men werden, die zu groß...
  • Seite 232 Aufnahmen mit Blitz (Fortsetzung) Zur Beachtung • Beim Fotografieren im [ ] Unterdrückter Blitz-Modus in dunkler Umgebung stellt die Kamera eine lange Verschlußzeit ein. Es empfiehlt sich die Verwendung eines Stativs, um ein Verwackeln der Aufnahme zu vermeiden. • Die Blitzeinstellung wird nicht aufgehoben, auch wenn die Kamera ausgeschaltet oder die Ausschalt- automatik aktiviert wird.
  • Seite 233: Sequentielle Fotografie (Serienaufnahme-Modus)

    Sequentielle Fotografie (Serienaufnahme-Modus) Bei der sequentiellen Aufnahme werden vier Bilder in Abfolge mit einem 1-Sekunden-Intervall (bei schwachen Lichtverhältnissen) bis zu einem 1/30-Sekunden-Intervall (bei sehr guten Lichtverhältnissen) zwischen den Einzelbildern aufgenommen. Dieser Modus wird wirksam, wenn bewegte Objekte fortwährend fotografiert werden sollen. Stellen Sie das Modus-Wählrad auf [ Stellen Sie den Aufnahme-Modus auf [FOLGE].
  • Seite 234: Ändern Der Voreinstellungen (Aufnahmemenü)

    Ändern der Voreinstellungen (AUFNAHMEMENÜ) Dieses Menü dient zum Einstellen der grundlegenden Einstellungen zum Fotografieren im [ ]-Fotografiermodus. Die Einstellungen werden nicht aufgehoben, auch wenn die Kamera ausgeschaltet oder die Ausschaltautomatik aktiviert wird. Stellen Sie das Modus-Wählrad auf [ Drücken Sie die MENU-Taste. Das Menü...
  • Seite 235: Weissabgl (Weißabgleich)

    Ändern der Voreinstellungen (AUFNAHMEMENÜ) (Fortsetzung) WEISSABGL (Weißabgleich) Weißabgleich Zusätzliche Information, Glossar (S.86) Die Kamera bestimmt den Weißabgleich durch Errechnen eines Durchschnittswerts aus den verschiede- nen Lichtarten, die in das Objektiv eintreten. Mit Hilfe der folgenden Einstellung kann der Weißabgleich beim Fotografieren unter verschiedenen Beleuchtungsverhältnissen im voraus festgelegt werden. [AUTO] : Automatische Einstellung (Vorgabe) : Fotografie im Freien : Fotografie in warmweißem Leuchtstofflicht...
  • Seite 236: Belichtungskorrektur)

    Ändern der Voreinstellungen (AUFNAHMEMENÜ) (Fortsetzung) B.W. (Belichtungskorrektur) Belichtungskorrektur Zusätzliche Information, Glossar (S.86) Diese Einstellung erlaubt es, das gesamte Bild heller oder dunkler zu stellen. Verwenden Sie diese Einstellung, wenn die optimale Helligkeit (Belichtung) automatisch nicht erzielt werden kann, z.B. wenn ein hoher Kontrast zwischen dem Motiv und dem Hintergrund besteht oder wenn das Motiv nur einen sehr kleinen Teil des Bildes einnimmt.
  • Seite 237: Farbe

    Ändern der Voreinstellungen (AUFNAHMEMENÜ) (Fortsetzung) FARBE Stellt den Farbemodus ein, in dem das Bild aufgezeichnet wird. [FARBE] : Dies ermöglicht Ihnen die Aufnahme von Farbfotos. (Vorgabe) [MONO] : Dies ermöglicht Ihnen die Aufnahme von Schwarzweißfotos. SCHÄRFE Kontrolliert das Bild-Detail. [HART] : Schärft den Rand des Bild-Details.
  • Seite 238: Wiedergabe Aufgenommener Bilder

    Wiedergabe aufgenommener Bilder Der folgende Text beschreibt die Wiedergabe einzelner Bilder. Stellen Sie das Modus-Wählrad auf [ Die letzte Bildmarkierung erscheint im LCD-Monitor. Ändern der LCD-Monitor-Anzeige Drücken Sie die Taste oder , um vorwärts oder rückwärts zu schalten. Bild rückwärts / Bild vorwärts Zur Beachtung •...
  • Seite 239: Vergrößern Von Aufnahmen (Zoom-Wiedergabe)

    Vergrößern von Aufnahmen (Zoom-Wiedergabe) Diese Funktion vergrößert die Bilder auf das 2 fache der tatsächlichen Größe. Bei der Bildwiedergabe können die vergrößerten Bilder einzeln nacheinander abgerufen werden. Stellen Sie das Modus-Wählrad auf [ Das letzte Bild erscheint auf dem LCD-Monitor. Verwenden Sie die Taste oder , um die gewünschte Bildmarkierung zu...
  • Seite 240: Abrufen Der Bilderliste (Miniaturbildanzeige)

    Abrufen der Bilderliste (Miniaturbildanzeige) Mit dieser Funktion werden neun verkleinerte Bilder gleichzeitig auf dem LCD-Monitor angezeigt — im weiteren Text “Miniaturbildanzeige” genannt. Diese Funktion ist zum Beispiel nützlich, wenn viele Bildern vorhanden sind. Durch Abrufen der Miniaturbilder können gewünschte Bilder ausgewählt und danach in normaler Größe gezeigt werden. Stellen Sie das Modus-Wählrad auf [ Das letzte Bild erscheint auf dem LCD-Monitor.
  • Seite 241: Bilder Vor Löschen Schützen

    Bilder vor Löschen schützen Dieses Merkmal schützt Bilder vor Löschen. WICHTIG • Das Formatieren löscht alle Bilder auf einem SmartMedia™, ungeachtet ob sie schreibgeschützt sind oder nicht. • Zum Schützen der gesamten SmartMedia™ siehe “Schreibschutz” ( S. 32). Schützen eines Bildes Stellen Sie das Modus-Wählrad auf [ Die letzte Bildmarkierung erscheint im LCD-Monitor.
  • Seite 242 Bilder vor Löschen schützen (Fortsetzung) Verwenden Sie die Taste oder , um [SCHÜTZEN] GABEMENU zu wählen und drücken Sie die Taste C S TZEN E I NSTE Das SCHÜTZEN-Menü erscheint. E I NSTE E I NSTE O F AT E I NSTE E I NSTE Verwenden Sie die Taste oder...
  • Seite 243: Aufheben Des Schreibschutzes

    Bilder vor Löschen schützen (Fortsetzung) Aufheben des Schreibschutzes Stellen Sie das Modus-Wählrad auf [ Die letzte Bildmarkierung erscheint im LCD-Monitor. Verwenden Sie die Taste oder , um das freizugebende Bild zu wählen. Drücken Sie die Taste MENU. Das WIEDERGABEMENÜ ist angezeigt. Verwenden Sie die Taste oder , um [SCHÜTZEN] zu wählen und drücken Sie...
  • Seite 244: Automatische Wiedergabe (Diaschau)

    Automatische Wiedergabe (Diaschau) Zeigt automatisch ein Bild nach dem anderen der Reihe nach. Stellen Sie das Modus-Wählrad auf [ Das letzte Bild erscheint auf dem LCD-Monitor. Drücken Sie die MENU-Taste. Das Menü WIEDERGABEMENÜ erscheint. Verwenden Sie die Taste oder , um [DIA-SHOW] GABEMENU zu wählen, und drücken Sie die Taste C S TZEN...
  • Seite 245 Automatische Wiedergabe (Diaschau) (Fortsetzung) Zum Beenden der Diaschau drücken Sie die ENTER-Taste. Die Diaschau wird wiederholt, bis die ENTER-Taste gedrückt wird. Der LCD-Monitor zeigt das beim Drücken der ENTER-Taste gewählte Bild. Zur Beachtung • Die Ausschaltautomatik arbeitet bei automatischer Wiedergabe nicht. - 63 - 62-63 PDRM11-G 01.6.22, 4:51 PM...
  • Seite 246: Löschen Von Bildern (Einzelbild-Löschung)

    Löschen von Bildern (Einzelbild-Löschung) Bilder können einzeln gelöscht werden. Beachten Sie aber, daß Bilder nicht gelöscht werden können, wenn sie geschützt sind ( S. 59) oder SmartMedia™ schreibgeschützt sind ( S. 32). Stellen Sie das Modus-Wählrad auf [ ] oder [ Bei Einstellung auf [ ] erscheint das letzte Bild auf dem LCD-Monitor.
  • Seite 247: Löschen Aller Bilder

    Löschen aller Bilder Löscht alle Bilder innerhalb des SmartMedia™. Beachten Sie aber, daß Bilder nicht gelöscht werden können, wenn sie geschützt sind ( S. 59) oder SmartMedia™ schreibgeschützt sind ( S. 32). Stellen Sie das Modus-Wählrad auf [ Das letzte Bild erscheint im LCD-Monitor. Drücken Sie die Taste MENU.
  • Seite 248 Löschen aller Bilder (Fortsetzung) Verwenden Sie die Taste oder , um [AUSFÜH] zu wählen, und drücken Sie die ENTER-Taste. Dadurch werden die Bilder gelöscht und die Kamera kehrt zum WIEDERGABEMENÜ zurück. U A SF H Zum Beenden des Löschens von Bilddaten wählen Sie [ABBREC], und drücken Sie die ENTER-Taste.
  • Seite 249: Formatieren Von Smartmedia

    Formatieren von SmartMedia™ Durch Formatieren werden alle momentan im in der Kamera eingesetzten SmartMedia™ gelöscht. Geschützte Bilder ( S. 59) werden dabei ebenfalls gelöscht. SmartMedia™ kann nicht formatiert werden, wenn es schreib- geschützt ist. ( S. 32) WICHTIG • SmartMedia™ muß formatiert sein, bevor es in der Kamera verwendet werden kann. Stellen Sie das Modus-Wählrad auf [ Das letzte Bild erscheint im LCD-Monitor.
  • Seite 250 Formatieren von SmartMedia™ (Fortsetzung) Verwenden Sie die Taste oder , um [AUSFÜH] zu wählen, und drücken Sie die ENTER-Taste. Zum Beenden des Formatierens wählen Sie [ABBREC], und drücken Sie die ENTER-Taste. U A SF H B A R B C E Zum Rücksetzen der Bildnummer verwenden Sie die Taste oder...
  • Seite 251: Ändern Der Display-Einstellung Im Wiedergabemodus

    Ändern der Display-Einstellung im Wiedergabemodus Dieses Merkmal erlaubt es, das OSD-Display zu wechseln. Stellen Sie das Modus-Wählrad auf [ Das letzte Bild erscheint im LCD-Monitor. Drücken Sie die Taste MENU. GABEMENU Das Menü WIEDERGABEMENÜ erscheint. C S TZEN E I NSTE E I NSTE E I NSTE O F AT...
  • Seite 252: Grundlegende Kameraeinstellungen (Setup-Modus)

    Grundlegende Kameraeinstellungen (SETUP-Modus) Dieses Merkmal erlaubt es, die Umgebung zur Verwendung der Kamera neben den bildbezogenen Einstellungen einzustellen. Dies wird “Setup” genannt. Die folgenden Punkte können im SETUP-Modus eingestellt werden: SPRACHE/TON/AUTO AUS/ SELBSTA/ZEIT/RESET Die hier eingestellten Einzelheiten werden auch nach dem Ausschalten der Kamera im Speicher bewahrt. Stellen Sie das Modus-Wählrad auf [ Das SETUP-Menü...
  • Seite 253: Sprache

    Grundlegende Kameraeinstellungen (SETUP-Modus) (Fortsetzung) S UP Drücken Sie die Taste P S CHE GER . Das Tab-Menü erscheint. Einstellen der Uhrzeit Seite 73 O T N N E G R F N Verwenden Sie die Taste oder , um die BSTA E G R Einstellung im Tab-Menü...
  • Seite 254: Auto Aus (Automatisches Ausschalten)

    Grundlegende Kameraeinstellungen (SETUP-Modus) (Fortsetzung) AUTO AUS (Automatisches Ausschalten) Wenn für eine festgelegte Zeit (Vorgabe: ca. eine Minute) die Kamera nicht benutzt wird, wird die Leistungsaufnahme auf Minimum reduziert (Standby-Betrieb), um den Batterieverbrauch zu reduzieren. Dieses Merkmal wird Automatisches Ausschalten genannt. Diese Einstellung erlaubt es, die Zeit bis zum Einsetzen der Automatikausschaltung einzustellen.
  • Seite 255: Zeit

    Grundlegende Kameraeinstellungen (SETUP-Modus) (Fortsetzung) ZEIT Stellt Datum und Uhrzeit ein. Sekunden können nicht eingestellt werden. Wenn Sie [STAMP] auf [OK] stellen, werden das Datum und die Uhrzeit in die Bilddatei aufgezeichnet, sobald der Auslöser betätigt wird. Wählen Sie mit der Taste oder den gewünschten A D TUM...
  • Seite 256: Übertragen Von Bildern Zu Einem Pc

    Übertragen von Bildern zu einem PC Sie können mit der Kamera aufgenommene Bilder mit Hilfe der mitgelieferten CD-ROM und dem Kabelsatz zu einem PC übertragen. Auf SmartMedia™ aufgezeichnete Bilder können auch mit dem PC-Kartenadapter (getrennt erhältlich) oder Diskettenadapter (getrennt erhältlich) zu einem PC übertragen werden. ( S.
  • Seite 257: Installation Des Usb-Treibers

    Diesen Treiber installieren, wenn das USB-Kabel (mitgeliefert) verwendet wird. Die im Software-Paket mitgelieferte CD-ROM in das CD-ROM-Laufwerk einschieben. Das Feld zum Wählen der gewünschten Sprache erscheint. “Deutsch” anklicken. “(Install PDR-M11 driver)” anklicken. Zum Einrichten des Programms anschließend den Anweisungen auf dem Bildschirm folgen. - 75 - 75-77 PDRM11-G 01.6.22, 4:53 PM...
  • Seite 258: Sonderzubehör

    Sonderzubehör Die folgenden Artikel sind als Sonderzubehör erhältlich. Die Beziehung zwischen Ihrer Kamera und dem Zubehör ist unter “Anschluß an andere Geräte” (S. 77) beschrieben. Einzelheiten über diese Zubehörteile siehe Bedienungsanleitung für die betreffenden Zubehörteile. Netzteil PDR-ACM1A (für USA und Kanada) PDR-ACM1E (für Europa) PDR-ACM1U (für Vereinigtes Königreich) PDR-ACM1J (für Japan)
  • Seite 259: Anschluß An Andere Geräte

    Anschluß an andere Geräte PC-Kartenadapter SmartMedia™ (mitgeliefert) Diskettenadapter Drucker Software-Applikation (CD-ROM) (mitgeliefert) USB-Kabel (mitgeliefert) PDR-M11 Netzteil (getrennt erhältlich) Netzstecker - 77 - 75-77 PDRM11-G 01.6.22, 4:53 PM...
  • Seite 260: Technische Daten

    Technische Daten Kamera Modell Toshiba Digital Still Camera PDR-M11 Datenträger SmartMedia™ (3,3V) 2/4/8/16/32/64/128 MB-kompatibel Kompressionssystem Entsprechend JPEG Bilddateiformat Entsprechend Exif Ver.2.1 (TIFF) Qualitäts- Bildanzahl (ca.) Bildformat 16MB 32MB 64MB 128MB modus Ganzbild (FULL): TIFF FULL 1280 x 960 Pixel Halbbild (HALF):...
  • Seite 261 Technische Daten (Fortsetzung) Aufnahmesensor 1/2,7-Zoll CCD-Sensor (Pixel gesamt: ca. 1,3 Millionen) Entsprechend ISO 80 bis 320 Empfindlichkeit Objektiv Einzelfokus-Objektiv F2,8/F8,0 Brennweite f=6,67 mm (Äquivalent zu 52 mm an einer 35 mm-Kamera) Sucher Virtueller Bildtyp-Sucher Autofokus Autofokus mit TTL, Fokuseinstellbereich: ca. 20 cm bis Unendlich Erkennungssystem: Kontrasterkennung Meßsystem TTL-Messung durch Bildaufnahmesystem...
  • Seite 262 Pixelzahl ist es aber unvermeidlich, daß vereinzelte Bildpunkte nicht richtig arbeiten und schwarz bleiben. Dies ist normal und keine Fehlfunktion. Der LCD-Monitor kann in diesem Zustand normal betrieben werden. Für PDR-M11 kann keine Mangantrockenbatterie verwendet werden. SmartMedia™ Bildspeicherkarte für Digitalkameras (SmartMedia™)
  • Seite 263 Technische Daten (Fortsetzung) Netzteil (PDR-ACM1A) (getrennt erhältlich) Betriebsstrom Wechselstrom 120V, 50/ 60 Hz Nenn-Eingangskapazität 18 VA Nenn-Ausgang Gleichstrom 5,0 V, 1,5 A Betriebstemperatur 0°C bis +40°C Lagertemperatur –10°C bis +70°C Abmessungen 48 mm x 26 mm x 70 mm (B/H/T) Gewicht Ca.
  • Seite 264: Warnungen Und Meldungen Im Lcd-Monitor

    Warnungen und Meldungen im LCD-Monitor Die folgenden Warnungen, Meldungen und Symbole erscheinen im LCD-Monitor und der Statusanzeige. Display Bedeutung LCD-Monitor Statusanzeige Batterie auf Hälfte oder weniger abgesunken Wenig Batteriestärke übrig Batterie völlig verbraucht KEINE KARTE Kein Symbol ist angezeigt. SmartMedia™ nicht eingelegt SmartMedia™...
  • Seite 265: Fehlersuche

    Fehlersuche Wenn Sie glauben, daß eine Betriebsstörung vorliegt, prüfen Sie zunächst die Warnung am LCD-Monitor ( S. 82) und die Farbe der Sucher-Lampe ( S. 39). Danach prüfen Sie zunächst die folgenden Punkte. Problem Mögliche Ursache Abhilfe Siehe Seite Gerät schaltet nicht ein. Die Batterien sind verbraucht.
  • Seite 266 Fehlersuche (Fortsetzung) Problem Mögliche Ursache Abhilfe Siehe Seite Blitz läßt sich nicht zur Modus-Wählrad wurde auf eine Das Modus-Wählrad auf korrekte S. 33 Aufnahme verwenden. andere Einstellung gestellt. Einstellung zurückstellen. Der Blitzmodus ist auf unterdrückt Den Blitzmodus auf Auto, Rote-Augen-Effekt- S.
  • Seite 267 Fehlersuche (Fortsetzung) Problem Mögliche Ursache Abhilfe Siehe Seite Keine Anzeige, obwohl Die Kamera ist im PC-Modus. Die Kamera auf Foto- oder S.40 der LCD-Monitor Wiedergabemodus zurückstellen. S.56 eingeschaltet ist. Die Eingaben für Datum Sowohl Batterien als auch Netzteil Datum und Uhrzeit neu einstellen. S.73 und Uhrzeit wurden bei eingeschaltetem...
  • Seite 268: Glossar

    Glossar AF/AE PC-Karte AF (Autofokus) ... Eine Funktion, die die Kamera Ein Oberbegriff für Karten, die der PC-Kartennorm automatisch scharfstellt. entsprechen. AE (Automatikbelichtung) ... Eine Funktion, die die Rote-Augen-Effekt Belichtung automatisch richtig einstellt. Wenn man Menschen bei dunklen Lichtverhältnissen AF/AE-Sperre ... Festhalten der Fokus- und mit Blitz fotografiert, erscheinen ihre Augen bisweilen Belichtungseinstellungen.
  • Seite 269: Globale Kontakte

    E-mail Anschrift Anfragen Website für Anfragen Kanada Toshiba America Information (800) 829-8318 dsc.support@tais.toshiba.com www.toshiba.com/taisisd Systems, Inc. China Hongkong Toshiba Hong Kong Ltd. 2956-0222 www.toshiba.com.hk Frankreich Toshiba Systems (France) 01 47 28 28 50 consommateur@toshiba-tsf.com www.toshiba.fr/produits/video/index.htm Deutschland Toshiba Europe Gmbh (02131) 158 01 consumer@toshiba-teg.com...
  • Seite 270 78-87 PDRM11 F nosaveas! 01.6.22, 3:42 PM...
  • Seite 271 Cover3,4/PDRM11-EFG 01.6.21, 9:13 PM...
  • Seite 272 TOSHIBA DIGITAL STILL CAMERA PDR-M11 DIGITAL STILL CAMERA Toshiba America Information Systems, Inc. Imaging Systems Division 9740 Irvine Boulevard, Irvine, California 92618-1697 For technical support, please contact: (800)829-8318 5:00 a.m. to 5:00 p.m. PST, Monday to Friday except holidays, or e-mail us at: dsc.support@tais.toshiba.com * Address and telephone number are subject to change without notice.

Inhaltsverzeichnis