Herunterladen Inhalt Inhalt Diese Seite drucken
Motorola MBP854CONNECT Bedienungsanleitung

Motorola MBP854CONNECT Bedienungsanleitung

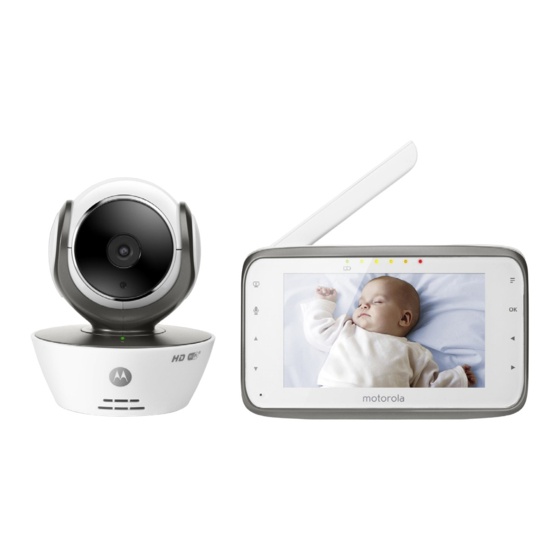
Digital video baby monitor with wi-fi internet viewing
Vorschau ausblenden Andere Handbücher für MBP854CONNECT:
Inhaltsverzeichnis

Werbung

Verfügbare Sprachen
  • DE

Verfügbare Sprachen

  • DEUTSCH, seite 73
User's Guide
®
Digital Video Baby Monitor With Wi-Fi
Internet Viewing
Models: MBP854CONNECT, MBP854CONNECT-2,
MBP854CONNECT-3, MBP854CONNECT-4
The features described in this User's Guide are subject to modifications without prior notice.

Werbung

Inhaltsverzeichnis
loading

Inhaltszusammenfassung für Motorola MBP854CONNECT

  • Seite 1 User’s Guide ® Digital Video Baby Monitor With Wi-Fi Internet Viewing Models: MBP854CONNECT, MBP854CONNECT-2, MBP854CONNECT-3, MBP854CONNECT-4 The features described in this User’s Guide are subject to modifications without prior notice.
  • Seite 2 Please retain your original dated sales receipt for your records. For warranty service of your Motorola product, you will need to provide a copy of your dated sales receipt to confirm warranty status. Registration is not required for warranty coverage.
  • Seite 3 Overview of the Parent Unit RESET Display (LCD screen) Power Adapter / Battery LED BLUE Video ON/OFF Key when connected to a mains power Press to turn the LCD display ON/ socket RED when battery low. Talk Key Unit ON/OFF LED (Green) Press and hold to speak to your baby Audio Level LED (Green, Orange, Up Key...
  • Seite 4 Parent Unit menu icons Signal Level (4 Levels) Night Vision Mode (Screen changes to Black/White) Talk Mode Battery Level Control (4 Levels) Pan Left Pan Right Tilt Up Tilt Down Zoom Level Control (1X, 2X) Brightness Level Control (8 Levels) Lullaby Control (5 Song Selections) Alarm Setting (6h, 4h, 2h, Off) Temperature Reading (HH ºC / ºF or LL ºC / ºF)
  • Seite 5 Overview of Your Baby Unit 5V 1.5A 1. Light Sensor (for night mode detection) 7. Speaker 2. Camera Lens 8. Antenna 3. Infrared LEDs (for night vision) 9. Micro USB socket 4. Power / Status indicator 10. ON/OFF Switch 5. Microphone 11.
  • Seite 6: Inhaltsverzeichnis

    Table of contents 1. Safety Instructions ..................8 2. Getting Started..................11 Baby Unit Power Supply................11 Parent Unit Power Supply ................. 11 Registration (Pairing) ................13 3. Using the Baby Monitor................14 Setting up ....................14 Pan and Tilt ....................14 Night Vision Mode ..................
  • Seite 7 User Account and Camera Setup: ® ® Working with iPhone /iPad ..............28 5.4.1 Power ON and Connect the Camera ........28 5.4.2 Download the Hubble App ............28 ® ® 5.4.3 Run the Hubble App on your iPhone /iPad ......29 5.4.4 Add the Camera to your account ..........
  • Seite 8: Safety Instructions

    1. Safety Instructions WARNING: Strangulation Hazard: Children have STRANGLED in cords. Keep this cord out of the reach of children (more than 3ft (1m) away). Never use extension cords with AC Adapters. Only use the AC Adapters provided. Safety Instructions...
  • Seite 9 Baby Unit SET UP & USE: ● Choose a location for the Baby Unit that will provide the best view of your baby in their cot. ● Place the Baby Unit on a flat surface, such as a dresser, desk, or shelf or mount the Unit to a wall securely using the keyhole slots on the underside of the stand.
  • Seite 10 • Do not place the Baby Monitor near a heat source. • Only use the chargers and power adapters provided. Do not use other chargers or power adapters as this may damage the device and battery pack. • Do not touch the plug contacts with sharp or metal objects. CAUTION Risk of explosion if battery is replaced by an unapproved battery type.
  • Seite 11: Getting Started

    2. Getting Started Baby Unit Power Supply Power adapter plug Switch to turn ON the camera 1. Connect the small plug of the power adapter to the Baby Unit (camera) and the other end to a suitable mains power socket. NOTE Only use the enclosed power adapter (5V DC / 1500mA).
  • Seite 12 2. Press and hold the POWER ON/OFF button for 1 second to turn ON the Parent Unit. 3. Once the Baby and Parent Units are switched on, the display on the Parent Unit will show the video captured by the Baby Unit. 4.
  • Seite 13: Registration (Pairing)

    Registration (Pairing) The Baby Monitor is pre-registered to your Parent Unit. You do not need to register it again unless the Baby Unit loses its link with the Parent Unit. To re-register your Baby Unit, or register a new Baby Unit, follow the procedures below: 1.
  • Seite 14: Using The Baby Monitor

    3. Using the Baby Monitor Setting up • Place the Baby Unit in a convenient location (e.g. on a table) and point the camera lens towards the area you want to monitor. • Adjust the angle of the Baby Unit's head by rotating the camera up, down, left and right until you are satisfied with the image in the Parent Unit.
  • Seite 15: Temperature Display (Hh °C / °F Or Ll °C / °F)

    Temperature Display (HH °C / °F or LL °C / °F) The temperature reading from the temperature sensor at the back of the Baby Unit will be displayed at the top of the LCD screen. The readings will turn RED if the temperature goes above 29°C / 84°F or below 14°C / 57°F.
  • Seite 16: Parent Unit Menu Options

    4. Parent Unit Menu Options Volume 1. Press the Volume button - or + to adjust the volume level, the icon will pop up and you can select the desired volume level from level 0~8. (The default volume level setting is level 4.) Brightness 1.
  • Seite 17: Camera Control

    Camera Control 4.6.1 Add (pair) a camera 1. Press the button and the menu bar will pop up. < > 2. Press the LEFT button or RIGHT button until is highlighted, and del/ add/ view/ scan menu will pop up. 3.
  • Seite 18: Delete A Camera

    4.6.3 Delete a camera 1. Press the button and the menu bar will pop up. < > 2. Press the LEFT button or RIGHT button until is highlighted, and del/ add/ view/ scan menu will pop up. 3. Press the UP button or DOWN button to select , and press the...
  • Seite 19: Video

    Video You can record a video of your baby with this function. The videos will be stored on the SD Memory Card, so please ensure the memory card has enough free memory. 1. Press the button and the menu bar will pop up. <...
  • Seite 20: Wi-Fi Internet Viewing

    5. Wi-Fi Internet Viewing Minimum System Requirements Web Portal ® • Windows ® • Mac OS 10.7 • Chrome™ 24 ® • Internet Explorer ® • Safari • Java™ 7 ® • Firefox 18.0 ® ® • Adobe Flash Player 15.0 ™...
  • Seite 21: Getting Started - Connecting Devices

    Getting started - Connecting Devices How does it work? View your Camera from any compatible device remotely When a user tries to access the Camera, our secure server authenticates the user’s identity and permits access to the Camera. Setup Connect the Camera to the power adapter, then plug into an suitable mains power socket and make sure the power switch is in the ON position.
  • Seite 22: User Account And Camera Setup On Android™ Devices

    ‘beeps’ this means the Camera is ready to setup. 5.3.2 Download the Hubble App • Go to the Google Play™ Store to search “Hubble for Motorola Monitors”. • Download the Hubble for Motorola Monitors App from the Google Play™ Store and install it on your Android™ device.
  • Seite 23: Run The Hubble App On Android™ Device

    5.3.3 Run the Hubble App on Android™ device ® • Ensure your Android™ device is connected to your Wi-Fi router. • Run the Hubble App and key in your Hubble App account information, read through the Terms of Service then select “I agree to the Terms of Use” before you tap on Create.
  • Seite 24: Add Camera To Your Account

    5.3.4 Add Camera to your account • Create a new account and Login. • Tap on Add Camera. (Picture A2) • Tap on Continue. (Picture A3) • The setup instructions will appear on the following screen. (Picture A4) Wi-Fi Internet Viewing...
  • Seite 25 • Press and hold the PAIR button for 3 seconds at the side of the Camera, you will then hear a beep tone and a voice saying "Ready for pairing" from the Camera Unit. Tap on Search for Camera. • The App will automatically search for and connect to your Camera as shown in the pictures below (Pictures A5, A6) and the blue/red colour LED on the Camera will flash.
  • Seite 26 ® • Select your Wi-Fi Network and tap Continue, enter your password then tap on Connect. (Pictures A7, A8) ® • It will take a few minutes for the Camera to connect to the Wi-Fi network before showing the connection status (Pictures A9, A10). If connection fails, please tap on the Retry button and repeat the steps starting from 5.3.4.
  • Seite 27 • Tap on Watch Live Camera to view the Camera video, the Camera's Blue LED will flash. (Picture A11) • Tap on the Hubble logo and go back to the Camera list. (Picture A12) Wi-Fi Internet Viewing...
  • Seite 28: User Account And Camera Setup: Working With Iphone ® /Ipad

    Camera is ready for setup. 5.4.2 Download the Hubble App • Go to the App Store to search for “Hubble for Motorola Monitors”. • Download the Hubble for Motorola Monitors App and install it on your ®...
  • Seite 29: Run The Hubble App On Your Iphone ® /Ipad

    ® ® 5.4.3 Run the Hubble App on your iPhone /iPad ® ® ® • Ensure your iPhone /iPad is connected to your Wi-Fi Router. • Run the Hubble App and key in your account information, read through the Terms of Service then select “I agree to the Terms of Service” before you tap on Create.
  • Seite 30: Add The Camera To Your Account

    5.4.4 Add the Camera to your account • Create a new account and Login. • Tap on Add Camera. (Picture i2) • Tap on “MBP854CONNECT”. (Picture i3) FOCUS85 / Blink83 / Scout83 / SCOUT66 / MBP36HD MBP854 • Follow the instruction on screen to turn on the Bluetooth™ function of your iPhone/iPad.
  • Seite 31 • Tap on the Home button, then enter the “Settings” menu to turn on the Bluetooth™ function of your iPhone/iPad. • Press the HOME key to exit the Settings menu and tap on the “Hubble for Motorola Monitors” App to enter the start up screen. Wi-Fi Internet Viewing...
  • Seite 32 • Tap on Continue and follow the instructions below. (Pictures i4-i7) Wi-Fi Internet Viewing...
  • Seite 33 • Follow the steps above to locate the Camera with identification number ® “CameraHD-xxxxxxxxxx”, then tap on Continue once ensure your iPhone ® or iPad has connected to the camera. (Picture i8) ® • Select your Wi-Fi Network and tap Continue, enter your password and then tap Next.
  • Seite 34 ® • It will take a few minutes for the Camera to connect to the Wi-Fi network before showing the connection status (Pictures i11, i12). If connection fails, please tap on the Retry button and repeat Step 5.4.4 as instructed above. •...
  • Seite 35: Camera Functions: Working With Devices For Android

    Camera Functions: Working with devices for Android™ 5.5.1 Connecting the Camera to Power • Insert the small end of the Power Adapter into the Power Adapter Connector and plug the Power Adapter into a suitable mains power socket. • Slide the ON/OFF switch to ON, the blue Power LED will light up. (Note: To switch the device off, slide the ON/OFF switch to OFF.) •...
  • Seite 36: Remove A Camera

    5.5.3 Remove a Camera You can remove a Camera from your account by following these steps: • Tap the Settings icon on the General page, then tap on Camera Detail. (Picture A15) • Select Remove Camera and tap on Yes to delete the unit from camera list. (Picture A16) Wi-Fi Internet Viewing...
  • Seite 37: Change Your Account Information

    5.5.4 Change your Account Information You can change the account information using your Android™ device. • Tap Account on the General page, and the Account Settings appears on screen. (Picture A17) • Tap on Change Password to change your password by following the instructions.
  • Seite 38: Camera Settings

    5.5.5 Camera settings You can change the Camera settings by tapping the Settings icon on the Camera list screen/page. (Picture A18) • Tap on Camera Details to review Camera Name, Change Image, Firmware version, Model ID and Remove Camera. (Picture A19) •...
  • Seite 39: General Settings

    5.5.6 General Settings • Tap Settings on the General page. • Tap on General Settings to shift the format of the Clock (12hr/24hr) & the Temperature (°C / °F) and activate Notification Sound or Vibration. (Picture A21) • Tap on Do Not Disturb, set the timer to the desired time and select ON, the Camera will not send any sound or alert to your Android™...
  • Seite 40: Features Of The Hubble App

    5.5.7 Features of the Hubble App Tap on the viewing area and the function icons will appear as shown below. Two Way Communication – Tap on to activate the function. Press the round button once to speak through the Camera. Toggle the button again to listen to the audio feedback from the Camera.
  • Seite 41 Pan and Tilt Function: Tap the up and down buttons to tilt, the left and right buttons to pan. (Pictures A25, A26) Wi-Fi Internet Viewing...
  • Seite 42 Photo/Video - Take a photo or record a video from your Camera. Tap the Video icon to activate the Video function and press the red button to start and release to stop recording. (Pictures A27, A28) Tap the Camera icon to switch to Camera mode, you can capture photos from the Camera view.
  • Seite 43 Note: Photos and videos will be stored on the internal flash memory of your Android™ device, and can be accessed via the Gallery or Media Player. To play videos, please use the Hubble App or a 3rd party application, such as MX player (found in the Google Play™...
  • Seite 44: Camera Functions

    /iPad • The Camera view appears on the screen. 5.6.1 Add more cameras • In Camera view, tap on the Motorola logo to go to the Add Camera page. (Picture i15) ® ® • Tap on Add Camera to add another Camera (follow steps for iPhone /iPad setup Section 5.4.4.) (Picture i16)
  • Seite 45: Remove A Camera

    5.6.2 Remove a Camera You can remove a Camera from your Account by following these steps: • Tap the Settings icon on the General page, then tap on Camera Detail. (Picture i17) • Select Remove Camera and tap on Yes to delete the unit from camera list. (Picture i18) Wi-Fi Internet Viewing...
  • Seite 46: Change Your Account Information

    5.6.3 Change your Account Information ® ® You can change the account information using your iPhone /iPad • Tap Account on the General page and the Account settings will appear on screen. (Picture i19) • Tap on Change Password to change your password by following the instructions.
  • Seite 47: Camera Settings

    5.6.4 Camera settings You can change the Camera settings to tap the Settings icon on the General page (Picture i20). You can review the Camera Name and Firmware version (Picture i21) and are allowed to change the Camera name by tapping on the existing name and following the instructions.
  • Seite 48: General Settings

    5.6.5 General settings • Tap on Settings on the General page. (Picture i23) • Tap on General Settings to change the format for Clock (12hr/24hr) & Temperature (°C / °F) and activate Notification Sound or Vibration. (Picture i24) • Tap on Do Not Disturb, set the timer to the desired time and select ON, the ®...
  • Seite 49: Hubble App Settings

    5.6.6 Hubble App Settings ® ® • Tap on Settings on your iPhone /iPad , and the applications will appear, tap on the Hubble App and the settings will be shown on screen. (Picture i26) Wi-Fi Internet Viewing...
  • Seite 50: Features Of The Hubble App

    5.6.7 Features of the Hubble App On Camera view, tap the viewing area and Function Icons will appear as follows. Two Way Communication – Tap on to activate the function. Press the round button once to speak through the Camera. Toggle the button again to listen to the audio feedback from the Camera.
  • Seite 51 Pan and Tilt Function: Tap the up and down buttons to tilt, the left and right buttons to pan. (Pictures i29, i30) Wi-Fi Internet Viewing...
  • Seite 52 Take Picture - Tap on Camera icon to capture photos from the Camera view. (Picture i31) Note: ® ® Photos will be stored on the internal flash memory of your iPhone /iPad Wi-Fi Internet Viewing...
  • Seite 53 Melody – To play one of the pre-set 5 melodies, tap on Melody to show the Melody menu and select the one you prefer to play on your Camera. (Picture i32) Temperature Display – The temperature reading from the temperature ®...
  • Seite 54: Camera Functions: Working With Pc/Notebook

    Camera Functions: Working with PC/Notebook • Go to https://app.hubbleconnected.com/#login • Enter your User Name and Password and then click Login if you have already created an account. • Click on the Camera list paired in your account via Android™ device or ®...
  • Seite 55: Disposal Of The Device (Environment)

    6. Disposal of The Device (environment) At the end of the product lifecycle, you should not dispose of this product with normal household waste. Take this product to a collection point for the recycling of electrical and electronic equipment. The symbol on the product, user's guide and/or box indicates this.
  • Seite 56: Cleaning

    7. Cleaning Clean the Baby Monitor with a slightly damp cloth or with an anti-static cloth. Never use cleaning agents or abrasive solvents. Cleaning and care • Do not clean any part of the product with thinners or other solvents and chemicals –...
  • Seite 57: Help

    8. Help Display No display • Try recharging or replacing the battery pack. • Reset the units. Disconnect the battery pack of the Parent Unit and unplug both the units' electrical power, then plug them back in. • Is the unit turned on? Press and hold the ON/OFF button on the Parent Unit to turn it ON.
  • Seite 58 Interference Noise interference on your Parent Unit • Your Baby and Parent Units may be too close. Move them farther apart. • Make sure there is at least 1 to 2m (3 to 6ft) between the 2 units to avoid audio feedback.
  • Seite 59 If you forgot your password If you do not remember your password, tap Forgot password and submit your e-mail address. A new password will be sent to your e-mail address immediately. ® Troubleshooting for Wi-Fi Internet Viewing Category Problem Solution Description / Error Account I am unable to login...
  • Seite 60 Connectivity I get a message: We 1. Please try again in a few minutes. This could be because of any Issues are having problems issue with your internet accessing your connection. camera. This could be 2. If the problem remains, please due to lack of internet restart your Camera to check if connection.
  • Seite 61 General What are the We recommend using Google supported browsers for Chrome™ 24 or above. However the accessing from my PC/ following browsers are also ® ® supported: Internet Explorer 9.0 or ® above (for PC), Safari 6.0 or above ®...
  • Seite 62 Setting Up During setup on device Please reset the Camera to setup for Android™ and iOS, mode and try again. Press and hold I am not able to find my the PAIR button on the bottom of the Camera during the last Camera until you hear a beep.
  • Seite 63 App for Android™ and - Open the Google Play Store on iOS devices? your Android™ device - Select Search - Type in "Hubble for Motorola Monitors" - The results will show the Hubble - Select to install it iOS Device:...
  • Seite 64 Setting up When the video is cut You will need to turn off the auto lock off, the application function of your smart device to attempts to reconnect ensure continuous video/audio and and results in lost feeding. sound and choppy video.
  • Seite 65: General Information

    To order a replacement battery pack, contact customer service. Consumer Products and Accessories Limited Warranty ("Warranty") Thank you for purchasing this Motorola branded product manufactured under license by Binatone Electronics International LTD ("BINATONE"). What Does this Warranty Cover? Subject to the exclusions contained below, BINATONE warrants that this Motorola branded product ("Product") or certified accessory ("Accessory") sold...
  • Seite 66 PROVIDED UNDER THIS EXPRESS LIMITED WARRANTY IS THE EXCLUSIVE REMEDY OF THE CONSUMER, AND IS PROVIDED IN LIEU OF ALL OTHER WARRANTIES, EXPRESS OR IMPLIED. IN NO EVENT SHALL MOTOROLA OR BINATONE BE LIABLE, WHETHER IN CONTRACT OR TORT (INCLUDING...
  • Seite 67 (c) use of the Products or Accessories for commercial purposes or subjecting the Product or Accessory to abnormal usage or conditions; or (d) other acts which are not the fault of MOTOROLA or BINATONE, are excluded from coverage.
  • Seite 68 Unauthorised Service or Modification. Defects or damages resulting from service, testing, adjustment, installation, maintenance, alteration, or modification in any way by someone other than MOTOROLA, BINATONE or its authorised service centers, are excluded from coverage. Altered Products. Products or Accessories with (a) serial numbers or date tags that have been removed, altered or obliterated;...
  • Seite 69 General Information...
  • Seite 70: Technical Specifications

    Technical Specifications Baby Unit Frequency 2.4 GHz to 2.48 GHz Image sensor colour CMOS 1M Pixels Lens f 2.5mm, F 2.8 IR LED 8 pcs Power Adapter Ten Pao International Ltd. S009GV0500150 Input: 100-240V AC, 50/60Hz, 300mA; Output: 5.0V DC, 1500mA WARNING Use only with supplied power supply.
  • Seite 71 Input: 100-240V AC, 50/60Hz, 300mA; Output: 5.0V DC, 1500mA WARNING Use only with provided power supply. Battery Motorola BF6X 3.7V, 1880mAh Lithium-Ion Polymer, rechargeable battery pack WARNING Do not use non-rechargeable batteries for the Parent Unit. Risk of explosion if battery is replaced by an incorrect type.
  • Seite 72 Manufactured, distributed or sold by Binatone Electronics International LTD., official licensee for this product. MOTOROLA and the Stylized M logo are trademarks or registered trademarks of Motorola Trademark Holdings, LLC. and are used under license. Apple logo and Safari are trademarks of Apple Inc., registered in the U.S.
  • Seite 73: Digitales Babyphone Mit Farbdisplay Und Wi-Fi

    Bedienungsanleitung ® Digitales Babyphone mit Farbdisplay und Wi-Fi -Internet konnektivität Modelle: MBP854CONNECT, MBP854CONNECT-2, MBP854CONNECT-3, MBP854CONNECT-4 Die in der Bedienungsanleitung beschriebenen Funktionen können ohne Vorankündigung geändert werden.
  • Seite 74 Ihrem neuen digitalen Motorola Digitales Babyphone ® mit Farbdisplay und Wi-Fi -Internet konnektivität! Vielen Dank, dass Sie den neuen Motorola Digitales Babyphone mit ® Farbdisplay und Wi-Fi -Internet konnektivität gekauft haben. Sie können jetzt Ihr Baby sehen oder hören, während es in einem anderen Raum schläft, oder Sie können ältere Kinder im Kinderzimmer beobachten.
  • Seite 75: Übersicht Über Das Elterngerät

    Übersicht über das Elterngerät RESET Display (LCD-Bildschirm) Netzteil/Batterie LED BLAU, wenn Video EIN/AUS-Taste mit einer Netzsteckdose verbunden Drücken Sie diese Taste, um das ROT, wenn die Batterie schwach ist. LCD-Display ein/auszuschalten. Gerät EIN/AUS-LED (Grün) Sprech-Taste Audiopegel-LED (Grün, Orange, Rot) Halten Sie diese Taste gedrückt, um Power-Taste mit Ihrem Baby zu sprechen.
  • Seite 76: Menüsymbole Auf Dem Elterngerät

    Menüsymbole auf dem Elterngerät Signalstufe (4 Stufen) Nachtsichtmodus (Bildschirm wechselt zu SW) Sprechmodus Batteriestandskontrolle (4 Stufen) Nach links schwenken Nach rechts schwenken Nach oben neigen Nach unten neigen Regelung des Zoompegels (1X, 2X) Helligkeitsregelung (8 Stufen) Schlafliedeinstellung (Auswahl aus 5 Liedern) Alarmeinstellung (6h, 4h, 2h, Aus) Temperaturanzeige (HH ºC / ºF oder LL ºC / ºF) >...
  • Seite 77: Übersicht Über Das Babygerät

    Übersicht über das Babygerät 5V 1.5A 1. Lichtsensor (für die Erkennung im Nachtmodus) 7. Lautsprecher 2. Kameraobjektiv 8. Antenne 3. IR-LEDs (für die Nachtsicht) 9. Micro USB-Buchse 4. Ein/Aus-/Status-Anzeige 10. EIN/AUS-Schalter 5. Mikrofon 11. Temperatursensor 6. PAIR-Taste Wichtige Richtlinien für die Installation des Babymonitors •...
  • Seite 78 Inhaltsverzeichnis 1. Sicherheitshinweise .................. 8 2. Erste Schritte ................... 11 Stromversorgung des Babygeräts............11 Stromversorgung des Elterngeräts ............11 Registrierung (Abstimmung)..............13 3. Verwendung des Babymonitors ............. 14 Einrichten ....................14 Schwenken und Neigen................14 Nachtsichtmodus ..................14 Sprechmodus .................... 14 Video EIN/AUS..................
  • Seite 79 Einrichtung eines Benutzerkontos und der Kamera ® ® Verwendung mit iPhone /iPad ............. 28 5.4.1 Einschalten und Verbinden der Kamera ........28 5.4.2 Herunterladen der Hubble-App ..........28 ® ® 5.4.3 Ausführen Hubble-App auf Ihrem iPhone /iPad ....29 5.4.4 Hinzufügen der Kamera zu Ihrem Konto ........
  • Seite 80: Sicherheitshinweise

    1. Sicherheitshinweise WARNUNG: Strangulierungsgefahr: Kinder haben sich mit den Kabeln STRANGULIERT. Dieses Kabel außerhalb der Reichweite von Kindern aufbewahren (mindestens 1 m entfernt). Verwenden Sie keine Verlängerungskabel mit Netzteilen. Verwenden Sie nur das mitgelieferte Netzteil. Sicherheitshinweise...
  • Seite 81: Einrichtung Und Verwendung Des Babygeräts

    EINRICHTUNG UND VERWENDUNG des Babygeräts: ● Legen Sie einen Ort für das Babygerät fest, der optimale Sicht auf das Baby in seinem Bett bietet. ● Stellen Sie das Babygerät auf eine ebene Fläche, zum Beispiel eine Kommode, einen Schreibtisch oder ein Regal, oder befestigen Sie das Gerät mithilfe der Schlüssellochschlitze an der Unterseite des Ständers an der Wand.
  • Seite 82 • Testen Sie diesen Monitor und alle seine Funktionen, damit Sie vor dem tatsächlichen Gebrauch damit vertraut sind. • Verwenden Sie den Babymonitor nicht in der Nähe von Wasser. • Stellen Sie den Babymonitor nicht in der Nähe einer Wärmequelle. •...
  • Seite 83: Erste Schritte

    2. Erste Schritte Stromversorgung des Babygeräts Netzteilstecker Schalter zum Einschalten der Kamera 1. Schließen Sie den kleinen Stecker des Netzteils an das Babygerät (Kamera) und den anderen Stecker an eine geeignete Netzsteckdose an. HINWEIS Verwenden Sie nur das mitgelieferte Netzteil (5V DC/1500 mA). 2.
  • Seite 84 1. Schließen Sie den Micro USB-Stecker des Netzteils an das Elterngerät und den anderen Stecker an eine geeignete Netzsteckdose an. Verwenden Sie nur das mitgelieferte Netzteil (5 V/1500 mA) mit dem Micro USB-Stecker. 2. Halten Sie die EIN/AUS-Taste 1 Sekunde lang gedrückt, um das Elterngerät einzuschalten.
  • Seite 85: Registrierung (Abstimmung)

    Registrierung (Abstimmung) Der Babymonitor ist bereits in Ihrem Elterngerät registriert. Sie müssen ihn nur erneut registrieren, wenn das Babygerät seine Verbindung zum Elterngerät verliert. Gehen Sie wie folgt vor, um Ihr Babygerät erneut zu registrieren oder ein neues Babygerät zu registrieren: 1.
  • Seite 86: Verwendung Des Babymonitors

    3. Verwendung des Babymonitors Einrichten • Stellen Sie das Babygerät an einem geeigneten Ort (zum Beispiel auf einem Tisch) auf und richten Sie das Kameraobjektiv in Richtung des Bereichs, den Sie überwachen möchten. • Passen Sie den Winkel des Babygeräts an, indem Sie die Kamera nach oben, nach unten, nach links und nach rechts drehen, bis Sie mit dem Bild auf dem Elterngerät zufrieden sind.
  • Seite 87: Video Ein/Aus

    Video EIN/AUS Drücken Sie die Taste VIDEO EIN/AUS, um das LCD-Display ein- oder auszuschalten, den Audiomonitor jedoch eingeschaltet zu lassen. Temperaturanzeige (HH °C / °F oder LL °C / °F) Die Temperaturwerte vom Temperatursensor an der Rückseite des Babygeräts werden oben auf dem LCD-Bildschirm angezeigt. Die Werte werden ROT, wenn die Temperatur 29 ºC überschreitet oder 14 ºC unterschreitet.
  • Seite 88: Menüoptionen Auf Dem Elterngerät

    4. Menüoptionen auf dem Elterngerät Lautstärke 1. Drücken Sie die Lautstärketaste - oder +, um die Lautstärke einzustellen. Das Symbol wird angezeigt und Sie können die gewünschte Lautstärke von 0~8 einstellen. (Die Standard-Lautstärkeeinstellung ist 4.) Helligkeit 1. Drücken Sie die Taste und eine Menüleiste erscheint.
  • Seite 89: Kamerasteuerung

    < > 2. Drücken Sie die Taste NACH LINKS oder NACH RECHTS, bis markiert ist. 3. Drücken Sie die Taste NACH OBEN oder NACH UNTEN, um die Alarmzeit auszuwählen ( ). (Die Standardeinstellung ist Alarm AUS.) 4. Wenn eine Alarmzeit ausgewählt ist, piept das Elterngerät nach 6, 4 oder 2 Stunden 45 Sekunden lang.
  • Seite 90: Kamera Löschen

    TIPP Schnelle Methode zur Anzeige von Kameras statt Eingabe über die Menüleiste. scan Drücken Sie direkt OK wiederholt, um Camera (Kamera scannen) auszuwählen. 4.6.3 Kamera löschen 1. Drücken Sie die Taste und eine Menüleiste erscheint. < > 2. Drücken Sie die Taste NACH LINKS oder NACH RECHTS, bis del/...
  • Seite 91: Energiesparmodus

    < > 2. Drücken Sie die Taste NACH LINKS oder NACH RECHTS, bis markiert ist. 3. Drücken Sie die Taste NACH OBEN oder NACH UNTEN, um ºC oder ºF auszuwählen. Energiesparmodus 1. Drücken Sie die Taste und eine Menüleiste erscheint. <...
  • Seite 92: Wi-Fi-Internet-Anzeige

    5. Wi-Fi-Internet-Anzeige Mindestsystemanforderungen Webportal ® • Windows ® • Mac OS 10.7 • Chrome™ 24 ® • Internet Explorer ® • Safari • Java™ 7 ® • Firefox 18.0 ® ® • Adobe Flash Player 15.0 ™ Android -System • Version 4.2 oder höher ®...
  • Seite 93: Erste Schritte - Anschließen Der Geräte

    Erste Schritte – Anschließen der Geräte Wie funktioniert es? ® Wi-Fi -Router MBP854CONNECT Kamera Remote-Anzeige der Kamera auf jedem kompatiblen Gerät Hubble Service Wenn ein Benutzer versucht, auf die Kamera zuzugreifen, authentifiziert unser sicherer Server die Identität des Benutzers und erlaubt den Zugriff auf die Kamera.
  • Seite 94: Einrichtung Eines Benutzerkontos Und Der Kamera Auf Android™-Geräten

    Herunterladen der Hubble-App • Gehen Sie zum Google Play™ Store, um nach „Hubble for Motorola Monitors“ zu suchen. • Laden Sie die App „Hubble for Motorola Monitors“ vom Google Play™ Store herunter und installieren Sie sie auf Ihrem Android™-Gerät. Wi-Fi-Internet-Anzeige...
  • Seite 95: Ausführen Der Hubble-App Auf Einem Android™-Gerät

    5.3.3 Ausführen der Hubble-App auf einem Android™-Gerät ® • Stellen Sie sicher, dass Ihr Android™-Gerät mit Ihrem Wi-Fi -Router verbunden ist. • Führen Sie die Hubble-App aus und geben Sie Ihre Hubble-App- Kontoinformationen ein. Lesen Sie die Nutzungsbedingungen durch und wählen Sie „I agree to the Terms of Use“...
  • Seite 96: Hinzufügen Der Kamera Zu Ihrem Konto

    5.3.4 Hinzufügen der Kamera zu Ihrem Konto • Erstellen Sie ein neues Konto und melden Sie sich an. • Tippen Sie auf Add Camera. (Bild A2) • Tippen Sie auf Continue. (Bild A3) • Die Setup-Anleitung wird auf dem folgenden Bildschirm angezeigt. (Bild A4) Wi-Fi-Internet-Anzeige...
  • Seite 97 • Halten Sie die Taste PAIR an der Seite der Kamera drei Sekunden lang gedrückt. Sie hören eine Piepton und eine Stimme aus der Kamera, die sagt: „Ready for pairing“ (Zum Abstimmen bereit). Tippen Sie auf Search for Camera. • Die App sucht und verbindet Ihre Kamera automatisch, wie in den folgenden Bildern zu sehen (Bilder A5, A6), und die blaue/rote LED an der Kamera blinkt.
  • Seite 98 ® • Wählen Sie Ihr Wi-Fi -Netzwerk und tippen Sie auf „Continue“ geben Sie Ihre Passwort ein und tippen Sie dann auf Connect. (Bilder A7, A8) ® • Die Kamera benötigt einige Minuten, um sich mit dem Wi-Fi -Netzwerk zu verbinden und den Verbindungsstatus anzuzeigen (Bilder A9, A10).
  • Seite 99 • Tippen Sie auf Watch Live Camera, um das Kamerabild anzuzeigen. Die blaue LED der Kamera blinkt. (Bild A11) • Tippen Sie auf das Hubble-Logo, um zur Kameraliste zurückzugehen. (Bild A12) Wi-Fi-Internet-Anzeige...
  • Seite 100: Einrichtung Eines Benutzerkontos Und Der Kamera Verwendung Mit Iphone /Ipad

    Wenn Sie zwei Pieptöne hören, bedeutet dies, dass die Kamera für das Einrichten bereit ist. 5.4.2 Herunterladen der Hubble-App • Gehen Sie zum App Store, um „Hubble for Motorola Monitors“ zu suchen. • Laden Sie die App „Hubble for Motorola Monitors“ herunter und installieren ® ®...
  • Seite 101: Ausführen Hubble-App Auf Ihrem Iphone ® /Ipad

    ® ® 5.4.3 Ausführen Hubble-App auf Ihrem iPhone /iPad ® ® ® • Stellen Sie sicher, dass Ihr iPhone /iPad mit Ihrem Wi-Fi -Router verbunden ist. • Führen Sie die Hubble-App aus und geben Sie Ihre Kontoinformationen ein. Lesen Sie die Nutzungsbedingungen durch und wählen Sie „I agree to the Terms of Use“...
  • Seite 102: Hinzufügen Der Kamera Zu Ihrem Konto

    Hinzufügen der Kamera zu Ihrem Konto • Erstellen Sie ein neues Konto und melden Sie sich an. • Tippen Sie auf Add Camera. (Bild i2) • Tippen Sie auf „MBP854CONNECT“. (Bild i3) FOCUS85 / Blink83 / Scout83 / SCOUT66 /...
  • Seite 103 -Funktion auf Ihrem iPhone /iPad einzuschalten. • Drücken Sie die HOME-Taste, um das Menü „Settings“ zu beenden, und tippen Sie auf die App „Hubble for Motorola Monitors“, um den Startbildschirm aufzurufen. • Tippen Sie auf Continue und befolgen Sie die Anweisungen unten. Wi-Fi-Internet-Anzeige...
  • Seite 104 • Befolgen Sie die obigen Schritte, um die Kamera mit der ID-Nummer „CameraHD-xxxxxxxxxx“ zu finden, und tippen Sie dann einmal auf ® ® Continue, um sicherzustellen, dass sich Ihr iPhone oder iPad mit der Kamera verbunden hat. (Bild i8) ® •...
  • Seite 105 ® • Die Kamera benötigt einige Minuten, um sich mit dem Wi-Fi -Netzwerk zu verbinden und den Verbindungsstatus anzuzeigen (Bilder i11, i12). Falls die Verbindung fehlschlägt, tippen Sie auf die Schaltfläche Retry und wiederholen Sie Schritt 5.4.4, wie oben beschrieben. •...
  • Seite 106: Kamerafunktionen: Betrieb Mit Android™-Geräten

    Kamerafunktionen: Betrieb mit Android™-Geräten 5.5.1 Anschließen der Kamera an den Strom • Schließen Sie den kleinen Stecker des Netzteils an den Netzteilanschluss an und schließen Sie das Netzteil an eine geeignete Netzsteckdose an. • Schieben Sie den EIN/AUS-Schalter auf ON. Die blaue Power-LED leuchtet. (Hinweis: Um das Gerät auszuschalten, schieben Sie den EIN/AUS-Schalter auf OFF.) •...
  • Seite 107: Entfernen Einer Kamera

    5.5.3 Entfernen einer Kamera Sie können eine Kamera wie folgt von Ihrem Konto entfernen: • Tippen Sie auf das Einstellungen-Symbol auf der allgemeinen Seite und tippen Sie dann auf Camera Detail. (Bild A15) • Wählen Sie Remove Camera und tippen Sie auf Yes, um das Gerät aus der Kameraliste zu entfernen.
  • Seite 108: Ändern Ihrer Kontoinformationen

    5.5.4 Ändern Ihrer Kontoinformationen Sie können die Kontoinformationen mithilfe Ihres Android™-Geräts ändern. • Tippen Sie auf Account auf der allgemeinen Seite. Die Kontoeinstellungen werden auf dem Bildschirm angezeigt. (Bild A17) • Tippen Sie auf Change Password, um Ihr Passwort gemäß der Anleitung zu ändern.
  • Seite 109: Kameraeinstellungen

    5.5.5 Kameraeinstellungen Sie können die Kameraeinstellungen ändern, indem Sie auf das Einstellungen- Symbol auf der Kameralistenseite tippen. (Bild A18) • Tippen Sie auf Camera Details, um Camera Name, Change Image, Firmware version, Model ID und Remove Camera zu überprüfen. (Bild A19) Wi-Fi-Internet-Anzeige...
  • Seite 110 • Tippen Sie auf Notification Sensitivity, um die Empfindlichkeit der Ton- und Bewegungserkennung einzustellen, und stellen Sie die Warnung bei hoher/ niedriger Temperatur ein. (Bild A20) Wi-Fi-Internet-Anzeige...
  • Seite 111: Allgemeine Einstellungen

    5.5.6 Allgemeine Einstellungen • Tippen Sie auf Settings auf der allgemeinen Seite. • Tippen Sie auf General Settings, um das Format für Clock (12hr/24hr) und Temperature (°C / °F) umzustellen und Notification Sound oder Vibration zu aktivieren. (Bild A21) • Tippen Sie auf Do Not Disturb, stellen Sie den Timer auf die gewünschte Zeit ein und wählen Sie ON.
  • Seite 112: Funktionen Der Hubble-App

    5.5.7 Funktionen der Hubble-App Tippen Sie auf den Ansichtsbereich und die Funktionssymbole erscheinen, wie unten dargestellt. Zwei-Wege-Kommunikation – Tippen Sie auf , um die Funktion zu aktivieren. Drücken Sie die runde Taste einmal, um über die Kamera zu sprechen. Drücken Sie die Taste erneut, um das Audiofeedback von der Kamera zu hören.
  • Seite 113 Schwenk- und Neigefunktion: Tippen Sie auf die Nach oben- und Nach unten-Tasten zum Neigen und die Nach links- und Nach rechts-Tasten zum Schwenken. (Bilder A25, A26) Wi-Fi-Internet-Anzeige...
  • Seite 114 Foto/Video - Nehmen Sie ein Foto auf oder zeichnen Sie ein Video mit der Kamera auf. Tippen Sie auf das Video-Symbol, um die Videofunktion zu aktivieren, und drücken Sie auf den roten Punkt, um die Aufzeichnung zu starten, und lassen Sie ihn los, um die Aufzeichnung zu stoppen.
  • Seite 115 Hinweis: Fotos und Videos werden im internen Flash-Speicher Ihres Android™-Geräts gespeichert. Sie können über die Galerie oder den Media-Player darauf zugreifen. Um Videos wiederzugeben, verwenden Sie bitte die Hubble-App oder die Anwendung eines Fremdanbieters, z. B. MX Player (vom Google Play™...
  • Seite 116: Kamerafunktionen: Betrieb Mit Iphone /Ipad

    • Die Kameraansicht wird auf dem Bildschirm angezeigt. 5.6.1 Hinzufügen weiterer Kameras • Tippen Sie in der Kameraansicht auf das Motorola-Logo, um zur Seite Add Camera zu gelangen. (Bild i15) • Tippen Sie auf Add Camera, um eine weitere Kamera hinzuzufügen ®...
  • Seite 117: Entfernen Einer Kamera

    5.6.2 Entfernen einer Kamera Sie können eine Kamera wie folgt von Ihrem Konto entfernen: • Tippen Sie auf das Einstellungen-Symbol auf der allgemeinen Seite und tippen Sie dann auf Camera Detail. (Bild i17) • Wählen Sie Remove Camera und tippen Sie auf Yes, um das Gerät aus der Kameraliste zu entfernen.
  • Seite 118: Ändern Ihrer Kontoinformationen

    5.6.3 Ändern Ihrer Kontoinformationen ® ® Sie können die Kontoinformationen mithilfe Ihres iPhone /iPad ändern. • Tippen Sie auf Account auf der allgemeinen Seite. Die Kontoeinstellungen werden auf dem Bildschirm angezeigt. (Bild i19) • Tippen Sie auf Change Password, um Ihr Passwort gemäß der Anleitung zu ändern.
  • Seite 119: Kameraeinstellungen

    5.6.4 Kameraeinstellungen Sie können die Kameraeinstellungen ändern, indem Sie auf das Einstellungen- Symbol auf der allgemeinen Seite tippen (Bild i20). Sie können Camera Name und Firmware version (Bild i21) anzeigen und den Kameranamen ändern, indem Sie auf den vorhandenen Namen tippen und die Anweisungen befolgen. •...
  • Seite 120: Allgemeine Einstellungen

    5.6.5 Allgemeine Einstellungen • Tippen Sie auf Settings auf der allgemeinen Seite. (Bild i23) • Tippen Sie auf General Settings, um das Format für Clock (12hr/24hr) und Temperature (°C / °F) umzustellen und Notification Sound oder Vibration zu aktivieren. (Bild i24) •...
  • Seite 121: Hubble App-Einstellungen

    5.6.6 Hubble App-Einstellungen ® ® • Tippen Sie auf Settings auf Ihrem iPhone /iPad und eine Liste der Anwendungen wird angezeigt. Tippen Sie auf die Hubble-App und die Einstellungen werden auf dem Bildschirm angezeigt. (Bild i26) Wi-Fi-Internet-Anzeige...
  • Seite 122: Funktionen Der Hubble-App

    5.6.7 Funktionen der Hubble-App Tippen Sie in der Kameraansicht auf den Anzeigebereich. Folgende Funktionssymbole werden angezeigt: Zwei-Wege-Kommunikation – Tippen Sie auf , um die Funktion zu aktivieren. Drücken Sie die runde Taste einmal, um über die Kamera zu sprechen. Drücken Sie die Taste erneut, um das Audiofeedback von der Kamera zu hören.
  • Seite 123 Schwenk- und Neigefunktion: Tippen Sie auf die Nach oben- und Nach unten-Tasten zum Neigen und die Nach links- und Nach rechts-Tasten zum Schwenken. (Bilder i29, i30) Wi-Fi-Internet-Anzeige...
  • Seite 124 Bild aufnehmen - Tippen Sie auf das Kamerasymbol , um Fotos von der Kamerasicht aufzunehmen. (Bild i31) Hinweis: ® ® Fotos werden im internen Flash-Speicher Ihres iPhone /iPad gespeichert. Wi-Fi-Internet-Anzeige...
  • Seite 125 Melodie – Tippen Sie für die Wiedergabe einer der 5 voreingestellten Melodien auf diese Schaltfläche, um das Menü Melody anzuzeigen und eine Melodie auszuwählen, die Sie an Ihrer Kamera wiedergeben möchten. (Bild i32) Temperaturmessung – Die Temperaturanzeige des Temperatursensors an ®...
  • Seite 126: Kamerafunktionen: Betrieb Mit Pc/Notebook

    Kamerafunktionen: Betrieb mit PC/Notebook • Gehen Sie zu https://app.hubbleconnected.com/#login • Geben Sie Ihren Benutzernamen und Ihr Passwort ein und klicken Sie auf „Login“, wenn Sie bereits ein Konto erstellt haben. ® ® • Klicken Sie über Ihr Android™-Gerät oder iPhone /iPad auf die Liste der abgestimmten Kameras in Ihrem Konto und die Kamera wird angezeigt.
  • Seite 127: Entsorgung Des Geräts (Umwelt)

    6. Entsorgung des Geräts (Umwelt) Am Ende des Produktlebenszyklus dürfen Sie dieses Gerät nicht mit dem normalen Hausmüll entsorgen. Bringen Sie dieses Produkt für das Recycling der elektrischen und elektronischen Bauteile zu einer Sammelstelle. Dies wird durch das Symbol auf dem Produkt, in der Bedienungsanleitung und/ oder auf der Verpackung angegeben.
  • Seite 128: Reinigung

    7. Reinigung Reinigen Sie den Babymonitor mit einem leicht angefeuchteten Tuch oder mit einem antistatischen Tuch. Verwenden Sie niemals Reinigungsmittel oder scheuernde Lösungsmittel. Reinigung und Pflege • Reinigen Sie keine Teile des Produkts mit Verdünner oder anderen Lösungsmitteln und Chemikalien – dies kann dauerhafte Schäden am Produkt verursachen, die nicht von der Garantie abgedeckt sind.
  • Seite 129: Hilfe

    8. Hilfe Display Keine Anzeige? • Versuchen Sie, den Batteriesatz aufzuladen oder auszutauschen. • Setzen Sie die Geräte zurück. Nehmen Sie den Batteriesatz aus dem Elterngerät und trennen Sie beide Geräte vom Strom. Schließen Sie sie dann wieder an. • Ist das Gerät eingeschaltet? Halten Sie die EIN/AUS-Taste am Elterngerät gedrückt, um das Gerät einzuschalten.
  • Seite 130: Störsignale Durch Rauschen An Ihrem Elterngerät

    Interferenz Störsignale durch Rauschen an Ihrem Elterngerät • Ihr Baby- und Elterngerät stehen möglicherweise zu nah beieinander. Stellen Sie sie weiter auseinander. • Achten Sie auf einen Abstand von mindestens 1 bis 2 m zwischen den zwei Geräten, um eine Rückkopplung zu vermeiden. •...
  • Seite 131 Wenn Sie Ihr Passwort vergessen haben Wenn Sie Ihr Passwort nicht mehr wissen, tippen Sie auf „Forgot password“ und geben Sie Ihre E-Mail-Adresse an. Es wird umgehend ein neues Passwort an Ihre E-Mail-Adresse gesendet. ® Fehlerbehebung für Wi-Fi -Internet-Anzeige Kategorie Problem- Lösung beschreibung/Fehler...
  • Seite 132 Verbindungs- Ich erhalte die 1. Bitte versuchen Sie es in einigen Minuten erneut. Es könnte ein probleme Meldung: „We are Problem mit Ihrer having problems Internetverbindung vorliegen. accessing your 2. Falls das Problem weiterhin camera. This could be besteht, starten Sie Ihre Kamera due to lack of internet erneut, um zu prüfen, ob dies das connection.
  • Seite 133 Einrichten Während ich eine neue Wenn Sie versuchen, eine Kamera Kamera zu meinem hinzuzufügen, die bereits vorher zu Konto hinzufüge, kann Ihrem Konto oder einem anderen ich keine Kameras zum Konto hinzugefügt wurde, müssen die Hinzufügen finden. Kamera zuerst zurücksetzen. Halten Sie dazu die Taste PAIR unten an der Kamera 5 Sekunden lang gedrückt.
  • Seite 134 Verbindungs- Ich kann auf meine Bitte prüfen Sie, ob sich die Kamera ® probleme Kamera nicht innerhalb der Wi-Fi -Reichweite zugreifen. befindet. Wenn die LED an Ihrer Kamera langsam blinkt, versuchen Sie, die Kamera näher zum Router zu ® stellen, um ein besseres Wi-Fi -Signal zu erhalten, und versuchen Sie es erneut.
  • Seite 135 Kamera Wenn ich versuche, Bitte aktualisieren Sie Ihre Firmware. die Kamera Dies dauert ca. 5 Minuten. Wir anzuzeigen, erhalte ich veröffentlichen von Zeit zu Zeit die Aufforderung, ein Upgrades, um die Kamerafunktionen Firmware-Upgrade der zu verbessern. Kamera durchzuführen. Was soll ich tun? Allgemein Welche Plattformen Mindestanforderung:...
  • Seite 136 Android™- und - Öffnen Sie den Google Play Store iOS-Geräte herunter? auf Ihrem Android™-Gerät. - Wählen Sie „Suche“. - Geben Sie „Hubble for Motorola Monitors“ ein. - In den Ergebnissen wird die Hubble App angezeigt. - Installieren Sie sie.
  • Seite 137 Einrichten Wenn das Video Sie müssen die automatische stoppt, versucht die Sperrfunktion Ihres intelligenten Anwendung, sich Geräts ausschalten, um einen erneut zu verbinden. kontinuierlichen Video/Audio-Feed Dies führt zu sicherzustellen. fehlendem Ton und einem unterbrochenen Bild. Funktionen Wie viele Benutzer Wenn Sie lokal darauf zugreifen, können gleichzeitig auf werden zwei oder mehr Benutzer die Kamera zugreifen?
  • Seite 138: Allgemeine Informationen

    Wenn Sie einen Ersatz-Batteriesatz bestellen möchten, wenden Sie sich an den Kundendienst. Eingeschränkte Garantie für Konsumgüter und Zubehör („Garantie“) Vielen Dank, dass Sie dieses Produkt der Marke Motorola gekauft haben, das von Binatone Electronics International LTD („BINATONE“) unter Lizenz gefertigt wird. Was deckt diese Garantie ab? Vorbehaltlich der unten angegebenen Ausschlüsse garantiert BINATONE, dass...
  • Seite 139 AUSDRÜCKLICHEN EINGESCHRÄNKTEN GARANTIE ERFOLGEN, DER AUSSCHLIESSLICHE RECHTSBEHELF DES VERBAUCHERS UND ES WERDEN DADURCH ALLE ANDEREN GARANTIEN, OB AUSDRÜCKLICH ODER STILLSCHWEIGEND, ERSETZT. MOTOROLA ODER BINATONE ÜBERNEHMEN IN KEINEM FALL EINE HAFTUNG, WEDER AUFGRUND EINES VERTRAGS ODER WEGEN UNERLAUBTER HANDLUNG (EINSCHLIESSLICH FAHRLÄSSIGKEIT), FÜR SCHÄDEN, DIE DEN KAUFPREIS DES PRODUKTS ODER ZUBEHÖRS ÜBERSTEIGEN, ODER FÜR INDIREKTE, BESONDERE,...
  • Seite 140 Zubehörteile für gewerbliche Zwecke oder unsachgemäße Verwendung oder Aussetzen des Produkts oder der Zubehörteile anormaler Bedingungen, oder (d) andere Handlungen, die nicht der Fehler von MOTOROLA oder BINATONE sind, sind von der Garantie ausgeschlossen. Verwendung von Produkten und Zubehörteilen, die nicht von Motorola stammen.
  • Seite 141 Datumsschildern, die entfernt, geändert oder unleserlich gemacht wurden, (b) gebrochenen Siegeln oder solchen, die Zeichen von Manipulation aufweisen, (c) nicht übereinstimmenden Platinenseriennummern, oder (d) nicht konformen oder nicht von Motorola stammenden Gehäusen oder Teilen sind von der Garantie ausgeschlossen. Kommunikationsdienste. Defekte, Schäden oder der Ausfall von Produkten oder Zubehörteilen aufgrund von Kommunikationsdiensten oder -signalen, die...
  • Seite 142 Vereinbarungen oder Erklärungen, einschließlich Erklärungen in Publikationen oder Werbematerialien, die von BINATONE ausgegeben werden, oder Erklärungen durch einen Vertreter oder Mitarbeiter von BINATONE, die möglicherweise in Verbindung mit besagtem Kauf erfolgt sind. Allgemeine Informationen...
  • Seite 143 Allgemeine Informationen...
  • Seite 144: Technische Daten

    Technische Daten Babygerät Frequenz 2,4 GHz bis 2,48 GHz Bildsensor Farbe CMOS 1 Mio. Pixel Objektiv f 2,5 mm, F 2,8 IR-LED 8 Stck. Netzteil: Ten Pao International Ltd. S009GV0500150 Eingang: 100 - 240 V AC, 50/60 Hz, 300 mA; Ausgang: 5,0 V DC, 1500 mA ACHTUNG! Nur mit dem mitgelieferten Netzteil verwenden.
  • Seite 145 Eingang: 100 - 240 V AC, 50/60 Hz, 300 mA; Ausgang: 5,0 V DC, 1500 mA ACHTUNG! Nur mit dem mitgelieferten Netzteil verwenden. Batterie Motorola BF6X 3,7 V, 1880 mAh Lithium-Ionen-Polymer, aufladbarer Batteriesatz ACHTUNG! Verwenden Sie keine nicht aufladbaren Batterien für das Elterngerät.
  • Seite 146 Gefertigt, vertrieben oder verkauft durch Binatone Electronics International LTD., dem offiziellen Lizenznehmer für dieses Produkte. MOTOROLA und das Stylized M Logo sind Marken oder eingetragene Marken von Motorola Trademark Holdings, LLC und werden unter Lizenz verwendet. Das Apple-Logo und Safari sind Marken von Apple Inc., eingetragen in den USA und in anderen Ländern.
  • Seite 147 Guide de l’utilisateur ® Ecoute bébé vidéo digital avec écran couleur et visionnage en ligne par Wi-Fi Modèles : MBP854CONNECT, MBP854CONNECT-2, MBP854CONNECT-3, MBP854CONNECT-4 Les caractéristiques décrites dans ce Guide de l'utilisateur peuvent être modifiées sans préavis.
  • Seite 148 Veuillez conserver votre facture originale datée. Une copie de cette facture sera exigée pour bénéficier de la garantie de votre produit Motorola. Aucun enregistrement n’est nécessaire pour bénéficier de la garantie. Pour toute question relative au produit, veuillez vous adresser à notre service clientèle :...
  • Seite 149 Présentation de l’unité parents RESET > Écran LCD Touche Droite Touche MARCHE/ARRÊT vidéo Mode normal : pour faire pivoter la Appuyez pour activer ou désactiver caméra vers la droite l’écran LCD. Dans les menus : pour défiler vers la Touche Parole droite Maintenez-la enfoncée pour parler à...
  • Seite 150 Icônes de l'écran de l’unité parents Puissance du signal (4 niveaux) Mode de vision nocturne (l’écran passe en noir et blanc) Mode parole Niveau de charge du bloc-piles (4 niveaux) Pivotement vers la gauche Pivotement vers la droite Inclinaison vers le haut Inclinaison vers le bas Commande du zoom (1X, 2X) Niveau de la luminosité...
  • Seite 151 Présentation de l’unité bébé 5V 1.5A 1. Cellule photoélectrique (pour la détection 6. Touche PAIR de la luminosité ambiante) 7. Haut-parleur 2. Objectif de la caméra 8. Antenne 3. DEL infrarouges (pour la vision nocturne) 9. Prise micro USB 4. Voyant d’alimentation et d’état 10.
  • Seite 152 Table des matières 1. Consignes de sécurité ................8 2. Pour commencer..................11 Alimentation électrique de l’unité bébé ..........11 Alimentation électrique de l’unité parents..........11 Souscription (Couplage) ................13 3. Utilisation du moniteur pour bébé............14 Installation....................14 Mouvements de la caméra ............... 14 Mode de vision nocturne................
  • Seite 153 Compte d’utilisateur et configuration de la caméra : ® ® Avec un iPhone /iPad ................28 5.4.1 Mise sous tension et connexion de la caméra ......28 5.4.2 Téléchargement de l'application Hubble ........ 28 ® ® 5.4.3 Utilisation de l'application Hubble sur votre iPhone /iPad ..
  • Seite 154: Consignes De Sécurité

    1. Consignes de sécurité AVERTISSEMENT : Danger d’étranglement : des enfants se sont accidentellement ÉTRANGLÉS avec les cordons. Tenez ce cordon hors de portée des enfants, à plus d'un mètre (3 pieds) de distance. N’utilisez jamais de prolongateurs avec les adaptateurs secteur.
  • Seite 155 INSTALLATION ET UTILISATION de l'unité bébé : ● Choisissez pour l'unité bébé un emplacement qui offrira la meilleure vue de votre bébé dans son berceau. ● Posez l’unité bébé sur une surface plane telle que coiffeuse, bureau ou étagère, ou fixez-la solidement au mur à l’aide des œillets de fixation situés sous le support.
  • Seite 156 • Essayez ce moniteur et toutes ses fonctionnalités afin de vous familiariser avec l’appareil avant de l’utiliser. • N’utilisez pas le moniteur pour bébé à proximité de l’eau. • N’installez pas le moniteur pour bébé près d’une source de chaleur. •...
  • Seite 157: Pour Commencer

    2. Pour commencer Alimentation électrique de l’unité bébé Connecteur micro USB de l’adaptateur secteur Poussez pour allumer la caméra 1. Insérez le connecteur micro USB de l’adaptateur secteur dans la prise micro USB de la caméra et branchez l’adaptateur à une prise de courant adéquate.
  • Seite 158 courant adéquate. Si cette dernière comporte un interrupteur, veillez à ce que celui-ci soit sur ON. Utilisez uniquement l’adaptateur secteur fourni (5 Vcc / 1500 mA), avec le connecteur micro USB. 2. Appuyez sur la touche POWER ON/OFF pendant 1 seconde pour allumer l'unité...
  • Seite 159: Souscription (Couplage)

    Souscription (Couplage) L’unité bébé est déjà couplée à l’unité parents. Il n’est pas nécessaire de la coupler de nouveau, sauf si l'unité bébé perd sa liaison avec l’unité parents. Pour rétablir le couplage avec votre unité bébé ou en coupler une nouvelle, suivez la procédure ci-dessous : 1.
  • Seite 160: Utilisation Du Moniteur Pour Bébé

    3. Utilisation du moniteur pour bébé Installation • Placez l’unité bébé dans un endroit pratique (par exemple sur une table), l’objectif de la caméra dirigé vers la zone que vous souhaitez surveiller. • Orientez la tête de l'unité bébé en faisant pivoter la caméra vers le haut, le bas, la gauche ou la droite, jusqu'à...
  • Seite 161: Marche/Arrêt Vidéo

    MARCHE/ARRÊT vidéo Appuyez sur VIDEO ON/OFF pour activer ou désactiver l'écran LCD, tout en conservant la surveillance audio. Affichage de la température (HH °C/°F ou LL °C/°F) La température mesurée par le capteur situé au dos de l’unité bébé s’affiche en haut de l’écran.
  • Seite 162: Options Du Menu De L'unité Parents

    4. Options du menu de l’unité parents Volume 1. Appuyez sur la touche Volume - ou + pour régler le volume ; l'icône apparaît et vous pouvez régler le niveau du volume de 0 à 8. (Le volume par défaut est 4). Luminosité...
  • Seite 163: Contrôle De La Caméra

    Contrôle de la caméra 4.6.1 Ajouter (coupler) une caméra 1. Appuyez sur pour ouvrir le menu. < > 2. Appuyez sur GAUCHE ou DROITE pour mettre en surbrillance : del/ add/ view/ scan les options s'affichent. 3. Appuyez sur HAUT ou BAS pour sélectionner , puis sur pour confirmer.
  • Seite 164: Supprimer Une Caméra

    4.6.3 Supprimer une caméra 1. Appuyez sur pour ouvrir le menu. < > 2. Appuyez sur GAUCHE ou DROITE pour mettre en surbrillance : del/ add/ view/ scan les options s'affichent. 3. Appuyez sur HAUT ou BAS pour sélectionner , puis sur pour confirmer.
  • Seite 165: Enregistrement Vidéo

    Enregistrement vidéo Cette fonction vous permet d'enregistrer une vidéo de votre bébé. Cette vidéo sera stockée dans la carte mémoire SD, donc veillez à ce que la carte dispose d'un espace mémoire suffisant. 1. Appuyez sur pour ouvrir le menu. <...
  • Seite 166: Visionnage Sur Internet Via Le Wi-Fi

    5. Visionnage sur Internet via le Wi-Fi Configuration minimale requise Systèmes d'exploitation et navigateurs ® • Windows ® • Mac OS 10.7 • Chrome™ 24 ® • Internet Explorer ® • Safari • Java™ 7 ® • Firefox 18.0 ® ®...
  • Seite 167: Pour Commencer : Connexion Des Appareils

    Pour commencer : connexion des appareils Comment cela fonctionne-t-il ? ® MBP854 Routeur Wi-Fi CONNECT Visionnez à distance les images Camera de votre caméra sur n’importe quel appareil compatible Hubble Service Lorsqu'un utilisateur tente d'accéder à la caméra, notre serveur sécurisé vérifie son identité...
  • Seite 168: Compte D'utilisateur Et Configuration De La Caméra Avec Un Appareil Android

    Téléchargement de l'application Hubble • Allez sur Google Play™ Store pour chercher l'application « Hubble for Motorola Monitors ». • Téléchargez l'application Hubble for Motorola Monitors sur Google Play™ Store et installez-la sur votre appareil Android™. Visionnage sur Internet via le Wi-Fi...
  • Seite 169: Utilisation De L'application Hubble Sur Votre Appareil Android

    5.3.3 Utilisation de l'application Hubble sur votre appareil Android™ ® • Vérifiez que votre appareil Android™ est connecté à votre routeur Wi-Fi • Démarrez l'application Hubble, entrez les informations de votre compte, lisez les conditions générales d'utilisation, puis sélectionnez « I agree to the Terms of Use »...
  • Seite 170: Ajout De La Caméra À Votre Compte

    5.3.4 Ajout de la caméra à votre compte • Créez un nouveau compte et connectez-vous. • Tapez sur Add Camera. (Image A2) • Tapez sur Continue. (Image A3) • Les instructions de configuration s’affichent sur l’écran suivant. (Image A4) Visionnage sur Internet via le Wi-Fi...
  • Seite 171 • Maintenez la touche PAIR sur le côté de la caméra enfoncée pendant 3 secondes, jusqu'à ce que vous entendiez un bip, suivi de l'annonce vocale « Ready for coupling ». Tapez sur Search for Camera. • L'application cherche et se connecte automatiquement à votre caméra comme le montrent les (Images A5 et A6) ci-dessous, et la DEL de la caméraclignote en bleu et rouge.
  • Seite 172 ® • Sélectionnez votre réseau Wi-Fi , tapez sur Continue, saisissez votre mot de passe, puis tapez sur Connect. (Images A7 et A8) ® • La connexion de la caméra au réseau Wi-Fi demande quelques minutes, puis l'état de la connexion s'affiche (Images A9 et A10). Si la connexion échoue, tapez sur Retry et recommencez à...
  • Seite 173 • Tapez sur Watch Live Camera pour visionner le streaming de la caméra vidéo. La DEL bleue de la caméra clignote. (Image A11) • Tapez sur le logo Hubble pour revenir à la liste des caméras. (Image A12) Visionnage sur Internet via le Wi-Fi...
  • Seite 174: Compte D'utilisateur Et Configuration De La Caméra : Avec Un Iphone ® /Ipad

    Lorsque la caméra est prête à être configurée, vous entendez deux bips. 5.4.2 Téléchargement de l'application Hubble • Allez sur l'App Store et cherchez « Hubble for Motorola Monitors ». • Téléchargez l’application Hubble for Motorola Monitors et installez-la sur ®...
  • Seite 175: Utilisation De L'application Hubble Sur Votre Iphone /Ipad

    ® ® 5.4.3 Utilisation de l'application Hubble sur votre iPhone /iPad ® ® ® • Vérifiez que votre iPhone /iPad est connecté à votre routeur Wi-Fi • Démarrez l'application Hubble, entrez les informations de votre compte, lisez les conditions générales d'utilisation, puis sélectionnez « I agree to the Terms of Use »...
  • Seite 176: Ajout De La Caméra À Votre Compte

    5.4.4 Ajout de la caméra à votre compte • Créez un nouveau compte et connectez-vous. • Tapez sur Add Camera. (Image i2) • Tapez sur « MBP854CONNECT ». (Image i3) FOCUS85 / Blink83 / Scout83 / SCOUT66 / MBP36HD MBP854 ®...
  • Seite 177 /iPad • Appuyez sur HOME pour sortir du menu des réglages, puis tapez sur l'application « Hubble for Motorola Monitors » pour afficher l'écran d'accueil. • Tapez sur Continue et suivez les instructions ci-dessous. Visionnage sur Internet via le Wi-Fi...
  • Seite 178 • Suivez les étapes ci-dessus pour localiser la caméra dont l'identifiant est « CameraHD-xxxxxxxxxx », puis tapez sur Continue une fois et vérifiez que ® ® votre iPhone /iPad est connecté à la caméra. (Image i8) ® • Sélectionnez votre réseau Wi-Fi Network , tapez sur Continue, saisissez votre mot de passe, puis tapez sur Next.
  • Seite 179 ® • La connexion de la caméra au réseau Wi-Fi demande quelques minutes, puis l'état de la connexion s'affiche (Images i11 et i12). Si la connexion échoue, tapez sur Retry et suivez de nouveau 5.4.4 les instructions ci-dessus. • Tapez sur Watch Live Camera pour visionner les images filmées par la caméra.
  • Seite 180: Fonctions De La Caméra : Avec Des Périphériques Android

    Fonctions de la caméra : Avec des périphériques Android™ 5.5.1 Alimentation électrique de la caméra • Insérez le connecteur micro USB de l’adaptateur secteur dans la prise micro USB de la caméra et branchez l’adaptateur à une prise de courant adéquate. Si cette dernière comporte un interrupteur, veillez à...
  • Seite 181: Suppression D'une Une Caméra

    5.5.3 Suppression d'une une caméra Vous pouvez supprimer une caméra de votre compte comme suit : • Tapez sur l'icône des réglages dans la page d'accueil, puis sur Camera Details. (Image A15) • Sélectionnez Remove Camera, puis tapez sur Yes pour supprimer la caméra de la liste.
  • Seite 182: Modifier Les Informations De Votre Compte

    5.5.4 Modifier les informations de votre compte Vous pouvez modifier les informations de votre compte depuis votre appareil Android™. • Tapez sur Account dans la page d'accueil : les paramètres du compte s'affichent. (Image A17) • Tapez sur Change Password pour changer votre mot de passe en suivant les instructions.
  • Seite 183: Réglages De La Caméra

    5.5.5 Réglages de la caméra Vous pouvez modifier les réglages de la caméra en tapant sur l’icône des réglages dans la page de la liste des caméras. (Image A18) • Tapez sur Camera Details pour accéder à Camera Name, Change Image, Firmware version, Model ID et Remove Camera.
  • Seite 184 • Tapez sur Notification Sensitivity pour régler la sensibilité de détection des sons et des mouvements, et régler l’alerte de température trop élevée ou trop basse. (Image A20) Visionnage sur Internet via le Wi-Fi...
  • Seite 185: Paramètres Généraux

    5.5.6 Paramètres généraux • Tapez sur Settings dans la page d'accueil. • Tapez sur General Settings pour choisir le format d'affichage de Clock (12 h/24 h), l'unité de Temperature (°C / °F), et activer Notification Sound ou Vibration. (Image A21) •...
  • Seite 186: Fonctionnalités De L'application Hubble

    5.5.7 Fonctionnalités de l'application Hubble Tapez sur la zone de visionnage pour afficher les icône suivantes : Two Way Communication : tapez sur pour activer la fonction. Appuyez une fois sur la touche ronde pour parler via la caméra. Appuyez de nouveau sur la touche pour écouter le son capté...
  • Seite 187 Balayage et inclinaison : Tapez sur les touche haut/bas pour incliner la caméra vers le haut ou le bas et sur les touches gauche/droite pour balayer de gauche à droite. (Images A25 et A26) Visionnage sur Internet via le Wi-Fi...
  • Seite 188 Photo/Video : prenez une photo ou enregistrez une vidéo avec votre caméra. Tapez sur l'icône de la vidéo pour activer la fonction vidéo, appuyez sur la touche rouge pour démarrer l'enregistrement, et relâchez-la pour arrêter. (Images A27, A28) Tapez sur l'icône de l'appareil photo passer en mode appareil photo et capturer une image de l'écran de visionnage vidéo.
  • Seite 189 Remarque : Les photos et les vidéos sont stockées dans la mémoire flash interne de votre appareil Android™ ; vous pouvez les visionner dans la galerie ou à l’aide du lecteur multimédia. Pour visionner les vidéos, utilisez l’application Hubble ou une application tierce capable de prendre en charge le format MJPG (Motion JPEG), telle que MX Player de Google Play™...
  • Seite 190: Fonctions De La Caméra : Avec Un Iphone ® /Ipad

    • L’écran de visionnage vidéo s’ouvre. 5.6.1 Ajout de caméras • Dans cet écran, tapez sur le logo Motorola pour aller à la page Add Camera. (Image i15) • Tapez sur Add Camera pour ajouter une caméra en suivant les étapes de la ®...
  • Seite 191: Suppression D'une Une Caméra

    5.6.2 Suppression d'une une caméra Vous pouvez supprimer une caméra de votre compte comme suit : • Tapez sur l'icône des réglages dans la page d'accueil, puis sur Camera Details. (Image i17) • Sélectionnez Remove Camera, puis tapez sur Yes pour supprimer la caméra de la liste.
  • Seite 192: Modifier Les Informations De Votre Compte

    5.6.3 Modifier les informations de votre compte Vous pouvez modifier les informations de votre compte à partir de votre ® ® iPhone /iPad • Tapez sur Account dans la page d'accueil : les détails du compte s'affichent. (Image i19) • Tapez sur Change Password pour changer votre mot de passe en suivant les instructions instructions.
  • Seite 193: Réglages De La Caméra

    5.6.4 Réglages de la caméra Vous pouvez modifier les réglages de la caméra et tapant sur l'icône des réglages dans la page d'accueil (Image i20). Vous pouvez accéder à Camera Name et Firmware version (Image i21), et changer le nom de la caméra en tapant sur le nom existant et en suivant les instructions.
  • Seite 194: Paramètres Généraux

    5.6.5 Paramètres généraux • Tapez sur Settings dans la page d'accueil. (Image i23) • Tapez sur General Settings pour choisir le format d'affichage de Clock (12 h/24 h), l'unité de Temperature (°C / °F) et activer Notification Sound ou Vibration. (Image i24) •...
  • Seite 195: Paramètres De L'application Hubble

    5.6.6 Paramètres de l'application Hubble ® ® • Tapez sur Settings sur votre iPhone /iPad ; une liste d'applications s'affiche ; tapez sur l'application Hubble et les paramètres s'affichent à l'écran. (Image i26) Visionnage sur Internet via le Wi-Fi...
  • Seite 196: Fonctionnalités De L'application Hubble

    5.6.7 Fonctionnalités de l'application Hubble Tapez sur la zone de visionnage pour afficher les icônes suivantes : Two Way Communication : tapez sur pour activer la fonction. Appuyez une fois sur la touche ronde pour parler via la caméra. Appuyez de nouveau sur la touche pour écouter le son capté...
  • Seite 197 Pan and Tilt : Tapez sur les touche haut/bas pour incliner la caméra vers le haut ou le bas et sur les touches gauche/droite pour balayer de gauche à droite. (Images i29 et i30) Visionnage sur Internet via le Wi-Fi...
  • Seite 198 Take Picture : tapez sur l'icône de l'appareil photo pour capturer une image de l'écran de visionnage vidéo. (Image i31) Remarque : ® ® Les photos sont stockées dans la mémoire flash interne de votre iPhone /iPad Visionnage sur Internet via le Wi-Fi...
  • Seite 199 Melody : pour jouer l’une des 5 mélodies préenregistrées, tapez sur Melody pour afficher le menu Melody et sélectionner votre mélodie favorite qui sera jouée via la caméra. (Image i32) Temperature : la température mesurée par le capteur situé au dos de la ®...
  • Seite 200: Fonctions De La Caméra : Avec Un Pc Ou Ordinateur Portable

    Fonctions de la caméra : Avec un PC ou ordinateur portable • Rendez-vous sur https://app.hubbleconnected.com/#login • Entrez votre nom d’utilisateur et votre mot de passe, puis cliquez sur Login si vous avez déjà créé un compte. • Cliquez sur la caméra couplée à votre compte à l’aide de votre appareil ®...
  • Seite 201: Élimination De L'appareil (Environnement)

    6. Élimination de l'appareil (environnement) À la fin du cycle de vie de ce produit, ne le jetez pas dans les ordures ménagères. Apportez ce produit à un centre de collecte pour le recyclage d’équipements électriques et électroniques. Ceci est indiqué par le pictogramme ci-contre sur le produit, dans le guide de l’utilisateur et/ou sur la boîte.
  • Seite 202: Nettoyage

    7. Nettoyage Essuyez le moniteur pour bébé avec un linge légèrement humide ou une lingette antistatique. N'utilisez jamais de détergents ou de solvants abrasifs. Nettoyage et soin • Ne nettoyez aucune partie du produit avec des diluants, solvants ou autres produits chimiques : ceci pourrait endommager le produit de façon définitive et ne serait pas couvert par la garantie.
  • Seite 203: Aide

    8. Aide Écran Pas d’affichage • Essayez de recharger ou de remplacer le bloc-piles. • Réinitialisez les appareils. Retirez le bloc-piles de l’unité parents et débranchez les adaptateurs secteur des deux appareils, puis rebranchez le tout. • Le moniteur est-il allumé ? Maintenez la touche MARCHE/ARRÊT de l'unité...
  • Seite 204 Parasites Parasites sur l’unité parents • Les unités bébé et parents sont peut-être trop proches l’une de l’autre. Éloignez-les. • Veillez à ce que la distance entre les deux appareils soit d’au moins 1 à 2 mètre (3 à 6 pieds) pour éviter l’effet d’écho. •...
  • Seite 205 Si vous avez oublié votre mot de passe Si vous avez oublié votre mot de passe, tapez sur « Forgot Password » et entrez votre adresse de courriel. Un nouveau mot de passe sera immédiatement envoyé à cette adresse. ® Dépannage pour le visionnage Wi-Fi sur Internet Catégorie...
  • Seite 206 Problèmes de Je reçois le message 1. Attendez quelques minutes, puis réessayez. Cela pourrait être dû à connectivité suivant : Nous avons un problème avec votre des problèmes pour connexion Internet. accéder à votre 2. Si le problème persiste, essayez caméra.
  • Seite 207 Général Quels sont les Nous recommandons d'utiliser navigateurs pris en Google Chrome™ 24 ou plus récent. charge pour accéder à Cependant, les navigateurs suivants ma caméra depuis mon sont également pris en charge : ® ® PC/Mac Internet Explorer 9.0 (pour PC), ®...
  • Seite 208 Installation Pendant la dernière Réinitialisez la caméra et réessayez. étape de la Maintenez la touche PAIR située sous configuration pour un la caméra enfoncée jusqu'à ce que appareil Android™ ou vous entendiez un bip. Attendez une iOS, je ne trouve pas minute que la caméra redémarre.
  • Seite 209 - Allez sur Google Play Store sur appareils Android™ et votre appareil Android™ iOS ? - Sélectionnez Search - Entrez « Hubble for Motorola Monitors » - Le résultat sera l'application Hubble. - Sélectionnez-la pour l’installer iOS : - Ouvrez l'App Store - Sélectionnez Search...
  • Seite 210 Installation Lorsque la vidéo est Vous devez désactiver la fonction de coupée, l'application verrouillage automatique de votre tente de se appareil intelligent pour assurer le reconnecter, le son est streaming audio/vidéo ininterrompu. perdu et la vidéo est saccadée. Fonctions Combien d’utilisateurs En mode local, deux utilisateurs sont peuvent accéder pris en charge ;...
  • Seite 211: Informations Générales

    Que couvre la présente Garantie ? Sous réserve des exclusions indiquées ci-dessous, la société BINATONE garantit que ce produit (« Produit ») de marque Motorola ou cet accessoire certifié et vendu pour être utilisé avec le Produit (« Accessoire ») fabriqué par BINATONE est exempt de défauts de matériaux et de fabrication, sous réserve d’une...
  • Seite 212 RECOURS DU CONSOMMATEUR ET SERONT OFFERTS EN LIEU ET PLACE DE TOUTE AUTRE GARANTIE EXPLICITE OU IMPLICITE. EN AUCUN CAS MOTOROLA OU BINATONE NE POURRONT ÊTRE TENUS RESPONSABLES, QUE CE SOIT PAR CONTRAT OU DÉLIT CIVIL (Y COMPRIS NÉGLIGENCE), DE TOUT DOMMAGE AU-DELÀ DU PRIX D’ACHAT DU PRODUIT OU ACCESSOIRE, OU DE DOMMAGES INDIRECTS, ACCESSOIRES, PARTICULIERS OU CONSÉCUTIFS, OU DE TOUTE AUTRE PERTE DE...
  • Seite 213 à des fins commerciales ou de nature à soumettre le produit ou les accessoire à un usage ou à des conditions anormales ; ou (d) de tout autre acte étranger à MOTOROLA ou à BINATONE, ne sont pas couverts par la présente Garantie.
  • Seite 214 évidents de manipulation ; (c) dont les numéros de série des cartes ne correspondent pas ; ou (d) dont les boîtiers ou certaines pièces ne sont pas conformes ou sont d’une marque autre que Motorola, sont exclus de la présente Garantie.
  • Seite 215 Informations générales...
  • Seite 216: Caractéristiques Techniques

    Caractéristiques techniques Unité bébé Gamme de fréquence 2,4 GHz à 2,48 GHz Capteur d’images CMOS couleur 1 Mégapixels Objectif f 2,5 mm, F 2.8 DEL IR Adaptateur secteur Ten Pao International Ltd. S009GV0500150 Entrée : 100-240 V CA, 50/60 Hz, 300 mA Sortie : 5.0 V CC, 1500 mA AVERTISSEMENT Utilisez le produit uniquement avec l'alimentation...
  • Seite 217 Sortie : 5,0 V / 1500 mA AVERTISSEMENT Utilisez l’appareil uniquement avec l'alimentation fournie. Bloc-piles Motorola BF6X 3,7 V, 1880 mAh Lithium-Ion Polymère batterie rechargeable AVERTISSEMENT N’utilisez jamais de piles jetables pour l’unité parents. Un bloc-piles de type incorrect pourrait provoquer une explosion.
  • Seite 218 Fabriqué, distribué ou vendu par Binatone Electronics International LTD., détenteur officiel de la licence pour ce produit. MOTOROLA et le logo M stylisé sont des marques commerciales ou des marques déposées de Motorola Trademark Holdings, LLC. et sont utilisés sous licence. Le logo Apple et Safari sont des marques commerciales d’Apple Inc., déposées aux États-Unis et dans d’autres pays.
  • Seite 219 Gebruikershandleiding ® Digitale Video Baby Monitor met Wi-Fi Internet Weergave Modellen: MBP853CONNECT, MBP853CONNECT-2, MBP853CONNECT-3, MBP853CONNECT-4 De functies beschreven in deze handleiding zijn onderhevig aan wijzigingen zonder voorafgaande kennisgeving.
  • Seite 220 Bewaar uw originele aankoopbewijs voor uw administratie. Voor service onder garantie van uw Motorola-product, moet u een kopie van uw gedateerde aankoopbon overleggen om aanspraak te maken op garantie. Registratie is niet vereist voor de garantie.
  • Seite 221 Overzicht van het Oudertoestel RESET Display (LCD-scherm) Voedingsadapter/Batterij LED Video AAN/UIT-toets BLAUW wanneer aangesloten op Indrukken om het LCD-scherm uit te een stopcontact schakelen ROOD wanneer de batterij zwak is Spreek-toets Toestel AAN/UIT LED (Groen) Ingedrukt houden om tegen uw Audioniveau-LED (Groen, Oranje, baby te spreken Rood)
  • Seite 222 Menu-pictogrammen oudertoestel Signaalniveau (4 niveaus) Nachtzichtmodus (Scherm wordt zwart/wit) Spreek-modus Batterijniveau-regelaar (4 niveaus) Zwenk links Zwenk links Omhoog kantelen Omlaag kantelen Zoomniveau-regelaar (1X, 2X) Helderheidsniveau-regelaar (8 niveaus) Slaapliedjes-regelaar (met 5 slaapliedjes) Alarminstelling (6u, 4u, 2u, Uit) Temperatuuraanduiding (HHºC / ºF of LL ºC / ºF) Pictogram &...
  • Seite 223 Overzicht van het Babytoestel 5V 1.5A 1. Lichtsensor (voor nachtmodus detectie) 7. Luidspreker 2. Cameralens 8. Antenne 3. Infrarode LEDs (voor nachtzicht) 9. Micro USB-aansluiting 4. Voeding/status-indicator 10. AAN/UIT-schakelaar 5. Microfoon 11. Temperatuursensor 6. KOPPELING-toets Belangrijke richtlijnen voor het installeren van uw Babymonitor •...
  • Seite 224 Inhoud 1. Veiligheidsinstructies................8 2. In gebruik nemen ..................11 Voeding voor Babytoestel ................ 11 Voeding voor Oudertoestel ..............11 Aanmelden (Koppelen) ................13 3. Gebruik van de Baby Monitor ..............14 Instellen ..................... 14 Zenken en kantelen................... 14 Nachtzichtmodus ..................14 Spreek-modus ...................
  • Seite 225 Gebruikersaccount en Camera-instelling: ® ® Gebruik met iPhone /iPad ..............28 5.4.1 De voeding inschakelen en de Camera aansluiten ....28 5.4.2 Download de Hubble App ............28 ® ® 5.4.3 Activeer de Hubble App op uw iPhone /iPad .....29 5.4.4 Een Camera aan uw account toevoegen ........
  • Seite 226: Veiligheidsinstructies

    1. Veiligheidsinstructies WAARSCHUWING: Wurgingsgevaar: Kinderen zijn met snoeren GEWURGD. Houd dit snoer buiten bereik van kinderen (meer dan 1 meter afstand). Nooit verlengsnoeren gebruiken met voedingsadapters. Gebruik uitsluitend de meegeleverde voedingsadapters. Veiligheidsinstructies...
  • Seite 227 Instellen en gebruik van Babytoestel: ● Kies een plaats voor het Babytoestel die u goed zicht geeft op de baby in de wieg. ● Plaats het Babytoestel op een vlakke ondergrond, zoals een dressoir, bureau of boekenplank, of monteer het Babytoestel op een muur met behulp van de ophanging onder de stand.
  • Seite 228 • De Baby Monitor niet in de omgeving van water gebruiken. • De Baby Monitor niet bij een warmtebron plaatsen. • Gebruik uitsluitend de meegeleverde opladers en voedingsadapters. Geen andere opladers of voedingsadapters gebruiken om schade aan het apparaat en de batterijen te voorkomen. •...
  • Seite 229: In Gebruik Nemen

    2. In gebruik nemen Voeding voor Babytoestel Stekker van voedingsadapter Zet de camera op de stand AAN 1. Sluit de kleine stekker van de voedingsadapter aan op het babytoestel (camera) en het andere uiteinde op een geschikt stopcontact. OPMERKING Gebruik alleen de meegeleverde adapter (5V DC/1500mA). 2.
  • Seite 230 2. De toets VOEDING AAN/UIT 1 seconden ingedrukt houden om het oudertoestel in te schakelen. 3. Als het babytoestel en oudertoestel zijn ingeschakeld, toont het oudertoestel een videobeeld opgenomen door het babytoestel. 4. Als de verbinding verbroken is of als u buiten bereik bent, wordt het videobeeld uitgeschakeld en het toestel laat elke 5 seconden een geluidstoon horen.
  • Seite 231: Aanmelden (Koppelen)

    Aanmelden (Koppelen) De Baby monitor is al aangemeld bij uw oudertoestel. Het is niet nodig opnieuw aan te melden tenzij het babytoestel de verbinding met het oudertoestel verliest. Ga als volgt te werd om uw babytoestel opnieuw aan te melden of een nieuw babytoestel aan te melden: 1.
  • Seite 232: Gebruik Van De Baby Monitor

    3. Gebruik van de Baby Monitor Instellen • Plaats het babytoestel op een toegankelijk plaatst (b.v. op een tafel) en richt de lens van de camera op de ruimte die u wilt monitoren. • De richting van het babytoestel aanpassen door de camera naar boven, beneden, links of rechts te verstellen totdat u het gewenst beeld ziet op het oudertoestel.
  • Seite 233: Video Aan/Uit

    Video AAN/UIT Druk op de VIDEO AAN/UIT toets om het LCD-scherm aan of uit te schakelen en de audiomonitor aan te laten. Temperatuur display (HH °C / °F of LL °C / °F) De temperatuurmeting van de temperatuursensor aan de achterkant van het babytoestel verschijnt bovenin het LCD-scherm.
  • Seite 234: Menu-Opties Van Oudertoestel

    4. Menu-opties van oudertoestel Volume 1. Druk op de Volume-toets - of + om het volume in te stellen. Het pictogram verschijnt en u kunt het gewenste volume instellen tussen 0~8. (De standaardinstelling voor volumeniveau is 4.) Helderheid 1. Druk op de toets om de menu-balk te openen.
  • Seite 235: Camera-Instelling

    Camera-instelling 4.6.1 Een camera toevoegen (koppelen) 1. Druk op de toets om de menu-balk te openen. < > 2. Druk op de LINKS-toets of RECHTS-toets totdat wordt del/ add/ view/ scan gemarkeerd. Het menu verschijnt. 3. Druk op de OMHOOG-toets of OMLAAG-toets en selecteer Druk op de toets om te bevestigen.
  • Seite 236: Een Camera Verwijderen

    4.6.3 Een camera verwijderen 1. Druk op de toets om de menu-balk te openen. < > 2. Druk op de LINKS-toets of RECHTS-toets totdat wordt del/ add/ view/ scan gemarkeerd. Het menu verschijnt. 3. Druk op de OMHOOG-toets of OMLAAG-toets en selecteer Druk op de toets om te bevestigen.
  • Seite 237: Video

    Video U kunt een video van uw baby opnemen met deze functie. De video's worden opgeslagen op de SD-geheugenkaart, dus zorg ervoor dat de geheugenkaart voldoende geheugenruimte heeft. 1. Druk op de toets om de menu-balk te openen. < > 2.
  • Seite 238: Weergave Via Wi-Fi ® Internet

    ® 5. Weergave via Wi-Fi Internet Minimale systeemvereisten Webportal ® • Windows ® • Mac OS 10.7 • Chrome™ 24 ® • Internet Explorer ® • Safari • Java™ 7 ® • Firefox 18.0 ® ® • Adobe Flash Player 15.0 ™...
  • Seite 239: Aan De Slag - Apparaten Aansluiten

    Aan de slag - Apparaten aansluiten Hoe werkt het? ® MBP854CONNECT Wi-Fi Router Camera Het beeld van uw Camera vanaf een compatibel apparaat extern weergeven Hubble Service Wanneer een gebruiker probeert toegang te krijgen tot de Camera, verifieert onze beveiligde server de identiteit van de gebruiker en geeft toegang tot de Camera.
  • Seite 240: Gebruikersaccount En Camera-Instelling Op Android™ Apparaten

    Wanneer u twee 'pieptonen' hoort, is de Camera klaar voor installatie. 5.3.2 Download de Hubble App • Ga naar de Google Play™ Store en zoek naar “Hubble for Motorola Monitors”. • Download de Hubble for Motorola Monitors toepassing van de Google Play™ Store en installeer het opuw Android™ apparaat.
  • Seite 241: Activeer De Hubble App Op Het Android™ Apparaat

    5.3.3 Activeer de Hubble App op het Android™ apparaat ® • Zorg ervoor dat uw Android™ apparaat is aangesloten op uw Wi-Fi router. • Activeer de Hubble App en voer uw Hubble App accountgegevens in. Lees de Gebruiksvoorwaarden en selecteer “I agree to the Terms of Use” voordat u op Create tikt.
  • Seite 242: Een Camera Aan Uw Account Toevoegen

    5.3.4 Een Camera aan uw account toevoegen • Een nieuwe account aanmaken en inloggen. • Tik op Add Camera. (Afbeelding A2) • Tik op Continue. (Afbeelding A3) • De installatie-instructies verschijnen op het scherm. (Afbeelding A4) Weergave via Wi-Fi® Internet...
  • Seite 243 • De KOPPELING toets aan de zijkant van de Camera 3 seconden ingedrukt houden. U hoort een pieptoon en een stem die zegt “Ready to Pairing” van de Camera. Tik op Search for Camera. • De App zoekt automatisch naar verbinding met uw Camera zoals getoond de onderstaande afbeeldingen (Afbeeldingen A5, A6) en de LED op de Camera knippert blauw/rood.
  • Seite 244 ® • Selecteer uw Wi-Fi Netwerk en tik op Continue. Uw wachtvoord invoeren en op Connect tikken. (Afbeeldingen A7, A8) ® • Het duurt een paar minuten voor de Camera verbinden maakt met het Wi-Fi netwerk voordat de verbindingsstatus wordt getoond (Afbeeldingen A9, A10). Als de aansluiting mislukt, op Retry drukken en de stappen in 5.3.4 herhalen.
  • Seite 245 • Tik op Watch Live Camera om de Camera videostream te bekijken. De blauwe LED van de Camera knippert. (Afbeelding A11) • Tik op het Hubble logo en ga terug naar de Camera-lijst. (Afbeelding A12) Weergave via Wi-Fi® Internet...
  • Seite 246: Gebruikersaccount En Camera-Instelling

    Wanneer u twee 'pieptonen' hoort, is de Camera klaar voor installatie. 5.4.2 Download de Hubble App • Ga naar de App Store en zoek naar de "Hubble for Motorola Monitors” app. • Download de Hubble for Motorola Monitors App en installeer deze op uw ®...
  • Seite 247: Activeer De Hubble App Op Uw Iphone ® /Ipad

    ® ® 5.4.3 Activeer de Hubble App op uw iPhone /iPad ® ® ® • Zorg ervoor dat uw iPhone /iPad is aangesloten op uw Wi-Fi Router. • Activeer de Hubble App en voer uw Hubble App accountgegevens in. Lees de Gebruiksvoorwaarden en selecteer “I agree to the Terms of Use”...
  • Seite 248: Een Camera Aan Uw Account Toevoegen

    5.4.4 Een Camera aan uw account toevoegen • Een nieuwe account aanmaken en inloggen. • Tik op Add Camera. (Afbeelding i2) • Tik op “MBP85CONNECT”. (Afbeelding i3) FOCUS85 / Blink83 / Scout83 / SCOUT66 / MBP36HD MBP854 ® • De aanwijzingen op het scherm volgen om de Bluetooth -functie op uw ®...
  • Seite 249 /iPad te openen. • Druk op de HOME-toets om het Instellingen-menu te verlaten en tik op "Hubble for Motorola Monitors" applicatie op het opstartscherm te openen. • Tik op Continue en volg de onderstaande aanwijzingen. Weergave via Wi-Fi® Internet...
  • Seite 250 • Volg de bovenstaande stappen om de camera te zoeken met identificatienummer “CameraHD-xxxxxxxxxx”, en tik een keer op Continue. ® ® Zorg ervoor dat uw iPhone of iPad verbinding heeft met de camera. (Afbeelding i8) ® • Selecteer uw Wi-Fi Network tap en tik op Continue.
  • Seite 251 ® • Het duurt een paar minuten voor de Camera verbinden maakt met het Wi-Fi netwerk voordat de verbindingsstatus wordt getoond (Afbeeldingen i11, i12). Als de aansluiting mislukt, op Retry drukken en de bovenstaande stap 5.4.4 herhalen. • Tik op Watch Live Camera om het beeld van de Camera te bekijken. (Afbeelding i13) Weergave via Wi-Fi®...
  • Seite 252: Camera-Functies: Gebruik Met Android™ Apparaten

    • Tik op het Hubble logo en ga terug naar de Camera-lijst. (Afbeelding i14) Camera-functies: Gebruik met Android™ apparaten 5.5.1 De Camera op voeding aansluiten • De kleine stekker van de voedingsadapter aansluiten op de voedingsaansluiting van de voedingsadapter en de stekker van de voedingsadapter aansluiten op een geschikt stopcontact.
  • Seite 253 • Zodra de Camera is toegevoegd, zal het camerabeeld automatisch worden getoond. Weergave via Wi-Fi® Internet...
  • Seite 254: Een Camera Verwijderen

    5.5.3 Een Camera verwijderen Verwijder een Camera van uw account door onderstaande stappen uit te voeren: • Tik op het Instellingen-pictogram op de General-pagina, en tik dan op Camera Details. (Afbeelding A15) • Selecteer Remove Camera en tik op Yes om het toestel van de Cameralijst te verwijderen.
  • Seite 255: Uw Accountgegevens Veranderen

    5.5.4 Uw Accountgegevens veranderen U kunt uw accountgegevens veranderen met behulp van uw Android™ apparaat. • Tik op Account op de General-pagina. De Account-instellingen verschijnen op het scherm. (Afbeelding A17) • Tik op Change Password om uw wachtwoord te veranderen door de aanwijzingen te volgen.
  • Seite 256: Camera-Instellingen

    5.5.5 Camera-instellingen U kunt de Camera-instellingen veranderen door op het Settings-pictogram op de Camera-lijst/pagina te tikken. (Afbeelding A18) • Tik op Camera Details voor de Camera Name, Change Image, Firmware version, Model ID en Remove Camera. (Afbeelding A19) • Tik op Notification Sensitivity om de gevoeligheid van geluid & bewegingmotie in te stellen, en voor het instellen van Alarm voor Hoge/Lage temperatuur.
  • Seite 257: Algemene Instellingen

    5.5.6 Algemene instellingen • Tik op Settings op de General-pagina. • Tik op de General Settings om de aanduiding van de Clock(12uur/24uur) & de (°C / °F) te selecteren en om Notification SoundVibration te activeren. (Afbeelding A21) • Tik op Do Not Disturb, zet de timer op de gewenste tijd en selecteer ON. De Camera stuurt geen geluid of alarm naar uw Android™...
  • Seite 258: Functies Van De Hubble Applicatie

    5.5.7 Functies van de Hubble Applicatie Tik op het weergaveveld. De functiepictogrammen verschijnen zoals hieronder getoond. Two Way Communication – Tik op om de functie te activeren. Druk op de ronde toets om een keer door de Camera te spreken. De toets opnieuw indrukken uit om te luisteren naar de audiofeedback van de Camera.
  • Seite 259 Zwenk- en kantel-functie: Tik op de omhoog/omlaag-toetsen om te kantelen, en op de links/rechts- toetsen om te zwenken. (Afbeeldingen A25, A26) Weergave via Wi-Fi® Internet...
  • Seite 260 Foto/Video - Neem een foto of maak een video-opname met uw Camera. Tik op het Video-pictogram om de videofunctie te activeren en druk op de rode toets om het opnemen te starten en te stoppen. (Afbeeldingen A27, A28) Tik op het Camera-pictogram om naar de Camera-modus te schakelen.
  • Seite 261 Opmerking: Foto's en video's worden opgeslagen in het interne flashgeheugen uw Android™ apparaat. Ze kunnen bekeken worden via de Gallery of de Media Player. Ga voor het afspelen van video's naar de Hubble App of gebruik een 3rd party applicatie zoals de MX player (te vinden in de Google Play™ Store), die in staat is MJPG (Motionjpeg) bestanden weer te geven.
  • Seite 262: Camera-Functies: ® ® Gebruik Met Iphone /Ipad

    Camera-functies: ® ® Gebruik met iPhone /iPad ® ® • Activeer de Hubble App op uw iPhone /iPad • Het camerabeeld verschijnt op het scherm. 5.6.1 Meer Camera's toevoegen • Tik op het Hubble-logo en ga naar de pagina Add Camera om het camerabeeld te zien.
  • Seite 263: Een Camera Verwijderen

    5.6.2 Een Camera verwijderen U kunt een Camera van uw Account verwijderen door deze stappen te volgen: • Tik op het Settings-pictogram op de General-pagina, en tik op Camera Details. (Afbeelding i17) • Selecteer Remove Camera en tik op Yes om het toestel van de Cameralijst te verwijderen.
  • Seite 264: Uw Accountgegevens Veranderen

    5.6.3 Uw Accountgegevens veranderen ® ® U kunt uw account-gegeven veranderen met uw iPhone /iPad • Tik op Account op de General-pagina. De Account-instellingen verschijnen op het scherm. (Afbeelding i19) • Tik op Change Password om uw wachtwoord te veranderen door de aanwijzingen op te volgen.
  • Seite 265: Camera-Instellingen

    5.6.4 Camera-instellingen U kunt de instellingen van de camera wijzigen door op het Settings-pictogram op de General-pagina te tikken (Afbeelding i20). U kunt de Camera Name en Firmware version controleren (Afbeelding i21) en de naam van de Camera veranderen door op de bestaande naam te tikken en de instructies te volgen. •...
  • Seite 266: Algemene Instellingen

    5.6.5 Algemene instellingen • Tik op Settings op de General-pagina. (Afbeelding i23) • Tik op General Settings om het formaat van de Clock (12hr/24hr) & Temperature (°C / °F) te veranderen en om Notification Sound of Vibrationte activeren. (Afbeelding i24) •...
  • Seite 267: Hubble App Instellingen

    5.6.6 Hubble App instellingen ® ® • Tik op Settings op uw iPhone /iPad . Een lijst met applicaties verschijnt. Tik op de Hubble App en de instellingen worden op het scherm getoond. (Afbeelding i26) Weergave via Wi-Fi® Internet...
  • Seite 268: Functies Van De Hubble Applicatie

    5.6.7 Functies van de Hubble Applicatie Tik in de Camera-weergave op het scherm. De volgende functiepictogrammen verschijnen: Two Way Communication – Tik op om de functie te activeren. Druk op de ronde toets om een keer door de Camera te spreken. De toets opnieuw indrukken uit om te luisteren naar de audiofeedback van de Camera.
  • Seite 269 Zwenk- en kantel-functie: Tik op de omhoog/omlaag-toetsen om te kantelen, en op de links/rechts- toetsen om te zwenken. (Afbeeldingen A29, A30) Weergave via Wi-Fi® Internet...
  • Seite 270 Take Picture - Tik op het Camera-pictogram om foto's in de cameramodus te maken. (Afbeelding i31) Opmerking: ® ® Foto's worden opgeslagen in het interne flashgeheugen van uw iPhone /iPad Weergave via Wi-Fi® Internet...
  • Seite 271 Melodie – Om een van de 5 beschikbare melodieën af te spelen, drukt u op Melody om het Melody menu te openen. Selecteer een van de gewenste melodieën voor weergave op uw Camera. (Afbeelding i32) Temperatuurmeting – De temperatuurmeting van de temperatuursensor ®...
  • Seite 272: Camera-Functies: Gebruik Met Een Pc/Notebook

    Camera-functies: Gebruik met een PC/Notebook • Ga naar https://app.hubbleconnected.com/#login • Voer uw gebruikersnaam en wachtwoord in en klik vervolgens op Login als u al een account hebt gemaakt. • Klik op de Camera-lijst gekoppeld in uw account via het Android™ apparaat ®...
  • Seite 273: Afvoeren Van Het Apparaat (Milieu)

    6. Afvoeren van het apparaat (Milieu) Geef het product aan het einde van de levensduur niet mee met het normale huisvuil. Lever het product in bij een inzamelplaats voor elektrische en elektrische apparatuur voor recycling. Het product, de gebruikershandleiding en/of de verpakking zijn voorzien van een recyclingsymbool.
  • Seite 274: Reinigen

    7. Reinigen Reinig de Baby Monitor met een licht bevochtigde doek of met een antistatisch doekje. Gebruik nooit reinigingsmiddelen of schurende middelen. Reinigen en onderhoud • Gebruik geen verdunner of andere oplosmiddelen of chemicaliën om het apparaat te reinigen - dit kan het product permanent beschadigen en is niet gedekt door de garantie.
  • Seite 275: Hulp

    8. Hulp Scherm Geen beeld • Prober de batterij op te laden of te vervangen. • Het toestel resetten. De batterij van het oudertoestel verwijderen en de stekker uit het stopcontact verwijderen. Vervolgens weer aansluiten. • Is het apparaat ingeschakeld? Druk op de AAN/UIT-toets op het oudertoestel om het toestel in te schakelen.
  • Seite 276 Interferentie Geluidsinterferentie op uw oudertoestel • Uw babytoestel en oudertoestel staan mogelijk te dicht bij elkaar. Zet ze verder uit elkaar. • Zorg voor minimaal 1 tot 2 meter tussen de 2 toestellen om audiofeedback te voorkomen. • Als het babytoestel te ver weg staat, kan het buiten bereikt zijn. Plaats het babytoestel dichter bij het oudertoestel.
  • Seite 277 Als u uw wachtwoord vergeet Als u uw wachtwoord vergeet, op "Forgot Password" en uw e-mailadres versturen. Een nieuw wachtwoord zal onmiddellijk naar uw e-mailadres worden verzonden. ® Problemen oplossen met Wi-Fi Internet weergave Categorie Probleem Oplossing Beschrijving / Storing Account Ik kan niet inloggen, Controleer uw gebruikersnaam en...
  • Seite 278 Problemen Ik krijg de melding: We 1. Probeer het over een paar minuten opnieuw. De oorzaak are having problems kan een probleem zijn met uw aansluiting accessing your internetverbinding. camera. Dit kan 2. Als het probleem aanhoudt, de veroorzaakt worden Camera opnieuw starten om te door problemen met controleren of dit het probleem...
  • Seite 279 Algemeen Welke browsers Wij adviseren gebruik van Google worden ondersteund Chrome™ 24 of hoger. Echter, de voor toegang vanaf onderstaande browsers worden ook ® ® mijn PC/Mac ondersteund: Internet Explorer ® of hoger (voor PC), Safari 6.0 of ® ® hoger (voor Mac ) of Firefox 18.0 of...
  • Seite 280 Instellen Tijdens het instellen De Camera resetten naar de van het apparaat voor instellingsmodus en opnieuw Android™ en iOS, kan proberen. De KOPPELING toets aan ik mijn Camera niet de onderkant van de Camera vinden tijdens de ingedrukt houden totdat u een laatste stap en het piepgeluid hoort.
  • Seite 281 Algemeen Welke platforms Minimale eisen: ® worden ondersteund Windows 7* voor toegang tot mijn *Java browser plug-in vereist Camera? Mac OS versie 10.7 Chrome™ versie 24 ® Internet Explorer versie 9 ® Safari versie 6 Java™ versie 7 ® Firefox versie 18.0 ®...
  • Seite 282 - Open de Google Play Store op uw Android™ en iOS Android™ apparaat apparaten - Selecteer Zoeken downloaden? - "Hubble for Motorola Monitors" invoeren - De resultaten worden getoond in de Hubble App - Selecteren om te installeren iOS apparaat:...
  • Seite 283 Problemen Ik ondervind storing De prestaties van videostreaming is veroorzaakt door mijn gerelateerd aan internetbandbreedte, aansluiting andere webcam- vooral als u 2 of meer videostreaming apparaten. apparaten gebruikt die via dezelfde router werken. Hulp...
  • Seite 284: Algemene Informatie

    Beperkte garantie voor consumentenproduct en accessoires ("Garantie") Dank u voor de aankoop van dit Motorola-product, dat onder licentie is vervaardigd door Binatone Electronics International LTD ("BINATONE"). Wat wordt gedekt door deze garantie? BINATONE garandeert onder voorbehoud van het navolgende dat dit product, verkocht onder de merknaam van Motorola ("Product"), of de gecertificeerde...
  • Seite 285 VAN DE CONSUMENT, EN WORDT VERLEEND EN IN PLAATS VAN ALLE ANDERE GARANTIES, EXPLICIET OF IMPLICIET. IN GEEN GEVAL IS MOTOROLA OF BINATONE AANSPRAKELIJK OP BASIS VAN ONRECHTMATIGE DAAD OF ANDERSZINS (INCLUSIEF NALATIGHEID) VOOR SCHADE BOVEN DE AANKOOPPRIJS VAN HET PRODUCT OF...
  • Seite 286 MOTOROLA of BINATONE, vallen niet onder de dekking. Gebruik van niet-Motorola producten en accessoires. Defecten of schade als gevolg van gebruik van producten of accessoires of andere randapparatuur die niet van het merk Motorola of door Motorola zijn gecertificeerd, vallen niet onder dekking. Algemene informatie...
  • Seite 287 Niet-geautoriseerde service of wijziging. Defecten of schade als gevolg van service, testen, aanpassing, installatie, onderhoud, wijziging of wijziging op enigerlei wijze door iemand anders dan MOTOROLA, BINATONE of zijn erkende service centers, zijn uitgesloten van dekking. Gemodificeerde producten. Producten of accessoires met (a) serienummers...
  • Seite 288 Algemene informatie...
  • Seite 289: Technische Gegevens

    Technische gegevens Babytoestel Frequentie 2.4 GHz tot 2.48 GHz Beeldsensor colour CMOS 1M Pixels Lens f 2.5mm, F 2.8 IR LED 8 stuks Voedingsadapter Ten Pao International Ltd. S009GV0500150 Input: 100-240V AC, 50/60Hz, 300mA; Output: 5.0V DC, 1500mA WAARSCHUWING Gebruik uitsluitend de meegeleverde voedingsadapter. Algemene informatie...
  • Seite 290 S009GV0500150 Input: 100-240V AC, 50/60Hz, 300mA; Output: 5.0V DC, 1500mA WAARSCHUWING Gebruik uitsluitend de meegeleverde voedingsadapter. Batterij Motorola BF6X 3.7V, 1880mAh Lithium-Ion Polymeer oplaadbare batterij WAARSCHUWING Gebruik uitsluitend oplaadbare batterijen voor het oudertoestel. Explosiegevaar als de batterij worden vervangen door een verkeerd type batterij. Oude batterijen volgens de plaatselijke voorschriften inleveren.
  • Seite 291 Mozilla Foundation. Adobe en Flash zijn handelsmerken of geregistreerde handelsmerken van Adobe Systems Incorporated. Java is een geregistreerd handelsmerk van Oracle en/of haar gelieerde ondernemingen. Alle andere handelsmerken zijn het eigendom van hun respectieve eigenaars. © 2015 Motorola Mobility LLC. Alle rechten voorbehouden. NL_EU Version 3.0...
  • Seite 292 Manual de usuario ® Monitor de vídeo digital para bebés con Wi-Fi Internet Viewing Modelos: MBP854CONNECT, MBP854CONNECT-2, MBP854CONNECT-3, MBP854CONNECT-4 Las funciones descritas en este manual de usuario están sujetas a modificaciones sin previo aviso.
  • Seite 293 Conserve el comprobante de compra original (con fecha). Para poder disfrutar de la garantía de su producto Motorola tendrá que facilitar una copia de su comprobante de compra (con fecha) para confirmar el estado de la garantía. Para disfrutar de la garantía no es necesario registrarse.
  • Seite 294 Descripción general de la unidad para padres RESET Pantalla (LCD) El LED del adaptador de corriente/ Tecla Vídeo ACTIVADO/ batería cambia a color AZUL cuando DESACTIVADO se conecta a una toma de corriente Pulsar para encender y apagar la eléctrica. pantalla LCD.
  • Seite 295 Iconos del menú de la unidad para padres Nivel de señal (4 niveles) Modo de visión nocturna (la pantalla cambia a blanco y negro) Modo Hablar Control de nivel de batería (4 niveles) Mover a la izquierda Mover a la derecha Inclinar hacia arriba Inclinar hacia abajo Control del nivel de zoom (1X, 2X)
  • Seite 296 Descripción general de la unidad interior para mascotas 5V 1.5A 1. Sensor de luz (para la detección del 6. Botón PAIR modo nocturno) 7. Altavoz 2. Lente de la cámara 8. Antena 3. LED de infrarrojos (para visión 9. Toma micro USB nocturna) 10.
  • Seite 297 Índice 1. Instrucciones de seguridad............... 8 2. Primeros pasos ..................11 Fuente de alimentación de la unidad para bebés........11 Fuente de alimentación de la unidad para padres ........11 Registro (emparejamiento) ..............13 3. Utilización del vigilabebés ..............14 Colocación....................
  • Seite 298 Cuenta de usuario y configuración de la cámara: ® ® Funcionamiento con dispositivos iPhone /iPad ........28 5.4.1 Encendido y conexión de la cámara ........28 5.4.2 Descarga de la aplicación Hubble ..........28 ® ® 5.4.3 Ejecute la aplicación Hubble en su iPhone /iPad ....29 5.4.4...
  • Seite 299: Instrucciones De Seguridad

    1. Instrucciones de seguridad ADVERTENCIA: Riesgo de estrangulamiento: Los niños se han ESTRANGULADO con los cables. Mantenga este cable fuera del alcance de los niños (a más de 1 m (3 pies) de distancia). No utilice nunca alargaderas con los adaptadores de corriente de CA. Utilice únicamente los adaptadores de corriente de CA proporcionados.
  • Seite 300 CONFIGURACIÓN Y USO DE LA unidad para bebés: ● Coloque la unidad para bebés en la ubicación que proporcione la mejor vista posible de su bebé en su cuna. ● Coloque la unidad para bebés en una superficie plana, como por ejemplo un vestidor, un armario o una estantería, o monte la unidad en una pared de forma segura utilizando las ranuras situadas bajo el soporte.
  • Seite 301 • No utilice nunca alargaderas con los adaptadores de corriente. Utilice únicamente los adaptadores de corriente proporcionados. • Pruebe este vigila mascotas y todas sus funciones, para familiarizarse con él antes de utilizarlo. • No utilice el vigilabebés cerca del agua. •...
  • Seite 302: Primeros Pasos

    2. Primeros pasos Fuente de alimentación de la unidad para bebés Enchufe del adaptador de corriente Encienda la cámara 1. Conecte la clavija pequeña del adaptador de corriente a la unidad para bebés (cámara), y el otro extremo a una toma de corriente eléctrica adecuada.
  • Seite 303 1. Conecte la clavija pequeña del adaptador de corriente a la unidad para padres, y el otro extremo a una toma de corriente eléctrica adecuada. Utilice únicamente el adaptador de corriente que se incluye (5V CC/ 1500 mA) con conector micro USB. 2.
  • Seite 304: Registro (Emparejamiento)

    Registro (emparejamiento) El vigilabebés se entrega previamente registrado con la unidad para padres. No es necesario volver a registrarla, a menos que la unidad para bebés pierda el enlace con la unidad para padres. Para volver a registrar la unidad para bebés, o para registrar una nueva unidad para bebés, siga el procedimiento descrito a continuación: 1.
  • Seite 305: Utilización Del Vigilabebés

    3. Utilización del vigilabebés Colocación • Coloque la unidad para bebés en un lugar cómodo (por ejemplo, en una mesa), y apunte el objetivo de la cámara hacia el área que desea supervisar. • Ajuste el ángulo de la unidad para bebés girando la cámara hacia arriba, abajo, izquierda y derecha, hasta que esté...
  • Seite 306: Vídeo Activado/Desactivado

    Vídeo ACTIVADO/DESACTIVADO Pulse la tecla VÍDEO ACTIVADO/DESACTIVADO para encender o apagar la pantalla LCD pero dejar activado el control por audio. Lectura de temperatura (HH °C/°F o LL °C/°F) La lectura de temperatura proporcionada por el sensor de temperatura situado en la parte trasera de la unidad para bebés se mostrará...
  • Seite 307: Opciones De Menú De La Unidad Para Padres

    4. Opciones de menú de la unidad para padres Volumen Pulse el botón de volumen - o + para ajustar el nivel de volumen, aparecerá el icono emergente y podrá seleccionar el nivel de volumen deseado del nivel 0 al 8. (el ajuste de nivel de volumen predeterminado es el nivel 4). Brillo 1.
  • Seite 308: Alarma

    Alarma 1. Pulse el botón y aparecerá la barra de menús. < > 2. Pulse el botón IZQUIERDA o el botón DERECHA hasta que se resalte 3. Pulse el botón ARRIBA o el botón ABAJO para seleccionar el tiempo de alarma ( ).
  • Seite 309: Eliminar Una Cámara

    4. Aparecerá la opción emergente Cámara , pulse el botón ARRIBA o el botón ABAJO para seleccionar la cámara que desee, y pulse el botón para empezar a buscar una unidad de cámara. SUGERENCIA Método rápido para ver cámaras en lugar de tener que acceder a la barra de menús.
  • Seite 310: Temperatura

    Temperatura 1. Pulse el botón y aparecerá la barra de menús. < > 2. Pulse el botón IZQUIERDA o el botón DERECHA hasta que se resalte 3. Pulse el botón ARRIBA o el botón ABAJO para seleccionar °C o °F. Modo de ahorro energético 1.
  • Seite 311: Visualización A Través De Internet Wi-Fi

    5. Visualización a través de Internet Wi-Fi Requisitos mínimos del sistema Portal web ® • Windows ® • Mac OS 10.7 • Chrome™ 24 ® • Internet Explorer ® • Safari • Java™ 7 ® • Firefox 18.0 ® ® •...
  • Seite 312: Primeros Pasos: Conexión De Los Dispositivos

    Primeros pasos: conexión de los dispositivos ¿Cómo funciona? ® Router Wi-Fi MBP854CONNECT Cámara Vea la cámara de forma remota desde cualquier dispositivo compatible Hubble Service Cuando un usuario intenta acceder a la cámara, nuestro servidor seguro autentica la identidad del usuario y le permite acceder a la cámara.
  • Seite 313: Cuenta De Usuario Y Configuración De La Cámara En Dispositivos Android

    5.3.2 Descarga de la aplicación Hubble • Diríjase a Google Play™ para buscar la aplicación “Hubble for Motorola Monitors”. • Descargue la aplicación Hubble for Motorola Monitors de Google Play™ e instálela en su dispositivo Android™.
  • Seite 314: Ejecute La Aplicación Hubble En Su Dispositivo Android

    5.3.3 Ejecute la aplicación Hubble en su dispositivo Android™ ® • Asegúrese de que el dispositivo Android™ esté conectado a su router Wi-Fi • Ejecute la aplicación Hubble e introduzca la información de su cuenta de Hubble, lea los Términos del servicio y seleccione “Acepto los términos de uso” para después Create.
  • Seite 315: Añada La Cámara A Su Cuenta

    5.3.4 Añada la cámara a su cuenta • Cree una cuenta nueva e inicie sesión. • Pulse Add Camera. (Ilustración A2) • Pulse Continue. (Ilustración A3) • Aparecerán las instrucciones de configuración en la siguiente pantalla. (Ilustración A4) Visualización a través de Internet Wi-Fi...
  • Seite 316 • Mantenga pulsado el botón PAIR durante tres segundos en el lateral de la cámara, escuchará un aviso acústico y la voz "Ready for pairing" procedente de la unidad de cámara. Pulse Search for Camera. • La aplicación buscará y conectará la cámara automáticamente, como se muestra en las siguientes ilustraciones (Ilustraciones A5, A6) y el LED de la cámara parpadeará...
  • Seite 317 ® • Seleccione su red Wi-Fi y pulse Continue, introduzca la contraseña y pulse Connect. (Ilustraciones A7, A8) ® • La cámara tardará unos minutos en conectarse a la red Wi-Fi antes de mostrar el estado de conexión (Ilustraciones A9, A10). Si la conexión falla, pulse el botón Retry y repita los pasos a partir del paso 5.3.4.
  • Seite 318 • Pulse Watch Live Camera para ver el vídeo de la cámara, el LED azul de la cámara parpadeará. (Ilustración A11) • Pulse el logotipo de Hubble y vuelva a la lista de cámaras (Ilustración A12) Visualización a través de Internet Wi-Fi...
  • Seite 319: Cuenta De Usuario Y Configuración De La Cámara: Funcionamiento Con Dispositivos Iphone ® /Ipad

    Cuando escuche dos tonos, la cámara está lista para el proceso de configuración. 5.4.2 Descarga de la aplicación Hubble • Diríjase a la App Store para buscar “Hubble for Motorola Monitors”. • Descargue la aplicación Hubble for Motorola Monitors e instálela en su ® ®...
  • Seite 320: Ejecute La Aplicación Hubble En Su Iphone ® /Ipad

    ® ® 5.4.3 Ejecute la aplicación Hubble en su iPhone /iPad ® ® ® • Asegúrese de que su iPhone /iPad esté conectado a su router Wi-Fi • Ejecute la aplicación Hubble e introduzca a información de su cuenta de Hubble, lea los Términos del servicio y seleccione “Acepto los términos de uso”...
  • Seite 321: Añada La Cámara A Su Cuenta

    5.4.4 Añada la cámara a su cuenta • Cree una cuenta nueva e inicie sesión. • Pulse Add Camera. (Ilustración i2) • Pulse “MBP854CONNECT” (Ilustración i3) FOCUS85/ Blink83/Scout83/ SCOUT66/ MBP36HD MBP854 • Siga las instrucciones que aparecerán en la pantalla para activar la función ®...
  • Seite 322 /iPad • Pulse el botón Inicio para salir del menú Ajustes, y pulse la aplicación “Hubble for Motorola Monitors” para acceder a la pantalla de inicio. • Pulse Continue y siga las instrucciones indicadas a continuación. Visualización a través de Internet Wi-Fi...
  • Seite 323 • Siga los pasos anteriores para localizar la cámara que tiene el número de identificación “CameraHD-xxxxxxxxxx”, luego pulse Continue una vez, ® ® asegúrese de que su iPhone o iPad se haya conectado a la cámara. (Ilustración i8) ® • Seleccione su red Wi-Fi y pulse Continue, introduzca la contraseña y pulse Next.
  • Seite 324 ® • La cámara tardará unos minutos en conectarse a la red Wi-Fi antes de mostrar el estado de conexión (Ilustraciones i11, i12). Si la conexión falla, pulse el botón Retry y repita el paso 5.4.4 como se indica anteriormente. •...
  • Seite 325: Funciones De La Cámara: Funcionamiento Con Dispositivos Android

    Funciones de la cámara: Funcionamiento con dispositivos Android™ 5.5.1 Conexión de la cámara a la alimentación • Inserte el extremo pequeño del adaptador de corriente al conector del adaptador de corriente, y enchufe el adaptador de corriente en una toma eléctrica apropiada.
  • Seite 326: Eliminar Una Cámara

    5.5.3 Eliminar una cámara Puede eliminar una cámara de su cuenta siguiendo los pasos indicados a continuación: • Pulse el icono Settings de la página General, luego pulse Camera Detail. (Ilustración A15) • Seleccione Remove Camera y pulse Yes para eliminar la unidad de la lista de cámaras.
  • Seite 327: Modificación De La Información De La Cuenta

    5.5.4 Modificación de la información de la cuenta Puede cambiar la información de la cuenta desde un dispositivo Android™. • Pulse Account en la página General y aparecerá la pantalla Account Settings. (Ilustración A17) • Pulse Change Password para cambiar su contraseña siguiendo las instrucciones.
  • Seite 328: Ajustes De La Cámara

    5.5.5 Ajustes de la cámara Puede modificar los ajustes de la cámara pulsando el icono Settings en la pantalla/página de la lista de cámaras. (Ilustración A18) • Pulse Camera Details para revisar las opciones Camera Name, Change Image, Firmware version, Model ID y Remove Camera. (Ilustración A19) Visualización a través de Internet Wi-Fi...
  • Seite 329 • Pulse Notification Sensitivity para definir la sensibilidad de la detección del sonido y el movimiento, y defina la alerta de temperatura alta o baja. (Ilustración A20) Visualización a través de Internet Wi-Fi...
  • Seite 330: Configuración General

    5.5.6 Configuración general • Pulse Settings en la página General. • Pulse General Settings para cambiar el formato de las opciones Clock (12hr/24hr) y Temperature (°C/°F) y para activar Notification Sound o Vibration. (Ilustración A21) • Pulse Do Not Disturb, ajuste el temporizador al tiempo que desee y seleccione ON;...
  • Seite 331: Funciones De La Aplicación Hubble

    5.5.7 Funciones de la aplicación Hubble Pulse el área de visualización y aparecerán los siguientes iconos de función. Comunicación bidireccional: pulse para activar esta función. Pulse el botón redondo una vez para hablar a través de la cámara. Pulse el botón de audio para escuchar la respuesta de audio procedente de la cámara (Ilustraciones A23, A24) Visualización a través de Internet Wi-Fi...
  • Seite 332 Función de desplazamiento e inclinación: Pulse los botones arriba y abajo para inclinar la cámara, y los botones izquierda y derecha para desplazarla. (Ilustraciones A25, A26) Visualización a través de Internet Wi-Fi...
  • Seite 333 Photo/Video: haga una foto o grabe un vídeo desde su cámara. Pulse el icono Video para activar la función de vídeo, y pulse el el botón rojo para iniciar y detener la grabación. (Ilustraciones A27, A28) Pulse el icono Camera para cambiar al modo Camera.
  • Seite 334 Nota: Las fotos y los vídeos se almacenarán en la memoria flash interna de su dispositivo Android™, y podrá acceder a ellos desde la Galería o el Reproductor multimedia. Para reproducir vídeos, use la aplicación Hubble o una aplicación de un tercero, como MX player (desde Google Play™), capaz de reproducir archivos MJPG (Motionjpeg).
  • Seite 335: Funciones De La Cámara: Funcionamiento Con Dispositivos Iphone ® /Ipad

    • La imagen de la cámara aparecerá en la pantalla. 5.6.1 Añadir más cámaras • En la imagen de la cámara, pulse el logotipo de Motorola para ir a la página Add Camera. (Ilustración i15) • Pulse Add Camera para añadir otra cámara (siga los pasos para la ®...
  • Seite 336: Eliminar Una Cámara

    5.6.2 Eliminar una cámara Puede eliminar una cámara de su cuenta siguiendo los pasos indicados a continuación: • Pulse el icono Settings de la página General, luego pulse Camera Detail. (Ilustración i17) • Seleccione Remove Camera y pulse Yes para eliminar la unidad de la lista de cámaras (Ilustración i18) Visualización a través de Internet Wi-Fi...
  • Seite 337: Modificación De La Información De La Cuenta

    5.6.3 Modificación de la información de la cuenta ® ® Puede modificar la información de la cuenta desde su iPhone /iPad • Pulse Account en la página General aparecerá en la pantalla la configuración de la cuenta. (Ilustración i19) • Pulse Change Password para cambiar su contraseña siguiendo las instrucciones.
  • Seite 338: Ajustes De La Cámara

    5.6.4 Ajustes de la cámara Puede modificar los ajustes de la cámara pulsando el icono Settings en la página General (Ilustración i20). Puede revisar las opciones Camera Name y Firmware version (Ilustración i21) y cambiar el nombre de la cámara pulsando el nombre existente y siguiendo las instrucciones.
  • Seite 339: Ajustes Generales

    5.6.5 Ajustes generales • Pulse Settings en la página General. (Ilustración i23) • Pulse General Settings para cambiar el formato de las opciones Clock (12hr/ 24hr) y Temperature (°C/°F) y activar Notification Sound o Vibration. (Ilustración i24) • Pulse Do Not Disturb, ajuste el temporizador al tiempo que desee, y seleccione ON;...
  • Seite 340: Configuración De La Aplicación Hubble

    5.6.6 Configuración de la aplicación Hubble ® ® • Pulse Settings en su iPhone /iPad , y aparecerá una lista de aplicaciones, pulse la aplicación Hubble y los ajustes se mostrarán en la pantalla. (Ilustración i26) Visualización a través de Internet Wi-Fi...
  • Seite 341: Funciones De La Aplicación Hubble

    5.6.7 Funciones de la aplicación Hubble Mientras está en la vista Camera, pulse el área de visualización y aparecerán los siguientes iconos de función. Comunicación bidireccional: pulse para activar esta función. Pulse el botón redondo una vez para hablar a través de la cámara.
  • Seite 342 Función de desplazamiento e inclinación: Pulse los botones arriba y abajo para inclinar la cámara, y los botones izquierda y derecha para desplazarla. (Ilustraciones i29, i30) Visualización a través de Internet Wi-Fi...
  • Seite 343 Hacer una foto : pulse el icono de la cámara para capturar fotos desde la imagen de la cámara. (Ilustración i31) Nota: ® ® Las fotos se almacenarán en la memoria flash interna de su iPhone /iPad Visualización a través de Internet Wi-Fi...
  • Seite 344 Melody: si desea reproducir una de las cinco melodías preajustadas, pulse Melody para mostrar el menú Melody y seleccionar la que quiera reproducir en la cámara. (Ilustración i32) Temperature Display : la lectura de temperatura captada con el sensor de temperatura de la parte trasera de la cámara se mostrará...
  • Seite 345: Funciones De La Cámara: Funcionamiento Con Un Ordenador De Sobremesa/Portátil

    Funciones de la cámara: Funcionamiento con un ordenador de sobremesa/ portátil • Diríjase a https://app.hubbleconnected.com/#login • Introduzca su nombre de usuario y su contraseña y haga clic en Login, si ya ha creado una cuenta. • Haga clic en la lista de cámaras emparejadas con su cuenta desde un ®...
  • Seite 346: Eliminación Del Dispositivo (Información Medioambiental)

    6. Eliminación del dispositivo (información medioambiental) Al final del ciclo de vida del producto, no deberá eliminar este producto junto con los residuos domésticos convencionales. Trasládelo hasta un punto de recogida destinado al reciclaje de dispositivos eléctricos o electrónicos. El símbolo que aparece en el producto, en el manual de usuario y/o en la caja así...
  • Seite 347: Limpieza

    7. Limpieza Limpie el vigilabebés con un paño ligeramente humedecido o con un paño antiestático. No utilice nunca agentes de limpieza ni disolventes abrasivos. Limpieza y cuidados • No limpie ninguna de las piezas del producto con disolventes ni productos químicos, esto podría provocar daños permanentes al producto, y no cubiertos por la garantía.
  • Seite 348: Ayuda

    8. Ayuda Pantalla No aparece nada en la pantalla • Pruebe a recargar o sustituir el pack de baterías. • Restablezca las unidades. Desconecte la batería de la unidad para padres y desconecte la alimentación eléctrica de las unidades. A continuación, conéctela de nuevo.
  • Seite 349 Interferencias En la unidad para padres hay interferencias de ruido • La unidad para bebés y la unidad para padres podrían estar demasiado cerca. Aléjelas. • Asegúrese de que haya, como mínimo, entre 1 y 2 metros (entre 3 y 6 pies) entre las dos unidades, para evitar acoples.
  • Seite 350 Si olvida la contraseña Si no recuerda su contraseña, pulse Forgot password e introduzca su dirección de correo electrónico. Se enviará inmediatamente a su dirección de correo electrónico una contraseña nueva. ® Solución de problemas de visualización a través de Internet Wi-Fi Categoría Problema Solución...
  • Seite 351 Problemas de Me aparece el 1. Inténtelo en unos minutos. Esto podría deberse a algún tipo de conectividad mensaje: We are problema con su conexión a having problems Internet. accessing your 2. Si el problema persiste, reinicie la camera. This could be cámara para comprobar si se due to lack of internet resuelve.
  • Seite 352 General ¿Qué navegadores son Se recomienda usar Google Chrome™ compatibles para 24 o versiones superiores. Sin embargo, acceder desde mi PC/ también es posible usar los siguientes ® ® navegadores: Internet Explorer 9.0 o ® superior (para PC), Safari 6.0 o ®...
  • Seite 353 Configuración Durante la Active de nuevo el modo de configuración desde configuración e inténtelo de nuevo. un dispositivo Mantenga pulsado el botón PAIR Android™ o iOS, en el situado en la parte inferior de la último paso no puedo cámara, hasta que escuche un tono encontrar mi cámara y acústico.
  • Seite 354 General ¿Qué plataformas son Requisitos mínimos: ® compatibles para Windows 7* acceder a mi cámara? *Se necesita el complemento de navegador Java ® Mac OS versión 10.7 Chrome™ versión 24 ® Internet Explorer versión 9 ® Safari versión 6 Java™ versión 7 ®...
  • Seite 355 - Abra Google Play en su dispositivo dispositivos Android™ Android™ y iOS? - Seleccione Buscar - Escriba "Hubble for Motorola Monitors" - En los resultados se mostrará la aplicación Hubble - Selecciónela para instalarla Dispositivo iOS: - Abra la App Store - Seleccione Buscar - Escriba "Hubble for Motorola...
  • Seite 356 Problemas de Sufro interferencias El rendimiento de la transmisión de conectividad provocadas por mis vídeo está relacionado con el ancho otras webcam. de banda, especialmente si tiene dos o más dispositivos de transmisión funcionando a través del mismo router. Ayuda...
  • Seite 357: Información General

    Sujeto a las exclusiones presentes a continuación, BINATONE garantiza que este producto (el "Producto") o accesorio certificado (el "Accesorio") de marca Motorola vendido con este producto ha sido fabricado libre de fallos en materiales y en la mano de obra con un uso de consumo normal durante el periodo especificado a continuación.
  • Seite 358 CONSUMIDOR, Y SE PROPORCIONA EN LUGAR DEL RESTO DE GARANTÍAS, TANTO EXPRESAS COMO IMPLÍCITAS. BAJO NINGUNA CIRCUNSTANCIA MOTOROLA NI BINATONE SERÁN RESPONSABLES, NI POR CONTRATO NI POR AGRAVIO (INCLUIDA NEGLIGENCIA) DE DAÑOS SUPERIORES AL PRECIO DE COMPRA DEL PRODUCTO O ACCESORIO EN CUESTIÓN, NI DE NINGÚN DAÑO INDIRECTO, ACCIDENTAL, ESPECIAL O...
  • Seite 359 (d) otros actos que no puedan achacarse a MOTOROLA ni a BINATONE, están excluidos de la cobertura. Uso de Productos y Accesorios de marcas que no sean Motorola. Esta garantía no cubre aquellos defectos o daños derivados del uso de Productos, Accesorios o cualquier equipamiento periférico que no sean de la marca Motorola o no...
  • Seite 360 MOTOROLA, BINATONE o sus centros de servicio autorizados, están excluidos de la cobertura de la garantía. Productos modificados. Se excluyen de esta garantía todos los Productos o Accesorios con (a) números de serie o etiquetas de fecha alterados o borrados;...
  • Seite 361 Información general...
  • Seite 362: Especificaciones Técnicas

    Especificaciones técnicas Unidad para bebés Frecuencia 2,4 GHz a 2,48 GHz Sensor de imagen CMOS a color de 1 megapíxel Lente f 2.5mm, F 2,8 LED de infrarrojos 8 unidades Adaptador de corriente Ten Pao International Ltd. S009GV0500150 Entrada: 100-240 V de CA, 50/60 Hz, 300 mA; Salida: 5,0V CC, 1.500mA ADVERTENCIA Utilice el producto únicamente con la fuente de...
  • Seite 363 Salida: 5,0V CC, 1.500mA ADVERTENCIA Utilice el producto únicamente con la fuente de Batería Motorola BF6X Pack de batería recargable de polímeros de iones de litio, 3,7 V, 1880 mAh ADVERTENCIA No utilice baterías no recargables en la unidad para padres.
  • Seite 364 Fabricado, distribuido o comercializado por Binatone Electronics International LTD., licenciatario oficial de este producto. MOTOROLA y el logotipo de la M estilizada son marcas comerciales o marcas comerciales registradas de Motorola Trademark Holdings, LLC. y se usan con licencia. El logotipo de Apple y Safari son marcas comerciales de Apple Inc.

Inhaltsverzeichnis