Werbung
Quicklinks
Werbung

Verwandte Anleitungen für vogel's WALL 3250


Inhaltszusammenfassung für vogel's WALL 3250
- Seite 1 MARQUE: VOGEL’S REFERENCE: WALL 3450 CODIC: 4354605 NOTICE...
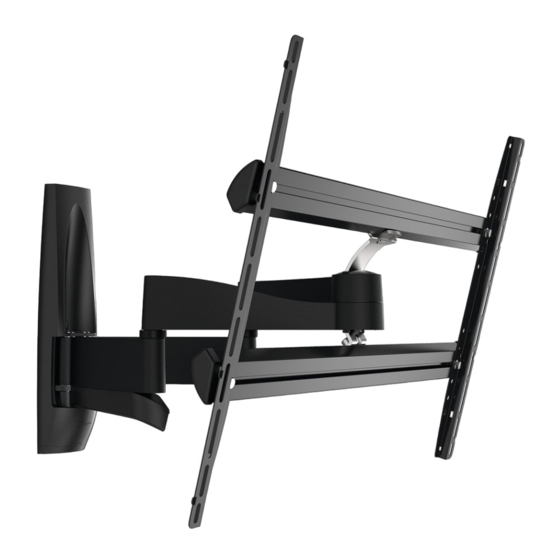
- Seite 2 WALL 3250 WALL 3350 WALL 3450...
- Seite 3 Important Before mounting the wall mount, first read the warnings at the back of the supplied parts list (separate card). DE - Wichtig Lesen Sie vor der Montage des Wandhalters zuerst die - Önemli Duvar montesini monte etmeden önce, (ayrı kart olarak) Warnhinweise auf der Rückseite der mitgelieferten Teileliste verilen parça listesinin arkasında bulunan uyarıları...
- Seite 4 1 Position the strips (D) on the screen. Make sure that the strips do not cover the connectors on the screen. DE - Positionieren Sie die Schienen (D) am Bildschirm. Achten Sie darauf, dass die CZE - Umístěte lišty (D) na obrazovku. Schienen die Anschlüsse am Bildschirm nicht bedecken.
- Seite 5 (Optional) (Optional) 2 Screw the strips (D) onto the screen. Refer to the user manual of your TV for the correct mounting material. DE - Schrauben Sie die Schienen (D) an den Bildschirm. Im Benutzerhandbuch Ihres RU - Прикрутите консольные планки (D) к экрану. Чтобы узнать, как правильно Fernsehers finden Sie Informationen zum richtigen Befestigungsmaterial.
- Seite 6 (Optional) (Optional) 2 Screw the strips (D) onto the screen. Refer to the user manual of your TV for the correct mounting material. JA - ストリップ (D) をスクリーンにネジ止めする。 テレビの正しい取付材料については、ユーザーマニュアルを参照してください。 ZH - 从您电视机的用户手册中找出正确的安装材料。...
- Seite 7 no 13 3.1 Loosen the bolts on the strips (D). 3.2 Remove the caps (Q). DE - Lösen Sie die Schrauben an den senkrechten Schienen (D). - Entfernen Sie die Kappen (Q). - Desserrez les boulons sur les barrettes (D). - Déposez les embouts (Q).
- Seite 8 3.3 Slide the bars (C) over the strips (D) . Make sure that the bars do not cover the connectors on the screen. DE - Schieben Sie die waagerechte Schienen (C) über die senkrechte Schienen (D). RU - Вставить рейки (C) в консольные планки (D) . Achten Sie darauf, dass die waagerechten Schienen die Anschlüsse am Bildschirm Убедитесь, что...
- Seite 9 ±3x no 13 4.1 Tighten the bolts. 4.2 Place the caps (Q) back onto the bars (C). DE - Ziehen Sie die Schrauben fest. DE - Bringen Sie die Kappen (Q) wieder an den waagerechte Schienen (C) an. - Serrez les boulons. - Remettez les embouts (Q) en place dans les barres (C).
- Seite 10 ø 5mm 20mm/0.8" ø 13/64" 80mm/3.2" ø 10mm 20mm/0.8" ø 25/64" Use the drilling template to drill the holes. - Verwenden Sie die Bohrschablone zum Bohren der Löcher. - Utilisez le gabarit de perçage pour forer les trous. - Gebruik de sjabloon om de gaten op de juiste plaats te boren. - Utilice la plantilla para perforar los agujeros.
- Seite 11 ø 5mm 50mm/2.0" ø 13/64" Use the drilling template to drill the holes. - Verwenden Sie die Bohrschablone zum Bohren der Löcher. - Utilisez le gabarit de perçage pour forer les trous. - Gebruik de sjabloon om de gaten op de juiste plaats te boren. - Utilice la plantilla para perforar los agujeros.
- Seite 12 no.13 no.13 6 Screw the wall mount (A) onto the wall. DE - Schrauben Sie den Wandhalter (A) an die Wand. - Vissez le support mural (A) sur le mur. NL - Schroef de wandsteun (A) op de muur. - Atornille el soporte de pared (A) a la pared. - Avvitare la piastra (A) alla parete.
- Seite 13 13 35kg MAX. WALL 3250 45kg MAX. WALL 3350 55kg MAX. WALL 3450 7.1 Place the screen onto the wall mount (A). 7.2 Tighten the bolts (L). DE - Stellen Sie den Bildschirm auf den Wandhalter (A). DE - Ziehen Sie die Schrauben (L) fest.
- Seite 14 8.1 Place the cable guide (S). 8.2 Guide the cables. 8.3 Place the cover (F). DE - Bringen Sie die Kabelführung S an. DE - Verlegen Sie die Kabel. DE - Bringen Sie die Abdeckung (F) an. - Installez le guide-câble S. - Guidez les câbles.
- Seite 15 9 Place the covers (B). DE - Bringen Sie die Abdeckungen (B) an. Mettez les capots (B) en place. Plaats de afdekplaten (B). - Coloque las cubiertas (B). - Montare i coperchi (B). - Coloque as tampas (B). - Τοποθετήστε τα καλύμματα (B). SV - Montera skydden (B).
- Seite 16 no. 4 • If the screen tilts downwards. Tighten the bolt with key X. DE - Wenn der Bildschirm sich nach unten neigt. Ziehen Sie die Schrauben mit Schlüssel X an. - Si l’écran penche vers le bas, Serrez le boulon avec la clé X. NL - Als het scherm naar beneden kantelt, draai dan de bout vast met sleutel X.
- Seite 17 no. 4 • If the tilt option is not used: tighten bolt Z to lock the tilt. Make sure to loosen the bolt when the tilt option is used agin. DE - Wenn die Neigeoption nicht verwendet wird: Ziehen Sie Schraube Z zum Verriegeln der Neigung fest. Achten Sie darauf, die Schraube zu lösen, wenn die Neigeoption wieder verwendet wird.
-
Seite 18: Garantiebedingungen
Guarantee terms and conditions 2 Um einen Anspruch auf Garantie geltend zu machen, • Isi le problème est la conséquence de facteurs Congratulations on the purchase of this Vogel’s product! muss das Produkt an Vogel’s eingesandt werden, wobei externes (extérieurs au produit) tels que foudre, The product you now have in your possession is made of der Original-Kaufbeleg (Rechnung, Kassenbon oder dégâts des eaux, incendie, éraflures, exposition à... - Seite 19 More from Vogel’s Loudspeaker solutions Cable solutions & multi AV supports Universal tablet mounts Sound bar solutions www.vogels.com...