Herunterladen Inhalt Inhalt Diese Seite drucken
Inhaltsverzeichnis

Werbung

Verfügbare Sprachen
  • DE

Verfügbare Sprachen

  • DEUTSCH, seite 31
Control up to four PS/2 computers
using one monitor, keyboard and mouse
Contrôlez jusqu'à quatre ordinateurs PS/2
en utilisant un écran, un clavier et une souris
Steuern Sie bis zu vier PS/2-Computer mit
einem Monitor, einer Tastatur und Maus
Beheer tot wel vier PS/2-computers met
slechts één monitor, toetsenbord en muis
Controla hasta cuatro ordenadores PS/2
utilizando un monitor, un teclado y un ratón
Per controllare fino a quattro computer PS/2 mediante
un singolo insieme di monitor, tastiera e mouse
User Manual
Manuel de l'utilisateur
Benutzerhandbuch
Handleiding
Manual del usuario
Manuale utente
11ea_F1DJ10x_man.indd 1
KVM Switch
En
Fr
De
Nl
Es
It
F1DJ102P-B
F1DJ104P-B
12/11/04 11:35:29

Werbung

Inhaltsverzeichnis
loading

Inhaltszusammenfassung für Belkin F1DJ102P-B

  • Seite 1 Per controllare fino a quattro computer PS/2 mediante un singolo insieme di monitor, tastiera e mouse User Manual Manuel de l’utilisateur Benutzerhandbuch Handleiding Manual del usuario F1DJ102P-B Manuale utente F1DJ104P-B 11ea_F1DJ10x_man.indd 1 12/11/04 11:35:29...
  • Seite 2 KVM Switch Control up to four PS/2 computers using one monitor, keyboard and mouse F1DJ102P-B User Manual F1DJ104P-B P74711ea_F1DJ10x_man.indd 2-3 12/11/04 11:35:35 am...
  • Seite 3: Inhaltsverzeichnis

    Feature Overview ........2 one console, Belkin KVM switches come in a variety of capacities suitable for all Equipment Requirements .
  • Seite 4: Overview

    OVERVIEW OVERVIEW Equipment Requirements The Belkin KVM Switch allows you to control multiple computers with one keyboard, monitor, and mouse. The Switch supports PS/2 input devices (keyboard and mouse), Cables VGA, SVGA, XGA, and PS/2 computers. For each PS/2 computer you plan to connect to the Switch, you will need one Feature Overview VGA cable, one PS/2 keyboard cable, and one PS/2 mouse cable.
  • Seite 5: Operating Systems

    • Microsoft® system-compatible PS/2 mice with 2, 3, 4, or 5 buttons Front-Panel Monitors Push Button • VGA • SVGA • MultiSync® Optional Power Supply An optional 9V, 600mA power supply is available. Visit belkin.com for ordering information. Computer 2 Ports P74711ea_F1DJ10x_man.indd 4-5 12/11/04 11:35:35 am...
  • Seite 6: Specifications

    OVERVIEW OVERVIEW Specifications Part No.: F1DJ102P, F1DJ104P Power: Optional 9V DC, 600mA adapter with center-pin positive polarity PCs Supported: F1DJ102P: 2 F1DJ104P: 4 Keyboard Emulation: PS/2 Front-Panel Push Button Mouse Emulation: PS/2 and Serial (with use of adapter) Monitors Supported: VGA, SVGA, MultiSync, and LCD (with use of adapter cable) Max.
  • Seite 7: Installation

    For this reason, your PS/2 computer should be placed data, and/or to the Switch. Belkin Corporation will not be responsible for damage within 25 feet of the KVM Switch.
  • Seite 8 INSTALLATION INSTALLATION 2. Take the video cable that is attached to your monitor and connect it to the Connecting the Computer: VGA OUT port located on the side of the Switch. 3. Using an OmniView KVM Cable kit, take the VGA cable and connect the male end of the cable to the VGA port on the first computer.
  • Seite 9 INSTALLATION INSTALLATION 4. Connect one end of the PS/2 keyboard KVM cable to the keyboard port on 5. Connect one end of the PS/2 mouse KVM cable to the mouse port on your the computer and the other end to the KEYBOARD 1 port on the side of computer and the other end to the MOUSE 1 port on the side of the Switch.
  • Seite 10: Using Your Switch

    USING YOUR SWITCH USING YOUR SWITCH Powering Up the Systems You can switch directly to any port by entering the Switch port number you wish to use. For example, if you press “SCROLL LOCK”, “SCROLL LOCK”, “2”, the Once all cables have been connected, power up your CPUs that are attached computer on port 2 will be selected.
  • Seite 11: Faqs

    PS/2 keyboard, PS/2 mouse, and monitor up to 500 feet away using standard CAT5 UTP cable. A: Yes, the Switch works with Sun computers when used with the Belkin Sun Adapter, part number F1D082. P74711ea_F1DJ10x_man.indd 16-17...
  • Seite 12: Troubleshooting

    Switch and computer, you will need to purchase cannot be drawn from the computer via the keyboard or through a USB port. the optional 9V DC, 600mA power adapter (Belkin part number F1D065-PWR for your appropriate country).
  • Seite 13 TROUBLESHOOTING TROUBLESHOOTING Keyboard • Deactivate power management schemes on the PC with which you are experiencing problems. Computer does not detect your keyboard and you get a keyboard error reported at boot up. • Try swapping the mouse with a different one. The mouse is not detected at boot up.
  • Seite 14: Information

    • Make sure that the keyboard and mouse cables are connected tightly between the Switch and the computer. We, Belkin Corporation, of 501 West Walnut Street, Compton, CA 90220, declare under our sole responsibility that the products: • Check that the keyboard and mouse cables are not crossed, i.e., make sure the connectors are plugged into the correct ports.
  • Seite 15 Belkin Corporation warrants this product against defects in materials and workmanship for its warranty period. If a defect is discovered, Belkin will, at its option, repair or replace the product at no charge provided it is returned during the warranty period, with transportation charges prepaid, to the authorized Belkin dealer from whom you purchased the product.
  • Seite 16 Fax: +31 (0) 20 654 7349 Fax: +33 (0) 1 39 46 62 89 Belkin Tech Support Europe: 00 800 223 55 460 © 2004 Belkin Corporation. All rights reserved. All trade names are registered trademarks of respective manufacturers listed. F1DJ102P-B Manuel de l’utilisateur F1DJ104P-B P74711ea_F1DJ10x_man.indd 2-3...
  • Seite 17 Contenu de l’emballage ........1 Notre gamme variée de solutions KVM en tête du marché vous montre comment Belkin s'engage à fournir des produits de grande qualité, résistants et à un prix Présentation compétitif.
  • Seite 18: Présentation

    PRÉSENTATION PRÉSENTATION Configuration requise Le Switch KVM de Belkin vous permet de contrôler de multiples ordinateurs à l'aide d'un seul clavier, moniteur et souris. Il prend en charge les périphériques de saisie Câbles PS/2 (clavier et souris) ainsi que les ordinateurs VGA, SVGA, XGA et PS/2.
  • Seite 19: Illustrations De L'unité

    PRÉSENTATION Illustrations de l'unité Port VGA de la Console Témoins lumineux de l’état du port Bouton de la face avant Ports de l'ordinateur 2 P74711ea_F1DJ10x_man.indd 4-5 12/11/04 11:35:52 am...
  • Seite 20: Spécifications

    PRÉSENTATION PRÉSENTATION Spécifications Référence : F1DJ102P, F1DJ104P Alimentation : Adaptateur de courant 9 VCC, 600 mA avec polarité positive sur la broche centrale (en option) PC pris en charge : F1DJ102P : 2 F1DJ104P : 4 Bouton de la Émulation du clavier : PS/2 face avant Émulation de la souris : PS/2 et Série (si utilisé...
  • Seite 21: Installation

    Remarque : Si votre ordinateur doit être éloigné de plus de 7,6 mètres du Switch 1. Branchez votre clavier et votre KVM, vous pouvez utiliser le câble d'extension CAT5 de Belkin (référence F1D084) pour souris PS/2 sur les ports CLAVIER et installer votre moniteur, votre clavier PS/2 et votre souris PS/2 jusqu'à...
  • Seite 22 INSTALLATION INSTALLATION 2. Saisissez le câble vidéo relié au moniteur et branchez-le sur le port vidéo Branchement de l’ordinateur : SORTIE VGA situé sur le côté de votre Switch. 3. À l’aide d’un kit de câbles KVM OmniView, saisissez le câble VGA et branchez l'extrémité...
  • Seite 23 INSTALLATION INSTALLATION 4. Branchez une extrémité du câble KVM PS/2 pour clavier sur le port clavier de 5. Branchez une extrémité du câble KVM PS/2 pour souris sur le port souris de l’ordinateur, et l’autre extrémité dans le port CLAVIER 1, situé sur le côté l’ordinateur, et l’autre extrémité...
  • Seite 24: Utilisation Du Switch

    UTILISATION DU SWITCH UTILISATION DU SWITCH Mise en route des systèmes quel port du Switch en entrant le numéro du port désiré. Par exemple, si vous appuyez sur [ARRÊT DÉFIL], [ARRÊT DÉFIL], [2], l'ordinateur situé sur le port 2 Une fois les câbles branchés, allumez toutes les unités centrales reliées au Switch est sélectionné.
  • Seite 25: Foire Aux Questions

    à niveau Flash et une option USB. obtenir réponse à vos questions concernant la compatibilité. Q : Quels sont les avantages à choisir un Switch KVM Belkin au lieu d’un Q : Comment le Switch KVM permet-il à l'utilisateur de changer de port ? produit venant d’un compétiteur ?
  • Seite 26: Dépannage

    Switch et l’ordinateur, vous ou via un port USB. devrez vous procurer le bloc d’alimentation 9 VCC, 600 mA (référence Belkin Q : Quelle est la durée de garantie du Switch KVM ? F1D065-PWR, selon votre pays).
  • Seite 27 DÉPANNAGE DÉPANNAGE Clavier • Désactivez les programmes de gestion de l'énergie sur le PC qui vous cause des problèmes. L'ordinateur ne détecte aucun clavier et j'obtiens une erreur de clavier au démarrage. • Vérifiez que le câble du clavier entre le Switch et l'ordinateur est correctement •...
  • Seite 28: Information

    FCC EN MATIÈRE DE COMPATIBILITÉ ÉLECTROMAGNÉTIQUE • Assurez-vous que les câbles du clavier et de la souris sont biens en place entre le Nous, Belkin Corporation, sis au 501 West Walnut Street , Compton CA, 90220, Switch et l'ordinateur. États-Unis, déclarons sous notre seule responsabilité que les produits : •...
  • Seite 29 Si l'appareil s'avère défectueux, Belkin le réparera ou le remplacera gratuitement, à sa convenance, à condition que le produit soit retourné, port payé, pendant la durée de la garantie, au dépositaire Belkin agréé auprès duquel le produit a été acheté. Une preuve d'achat peut être exigée.
  • Seite 30 Fax: +31 (0) 20 654 7349 Fax: +33 (0) 1 39 46 62 89 Assistance technique Belkin Europe: 00 800 223 55 460 © 2004 Belkin Corporation. Tous droits réservés. Toutes les raisons commerciales sont des marques déposées de leurs fabricants respectifs. F1DJ102P-B Benutzerhandbuch F1DJ104P-B P74711ea_F1DJ10x_man.indd 2-3...
  • Seite 31: Einführung

    Verwenden des Switches Wir freuen uns, dass Sie sich für den KVM-Switch von Belkin entschieden haben. Wir Hochfahren der Computer........14 AutoScan-Modus .
  • Seite 32: Übersicht

    ÜBERSICHT ÜBERSICHT Systemvoraussetzungen Mit dem KVM-Switch von Belkin können Sie mehrere Computer mit nur einer Tastatur, einem Bildschirm und einer Maus steuern. Der Switch unterstützt PS/2- Kabel Eingabegeräte (Tastatur und Maus), VGA-, SVGA-, XGA- und PS/2-Computer. Für den Anschluss an den Switch wird für jeden PS/2-Computer ein VGA-Kabel, ein Merkmale PS/2-Tastaturkabel und ein PS/2-Mauskabel benötigt.
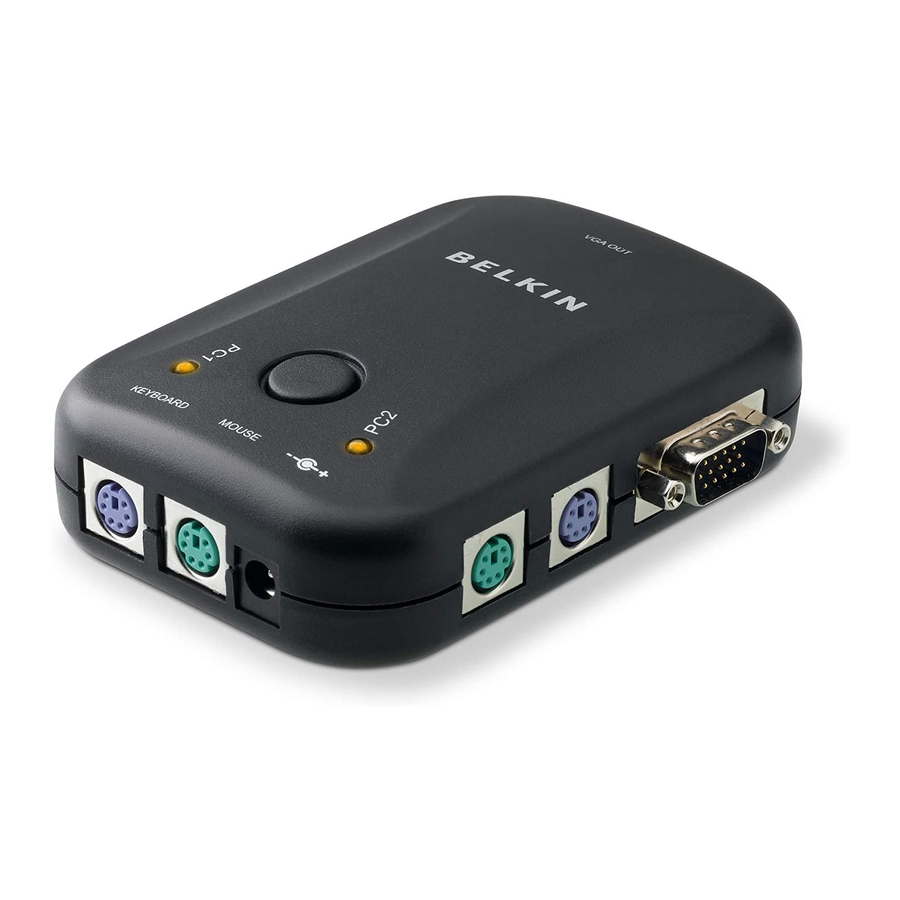
  • Seite 33: Bestandteile

    ÜBERSICHT Bestandteile Konsolen-VGA- Schnittstelle Anschluss- Statusanzeigen Vorderseiten- drucktaste Computer 2 Schnittstellen P74711ea_F1DJ10x_man.indd 4-5 12/11/04 11:36:08 am...
  • Seite 34: Technische Daten

    ÜBERSICHT ÜBERSICHT Technische Daten Artikelnr.: F1DJ102P, F1DJ104P Stromversorgung: Optionaler Adapter (9 V Gleichstrom, 600 mA), Mittenkontakt positiv Unterstützte PCs: F1DJ102P: 2 F1DJ104P: 4 Tastaturemulation: PS/2 Vorderseiten- drucktaste Mausemulation: PS/2 und seriell (unter Verwendung eines Adapters) Unterstützte Monitore: VGA, SVGA, MultiSync und LCD (unter Verwendung eines Adapterkabels) Max.
  • Seite 35: Installation

    Kabeln bei eingeschaltetem Computer kann zu irreparablen Schäden am Computer, verschlechtern. Aus diesem Grunde sollte Ihr PS/2-Computer innerhalb eines an Datenbeständen bzw. Switch führen. Die Belkin Corporation übernimmt keinerlei Abstands von 7,5 m von Ihrem KVM-Switch aufgestellt werden. Haftung für Schäden, die auf diese Weise verursacht werden.
  • Seite 36 INSTALLATION INSTALLATION 2. Schließen Sie das Bildschirmkabel Ihres Monitors an die Grafikschnittstelle Computeranschluss: VGA OUT an der Seite des Switches an. 3. Benutzen Sie ein OmniView KVM-Kabel. Schließen Sie den Stecker des VGA- Kabels an die VGA-Schnittstelle des ersten Computers an. Schließen Sie die Buchse an die VGA-1-Schnittstelle an der Seite des Switches an.
  • Seite 37 INSTALLATION INSTALLATION 4. Schließen Sie das PS/2-KVM-Tastaturkabel an die Tastaturschnittstelle 5. Schließen Sie das PS/2-KVM-Mauskabel an die Mausschnittstelle des Computers des Computers und an die KEYBOARD 1 Schnittstelle an der Seite und an die MOUSE 1 Schnittstelle an der Seite des Switches an. des Switches an.
  • Seite 38: Verwenden Des Switches

    VERWENDEN DES SWITCHES VERWENDEN DES SWITCHES Hochfahren der Computer Sie können direkt zu einer bestimmten Schnittstelle schalten, indem Sie die Nummer der Switch-Schnittstelle eingeben. Wenn Sie z.B. „Rollen-Taste“, „Rollen- Sobald alle Kabel angeschlossen sind, können Sie die an den Switch Taste“, „2“...
  • Seite 39: Fragen Und Antworten

    F: Kann ich den Switch mit meinem Sun Computer benutzen? Sie über ein standardmäßiges CAT5 UTP-Kabel PS/2-Tastatur, PS/2-Maus und Monitor in einem maximalen Abstand von 152,5 aufzustellen. A: Ja, der Switch ist kompatibel zu Sun-Computern, wenn ein Belkin Sun Adapter benutzt wird, Artikelnummer F1D082. P74711ea_F1DJ10x_man.indd 16-17...
  • Seite 40: Fehlerbehebung

    Tastatur- und Mausverbindung zwischen dem Switch und dem Computer besteht, ohne eine Tastatur oder eine Maus anzuschließen. In diesem Fall müssen sollten Sie ein Netzteil (9 V Gleichstrom, 600 mA) (Belkin Artikelnummer F1D065- Sie Tastatur und Maus direkt an den Computer anschließen, von dem die PWR entsprechend Ihres Landes) kaufen.
  • Seite 41 FEHLERBEHEBUNG FEHLERBEHEBUNG Tastatur • Es kann eine Minute dauern, bis die Maus wieder funktioniert, wenn der Computer im Standby-Modus gewesen ist. Der Computer erkennt die Tastatur nicht, und es wird beim Systemstart ein Tastaturfehler gemeldet. • Deaktivieren Sie Energiesparmodi des Computers, bei welchem Probleme auftreten. •...
  • Seite 42: Rechtliche Hinweise

    BESTIMMUNGEN ÜBER ELEKTROMAGNETISCHE KOMPATIBILITÄT Computer anschließe. Wir, Belkin Corporation, eine Gesellschaft mit Sitz in 501 West Walnut Street, • Stellen Sie sicher, dass Tastatur- und Mauskabel korrekt am Switch und am Compton, CA 90220, USA, erklären hiermit in alleiniger Verantwortung, dass Computer angeschlossen sind.
  • Seite 43 DIE VORSTEHENDEN GARANTIEBEDINGUNGEN UND RECHTSBEHELFE SCHLIESSEN ALLE ANDEREN GEWÄHRLEISTUNGEN UND RECHTSBEHELFE — OB MÜNDLICH ODER SCHRIFTLICH, AUSDRÜCKLICH ODER KONKLUDENT — AUS UND TRETEN AN DEREN STELLE. BELKIN ÜBERNIMMT INSBESONDERE KEINERLEI KONKLUDENTE GEWÄHRLEISTUNGEN, U.A. AUCH KEINE GEWÄHRLEISTUNG DER EIGNUNG FÜR EINEN BESTIMMTEN ZWECK ODER DER HANDELSÜBLICHEN QUALITÄT.
  • Seite 44 Fax: +31 (0) 20 654 7349 Fax: +33 (0) 1 39 46 62 89 Belkin Technischer Support Europa: 00 800 223 55 460 © 2004 Belkin Corporation. Alle Rechte vorbehalten. Alle Produktnamen sind eingetragene Warenzeichen der angegebenen Hersteller. F1DJ102P-B Handleiding F1DJ104P-B P74711ea_F1DJ10x_man.indd 2-3...
  • Seite 45: Inhoud Van De Verpakking

    Overzicht voor een aantrekkelijke prijs. Met de KVM-switches van Belkin kunt u meerdere Productkenmerken........2 computers en/of servers vanaf één console beheren.
  • Seite 46: Overzicht

    OVERZICHT OVERZICHT Vereisten Deze KVM-switch van Belkin maakt het u mogelijk meerdere computers te besturen met een toetsenbord, monitor en muis. De switch ondersteunt PS/2- Kabels invoerapparatuur (toetsenbord en muis), VGA, SVGA, XGA en PS/2-computers. Voor elke PS/2-computer die u wilt aansluiten op de switch hebt u één VGA-kabel, Productkenmerken één PS/2-toetsenbordkabel en één PS/2-muiskabel nodig.
  • Seite 47: Productafbeeldingen

    OVERZICHT Productafbeeldingen VGA-poort Console Poortstatus-LED’s Drukknop frontpaneel Poorten computer 2 P74711ea_F1DJ10x_man.indd 4-5 12/11/04 11:36:23 am...
  • Seite 48: Technische Gegevens

    OVERZICHT OVERZICHT Technische gegevens Artikelnr.: F1DJ102P, F1DJ104P Voeding: 9V DC, 600mA voedingsadapter met positieve polariteit middenpin (optioneel) Aantal ondersteunde pc’s: F1DJ102P: 2 F1DJ104P: 4 Toetsenbordemulatie: PS/2 Drukknop frontpaneel Muisemulatie: PS/2 en serieel (bij gebruik van adapter) Ondersteunde monitoren: VGA, SVGA, MultiSync en LCD (bij gebruik van adapterkabel) Max.
  • Seite 49: Installatie

    7,6 meter. Wanneer de afstand groter wordt, neemt de uw computers, de gegevens die erop staatn en/of de switch. Belkin is niet kans op verslechtering van het signaal toe. Vandaar dat wij u aanraden uw PS/2- verantwoordelijk voor de schade die hierdoor ontstaat.
  • Seite 50 INSTALLATIE INSTALLATIE 2. Neem de videokabel die aan uw monitor is bevestigd en sluit deze aan op de Het aansluiten van de computer VGA- uitgang aan de zijkant van uw switch. 3. Maak gebruik van de OmniView KVM-kabelset en sluit de male connector van de VGA-kabel aan op de VGA-poort van de eerste computer.
  • Seite 51 INSTALLATIE INSTALLATIE 4. Sluit het ene eind van de KVM-kabel voor het PS/2-toetsenbord aan op 5. Sluit het ene einde van de KVM-kabel voor PS/2-muizen aan op de daarvoor de toetsenbordaansluiting op de computer en het andere eind op de bestemde poort op uw computer en het andere einde op de MUISPOORT (1) TOETSENBORDAANSLUITING (1) aan de zijkant van de switch.
  • Seite 52: Gebruik Maken Van Uw Switch

    GEBRUIK MAKEN VAN UW SWITCH GEBRUIK MAKEN VAN UW SWITCH Het inschalen van de systemen een bepaalde poort overschakelen door het nummer in te voeren dat correspondeert met de switch-poort die u wilt gebruiken. Als u bijvoorbeeld de combinatie Als alle kabels zijn aangesloten, schakelt u de CPU’s in die zijn aangesloten op de “SCROLL LOCK”, “SCROLL LOCK”, “2”...
  • Seite 53: Veelgestelde Vragen

    V: Wat is het verschil tussen deze KVM-switch en de KVM-switch uit de SOHO- Serie? A: Ja, de switch werkt met muizen van Microsoft, Logitech, Kensington en Belkin. De switch zal slechts twee muisknoppen ondersteunen. Als u vragen hebt over...
  • Seite 54: Problemen Oplossen

    VEELGESTELDE VRAGEN PROBLEMEN OPLOSSEN V: Moet ik nog software installeren om de switch te kunnen gebruiken? Video Op mijn beeldscherm krijg ik nalichten, schaduwen of vage beelden te zien. A: Nee, er hoeven geen stuurprogramma's of software op uw computers te worden geïnstalleerd.
  • Seite 55 PROBLEMEN OPLOSSEN PROBLEMEN OPLOSSEN Toetsenbord • Deactiveer het programma voor energiebeheer op de pc waarmee u problemen hebt. Bij het opstarten ziet de computer geen toetsenbord en krijgt u melding van een toetsenbordfout. • Kijk wat er gebeurt als u de muis verwisselt voor een andere muis. De muis wordt bij het opstarten niet herkend.
  • Seite 56: Informatie

    CE-conformiteitsverklaring Wij, Belkin Corporation, verklaren hierbij dat wij de volle verantwoordelijkheid aanvaarden dat de producten met artikelnummers F1DJ102P en F1DJ104P, waarop deze verklaring van toepassing is, voldoen aan de emissienorm EN55022 en aan de immuniteitsnormen EN55024, LVP EN61000-3-2 en EN61000-3-3.
  • Seite 57 Belkin Corporation biedt garantie op dit product gedurende de garantieperiode voor zover het materiaal- en fabricagefouten betreft. In geval van defecten heeft Belkin de keuze tus- sen een gratis reparatie of vervanging, in het geval het product binnen de garantieperiode wordt teruggebracht naar de leverancier en dat de transportkosten aan de leverancier vooruit worden betaald.
  • Seite 58 Fax: +31 (0) 20 654 7349 Fax: +33 (0) 1 39 46 62 89 Belkin technische ondersteuning Europa: 00 800 223 55 460 © 2004 Belkin Corporation. Alle rechten voorbehouden. Alle handelsnamen zijn gedeponeerde handelsmerken van de betreffende rechthebbenden. F1DJ102P-B Manual del usuario F1DJ104P-B P74711ea_F1DJ10x_man.indd 2-3...
  • Seite 59 Contenido del paquete........1 La amplia línea de soluciones KVM líderes en el mercado de Belkin da muestra de...
  • Seite 60: Generalidades

    HDDB15 a macho HDDB15. Auto-escaneado Los cables KVM OmniView de Belkin ofrecen la más alta calidad posible para La propiedad de auto-escaneado le permite efectuar un rastreo y control asegurar que su información se transmita de manera óptima. Los cables KVM automáticos de la actividad de todos los ordenadores conectados a su conmutador...
  • Seite 61: Diagramas De Los Indicadores De La Unidad

    GENERALIDADES Diagramas de los indicadores de la unidad Consola puerto VGA Indicadores LED del estado de los puertos Panel frontal Botón Ordenador 2 Puertos P74711ea_F1DJ10x_man.indd 4-5 12/11/04 11:36:39 am...
  • Seite 62: Especificaciones

    GENERALIDADES GENERALIDADES Especificaciones Número de artículo: F1DJ102P, F1DJ104P Alimentación: Adaptador opcional CC 9V, 600mA con un pin central de polaridad positiva PCs válidos: F1DJ102P: 2 F1DJ104P: 4 Emulación de teclado: PS/2 Panel frontal Emulación de ratón: PS/2 y Serie (con uso de adaptador) Botón Monitores válidos: VGA, SVGA, MultiSync y LCD (con la utilización del cable adaptador)
  • Seite 63: Instalación

    Atención: Si es preciso que su ordenador se encuentre a una distancia superior de 25 1.Conecte su teclado y ratón tipo PS/2 pies del conmutador KVM, puede utilizar el cable alargador CAT5 de Belkin (número a los puertos de TECLADO y RATÓN de pieza F1D084) para ampliar su teclado PS/2, ratón PS/2 y monitor hasta una...
  • Seite 64 INSTALACIÓN INSTALACIÓN 2. Tome el cable de vídeo que se encuentra conectado a su monitor y conéctelo Cómo conectar el ordenador: al puerto de salida VGA situado en un lateral del conmutador. 3.Utilizando el kit de cableado Omniview KVM, tome el cable VGA y conecte el extremo macho al puerto VGA del primer ordenador.
  • Seite 65 INSTALACIÓN INSTALACIÓN 4. Conecte un extremo del cable KVM del teclado PS/2 al puerto del teclado 5. Conecte un extremo del cable KVM del ratón PS/2 al puerto de ratón de del ordenador y el otro extremo al puerto del TECLADO 1 en un lateral del su ordenador y el otro extremo al PUERTO del ratón 1 en un lateral del conmutador.
  • Seite 66: Cómo Usar El Conmutador

    CÓMO USAR EL CONMUTADOR CÓMO USAR EL CONMUTADOR Cómo encender los sistemas Podrá conmutar directamente a cualquiera de los puertos introduciendo el número de puerto del conmutador que desea utilizar. Por ejemplo, si pulsa “SCROLL LOCK”, Una vez que todos los cables han sido conectados, encienda las CPUs que “SCROLL LOCK”, “2”, será...
  • Seite 67: Preguntas Más Frecuentes

    USB. P: ¿De qué forma permite el conmutador al usuario conmutar entre puertos? P: ¿Cuáles son las ventajas del conmutador KVM de Belkin frente a un producto R: El conmutador soporta dos métodos de selección de puertos. El usuario puede similar de la competencia? seleccionar los ordenadores utilizando teclas de función directa del teclado o...
  • Seite 68: Resolución De Problemas

    9V CC, 600mA (Número de artículo de Belkin F1D065-PWR Atención: El conmutador requerirá el uso de un adaptador de alimentación CA opcional ya que la alimentación no puede extraerse del ordenador a través del...
  • Seite 69 RESOLUCIÓN DE PROBLEMAS RESOLUCIÓN DE PROBLEMAS Teclado • Desactive los esquemas de gestión de la alimentación del PC en el que está experimentando problemas. El ordenador no detecta su teclado y se obtiene un error de teclado durante el arranque. •...
  • Seite 70: Información

    FCC SOBRE COMPATIBILIDAD ELECTROMAGNÉTICA • Asegúrese de que los cables de teclado y ratón se encuentren perfectamente Nosotros, Belkin Corporation, con sede en 501 West Walnut Street, Compton, CA conectados entre el conmutador y el ordenador. 90220 (EEUU), declaramos bajo nuestra sola responsabilidad que los productos •...
  • Seite 71 Esta garantía perderá su validez en el caso de que el producto haya sido dañado de forma accidental, por abuso o empleo erróneo del mismo, si el producto ha sido modificado sin la autorización por escrito de Belkin o si alguno de los números de serie de Belkin ha sido eliminado o deteriorado.
  • Seite 72: Manuale Utente

    Fax: +33 (0) 1 39 46 62 89 Asistencia técnica de Belkin Europa: 00 800 223 55 460 © 2004 Belkin Corporation. Todos los derechos reservados. Todas las marcas son marcas registradas de los respectivos fabricantes enumerados. F1DJ102P-B Manuale utente F1DJ104P-B P74711ea_F1DJ10x_man.indd 2-3...
  • Seite 73 Utilizzo dello switch Grazie per aver acquistato lo switch KVM Belkin. Ci sta a cuore il vostro tipo di Avviamento dei sistemi ........14 Modalità...
  • Seite 74: Descrizione Generale

    DESCRIZIONE GENERALE DESCRIZIONE GENERALE Requisiti del sistema Lo Switch KVM Belkin rappresenta la soluzione più semplice per gestire vari computer PS/2 da una sola tastiera, un monitor ed un mouse. Lo Switch supporta Cavi periferiche di entrata PS/2 (tastiera e mouse), VGA, SVGA, XGA e computer PS/2.
  • Seite 75: Diagrammi Di Visualizzazione Dell'unità

    DESCRIZIONE GENERALE Diagrammi di visualizzazione unità Porta console VGA Indicatori LED di stato Pulsante pannello anteriore Porte Computer 2 P74711ea_F1DJ10x_man.indd 4-5 12/11/04 11:36:55 am...
  • Seite 76: Specifiche

    DESCRIZIONE GENERALE DESCRIZIONE GENERALE Specifiche Cod. Prodotto: F1DJ102P, F1DJ104P Alimentazione: Opzionale CC a 9 Volt, con adattatore da 600 mA con polarità positiva al contatto centrale. Numero di PC assistiti: F1DJ102P: 2 F1DJ104P: 4 Pulsante Emulazione tastiera: PS/2 pannello anteriore Emulazione mouse PS/2 e seriale (mediante adattatore) Tipi di monitor supportati: VGA e SVGA, MultiSync, LCD a cristalli liquidi (mediante un cavetto adattatore)
  • Seite 77: Installazione

    Nota: Se il computer deve essere situato a più di 7,6 metri dallo Switch KVM, si può Collegamento della console usare l’Extender CAT5 Belkin (codice prodotto F1D084) per estendere la tastiera PS/2, 1.Collegare la tastiera e il mouse, il mouse PS/2 e il monitor ad un massimo di 152,4 metri, usando un cavo CAT5 UTP.
  • Seite 78 INSTALLAZIONE INSTALLAZIONE 2.Collegare il cavo video che proviene dal monitor alla porta VGA OUT che si Collegamento del Computer: trova sul lato dello switch 3.Utilizzando un kit di cavi KVM OmniView, collegare lo spinotto maschio del cavo VGA alla porta VGA del primo computer. Collegare lo spinotto femmina alla porta VGA 1 sul lato dello switch.
  • Seite 79 INSTALLAZIONE INSTALLAZIONE 4. Collegare lo spinotto del cavo KVM della tastiera PS/2 alla porta della tastiera 5. Collegare uno spinotto del cavo KVM PS/2 del mouse alla porta del mouse sul sul computer, e l'altro spinotto dello stesso cavo alla porta KEYBOARD 1 sul computer e l'altro spinotto dello stesso cavo alla porta MOUSE 1 sul lato dello lato dello Switch.
  • Seite 80: Utilizzo Dello Switch

    UTILIZZO DELLO SWITCH UTILIZZO DELLO SWITCH Accensione dei sistemi direttamente una qualsiasi porta immettendo il numero della porta dello switch che si desidera utilizzare. Ad esempio, se si preme “Scroll Lock”, “Scroll Lock” e “2”, Una volta collegati tutti i cavi, accendere i computer connessi allo switch. Tutti i viene selezionato il computer della porta 2.
  • Seite 81: Domande Frequenti

    F1D084) per estendere la tastiera PS/2, il mouse PS/2 e il monitor ad un massimo di 152,4 metri, usando un cavo CAT5 UTP. R: Si, lo switch funziona con i computer Sun, se usato con l’Adattatore Belkin per Sun, codice prodotto F1D082.
  • Seite 82: Rilevazione E Risoluzione Delle Anomalie

    USB bisognerà usare un adattatore addizionale CA. adattatore di alimentazione 9 V CC da 600mA (Codice prodotto Belkin F1D065-PWR per il vostro paese). D: Qual è la durata della garanzia dello switch? •...
  • Seite 83 RILEVAZIONE E RISOLUZIONE DELLE ANOMALIE RILEVAZIONE E RISOLUZIONE DELLE ANOMALIE Tastiera • Disattivare la gestione dell’alimentazione sul PC con il quale si stanno verificando dei problemi. Il computer non rileva la tastiera e all’avvio viene segnalato un errore in tastiera. •...
  • Seite 84: Informazioni

    Dichiarazione di conformità CE Noi sottoscritti, Belkin Corporation, dichiariamo sotto la nostra piena responsabilità che i prodotti F1DJ102P e F1DJ104P, ai quali questa dichiarazione fa riferimento, sono realizzati in conformità allo Standard sulle Emissioni EN550022 e alla Norma di Immunità EN550024, nonché...
  • Seite 85 Questa garanzia non si applica nel caso in cui il prodotto sia stato danneggiato in seguito a incidente, abuso, cattivo utilizzo o errata applicazione; se il prodotto è stato modificato senza il consenso scritto da parte della Belkin; o se un qualsiasi numero di serie Belkin è stato rimosso o cancellato.
  • Seite 86 Fax: +33 (0) 1 39 46 62 89 Assistenza tecnica Belkin Europa: 00 800 223 55 460 © 2004 Belkin Corporation. Tutti i diritti riservati. Tutti i nomi commerciali sono marchi registrati dai rispettivi produttori elencati. P74711ea_F1DJ10x_man.indd 2-3 12/11/04 11:37:04 am...
  • Seite 87 Fax: +31 (0) 20 654 7349 Fax: +33 (0) 1 39 46 62 89 Belkin Tech Support Europe: 00 800 223 55 460 © 2004 Belkin Corporation. All rights reserved. All trade names are registered trademarks of respective manufacturers listed. P74711ea 11ea_F1DJ10x_man.indd 4...

Diese Anleitung auch für:

F1dj104p-b

Inhaltsverzeichnis