Roland EDIROL UA-1EX Bedienungsanleitung
Inhaltsverzeichnis
Bedienungsanleitung
Manual del usuario
Thank you, and congratulations on your choice of the UA-1EX USB Audio Interface.
201a
Before using this unit, carefully read the sections entitled: "USING THE UNIT
SAFELY" and "IMPORTANT NOTES" (p. 2; p. 4). These sections provide
important information concerning the proper operation of the unit. Additionally,
in order to feel assured that you have gained a good grasp of every feature
provided by your new unit, Owner's manual should be read in its entirety. The
manual should be saved and kept on hand as a convenient reference.
202
Copyright © 2005 ROLAND CORPORATION
All rights reserved. No part of this publication may be reproduced in any form
without the written permission of ROLAND CORPORATION.
Owner's Manual
Mode d'emploi
Manuale d'uso
Inhaltsverzeichnis

Verwandte Anleitungen für Roland EDIROL UA-1EX


Inhaltszusammenfassung für Roland EDIROL UA-1EX
- Seite 1 Owner’s manual should be read in its entirety. The manual should be saved and kept on hand as a convenient reference. Copyright © 2005 ROLAND CORPORATION All rights reserved. No part of this publication may be reproduced in any form without the written permission of ROLAND CORPORATION.
- Seite 2 • Dusty; or are provides specific instructions directing you • Subject to high levels of vibration. to do so). Refer all servicing to your retailer, the nearest Roland Service Center, or an authorized Roland distributor, as listed on the “Information” page....................
- Seite 3 • Immediately disconnect the USB cable, and the reach of children. request servicing by your retailer, the ....................nearest Roland Service Center, or an autho- • Never climb on top of, nor place heavy rized Roland distributor, as listed on the objects on the unit.
-
Seite 4: Additional Precautions
IMPORTANT NOTES 291a In addition to the items listed under “USING THE UNIT SAFELY” on pages 2 and 3, please read and observe the following: Placement Maintenance 401a • Using the unit near power amplifiers (or other • For everyday cleaning wipe the unit with a soft, dry equipment containing large power transformers) cloth or one that has been slightly dampened with may induce hum. - Seite 5 • Use a cable from Roland to make the connection. If * Microsoft and Windows are registered trademarks of using some other make of connection cable, please Microsoft Corporation. note the following precautions. 206e • Some connection cables contain resistors. Do not...
-
Seite 6: Inhaltsverzeichnis
Contents Contents of the Package...................9 Names of Things and What They Do .............11 Getting Connected and Installing Drivers (Windows)........15 About the Driver Modes ......................15 Installing the Driver ........................16 Windows XP/2000 users ..........................16 Windows Me/98 users..........................21 Driver Settings ..........................22 About the input and output devices ...................... - Seite 7 Installing the OS-Standard Driver ...................45 Windows XP/2000 users ..........................45 Windows Me users ............................46 Windows 98 users ............................47 Input/output device setting......................... 49 Mac OS X users............................... 53 Mac OS 9 users ............................... 54 Troubleshooting ....................55 UA-1EX Block Diagram ...................68 Main Specifications ..................69 Deutsch Anschlüsse herstellen und Treiber installieren (Windows)......70...
- Seite 8 Italiano Collegamento e installazione dei driver (Windows) ........80 Installazione del driver......................80 Utenti Windows XP/2000..........................80 Collegamento e installazione dei driver (Macintosh) ........83 Utenti Mac OS X .........................83 Installazione del driver ..........................83 Impostazioni dei dispositivi di ingresso/uscita..................84 Español Conexión e instalación de los controladores (Windows) ......85 Instalación del controlador .......................85 Usuarios de Windows XP/2000........................
-
Seite 9: Contents Of The Package
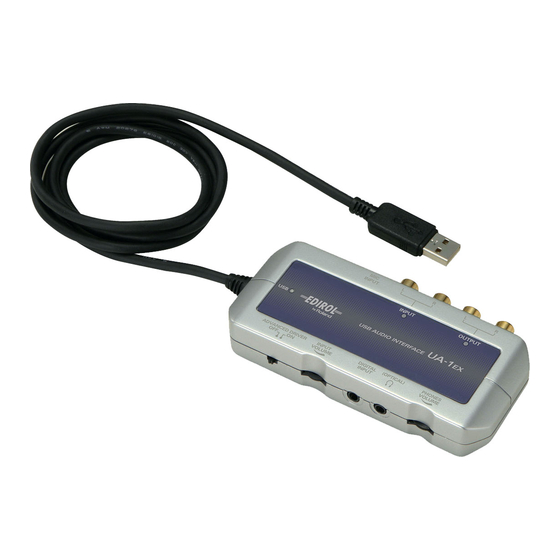
Contents of the Package The UA-1EX includes the following items. When you open the package, first make sure that all items are included. If any are missing, contact the dealer where you purchased the UA- 1EX. USB Audio Interface UA-1EX CD-ROM This contains drivers for using the UA-1EX in Advanced mode. - Seite 10 ■ You’ll need to provide the following items An external amp, speakers, headphones, microphone, and MD or DAT recorder are not included. The external amp, speakers, or headphones you’ll need in order to hear the sound that is output by the UA-1EX are not included. Also not included are a microphone or an MD or DAT recorder, which you’ll need in order to input sound to the UA-1EX.
-
Seite 11: Names Of Things And What They Do
Names of Things and What They Do USB cable Connect this to your computer so that audio signals can be transferred. USB Indicator After the UA-1EX is connected to your computer and your computer has recognized the UA-1EX, this indicator will light. Mic input jack (plug-in powered mic) Connect a miniature condenser microphone that is designed for connection to a computer or other device that will supply power to the microphone. - Seite 12 Output indicator This will light when an audio signal (sound) is being output from the line output jacks or the headphone jack ADVANCED (mode select) switch This switches the driver mode. Normally, you should leave this ON. This mode uses a dedicated audio driver created specifically for the UA-1EX. Use this mode when you want to use your sequencer software or audio editing (Advanced mode) software to record, play, or edit audio with high quality and stable timing.
- Seite 13 Setting select switches These are miniature switches that you can slide up or down to make various settings. Sampling frequency select switch ● This selects the sampling frequency for recording/playing audio data. * If you’ve changed the sampling frequency, disconnect the UA-1EX, and then reconnect it. Switch A set to the lower position 44.1kHz Record/play at 44.1 kHz...
- Seite 14 Input monitor switch ● This selects whether or not the audio signals that are input through the mic input jack , digital input connector , and Line input jacks will be output to the headphone jack and Line output jacks The audio signal being received will be output to the Switch set to the lower position Headphone jack and the Line output jacks.
-
Seite 15: Getting Connected And Installing Drivers (Windows)
Getting Connected and Installing Drivers (Windows) About the Driver Modes What is a driver? A “driver” is software that transfers data between the UA-1EX and application software running on your computer, when your computer and the UA-1EX are connected. The driver sends data from your application to the UA-1EX, and from the UA-1EX to your application. -
Seite 16: Installing The Driver
Installing the Driver The installation procedure will differ depending on your system. Please proceed to one of the following sections, depending on the system you use. • Windows XP/2000 users................(p. 16) • Windows Me/98 users ................... (p. 21) Steps to be performed on the UA-1EX itself are marked by a symbol. - Seite 17 5. Click [OK] to close the System Properties dialog box. 6. Exit all currently running software (applications). Also close any currently open windows. If you are using virus checking or similar software, you must exit all of these programs as well. 7.
- Seite 18 If the message “Connect to Windows Update to search for software?” appears, choose “No” and then click [Next]. 2. Make sure that “EDIROL UA-1EX” is indicated. Then, choose “Install the software automatically (Recommended) ” and click [Next]. If “Driver Signing Options” in step 4 is set to anything other than “Ignore,” a dialog box with an “!”...
- Seite 19 ■ Giving priority to Background Services If you don’t make this setting, you may experience problems such as clicks or pops in the sound. To ensure that audio data is handled smoothly, proceed as follows to make this setting. Windows XP users 1.
- Seite 20 Windows 2000 users 1. Click the Windows Start menu, and from the menu that appears, select Settings | Control Panel. 2. In Control Panel, double-click the System icon. 3. Click the Advanced tab. 4. Click [Performance Options]. The Performance Options dialog box will appear. fig.back2000 5.
-
Seite 21: Windows Me/98 Users
Windows Me/98 users 1. With the UA-1EX left unconnected, start up Windows. Do not connect the UA-1EX to the computer until you reach Step 9. 2. Exit all currently running software. Also close any open windows. If you are using virus checking or similar software, be sure to exit it as well. -
Seite 22: Driver Settings
Use this if you are using the UA-1EX with an ASIO-compatible sequencer software such as Cubase. In the ASIO settings of your sequencer software, choose “EDIROL UA-1EX.” * To prevent audio loop feedback or double monitoring, turn monitoring off in your sequencer... -
Seite 23: Input/Output Device Setting
2. Click the Audio tab. 3. For Sound Playback (or in Windows Me, Playback) and Sound Recording, click the ▼ located at the right of [Preferred device], and select EDIROL UA-1EX. 4. Click [OK] to complete the settings. Windows 98 users 1. -
Seite 24: Sequencer Software Settings
Sequencer software settings Before you start up your sequencer software, connect the UA-1EX to your computer. If your sequencer software allows you to specify audio input/output settings, choose EDIROL UA-1EX. For details, refer to the owner’s manual for your sequencer software. -
Seite 25: Checking That You Hear Sound
Checking that you hear sound Now let’s play back the sample data to verify that the connections and the settings are correct. In order to hear the sample data, you will need approximately 30 MB of free space on the hard disk in which Windows is installed. - Seite 26 ■ Playing back the sample data We will use standard Windows functionality to play back the sample data provided on the included CD-ROM. * Use of the song data supplied with this product for any purpose other than private, personal enjoyment without the permission of the copyright holder is prohibited by law.
-
Seite 27: Getting Connected And Installing Drivers (Macintosh)
Getting Connected and Installing Drivers (Macintosh) About the Driver Modes What is a driver? A “driver” is software that transfers data between the UA-1EX and application software running on your computer, when your computer and the UA-1EX are connected. The driver sends data from your application to the UA-1EX, and from the UA-1EX to your application. -
Seite 28: Mac Os X Users
4. In the Driver (Mac OS X) folder of the CD-ROM, double-click UA1EXUSBDriver.pkg. * A message such as “This Installer package needs to...” may appear. Click “Continue.” 5. The display will indicate “Welcome to the EDIROL UA-1EX Driver Installer.” Click [Continue]. 6. The display will indicate “Select a Destination.”... -
Seite 29: Input/Output Device Settings
3. Open “System Preferences” and click “Sound.” 4. In the Sound Effects tab, set “Play alerts and sound effects through” to “EDIROL UA-1EX 44.1 kHz.” * Although “44.1 kHz” is used for the purpose of explanation within this document, this changes depending on the actual setting of the Sampling frequency select switch on your UA-1EX. -
Seite 30: Mac Os 9 Users
Mac OS 9 Users Installing the UA-1EX driver 1. With the UA-1EX disconnected, start up the Macintosh. * Disconnect all USB cables except for a USB keyboard and USB mouse (if used). 2. Exit all currently running software (applications). If you are using virus checking or similar software, be sure to exit it as well. 3. - Seite 31 This section explains how to install the ASIO driver that allows the UA-1EX to be used by your sequencer software or audio editing software. For details on installation and settings of the ASIO driver, be sure to also read the Driver E (Mac OS 9) - Readme_E.htm document on the CD-ROM.
-
Seite 32: Checking That You Hear Sound
Checking that you hear sound Now let’s play back the sample data to verify that the connections and the settings are correct. In order to listen to the sample data, you’ll need approximately 30 MB of free space on your system hard disk. - Seite 33 ■ Playing back the sample data We will use standard Macintosh functionality to play back the sample data provided on the included CD-ROM. * Use of the song data supplied with this product for any purpose other than private, personal enjoyment without the permission of the copyright holder is prohibited by law.
-
Seite 34: Basic Use
Basic use This chapter explains various ways in which you can connect and use the UA-1EX. Listening to Sound from Your Computer You can connect your headphones or monitor speakers as shown in the diagram, and listen to the audio playback from your sequencer software. You can also listen to the sound from a microphone or audio device that’s connected to the UA-1EX. -
Seite 35: Recording A Cassette Tape Or Lp Into Your Computer
Recording a Cassette Tape or LP into Your Computer Here’s how you can record the analog output of an audio device such as a cassette tape or LP (vinyl record) into your computer. fig.analog Audio cables Audio Amplifier Computer (Cassette, record players) LINE OUT Signal flow Set this to ANALOG. - Seite 36 Sampling frequency select switch Set this to the sampling frequency that is selected in your recording sequencer software. * After you change the position of the sampling frequency select switch, you will need to disconnect and reconnect the UA-1EX. Recording source select switch Set this to ANALOG.
-
Seite 37: Recording Sound From Your Computer Onto Md Or Dat
Recording Sound from Your Computer onto MD or DAT Here’s how you can record audio data from your computer onto a digital device such as MD or DAT. fig.digital Computer Signal flow Select a sample rate that your recording Optical digital cable device (e.g., MD player) is able to record. -
Seite 38: Recording The Digital Output From A Cd/Md/Dat Into Your Computer
Recording the Digital Output from a CD/MD/DAT into Your Computer fig.digita1l Signal flow Computer Optical digital cable Set this to DIGITAL. ( p.14) Set this to match the sampling frequency DIGITAL OUTPUT of your digital playback device. ( p.13) MD/DAT/CD player Sampling frequency select switch Set this to match the sampling frequency of your digital playback device and the sampling frequency of your sequencer software or the audio data you are playing back. -
Seite 39: Recording A Mic
Recording a Mic Here’s how you can sing along with audio data played back from your computer, and use your sequencer software to record just the sound of the mic. fig.analog The mic input and the audio data from your Monitor computer will be mixed and output. - Seite 40 Sampling frequency select switch Set this to the sampling frequency that is selected on your recording sequencer software. * After you change the position of the sampling frequency select switch, you will need to disconnect and reconnect the UA-1EX. Recording source select switch Set this to ANALOG.
-
Seite 41: Adjusting The Audio Latency
Adjusting the Audio Latency When using the UA-1EX in Advanced mode, you can change the driver settings to adjust the latency of the audio. To adjust the latency, change the Buffer Size in the driver settings dialog box. * Latency is the time delay from when an sequencer software plays back audio data until the sound is actually heard from an audio device such as the UA-1EX. -
Seite 42: Decreasing The Asio Buffer Size (Windows)
1. As described in“Opening the dedicated driver settings dialog box” (p. 44), open the “Edirol UA-1EX Driver Settings” dialog box. 2. Check the “Use Smaller ASIO Buffer Size” check box. 3. Click [OK] to close the “Edirol UA-1EX Driver Settings” dialog box. -
Seite 43: Using Asio Direct Monitor (Windows/Mac Os 9)
3. Make the following settings. Check the “Use ASIO Direct Monitor” check box. 4. Click [OK] to close the “Edirol UA-1EX Driver Settings” dialog box. * Depending on your sequencer software, there may also be an ASIO Direct Monitor setting among the audio settings of your sequencer software. - Seite 44 The “Edirol UA-1EX Driver Settings” dialog box will appear. * In Windows XP, click “Switch to Classic View” to select Classic View on your computer. If you’re not in Classic View, the EDIROL UA-1EX icon won’t be shown. * In Windows Me, click “View all Control Panel options.”...
-
Seite 45: Appendices
Appendices Installing the OS-Standard Driver Standard driver mode uses the standard USB audio driver provided with the operating system. * Standard driver mode does not support 96 kHz or 24-bit. If you want to use 96 kHz or 24-bit audio, turn the ADVANCED (mode select) switch ON. -
Seite 46: Windows Me Users
Windows Me users 1. With the UA-1EX disconnected, start up Windows. * Disconnect all USB cables except for a USB keyboard and USB mouse (if used). 2. Exit all currently running software (applications). If you are using virus checking or similar software, be sure to exit it as well. 3. -
Seite 47: Windows 98 Users
Windows 98 users The driver necessary for using the UA-1EX with Windows 98 is provided on the Windows CD- ROM. Make sure that you have the Windows CD-ROM available. * Some computers are sold with the contents of the Windows CD-ROM stored on the hard disk, and therefore will not come with a Windows CD-ROM. - Seite 48 8. Click [Next]. Depending on your system, the Driver location may differ from the illustration, but this is not a problem. 9. File (driver) copying will begin. If the Windows CD-ROM is not inserted in the CD-ROM drive, a “Insert Disk” dialog box may appear.
-
Seite 49: Input/Output Device Setting
Input/output device setting Windows XP users 1. Open the Sound, Speech, and Audio Devices Properties dialog box. 1. From the Windows start menu, choose Control Panel. 2. In “Pick a category,” click Sound, Speech, and Audio Devices. 3. In “or Pick a Control Panel icon,” click the Sounds and Audio Devices icon. 2. - Seite 50 Windows 98 users 1. Open the Multimedia Properties dialog box. 1. Click the Windows Start button, and from the menu that appears, select Settings | Control Panel. 2. In Control Panel, double-click the Multimedia icon. 2. Click the Audio tab. 3.
- Seite 51 Volume Control setting If you have installed the Standard driver, the UA-1EX can use the Windows volume control to adjust the output volume. 1. Open the Volume Control. Click the Windows Start menu, and select Programs (or in Windows XP, All programs) | Accessories | Entertainment | Volume Control.
- Seite 52 When playing audio CDs from the computer’s internal CD-ROM drive, or using the UA-1EX to play game music Windows XP/2000 users: 1. Open the System Properties dialog box. Select Start | Settings | Control Panel, and in the Control Panel, double-click the System icon. (Windows XP–...
-
Seite 53: Mac Os X Users
Mac OS X users * If the “Authenticate” dialog box appears during the installation, input the password and click “OK.” * What you actually see on your computer screen may be different, depending on your computing environment and the operating system you’re using. 1. -
Seite 54: Mac Os 9 Users
Mac OS 9 users 1. With the UA-1EX disconnected, start up the Macintosh. * Disconnect all USB cables except for a USB keyboard and USB mouse (if used). 2. Exit all currently running software (applications). If you are using virus checking or similar software, be sure to exit it as well. 3. -
Seite 55: Troubleshooting
Troubleshooting If you experience problems, read this chapter first. It contains tips for solving most problems. * For details on operating your Windows or Macintosh computer, refer to the owner’s manual of the computer and operating system you are using. Problems related to the USB driver (Windows) Can’t install the driver correctly Install the driver once again as described in “Getting Connected and Installing Drivers... - Seite 56 Are the power conservation settings of your computer turned off? If power conservation settings are turned on for your computer, disable these settings. (For details on how to disable them, refer to the owner’s manual of your computer.) Is there enough free space on your hard disk? Delete unneeded files to increase the amount of free space.
- Seite 57 If the message “Connect to Windows Update to search for software?” appears, choose “No” and then click [Next]. 2. Make sure that “EDIROL UA-1EX” is indicated. Then, choose “Search for the best driver in these locations” and click [Next]. If “Driver Signing Options” in step 4 is set to anything other than “Ignore,” a dialog box with an “!”...
- Seite 58 No sound Can’t record or play back audio No sound Is the UA-1EX’s Recording source select switch set to “ANALOG”? If the recording source select switch is set to “DIGITAL,” and an input signal is being received at the digital input connector, the audio signal being input to the digital input connector will be output. The audio data from the computer will not be output.
- Seite 59 Can’t record from a digital connection When capturing audio data from a CD or MD into your computer, is the recording source select switch set to “DIGITAL”? Is the recording source select switch set to “DIGITAL”? Does the sampling frequency of your sequencer software match the sampling frequency of the digital audio device connected to the digital in connector? Set the sampling frequency to the same setting.
- Seite 60 Noise or pops are heard when recording/playing on your computer Noise is heard during audio playback Pops/clicks occur during audio playback Noise is heard in the recorded sound In Macintosh, check the Energy Saver settings. In the Mac OS System Setup, set Energy Saver as follows. Click the Sleep tab.
- Seite 61 In Windows, did you make the setting described in “Giving priority to background services”? In order to ensure that audio processing occurs smoothly, make the setting described in “Giving priority to background services.” (➔ “Giving priority to Background Services” (p. 19)) In Windows, Power Management settings in the Control Panel may cause clicks or pops to occur in the audio playback.
- Seite 62 You may be able to solve the problem by adjusting the buffer size in the Driver Settings dialog box. Adjust the buffer size as described in “Adjusting the Audio Latency” (p. 41). If your sequencer software has an audio device test function, execute the test function. * After changing the buffer size, you must restart any sequencer software that uses the UA-1EX.
- Seite 63 Depending on the virtual memory setting or network-related settings, noise may occur. Please make the following settings before use. • [Mac OS 9] In Chooser of the Apple menu, set AppleTalk to “Inactive.” (This setting is not changed as a result of turning off AppleTalk, as requested by OMS when sequencer software is started up.
- Seite 64 Insufficient volume from a device connected to the line input jacks Could you be using a connection cable with a built-in resistor? Please use a connection cable that does not contain a built-in resistor (such as one from the Roland PCS series).
- Seite 65 Others The volume changed when you resumed from Suspend or Hibernation status When Windows 2000 resumes from Suspend or Hibernation, the output volume setting is changed due to a problem of Windows. Using the Windows volume controls, adjust the USB audio (speaker) volume slider. (➔“Volume Control setting”...
-
Seite 66: Deleting The Driver
Deleting the driver If you were unable to install the driver according to the procedure given, the UA-1EX may not be recognized correctly by the computer. In this case, use the following procedure to delete the driver, and then follow the procedure in “Getting Connected and Installing Drivers” (Windows (p. 15), Macintosh (p. - Seite 67 Insert the CD-ROM into the CD-ROM drive of your Macintosh. 4. In the Driver (Mac OS X) folder of the CD-ROM, double-click “UA1EX_Uninstaller.” * The display will indicate “This uninstalls EDIROL UA-1EX driver from this Macintosh.”, click [Uninstall]. The display will indicate “Are you sure to uninstall the driver?”, click [OK].
-
Seite 68: Ua-1Ex Block Diagram
UA-1EX Block Diagram ■ When the recording source select switch is set to ANALOG USB connector USB CODEC USB indicator Digital output connector (optocal) Headphones volume Output indicator Input indicator Line input jacks Hedphone jack Input monitor switch Line output jacks Mic input jack Input volume (plug-in powered mic) -
Seite 69: Main Specifications
Main Specifications ● UA-1EX: USB Audio Interface Controllers ● ADVANCED switch Number of Audio Record/Playback Channels INPUT VOLUME Record: 1 pair of stereo PHONES VOLUME Play: 1 pair of stereo SAMPLE RATE switch REC SOURCE switch = ANALOG: 96kHz MODE switch Full duplex (except for 96 kHz setting) INPUT MONITOR switch REC SOURCE switch = DIGITAL:... -
Seite 70: Anschlüsse Herstellen Und Treiber Installieren (Windows)
Anschlüsse herstellen und Treiber installieren (Windows) Treiber installieren Schritte, die am UA-1EX selbst durchgeführt werden müssen, sind mit einem Operation of the UA-1EX Symbol gekennzeichnet. Windows XP/2000-Anwender 1. Starten Sie Windows, das UA-1EX ist dabei nicht angeschlossen. Schließen Sie das UA-1EX erst an den Computer an, wenn Sie Schritt 13 erreicht haben (S. 72). * Entfernen Sie sämtliche USB-Kabel außer denen der USB-Tastatur und der USB-Maus (falls vorhanden). - Seite 71 7. Halten Sie die CD-ROM bereit. Legen Sie die CD-ROM in das CD-ROM-Laufwerk Ihres Computers ein. Wenn die Meldung “Windows kann jedes Mal, wenn Sie eine Diskette einlegen oder ein Gerät mit dieser Dateiart anschließen, die gleiche Aktion ausführen” angezeigt wird, klicken Sie auf [Abbrechen].
- Seite 72 Wenn die Meldung “Mit Windows Update verbinden, um neue Software zu suchen?” erscheint, wählen Sie “Nein” und klicken dann auf [Weiter]. 2. Stellen Sie sicher, dass “EDIROL UA-1EX” angezeigt wird. Danach wählen Sie “Nach dem besten Treiber an diesen Orten suchen” und klicken auf [Weiter].
-
Seite 73: Anschlüsse Herstellen Und Treiber Installieren (Macintosh)
* Es kann eine Mitteilung wie “This Installer package needs to...” erscheinen. Klicken Sie auf “Continue”. 5. In der Anzeige erscheint “Welcome to the EDIROL UA-1EX Driver Installer”. Klicken Sie auf [Continue]. 6. In der Anzeige erscheint “Select a Destination”. Wählen Sie mit einem Mausklick das Laufwerk aus, auf dem das Betriebssystem installiert ist, und klicken Sie dann auf [Continue]. -
Seite 74: Einstellungen Der Eingabe-/Ausgabegeräte
4. Setzen Sie im Register Sound Effects (Soundeffekte) die Option “Play alerts and sound effects through” (Warntöne und Klangeffekte abspielen über) auf “EDIROL UA-1EX 44,1 kHz”. * Obwohl hier “44,1 kHz” für die Erklärungen verwendet wird, sind diese Änderungen von der tatsächlichen Einstellung des Sampling frequency select switch Sample-Frequenzschalters Ihres UA-1EX abhängig. -
Seite 75: Connexion Et Installation Des Pilotes (Windows)
Connexion et installation des pilotes (Windows) Installation du pilote spécial Les opérations à exécuter sur l’UA-1EX sont signalées par le symbole Operation of the UA-1EX Windows XP/2000 1. L’UA-1EX n’étant pas branché, lancer Windows. Ne pas raccorder l’UA-1EX à l’ordinateur avant le point 13 (p. 77). * Débrancher tous les câbles USB, sauf ceux d’éventuels clavier ou souris USB. - Seite 76 7. Prendre le CD-ROM. et l’introduire dans le lecteur de l’ordinateur. Si le message “Windows peut effectuer la même action à chaque fois que vous insérez un disque ou connectez un périphérique avec ce type de fichier” s’affiche, cliquer sur [Annuler]. 8.
- Seite 77 1. La boîte de dialogue Nouveau matériel détecté s’affiche.Si le message “Connect to Windows Update to search for software?” s’affiche, sélectionner “No” et cliquer sur [Suivant]. 2. S’assurer que la mention “EDIROL UA-1EX” est présente. Sélectionner alors l’option “Search for the best driver in these locations” et cliquer sur [Next].
-
Seite 78: Installation Des Pilotes Et Connexions (Macintosh)
4. Dans le dossier Driver (Mac OS X) du CD-ROM, double-cliquer sur UA1EXUSBDriver.pkg. * Un message du genre “This Installer package needs to...” s’affiche éventuellement. Cliquer sur “Continue”. 5. Le message “Welcome to the EDIROL UA-1EX Driver Installer” s’affiche. Cliquer sur [Continue]. 6. Le message “Select a Destination” (sélectionner l’emplacement d’installation) s’affiche. -
Seite 79: Configuration Des Périphériques Entrée/Sortie
5. Dans l’onglet Output (sortie), affecter à l’option “Choose a device for sound output” (sélectionner un périphérique de sortie audio) le paramètre “EDIROL UA-1EX 44.1 kHz”. * Si le son doit être diffusé par les haut-parleurs internes de l’ordinateur, déconnecter l’UA-1EX de ce dernier. -
Seite 80: Collegamento E Installazione Dei Driver (Windows)
Collegamento e installazione dei driver (Windows) Installazione del driver I passi da eseguire sulla UA-1EX stessa sono indicati con il simbolo Operation of the UA-1EX Utenti Windows XP/2000 1. Avviare Windows con l’UA-1EX scollegato. Non collegare l’UA-1EX al computer fino al passo 13 (p. 82). * Scollegare tutti i cavi USB, ad eccezione della tastiera e del mouse USB, se utilizzati. - Seite 81 7. Preparare il CD-ROM. Inserire il CD-ROM nell’apposita unità del computer. Se viene visualizzato il messaggio “È possibile eseguire la stessa operazione ogni volta che si inserisce un disco o che si connette una periferica con il seguente tipo di file” fare clic su [Annulla].
- Seite 82 Se viene visualizzato il messaggio “Consentire la connessione a Windows Update per la ricerca di software?”, scegliere “No” e quindi fare clic su [Avanti]. 2. Verificare che “EDIROL UA-1EX” sia visualizzato, quindi scegliere “Ricerca il miglior driver disponibile in questi percorsi” e fare clic su [Avanti].
-
Seite 83: Collegamento E Installazione Dei Driver (Macintosh)
* È possibile che venga visualizzato un messaggio simile a “This Installer package needs to...” Fare clic su “Continua”. 5. Sullo schermo comparirà il seguente messaggio: “Welcome to the EDIROL UA-1EX Driver Installer”. Fare clic su [Continue]. 6. Sullo schermo verrà visualizzato il messaggio: “Select a Destination”. -
Seite 84: Impostazioni Dei Dispositivi Di Ingresso/Uscita
* Il valore “44.1 kHz” è utilizzato in queste pagine solo a fini esplicativi; quello reale dipenderà dall'effettiva impostazione dell'Sampling frequency select switch sull'UA-1EX. 5. Nella scheda Output, impostare “Choose a device for sound output” su “EDIROL UA-1EX 44.1 kHz”. * Se si desidera che il suono venga emesso dai diffusori del Macintosh, scollegare l’UA-1EX dal Macintosh. -
Seite 85: Conexión E Instalación De Los Controladores (Windows)
Conexión e instalación de los controladores (Windows) Instalación del controlador Los pasos que deben realizarse en el propio UA-1EX aparecen marcados con el símbolo Operation of the UA-1EX Usuarios de Windows XP/2000 1. Con el UA-1EX desconectado, inicie Windows. No conecte el UA-1EX al equipo hasta que llegue al Paso 13 (pág. 87). * Desconecte todos los cables USB excepto el del teclado USB y el ratón USB (si se utilizan). - Seite 86 7. Prepare el CD-ROM. Inserte el CD-ROM en la unidad de CD-ROM de su PC.Si aparece el mensaje “Windows puede realizar la misma acción cada vez que inserte un disco o conecte un dispositivo con este tipo de archivo”, haga clic en [Cancelar]. 8.
- Seite 87 Si aparece el mensaje “¿Conectar a Windows Update para buscar software?”, elija “No” y a continuación haga clic en [Siguiente]. 2. Asegúrese de que se indica “EDIROL UA-1EX”. A continuación, seleccione “Buscar mejor controlador en estas ubicaciones” y haga clic en [Siguiente].
-
Seite 88: Conexión E Instalación De Los Controladores (Macintosh)
* Es posible que aparezca un mensaje parecido a “El paquete del programa de instalación necesita...”. Haga clic en “Continuar”. 5. Aparecerá el mensaje “Welcome to the EDIROL UA-1EX Driver Installer”. Haga clic en [Continue]. 6. La pantalla indicará “Select a Destination”. -
Seite 89: Configuración De Dispositivos De Entrada/Salida
Sampling frequency select switch del UA-1EX. 5. En la ficha Output, establezca “Choose a device for sound output” en “EDIROL UA-1EX 44.1 kHz”. * Si desea que el sonido salga de los altavoces del Macintosh, desconecte el UA-1EX del Macintosh. - Seite 90 When you need repair service, call your nearest EDIROL/Roland Service Center or authorized Information EDIROL/Roland distributor in your country as shown below. SOUTH AFRICA MALAYSIA/ ECUADOR CENTRAL/LATIN Paul Bothner(PTY)Ltd. SINGAPORE Mas Musika AMERICA Royal Cape Park, Unit 24 EUROPE Rumichaca 822 y Zaruma Roland Asia Pacific Sdn.
- Seite 91 Amman 11192 JORDAN ITALY HOLLAND/ Landstrasse 5, Postfach, TEL: (06) 5692696 Beyoglu - Istanbul / TURKEY LUXEMBOURG Roland Italy S. p. A. CH-4452 Itingen, TEL: (0212) 249 85 10 KUWAIT Viale delle Industrie 8, SWITZERLAND Roland Central Europe N.V. U.A.E.
-
Seite 92: Index
Index Numerics Input volume ............... 12 96 kHz play/record select switch ......13 latency ................41 Line input jacks ............11 ADVANCED (mode select) switch ......12 Line output jacks ............11 Advanced mode ..........12, 15, 27 Loop ................36 ANALOG .............. -
Seite 93: Federal Communications Commission Radio Frequency Interference Statement
For the USA DECLARATION OF CONFORMITY Compliance Information Statement Model Name : UM-1EX Type of Equipment : USB MIDI Interface Responsible Party : Roland Corporation U.S. Address : 5100 S. Eastern Avenue, Los Angeles, CA 90040-2938 Telephone : (323) 890 3700... - Seite 94 04014845...