Herunterladen Inhalt Inhalt Diese Seite drucken
cherubini MISTRAL Einstellanleitungen

cherubini MISTRAL Einstellanleitungen

Vibrations-windwächter zu markisen

Werbung

Verfügbare Sprachen
  • DE

Verfügbare Sprachen

  • DEUTSCH, seite 27
SENSORE A VIBRAZIONE PER
I
TENDE DA SOLE
MISTRAL VIBRATION WIND SENSOR
GB
FOR AWNINGS
VIBRATIONS-WINDWÄCHTER ZU
D
MARKISEN
CAPTEUR À VIBRATION POUR STORES
F
CENTRAL DE VIENTO POR VIBRACIÓN
E
DEL TOLDO
A520012
MISTRAL
ISTRUZIONI - INSTRUCTIONS - EINSTELLANLEITUNGEN
INSTRUCTIONS - INSTRUCCIONES

Werbung

Inhaltsverzeichnis
loading

Inhaltszusammenfassung für cherubini MISTRAL

  • Seite 1 SENSORE A VIBRAZIONE PER TENDE DA SOLE MISTRAL VIBRATION WIND SENSOR FOR AWNINGS VIBRATIONS-WINDWÄCHTER ZU MARKISEN CAPTEUR À VIBRATION POUR STORES CENTRAL DE VIENTO POR VIBRACIÓN DEL TOLDO A520012 MISTRAL ISTRUZIONI - INSTRUCTIONS - EINSTELLANLEITUNGEN INSTRUCTIONS - INSTRUCCIONES...
  • Seite 3: Caratteristiche Prodotto

    CARATTERISTICHE PRODOTTO Il sensore Mistral rileva le sollecitazioni indotte dal vento sulla struttura di una tenda a bracci, che si manifestano come oscillazioni della barra terminale. La funzione aggiuntiva “carico statico”, abilitabile dall’utente, permette di rilevare anche il gravare eccessivo di masse di acqua o neve, che producono un’inclinazione verso il basso della barra...
  • Seite 4: Telecomandi Compatibili

    TELECOMANDI COMPATIBILI LED - Skipper display - Skipper selezione del canale Skipper salita Skipper Skipper stop *fare riferimento alle istruzioni Skipper specifiche del telecomando discesa Skipper LEGENDA DEI SIMBOLI - rotazione breve del motore in un senso - rotazione lunga selettore rotativo del motore nell’altro senso - doppia breve rotazione...
  • Seite 5: Spiegazione Delle Sequenze Di Comando

    SPIEGAZIONE DELLE SEQUENZE DI COMANDO La maggior parte delle sequenze di comando è composta da tre passi ben distinti, al termine dei quali il motore segnala, con diversi tipi di rotazione, se il passo si è concluso in modo positivo o negativo. Lo scopo di questo paragrafo è quello di riconoscere le segnalazioni del motore.
  • Seite 6: Installazione

    INSTALLAZIONE BASE Il sensore è alloggiato in un contenitore plastico formato da due parti: una base che sarà fissata alla barra terminale e un guscio che si aggancia a scatto. GUSCIO TASTO SET VANO BATTERIE Il guscio contiene la scheda elettronica del sensore, il vano batterie e i comandi di programmazione.
  • Seite 7 • Inserire le batterie fornite; • Aprire completamente la tenda (tasto C); • Ruotare il selettore rotativo sulla posizione 0; Tn: telecomando memorizzato • Premere sul telecomando la sequenza di tasti A+B, B e sul sensore Mistral il tasto SET finchè il motore esegue il movimento di conferma (circa 2 secondi). 2 sec Nota: per verificare la corretta memorizzazione, premere ancora brevemente il tasto SET: la tenda si muoverà a circa metà...
  • Seite 8: Attivazione Del Sensore

    ATTIVAZIONE DEL SENSORE Prima di agganciare il guscio alla base: - Impostare il selettore rotativo su un valore intermedio fra 1 e 9 (ad esempio 5). - Attivare il sensore premendo il tasto SELETTORE SET per almeno 4 secondi finchè il LED 4 sec effettua 2 lampeggi veloci.
  • Seite 9 - Dopo i movimenti di conferma del motore, il sensore rimane in attesa di memorizzare l’angolo di inclinazione. - Entro un minuto inclinare manualmente la tenda fino al limite consentito per almeno 2 secondi e riportarla in posizione di riposo. - Se la posizione è...
  • Seite 10 Nota: per una corretta verifica della soglia di allarme per carico statico, è necessario applicare la forza costantemente, per almeno 5 secondi. VERIFICA ASSENZA ALLARME Per completare le verifiche, è necessario assicurarsi che il sensore non rilevi allarmi dovuti a oscillazioni o variazioni di inclinazione che possono essere introdotte dalla struttura della tenda durante il movimento.
  • Seite 11: Disattivazione Della Riapertura Automatica

    RIAPERTURA AUTOMATICA - solo con motori Blue Wave RX - In seguito all’allarme vento il motore comanderà l’avvolgimento della tenda fino alla posizione di chiusura, bloccandone il comando da parte dell’utente fino al termine dell’allarme vento. Per la disattivazione dell’allarme vento è necessario che le oscillazioni provocate dal vento rimangano sotto la soglia impostata per almeno 8 minuti.
  • Seite 12: Manutenzione

    DISATTIVAZIONE DEL SENSORE Per disattivare il sensore seguire la seguente procedura: - Aprire completamente la tenda, attendere che la barra terminale sia ferma per almeno 10 secondi prima di iniziare a sganciare il sensore. - Premere lateralmente su entrambi i ganci di fissaggio e contemporaneamente tirare il guscio, finché...
  • Seite 13 COSA FARE SE..Sintomo Causa Rimedio Batterie scariche. Aprire il guscio del sensore e disattivarlo: se il led lampeggia, le batterie sono quasi scariche. Se il led è spento e non si riesce a riattivarlo le batterie sono completamente scariche. Sostituire Chiusura periodica della con batterie nuove.
  • Seite 15: Product Features

    PRODUCT FEATURES The Mistral vibration wind sensor detects wind caused stresses on the structure of arm awnings, which then become vibrations of the terminal bar. The added “Static Load” function, which may be enabled by the user, also provides detection of any excessive weight from water or snow that pushes the terminal bar downwards.
  • Seite 16: Compatible Remote Controls

    COMPATIBLE REMOTE CONTROLS LED - Skipper display - Skipper channel selector Skipper Skipper Skipper stop * check the specific instruction Skipper book down Skipper KEY TO SYMBOLS - short motor rotation in one direction - long motor rotation in rotating selector other direction - double short rotation stop...
  • Seite 17: Command Sequences Example

    COMMAND SEQUENCES EXAMPLE Most of the command sequences have three distinct steps, at the end of which the motor indicates if the step has been concluded positively or not, by turning in different ways. This section is provided to demonstrate the motor indications. The buttons must be pressed as shown in the sequence, without taking more than 4 seconds between one step and the next.
  • Seite 18: Installation

    10 metres. Make sure that there is enough space and MISTRAL does not get damaged by closing the awning!
  • Seite 19 • Rotate the selector to the 0 position; Tn: already programmed remote control • Press the buttons on the remote control in this sequence: A+B and B, and then the SET button for 2 seconds on the Mistral sensor; until the motor performs the confirmation movement (around 2 second). 2 sec Note: to check proper memorisation, press the SET button briefly again: the awning should move about half way through its path.
  • Seite 20 SENSOR ACTIVATION Before assembling the shell on the base: - Rotate the selector to a middle value from 1 to 9 (e.g. 5). - Activate the sensor by pressing the SET SELECTOR button for at least 4 seconds until the LED 4 sec flashes twice quickly.
  • Seite 21 - After the motor makes its confirmation movements, the sensor will wait in stand-by to memorise the inclination angle. - Within one minute manually incline the awning down to its limit for al least 2 seconds and then bring it back to its rest position. - If the position was memorised properly, the motor will make its confirmation movements.
  • Seite 22 Note: to properly check the static load alarm threshold, the load has to be applied constantly for at least 5 seconds. VERIFY ABSENCE OF ALARMS To complete the checks, make sure that the sensor detects no alarms from vibrations or changes in the slope that might be caused by the awning’s structure when moving. If the end bar vibrates notably when opening or closing, or if the support arm permits the awning to slope downward beyond the static load threshold, the sensor could detect an unwanted alarm condition.
  • Seite 23: Deactivating Automatic Reopening

    The automatic reopening function can be deactivated at any moment with the following command sequence: Tn (2 sec) DELETING THE SENSOR To delete the Mistral sensor from the motor, an already programmed remote control must be used. The deleting sequence is the following: 2 sec...
  • Seite 24: Maintenance

    DISABLE THE SENSOR To deactivate the MISTRAL proceed as following: - Open the awning completely and wait for at least ten seconds after the terminal bar has stopped moving before beginning to unsnap the sensor. - Press both snap hooks sideways at the same time while pulling the shell downward, until it comes away from its base.
  • Seite 25 WHAT TO DO IF..Symptom Cause Remedy Low batteries. Open the sensor shell and deactivate it: if the LED flashes, the batteries are almost drained. If the LED is OFF and it does not come back on, the batteries are dead. Change the batteries.
  • Seite 27: Garantie

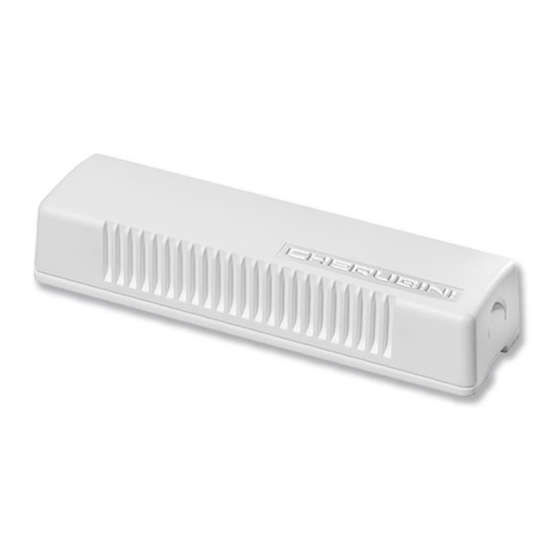
    PRODUKTMERKMALE Der Windwächter Mistral misst die windbedingten Vibrationen an der Struktur einer Gelenkarmmarkise, die sich in Bewegungen der Endstange äußern. Die Zusatzfunktion “statische Last”, die vom Benutzer aktiviert werden kann, ermöglicht auch die Erfassung übermäßiger Wasser- oder Schneemassen, die dazu führen, dass sich die Endstange nach unten neigt.
  • Seite 28: Kompatible Handsender

    KOMPATIBLE HANDSENDER LED - Skipper Display - Skipper Auswahl des Kanals Skipper Skipper Skipper Stopp *siehe die entsprechende Skipper Bedienungsanleitung Skipper SYMBOLERKLÄRUNG - Einzelne “kurze” Drehung in eine Richtung - Einzelne “längere” Drehung in die andere Drehschalter Richtung - Zweifache “kurze” Drehung des Motors Stopp TECHNISCHE EIGENSCHAFTEN...
  • Seite 29: Eingabe Der Befehlsfolgen

    EINGABE DER BEFEHLSFOLGEN Die meisten Befehlsfolgen entsprechen drei klar unterschiedlichen Schritten, bei deren Ende der Motor, mit unterschiedlichen Drehungen, anzeigt ob die Eingabe erfolgreich war oder misslungen ist. Hier werden die vom Motor gegebenen Signale erläutert. Die Tasten müssen wie unten beschrieben gedrückt werden und es dürfen nicht mehr als 4 Sekunden von einem Schritt zum anderen verstreichen.
  • Seite 30 Ausfallprofils montieren. Immer die Position an den Enden des Ausfallprofils zur Montage wählen, auf die Seite wo der Motor oder Funkempfänger sind (oder innerhalb von zehn Metern). NEIN Vergewissern Sie sich das der Mistral ausreichend Platz im Ausfallprofil hat und beim Schließen der Markise nicht beschädigt wird!
  • Seite 31: Einprogrammierung Der Wetterstation

    • Stellen Sie den Drehschalter in die Position 0. Tn: Eingestellter Handsender • Drücken Sie auf dem Handsender die Tastenfolge A+B, B und auf dem Windwächter Mistral zwei Sekunden lang die Taste SET bis der Motor das Bestätigungssignal ausgibt (ca. 2 Sekunden). 2 Sek Hinweis: Um die korrekte Speicherung zu prüfen, drücken Sie erneut kurz die Taste SET. Die Markise wird etwa zur Hälfte ausfahren.
  • Seite 32: Aktivierung Des Sensors

    AKTIVIERUNG DES SENSORS Vor der Befestigung des Gehäuses an der Basis: - Stellen Sie den Drehschalter auf einen Mittelwert zwischen 1 und 9 ein (zum Beispiel 5). DREHSCHALTER 4 Sek - Aktivieren Sie den Windwächter, indem Sie mindestens vier Sekunden lang die Taste SET drücken, bis die LED zwei Mal schnell blinkt. AKTIVIERUNG/DEAKTIVIERUNG DER FUNKTION “STATISCHE LAST”...
  • Seite 33 - Neigen Sie die Markise innerhalb einer Minute bis zur zulässigen Grenze und belassen Sie sie dort für einige Sekunden, bevor Sie sie wieder in die Ruheposition bringen. - Wenn die Position innerhalb weniger Sekunden korrekt gespeichert wurde, führt der Motor die Bestätigungsbewegungen aus.
  • Seite 34 Hinweis: Um die Prüfung der Alarmschwelle für die statische Last korrekt durchzuführen, muss die Kraft konstant und über einen Zeitraum von mindestens fünf Sekunden angewendet werden. PRÜFUNG KEIN ALARM Um die Prüfungen abzuschließen, muss sichergestellt werden, dass der Sensor keinen Alarmsignal infolge von Schwingungen oder Neigungsänderungen feststellt, die während der Bewegung der Markise herbeigeführt werden könnten.
  • Seite 35: Automatischen Öffnung

    AUTOMATISCHEN ÖFFNUNG - nur mit Motoren Blue Wave RX - Bei Auslösung des Windalarms, gibt die Elektronik des Motors den “Schließbefehl”, wobei die Markise ganz geschlossen wird. Jeder weitere Befehl, des Benutzers, bleibt bis Ende des Windalarms blockiert. Um den Windalarm zu deaktivieren, müssen die windbedingten Schwingungen für mindestens acht Minuten unterhalb des eingestellten Schwellwerts bleiben.
  • Seite 36: Deaktivierung Des Sensors

    DEAKTIVIERUNG DES SENSORS Um den MISTRAL zu deaktivieren wie folgend vorgehen: - Öffnen Sie die Markise vollständig und warten Sie, bis die Endstange mindestens zehn Sekunden lang stillsteht, bevor Sie den Windwächter abnehmen. - Drücken Sie seitlich auf beide Befestigungshaken und ziehen Sie gleichzeitig am Gehäuse, sodass es sich von der Befestigungsbasis löst.
  • Seite 37 WAS TUN WENN... Problem Ursache Lösung Batterien leer. Öffnen Sie das Gehäuse des Sensors und deaktivieren Sie ihn. Wenn die LED blinkt, sind die Batterien fast leer. Wenn die LED ausgeschaltet ist und nicht mehr aktiviert werden kann, sind die Batterien vollkommen leer.
  • Seite 39: Caractéristique Du Produit

    CARACTÉRISTIQUE DU PRODUIT Le capteur Mistral détecte les mouvements de la structure d’un store à bras, qui sont provoqués par le vent et qui se manifestent par des oscillations de la barre. La fonction supplémentaire “charge statique”, que l’utilisateur peut activer, permet également de détecter les surcharges provoquées par l’eau ou la neige, qui engendrent une inclinaison...
  • Seite 40: Émetteurs Compatibles

    ÉMETTEURS COMPATIBLES LED - Skipper écran - Skipper sélection du canal Skipper montée Skipper Skipper stop *voir les instructions Skipper spécifiques descente Skipper LÉGENDE DES SYMBOLES - rotation brève du moteur dans un sens - rotation longue du moteur sélecteur rotatif dans l’autre sens - double rotation brève du moteur...
  • Seite 41: Explication Des Séquences De Commande

    EXPLICATION DES SÉQUENCES DE COMMANDE Les séquences se composent pour la plupart de trois étapes bien distinctes à l’issue desquelles le moteur indique par différents types de rotation si l’étape s’est achevée de façon positive ou négative. Cette section a pour objet d’expliquer les signalisations du moteur.
  • Seite 42 INSTALLATION BASE Le capteur est logé dans un boîtier en plastique composé de deux parties: une base qui se fixe à la barre et une coque qui s’accroche à la base. COQUE BOUTON SET COMPARTIMENT PILES La coque contient la carte électronique du capteur, le compartiment pour piles et les commandes de programmation.
  • Seite 43: Mémorisation Du Capteur

    • Ouvrez complètement le store (touche C); • Placez le sélecteur rotatif sur 0; Tn: émetteur mémorisé • Sur l’émetteur, appuyez successivement sur les touches A+B, B et appuyez sur le bouton SET du capteur Mistral jusqu’à ce que le moteur donne le signal de confirmation (environ 2 secondes). 2 sec Commentaire: pour vérifier que la mémorisation a bien été effectuée, appuyez à nouveau brièvement sur le bouton SET:...
  • Seite 44 ACTIVATION DU CAPTEUR Avant d’accrocher la coque à la base: - Placez le sélecteur rotatif sur une valeur intermédiaire comprise entre 1 et 9 (5, par exemple). SÉLECTEUR 4 sec - activez le capteur en appuyant sur le bouton SET pendant au moins 4 secondes jusqu’à ce que la LED clignote 2 fois rapidement. ACTIVATION/DÉSACTIVATION DE LA FONCTION “CHARGE STATIQUE”...
  • Seite 45 - Vous disposez d’une minute pour incliner manuellement le store jusqu’à la limite, et le ramener dans la position de repos. - Si la position a été correctement mémorisée, le moteur effectuera les mouvements de confirmation au bout de quelques secondes. L’angle de déplacement doit être supérieur à...
  • Seite 46 Remarque: pour une bonne vérification du seuil d’alarme de la charge statique, la force doit être appliquée de façon constante, pendant au moins 5 secondes. VÉRIFICATION D’ABSENCE D’ALARME Pour compléter les vérifications, il est nécessaire de veiller à ce que le capteur ne détecte pas d’alarmes dues à...
  • Seite 47: Désactivation De La Réouverture Automatique

    RÉOUVERTURE AUTOMATIQUE - uniquement avec moteurs Blue Wave RX - Après le déclenchement de l’alarme de vent, le moteur ordonnera que le store s’enroule jusqu’à la position de fermeture, bloquant son actionnement par l’utilisateur jusqu’à la fin de l’alarme du vent. Pour désactiver l’alarme vent, les oscillations causées par le vent ne doivent pas dépasser le seuil réglé...
  • Seite 48: Entretien

    DÉSACTIVATION DU CAPTEUR Pour désactiver le senseur suivez la procédure: - Ouvrez complètement le store, attendez que la barre s’immobilise pendant au moins 10 secondes avant de commencer à décrocher le capteur. - Appuyez latéralement sur les deux crochets de fixation et tirez la coque en même temps, jusqu’à...
  • Seite 49: Que Faire En Cas De Dysfonctionnement

    QUE FAIRE EN CAS DE DYSFONCTIONNEMENT Problème Cause Solution Piles déchargées. Ouvrez la coque du capteur et désactivez-le: si la LED clignote, cela signifie que les piles sont presque vides. Si la LED est éteinte et que vous ne parvenez pas à la réactiver, cela signifie que les piles sont complètement vides.
  • Seite 51: Características Del Producto

    CARACTERÍSTICAS DEL PRODUCTO La central de viento por vibración Mistral detecta las vibraciones producidas por el viento en la estructura del toldo, que se manifiestan como oscilaciones de la barra de carga. La función adicional “sobrecarga en extension”, que puede ser habilitada por el usuario, permite además detectar la carga excesiva de masas de agua o nieve al producirse una...
  • Seite 52: Emisores Compatibles

    EMISORES COMPATIBLES LED - Skipper display - Skipper Selección del canal Skipper subida Skipper Skipper stop *ver el libro de instrucciones Skipper del emisor bajada Skipper LEYENDA DE SÍMBOLOS en los dos primeros pasos el motor realiza una breve rotación en un sentido.
  • Seite 53: Explicación De Las Secuencias De Mando

    EXPLICACIÓN DE LAS SECUENCIAS DE MANDO La mayor parte de las secuencias de mando están compuestas por tres pasos bien diferenciados, al término de los mismos el motor realiza una señal, con diversos tipos de rotación, según el paso haya concluido en modo positivo o negativo. El objetivo de este apartado es reconocer las indicaciones del motor.
  • Seite 54: Instalación

    INSTALACIÓN BASE El sensor está alojado en un contenedor de plástico formado por dos partes: una base, que va fijada a la barra de carga, y una cubierta, fijada CUBIERTA mediante mecanismo de anclaje. BOTÓN SET COMPARTIMENTO PILAS La cubierta contiene la placa electrónica del sensor, el compartimento de pilas y los mandos de programación.
  • Seite 55: Memorización Del Sensor

    En esta fase, no fijar la cubierta del sensor a la base. • Introducir las pilas suministradas; • Abrir completamente el toldo (tecla C); • Girar el conmutador giratorio hasta la posición 0; Tn: emisor memorizado • Pulsar en el mando a distancia la secuencia de teclas A+B, B y en el sensor Mistral el botón SET hasta que el motor realiza el movimiento de confirmación. 2 seg Nota: para comprobar la correcta memorización, pulsar de nuevo brevemente el botón SET; el toldo se moverá hasta la mitad aproximadamente del recorrido. Tras la comprobación, abrir nuevamente el toldo.
  • Seite 56 ACTIVACIÓN DEL SENSOR Antes de unir la cubierta a la base: - Configurar el conmutador giratorio en un valor intermedio entre 1 y 9 (por ejemplo, 5). - Activar el sensor pulsando el botón SET CONMUTADOR durante al menos 4 segundos, hasta que el 4 seg LED efectúe dos parpadeos rápidos.
  • Seite 57 - Tras los movimientos de confirmación del motor, el sensor permanece a la espera de la memorización del ángulo de inclinación. - Antes de que pase un minuto, inclinar manualmente el toldo hasta el límite permitido durante unos instantes y volver a ponerlo en la posición de reposo. - Si la posición se ha memorizado con éxito, en pocos segundos el motor realiza los movimientos de confirmación.
  • Seite 58 Nota: para una correcta comprobación del umbral de alarma por sobrecarga en extension, es necesario aplicar la fuerza constantemente durante al menos 5 segundos. COMPROBACIÓN DE LA AUSENCIA DE ALARMAS Para completar las comprobaciones, es necesario asegurarse de que el sensor no detecte alarmas debidas a oscilaciones o variaciones de inclinación que la estructura del toldo pudiera causar durante el movimiento.
  • Seite 59: Desactivación De La Reapertura Automática

    REAPERTURA AUTOMÁTICA - sólo con motores Blue Wave RX - Tras una alarma de viento el motor mandará la recogida del toldo hasta la posición del fin de carrera de cierre, bloqueando el accionamiento desde el emisor hasta que cese la alarma de viento.
  • Seite 60: Mantenimiento

    DESACTIVACIÓN DEL SENSOR Para desactivar el sensor realizar los siguiente pasos: - Abrir completamente el toldo y esperar hasta que la barra de carga haya permanecido parada al menos 10 segundos antes de empezar a quitar el sensor. - Presionar los ganchos de fijación laterales y tirar al mismo tiempo de la cubierta hasta que se desenganche de la base de fijación.
  • Seite 61 QUÉ HACER SI... Síntoma Causa Solución Pilas gastadas. Abrir la cubierta del sensor y desactivarlo; si el led parpadea, las pilas están casi gastadas. Si el led está apagado y no se logra reactivarlo, las pilas están completamente gastadas. Cierre periódico del toldo Sustituirlas por pilas nuevas. incluso en ausencia de Problemas con la Comprobar que el sensor no esté...
  • Seite 62 note - Bem - notes - notas:...
  • Seite 64 MOTEURS ET ACCESSOIRES POUR STORES ET FERMETURES SISTEMAS DE ACCIONAMIENTO PARA PROTECCIÓN SOLAR CHERUBINI S.p.A. 25081 Bedizzole (BS) - Italy - Via Adige, 55 Tel. +39 030 6872039 - Fax +39 030 6872040 info@cherubini.it - www.cherubini.it CHERUBINI Iberia S.L. 03630 SAX Alicante - Spain Avida. Unión Europea, 11-H - P.I. “El Castillo” Tel. +34 96 696 75 04 - Fax +34 96 696 75 05 info@cherubini.es - www.cherubini.es...

Diese Anleitung auch für:

A520012

Inhaltsverzeichnis