Werbung
Quicklinks
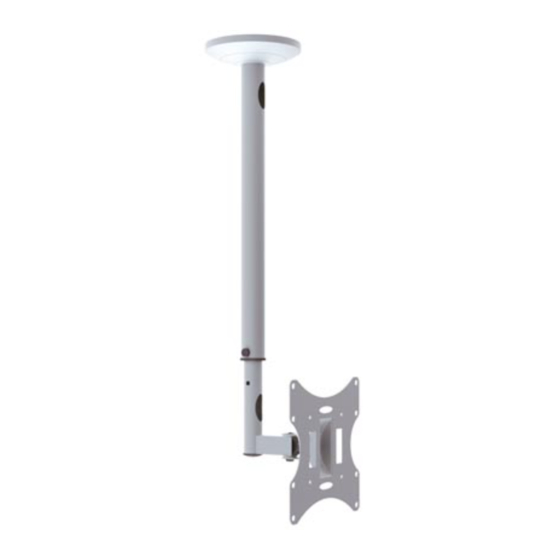
WB042
CEILING BRACKET
SUPPORT DE MONTAGE PLAFONNIER
PLAFONDMONTAGEBEUGEL
DECKENHALTERUNG
SOPORTE PARA MONTAJE AL TECHO
SUPORTE PARA MONTAGEM NO TECTO
INSTALLATION INSTRUCTIONS
INSTRUCTIONS DE MONTAGE
MONTAGE-INSTRUCTIES
BEDIENUNGSANLEITUNG
MANUAL DEL USUARIO
INSTRUÇÕES DE MONTAGEM
CAUTION: Do not exceed the maximum listed weight
capacity. Serious injury or property damage may occur.
ATTENTION: Ne dépassez pas la capacité de charge
maximum indiquée. Risque de dommage matériel ou
blessures graves !
OPGELET: Zorg ervoor dat u het toegelaten maximum
gewicht niet overschrijdt. Dit kan ernstige verwondingen
of schade aan het eigendom veroorzaken.
ACHTUNG: Überschreiten Sie das maximale Gewicht
nie. Dies kann zu Schäden am Produkt führen oder
schwere Verletzungen verursachen!
ADVERTENCIA: No sobrepase nunca la capacidad
máxima de carga. Esto podría causar daños o lesiones
graves.
ATENÇÃO: Não exceder o peso máximo recomendado.
Podem ocorrer acidentes ou danos graves.
42"
MAX
75x75/100x100
200x100/200x200
30kg (66lbs)
MAX
Werbung

Verwandte Anleitungen für Velleman WB042


Inhaltszusammenfassung für Velleman WB042
- Seite 1 WB042 CEILING BRACKET SUPPORT DE MONTAGE PLAFONNIER PLAFONDMONTAGEBEUGEL DECKENHALTERUNG SOPORTE PARA MONTAJE AL TECHO SUPORTE PARA MONTAGEM NO TECTO CAUTION: Do not exceed the maximum listed weight capacity. Serious injury or property damage may occur. ATTENTION: Ne dépassez pas la capacité de charge maximum indiquée.
- Seite 2 Note: Read the entire instruction manual before you start installation and assembly. WARNING • Do not begin the installation until you have read and understood the instructions • If mounting to a wood joist ceiling, make sure that the mounting screws and warnings contained in this installation sheet.
- Seite 3 Component Checklist - Liste de composants - Overzicht onderdelen - Stückliste - Lista de componentes - Lista de componentes IMPORTANT: Ensure that you have received all parts according to the component checklist prior to installing. If any parts are missing or faulty, contact your local distributor for a replacement. IMPORTANT: Assurez-vous d’avoir reçu toutes les pièces affichées sur la liste de composants avant le montage. Si une pièce apparaît comme manquante ou défectueuse, contactez votre distributeur local pour une pièce de rechange.
- Seite 4 Mounting on a Wood Joist Ceiling - Fixation à une poutre en bois - Montage op een houten balk Montage an Holzbalkendecke - Montaje en un techo de vigas de madera - Montagem num tecto com vigas de madeira Find and mark the exact location of the mounting holes. Drill two pilot holes.
- Seite 5 Mounting on Solid Brick and Concrete Blocks - Montage sur brique solide et blocs de béton. - Montage op massieve baksteen en betonblokken - Montage an Mauerwerk, Beton - Montaje en un techo de ladrillos u hormigón - 1b. Montagem em parede de tijolo e cimento Find and mark the exact location of the mounting holes.
- Seite 6 Installing the Outer Column to the Ceiling Plate - Fixer le tube extérieur à la plaque de plafond - De buitenste buis bevestigen aan de wandplaat Das obere Rohr an der Deckenplatte befestigen - Instalar el tubo superior a la placa - Montagem da coluna exterior na placa de tecto Installing the Inner Column and Cables - Fixer le tube intérieur et les câbles - De binnenste buis en kabels bevestigen - Das untere Rohr und die Kabel befestigen - Instalar el tubo inferior y los cables - Montagem da coluna interior e dos cabos Run the power cable...
- Seite 7 Assembling the VESA plate - Assembler la plaque VESA - De VESA-plaat monteren - Die VESA-Platte montieren Montar la placa VESA - Montagem da placa VESA Installing the VESA plate - Fixer la plaque VESA - De VESA-plaat bevestigen - Die VESA-Platte installieren - Instalar la placa VESA Instalação da placa VESA...
-
Seite 8: Manutenção
Installing the display - Fixer l’écran - Het scherm bevestigen - Das Display installieren - Instalar la pantalla - Instalação do ecrã oder oder • Remarque : Utilisez les vis, rondelles, et entretoises (si nécessaire) appropriées selon • Note: Choose the appropriate screws, washers, and spacers (if necessary) according to le type d’écran. - Seite 9 Warranty kwaliteitsgarantie Velleman® Since its foundation in 1972, Velleman® acquired Velleman® heeft sinds zijn oprichting in 1972 een Depuis 1972, Velleman® a gagné une vaste extensive experience in the electronics world and ruime ervaring opgebouwd in de elektronicawereld expérience dans le secteur de l’électronique et est currently distributes its products in over 85 countries.
- Seite 10 Die oben stehende Aufzählung kann eventuell del usuario del artículo en cuestión). utilização. angepasst werden gemäß der Art des Produktes (siehe Bedienungsanleitung des Gerätes). Made in PRC - Imported by Velleman nv - Legen Heirweg 33, 9890 Gavere, Belgium - www.velleman.eu...