Velleman WB045 Bedienungsanleitung
Quicklinks
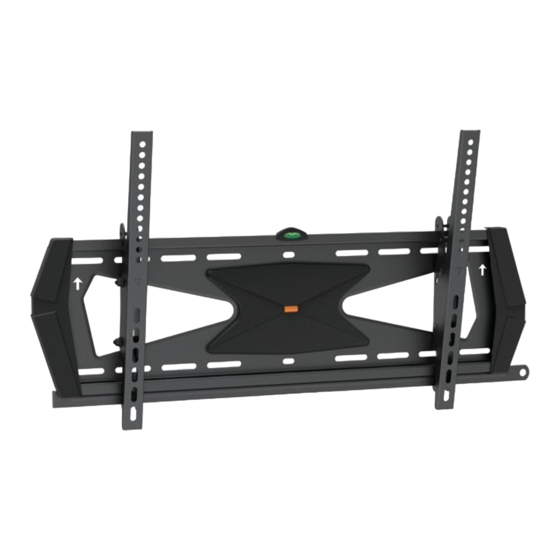
WB045
FLAT PANEL TILTING WALL SUPPORT
SUPPORT MURAL INCLINABLE POUR ÉCRANS PLATS
KANTELBARE MUURBEUGEL VOOR FLATSCREENS
SOPORTE DE PARED INCLINABLE PARA PANTALLAS PLANAS
NEIGBARE WANDHALTERUNG FÜR FLACHBILDSCHIRME
SUPORTE DE PAREDE PARA ECRÃS PLANOS
EN INSTALLATION INSTRUCTIONS
FR
CONSIGNES DE MONTAGE
NL
MONTAGE INSTRUCTIES
ES
MANUAL DEL USUARIO
DE BEDIENUNGSANLEITUNG
PT
INSTRUÇÕES DE MONTAGEM
100 x 100
200 x 100
200 x 200
75x75
400 x 200
100x100
400 x 400
600 x 400
60"
23"
max.
MAX
CAUTION: Do not exceed the maximum listed weight
capacity. Serious injury or property damage may occur.
ATTENTION: Ne dépassez pas la capacité de charge
maximum indiquée. Risque de dommage matériel ou
blessures graves !
OPGELET: Zorg ervoor dat u het toegelaten maximum
gewicht niet overschrijdt. Dit kan ernstige verwondingen
of schade aan het eigendom veroorzaken.
ADVERTENCIA: No sobrepase nunca la capacidad
máxima de carga. Esto podría causar daños o lesiones
graves.
ACHTUNG: Überschreiten Sie das maximale Gewicht
nie. Dies kann zu Schäden am Produkt führen oder
schwere Verletzungen verursachen!
ATENÇÃO: Não exceder o peso máximo recomendado.
Podem ocorrer acidentes ou danos graves.
40kg (88lb)
max.

Verwandte Anleitungen für Velleman WB045


Inhaltszusammenfassung für Velleman WB045
- Seite 1 WB045 FLAT PANEL TILTING WALL SUPPORT SUPPORT MURAL INCLINABLE POUR ÉCRANS PLATS KANTELBARE MUURBEUGEL VOOR FLATSCREENS SOPORTE DE PARED INCLINABLE PARA PANTALLAS PLANAS NEIGBARE WANDHALTERUNG FÜR FLACHBILDSCHIRME SUPORTE DE PAREDE PARA ECRÃS PLANOS 40kg (88lb) max. CAUTION: Do not exceed the maximum listed weight capacity.
- Seite 2 Note: Read the entire instruction manual before you start installation and assembly. WARNING • Do not begin the installation until you have read and understood the instructions and • Never exceed the maximum load capacity. warnings contained in this installation sheet. If you have any questions regarding any of the • If mounting to wood wall studs, make sure that mounting screws are anchored into the center instructions or warnings,please contact your local distributor.
- Seite 3 Component Checklist - Liste de composants - overzicht onderdelen - Lista de componentes - Komponentenliste - Lista de componentes IMPORTANT: Ensure that you have received all parts according to the component checklist prior to installing. If any parts are missing or faulty, contact your local distributor for a replacement.
- Seite 4 Install decorative covers - Fixer les plaques décoratives - De sierplaten bevestigen - Instalar las cubiertas decorativas Die dekorativen Platten installieren - Instalar as capas decorativas Attach decorative covers to wall plate using screws. Note: With the gap of the decorative cover downward.
- Seite 5 Mounting on Solid Brick and Concrete Blocks - Montant sur du béton plein ou un bloc de parpaing - Montage op een muur van massief beton of B2-blokken - Montaje en una pared de ladrillos u hormigón - Montage an Mauerwerk, Beton Montagem em parede de tijolo e cimento 60mm 60mm...
- Seite 6 Installing Adapter Brackets - Fixer les supports d’adaptateur - De bevestigingsadapter monteren Instalar los soportes adaptador - Die Adapterhalter installieren - Instalar suportes do adaptador Top of display Surface de l’écran Bovenkant van het scherm Parte superior de la pantalla Oberseite des Displays Parte de cima do ecrã...
- Seite 7 For Recessed Back Screen or to Access A/V Inputs - Voor schermen met een achterkant met uitsparing of voor toegang tot A/V-ingangen - Pour écrans avec rainure au dos ou pour accéder aux entrées A/V - Para pantallas con otro tipo de parte trasera o para pantallas con las entradas A/V en la parte trasera - Für Bildschirme mit einer gesenkten Rückseite oder mit A/V-Eingängen auf der Rückseite - Para ecrãs com uma reentrância na parte traseira ou para aceder a entradas A/V oder...
- Seite 8 Hook Display onto the Wall Plate - Accrocher l’écran à la plaque murale - Hook Display onto the Wall Plate Fijar la pantalla a la placa de pared - Das Display an der Wandplatte befestigen - Pendurar o ecrã na parede Two qualified persons are required Le montage doit être effectué...
-
Seite 9: Maintenance
Adjustment - Réglage - Regeling - Ajustar el ángulo de inclinación - Den Neigungswinkel einstellen - Ajuste +5 ° - 1 0 ° Push or pull from top or bottom of display to obtain the desired angle. Poussez ou tirez le côté supérieur de l’écran pour obtenir l’angle de vue souhaité. Duw of trek aan de bovenkant van het scherm om de gewenste kijkhoek in te stellen. Empuje o tire de la parte inferior o superior de la pantalla para obtener el ángulo deseado. - Seite 10 Since its foundation in 1972, Velleman® acquired Depuis 1972, Velleman® a gagné une vaste Velleman® heeft sinds zijn oprichting in 1972 een extensive experience in the electronics world and expérience dans le secteur de l’électronique et est ruime ervaring opgebouwd in de elektronicawereld currently distributes its products in over 85 countries.
- Seite 11 Die oben stehende Aufzählung kann eventuell utilização. angepasst werden gemäß der Art des Produktes (siehe Bedienungsanleitung des Gerätes). Made in PRC - Imported by Velleman nv - Legen Heirweg 33, 9890 Gavere, Belgium - www.velleman.eu...