PNI HOUSE WiFi650 Kurzanleitung
Inhaltsverzeichnis
Verfügbare Sprachen
Verfügbare Sprachen
Quicklinks
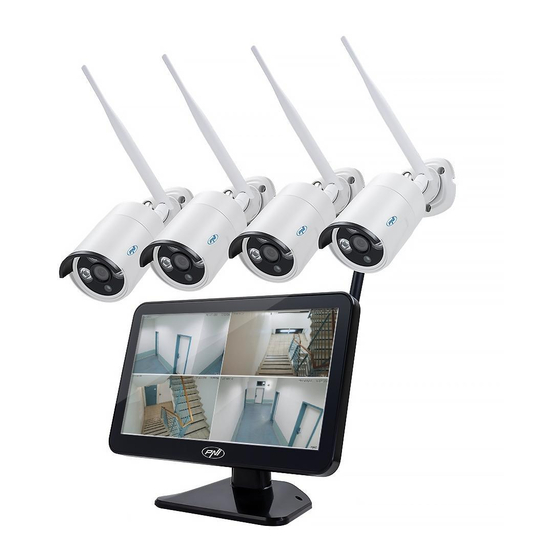
Video surveillance system / Система за видеонаблюдение / Videoüberwachungssystem /
Sistema de videovigilancia / Système de surveillance vidéo / Videófelügyeleti rendszer / Sistema
di videosorveglianza / System nadzoru wideo / Kit supraveghere video
PNI HOUSE WiFi650
EN
Quick guide .............................................
BG
Бързо ръководство ................................
DE
Kurzanleitung ..........................................
ES
Guía rápida .............................................
FR
Guide rapide ............................................
HU
Gyors útmutató ........................................
IT
Guida veloce ............................................
PL
Szybka porada .........................................
RO
Ghid rapid ................................................
2
11
20
29
38
47
56
65
74
Inhaltsverzeichnis

Verwandte Anleitungen für PNI HOUSE WiFi650


Inhaltszusammenfassung für PNI HOUSE WiFi650
-
Seite 20: Produktbeschreibung
ACHTUNG • Bevor Sie diesen Überwachungskit benutzen, bitte lesen Sie aufmerksam die Gebrauchsanweisungen. • Nach der ersten Authentifizierung empfehlen wir Ihnen das Passwort zu ändern. • Die Haupteinheit des Überwachungssystems nicht bei Feuchtigkeit oder Staub oder in der Reichweite der Kinder einbauen. Ventilieren Sie gut die Haupteinheit. •... -
Seite 21: Einbau Hard Disk
EINBAU HARD DISK Entfernen Sie Installieren Sie Benutzen Sie die Verbinden Sie Legen den Versorger, drinnen eine Schrauben die Kabel von alles zurück entfernen Sie Hard Disk von dem Paket um der Hard Disk. befestigen die Schrauben, 2.5” die Hard Disk zu entfernen Sie befestigen. -
Seite 22: Schema Draht Anschluss
SCHEMA DRAHT ANSCHLUSS Hinweis: Es gibt 2 Anschluss-Typen: LAN für den Anschluss der Kamera an NVR und WAN um das System aus einem anderen Netzwerk abzurufen. SYSTEM ABRUFEN UND SYSTEM KONTROLLIEREN Versorgen Sie die Kameras und NVR Logen Sie sich ein. Hinweis: Implizit ist der Nutzer Admin mit dem Passwort “1234”... -
Seite 23: Menü Optionen
Hinweis: Die Kameras aus Kit wurden aus der Fabrik mit NVR verkuppelt. So nach der Versorgung der Kameras und der NVR können Sie auf dem Bildschirm die Bilder der Kameras sehen. Wenn Sie auf dem Bildschirm keine Bilder sehen, in unterem Interface, klicken Sie die gewünschte Liste auf der Kamera, klicken Sie dann “Codes for Wireless”... -
Seite 24: Aufnahmen Wiedergeben
Dauer (Length) - Stellen Sie die Dauer für jede Video Datei ein. Modus (Mode) - Stellen Sie den Modus Aufnahme ein: Programmiert (Schedules) in manchen Tagen und bei bestimmten Uhrzeiten Manuell. In Modus programmiert können Sie die Aufnahme einstellen: Normal (Regular) - das System nimmt für die ganze eingestellte Dauer auf, Detektion (Detect) - das System nimmt auf, nur wenn es Bewegung detektiert und Alarm (Alarm) - das System nimmt auf, nur wenn ein Alarm ausgelöst wird. -
Seite 25: Zahl Kameras Und Unterstützte Resolutionen
Klicken Sie rechts auf dem Bildschirm - Hauptmenü (Main menu) - System (System) - Digital - Sender Typ (Channel type) PNI House wIfI650 unterstützt 4 Kameras IP 1080P oder 8 Kameras mit IP 960P. DETEKTION BEWEGUNG Klicken Sie rechts auf dem Bildschirm - Hauptmenü (Main menu) - Alarm (Alarm) - Detektion Bewegung (Motion detect) Sender (Channel): wählen Sie den Sender, den Sie konfigurieren möchten... -
Seite 26: Verwaltung Speichereinheit
VERWALTUNG SPEICHEREINHEIT Klicken Sie rechts auf dem Bildschirm - Hauptmenü (Main menu) - Fortgeschritten (Advanced) - HDD Info Das Interface zeigt Informationen über den internen HDD: Typ, Status und Speicherkapazität. Wählen Sie das Speichergerät und dann klicken Sie auf die gewünschte Funktion: Formatierung, Partitionieren, Einstellung Modus Lesen/Schreiben oder nur Lesen. -
Seite 27: Technische Spezifikationen
Hinweis: Implizit blockiert Internet Explorer den Plug-in. Deshalb müssen Sie das Sicherheitsniveau ändern : Internet option - Security - Custom level - ActiveX controls and plug-ins; aktivieren Sie alle Optionen. SYSTEM ABRUFEN DURCH CMS WINDOWS Bauen Sie die CMS Software ein (aus der CD aus dem Paket). Hinweis: Details finden Sie auf der CD aus dem Paket. - Seite 28 Manuell, programmiert, bei Modi Aufnahme Alarm Aufnahme Resolution Aufnahme 1080P Full HD (4 Sender) Bilder pro Sekunde 20-30fps @ 1080P 1 x max. 8TB (nicht Speicherung HDD 2.5” eingeschlossen) XMEye Android, iOS Kontrolle Web/CMS Netzwerk 1 x RJ45 Ausgang HD port 1 x HD port (1.3) Anschlüsse Ausgang VGA...
- Seite 83 Declaración UE de conformidad simplificada SC ONLINESHOP SRL declara que el Sistema de video vigilancia PNI House WiFi650 cumple con la Directiva RED 2014/53/EU. El texto completo de la declaración de conformidad de la UE está disponible en la siguiente dirección de Internet:...