Herunterladen Inhalt Inhalt Diese Seite drucken
Samsung MM-J330 Benutzerhandbuch
Vorschau ausblenden Andere Handbücher für MM-J330:
Inhaltsverzeichnis

Werbung

Verfügbare Sprachen

Verfügbare Sprachen

MM-J320
MM-J330
Micro Component System
MP3-CD/WMA-CD/CD-R/RW Playback
user manual
imagine
the possibilities
Thank you for purchasing this Samsung product.
To receive more complete service,
please register your product at
www.samsung.com/register

Werbung

Inhaltsverzeichnis
loading

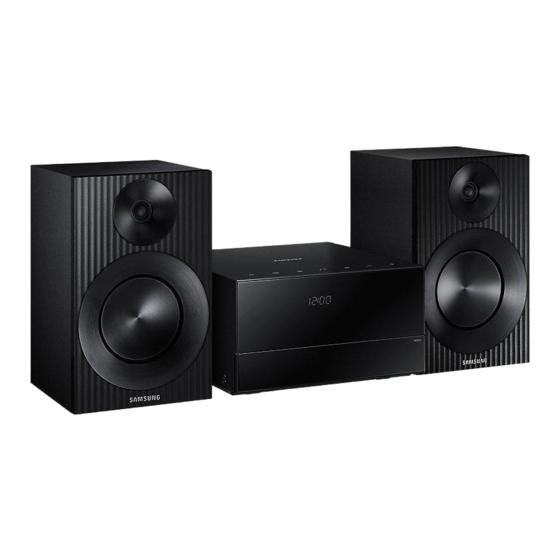
Inhaltszusammenfassung für Samsung MM-J330

  • Seite 1 MM-J320 MM-J330 Micro Component System MP3-CD/WMA-CD/CD-R/RW Playback user manual imagine the possibilities Thank you for purchasing this Samsung product. To receive more complete service, please register your product at www.samsung.com/register...
  • Seite 2: Safety Warnings

    Safety Warnings TO REDUCE THE RISK OF ELECTRIC SHOCK, DO NOT REMOVE THE COVER (OR BACK). NO USER- SERVICEABLE PARTS ARE INSIDE. REFER SERVICING TO QUALIFIED SERVICE PERSONNEL. CAUTION This symbol indicates “dangerous voltage” inside the product that presents a risk of electric shock or personal injury.
  • Seite 3: Precautions

    Precautions • To turn this apparatus off completely, you must • Ensure that the AC power in your house matches disconnect it from the wall outlet. Consequently, the requirements listed on the identification the wall outlet and power plug must be readily sticker located on the back of your product.
  • Seite 4: Disc And Format Compatibility

    Disc and Format Compatibility This product does not support Secure (DRM) • If a file is encoded in the Variable Bit Rate (VBR) Media files. format,( i.e. files encoded in both low bit rate and high bit rate - 32Kbps ~ 320Kbps), the sound CD-R Discs may skip during playback.
  • Seite 5: Inhaltsverzeichnis

    Contents Thank you for buying this SAMSUNG Component System. Please take time to read these instructions. They will allow you how to operate your system and take full advantage of its features. Safety Warnings ........2 10 Skip Track ........11 Precautions ..........
  • Seite 6: Description

    Description Front/Top Panel 5V 500mA AUX IN POWER button AUX IN JACK Press this button to switch your product 1. Use the Audio Cable (not supplied) to connect on or off. AUX IN on the player to Audio Out on the external analog component. Function button 2. Press to switch the input mode to AUX. STOP button • If no button actions for more than 8 hours in AUX mode, the power will automatically turn off.
  • Seite 7: Rear Panel

    Rear Panel 1. ONLY FOR SERVICE 3. 2.0 CH Speaker Connector Terminals • This jack is for service only. Please do not use. The speaker connector terminals are located on the rear of the system. 2. FM Antenna Connector Terminal 1.
  • Seite 8: Remote Control

    Remote Control FUNCTION Power SLEEP (Set a sleep time to shut off the TIMER CLOCK product.) TIMER ON/OFF REPEAT +10 USB REC Search backwards Search-forwards STOP PLAY/PAUSE Skip /RDS PTY* Skip/RDS DISPLAY* MUTE (Turn off the sound temporarily. Press again to turn the sound back on.) TUNING/ALBUM VOLUME (–) VOLUME (+) ENTER MO/ST TUNING MODE TUNING/ALBUM This product may not have the RDS function. Installing Batteries In The Remote Control • Place batteries in the remote control so that the polarities match the illustrations in the battery compartment : (+) to (+) and (–) to (–).
  • Seite 9: Cd/Mp3/Wma-Cd Playback

    CD/MP3/WMA-CD Playback • Keep the tray closed whenever you are not using it Lets you play 12 cm compact discs without an adapter. to prevent dust from entering. This product is designed to play audio CDs, CDs, • You can load or unload a compact disc when the CD-Rs, CD-RWs, or MP3/WMA-CDs.
  • Seite 10: Searching For A Specific Music

    Searching for a Specific Music Playing a USB Device Passage on a CD Connect an external storage device such as a USB flash memory stick or external HDD (Hard Disk When listening to a compact disc, you can quick- Drive) to the product. You can play files in MP3/ ly search for a specific music passage on a track.
  • Seite 11: 10 Skip Track

    Listening to Radio To Store the Stations You Want • DIR: Repeatedly plays all tracks in the selected folder. You can store up to15 FM stations. • ALL: Repeatedly plays all tracks. • RANDOM: Plays tracks in random order. Select FM by pressing the FUNCTION button. 10 Skip Track To search for a station, press the STOP on the product or TUNING MODE button one or...
  • Seite 12: Using Bluetooth

    ; BT on the front display. What is Bluetooth? • If the Bluetooth device has failed to pair with the product , delete the previous “[Samsung] Bluetooth technology lets Bluetooth-compliant devices MICRO xxxxxx ” found by the Bluetooth interconnect easily with each other using a short, device and have it search for the product wireless connection.
  • Seite 13: Using Bluetooth Power On

    To disconnect the Bluetooth device from Using Bluetooth Power On the Micro Component When the product is turned off, you can You can disconnect the Bluetooth device from connect your smart device to the product via the Micro Component. For instructions, see a Bluetooth connection to turn it on.
  • Seite 14: Tv Soundconnect

    Micro Component to switch from TV Before activating this function, be sure to activate SoundConnect mode to another mode or turn off the Samsung TV's SoundConnect or SoundShare the Micro Component. The currently connected mode. device is disconnected.
  • Seite 15: Timer Function

    Timer Function 8. Press the ENTER ( ) button. The timer enables you to switch the system on or Result: CHKREC (Do you want to record?) is dis- off at specific times automatically. played. • Before setting the timer, confirm that the current time is correct.
  • Seite 16: Recording Function

    Recording Function You can record from a CD, radio broadcast, or an 4. To stop recording, press the STOP (@) button. external source to a USB storage device. The product automatically creates and saves Connect an external USB storage device to the recorded files in .MP3 format (SAM-XXXX.MP3).
  • Seite 17: Selecting Eq Mode

    Selecting EQ Mode Software Update Your Micro Component System provides pre- Samsung may offer updates for the Product's system defined equalizer settings that are optimized for firmware in the future. particular music genre. If an update is offered, you can update the firmware 1.
  • Seite 18: Troubleshooting

    Refer to the chart below when this unit does not function properly. If the problem you are experiencing is not listed below or if the instructions below do not help, turn off the unit, disconnect the power cord, and contact the nearest authorized dealer or Samsung Electronics Service Center.
  • Seite 19: Specifications

    (AUX) 1.2 V Input sensitivity *: Nominal specification - Samsung Electronics Co., Ltd reserves the right to change the specifications without notice. - Weight and dimensions are approximate. - Design and specifications are subject to change without prior notice. - For information on the power supply and power consumption, refer to the label attached to the product.
  • Seite 20: Contact Samsung World Wide

    Contact SAMSUNG WORLD WIDE If you have any questions or comments relating to Samsung products, please contact the SAMSUNG customer care Centre. Area Contact Centre  Web Site Area Contact Centre  Web Site ` Europe LUXEMBURG 261 03 710 www.samsung.com/support...
  • Seite 21 MM-J320 MM-J330 Système Micro Component Lecture MP3-CD/WMA-CD/CD-R/RW manuel d'utilisation imaginez les possibilités Merci d'avoir choisi cet appareil Samsung. Pour obtenir une assistance plus complète, veuillez enregistrer votre produit sur www.samsung.com/register...
  • Seite 22: Avertissements Relatifs À La Sécurité

    Avertissements relatifs à la sécurité TO REDUCE THE RISK OF ELECTRIC SHOCK, DO NOT REMOVE THE COVER (OR BACK).POUR LIMITER LES RISQUES DE DÉCHARGE ÉLECTRIQUE, NE RETIREZ JAMAIS LE CACHE (NI L'ARRIÈRE DE L'APPAREIL). LES PIECES QU’IL CONTIENT NE SONT PAS REPARABLES PAR L’UTILISATEUR. VEUILLEZ CONTACTER UN TECHNICIEN QUALIFIÉ...
  • Seite 23: Rangement Et Gestion Des Disques

    Consignes • Assurez-vous que l’alimentation CA de votre • Evitez toute projection d’eau sur l’appareil. Ne domicile est conforme aux instructions de la posez jamais d’objet contenant un liquide (ex : un plaque d’identification située au dos de l’appareil. vase) dessus. • Posez votre appareil sur une surface horizontale • Pour éteindre complètement l'appareil, vous appropriée (meuble) en veillant à...
  • Seite 24: Compatibilité Des Disques Et Des Formats

    Compatibilité des disques et des formats • Si un disque n’est pas fermé, le début de la lecture sera retardé et la totalité des fichiers Ce produit ne prend pas en charge les fichiers à enregistrés pourra ne pas être lue. support sécurisé...
  • Seite 25 Sommaire Merci d’avoir acheté ce système Component SAMSUNG. Veuillez prendre le temps de lire ces instructions. Cela vous permettra de faire fonctionner correctement votre système et de bénéficier pleinement de ces fonctionnalités. Avertissements relatifs à la sécurité ..2 Pour répéter une ou toutes les pistes .. 10 Consignes ..........
  • Seite 26: Description

    Description Façade/Panneau supérieur avant 5V 500mA AUX IN Bouton POWER PRISE AUX IN (ENTRÉE AUX) Appuyez sur ce bouton pour allumer ou 1. Utilisez un câble audio (non fourni) pour éteindre votre appareil. connecter la prise AUX IN (ENTRÉE AUX) du lecteur à la sortie audio d'un composant Bouton Function (FONCTION) analogique externe. 2. Appuyez sur pour passer du mode d’entrée Bouton STOP (ARRÊT) au mode AUX (AUX).
  • Seite 27: Panneau Arrière

    Panneau arrière 1. UNIQUEMENT POUR LES RÉPARATIONS 3. Bornes des connecteurs des enceintes à 2,0 • Cette prise est destinée uniquement aux canaux réparateurs. Veuillez ne pas l’utiliser. Les bornes des connecteurs des enceintes sont situées à l’arrière du système. 2.
  • Seite 28: Insertion Des Piles Dans La Télécommande

    Télécommande FUNCTION (FONCTION) POWER (MARCHE/ARRÊT) SLEEP (VEILLE) (Permet de régler l'heure TIMER/CLOCK (MINUTERIE/HORLOGE) de mise en veille de l'appareil.) TIMER ON/OFF (MARCHE/ARRÊT MINUTERIE) REPEAT (RÉPÉTER) +10 USB REC (ENREG. USB) Recherche en lecture avant Recherche en lecture arrière STOP (ARRÊT) PLAY/PAUSE (LECTURE/PAUSE) Saut/RDS PTY* Saut/RDS DISPLAY* MUTE (MUET) (Permet de couper le son momentanément. EQ (ÉGALISEUR) Appuyez une nouvelle fois pour réactiver le son.) TUNING/ALBUM (SYNTONISATION/ALBUM) VOLUME (VOLUME) (–) VOLUME (VOLUME) (+) ENTER (ENTRÉE) MO/ST (MONO/STÉRÉO) TUNING MODE (MODE SYNTONISATION) TUNING/ALBUM (SYNTONISATION/ALBUM) Cet appareil peut ne pas disposer de la fonction RDS. Insertion des piles dans la télécommande • Placez les piles dans la télécommande afin que la polarité (+, -) corresponde à celle du schéma présent dans leur logement.
  • Seite 29: Lecture Cd/Mp3/Wma-Cd

    • La qualité de la lecture d’un CD MP3/WMA peut Lecture CD/MP3/WMA-CD varier suivant l’état du disque contenant les fichiers musicaux ou l’état de l’enregistreur utilisé pour créer Vous permet de lire des CD de 12 cm sans adaptateur. le disque. Cet appareil est conçu pour lire les CD audio, les • Si un même disque contient différents types de CD, les CD-R, les CD-RW ou les CD MP3/WMA.
  • Seite 30: Recherche D'un Passage De Musique Spécifique Sur Un Cd

    Recherche d’un passage de musique Lecture d’un dispositif USB spécifique sur un CD Connectez à l’appareil un périphérique de stock- age externe tel qu’une clé USB à mémoire flash Lorsque vous écoutez un CD, vous pouvez ou un disque dur externe. Vous pouvez lire des rechercher rapidement un passage de musique fichiers au format MP3/WMA.
  • Seite 31: Saut De 10 Pistes

    Écouter la radio Pour mémoriser les stations que vous voulez • DIR: permet de lire toutes les pistes contenues dans le dossier sélectionné de manière répétée. Vous pouvez enregistrer jusqu'à 15 stations de la • ALL: permet de lire le disque entier de manière répétée. bande FM.
  • Seite 32: Utilisation Du Système Bluetooth

    - Une partie de votre corps est en contact avec le de l'appareil a échoué supprimez le précédent système de réception/transmission du périphérique « [Samsung] MICRO xxxxxx » identifié par le Bluetooth ou du composant Micro Component. périphérique Bluetooth et faites-lui rechercher - L’appareil est soumis à...
  • Seite 33: Utiliser La Mise En Marche Par Bluetooth

    • Notez que des appareils tels que des fours à micro- n'a pas été apparié avec le composant Micro ondes, des adaptateurs LAN sans fil, des lampes fluorescentes et des fours à gaz pour chauffage des Component au préalable. locaux utilisent la même plage de fréquences que le périphérique Bluetooth, ce qui peut provoquer des Utiliser la mise en marche par Bluetooth interférences électriques.
  • Seite 34: Tv Soundconnect

    Suivant/Précédent) ne sont pas disponibles. Réglage de l’horloge • La fonction SoundConnect est disponible sur les téléviseurs Samsung commercialisés depuis Au cours de chaque étape, vous disposez de 2012. Vérifiez si votre téléviseur prend en charge la fonction SoundShare ou SoundConnect. (Pour quelques secondes pour régler les options...
  • Seite 35: Fonction Timer (Minuterie)

    Résultat: REC N s’affiche. Vous pouvez appuyez sur Fonction Timer (Minuterie) les boutons , ou . pour sélectionner REC Y ou La minuterie vous permet d’allumer ou d’éteindre le sys- REC N, puis appuyez sur le bouton ENTER ( tème automatiquement à des moments précis. 1). Si vous sélectionnez REC N (ENREG.
  • Seite 36: Fonction D'enregistrement

    Fonction d’enregistrement Vous pouvez enregistrer à partir d’un CD, d’une émis- 4. Pour arrêter l’enregistrement, appuyez sur le sion de radio, ou d’une source externe sur un bouton STOP (@). L'appareil crée périphérique de stockage USB. automatiquement les fichiers et les enregistre en 1.
  • Seite 37: Sélection Du Mode Eq

    Sélection du mode EQ Mise à jour logicielle Votre système Micro Component fournit des Samsung peut proposer à l’avenir des mises à jour paramètres d'égaliseur prédéfinis, optimisés pour le micrologiciel du système de l’appareil. pour un genre de musique particulier.
  • Seite 38: Dépannage

    Si le problème que vous rencontrez n’est pas répertorié ci-dessous ou si les consignes ne vous sont d’aucune aide, éteignez l’appareil, débranchez le cordon d’alimentation et contactez le revendeur agréé le plus proche ou un centre de dépannage Samsung Electronics. Problème Vérification/Solution • Le cordon d'alimentation est-il branché...
  • Seite 39: Caractéristiques Techniques

    Sensibilité d’entrée *: Caractéristiques nominales - Samsung Electronics Co., Ltd se réserve le droit de modifier les caractéristiques sans préavis. - Le poids et les dimensions figurent à titre approximatif. - La conception et les spécifications sont soumises à modification sans avis préalable.
  • Seite 40: Comment Contacter Samsung Dans Le Monde

    Comment contacter Samsung dans le monde Si vous avez des suggestions ou des questions concernant les produits Samsung, veuillez contacter le Service Consommateurs Samsung. Area Contact Centre  Web Site Area Contact Centre  Web Site ` Europe LUXEMBURG 261 03 710 www.samsung.com/support...
  • Seite 41 MM-J320 MM-J330 Microcomponentsysteem Voor het afspelen van mp3-cd's/wma-cd;s/ cd-r's/rw's gebruiksaanwijzing Ongekende mogelijkheden Bedankt voor het aanschaffen van dit Samsung- product. Registreer uw product op www.samsung.com/ register voor een completere service.
  • Seite 42: Veiligheidswaarschuwingen

    Veiligheidswaarschuwingen DE BEHUIZING (OF ACHTERZIJDE) NIET VERWIJDEREN, OM HET GEVAAR VAN ELEKTRISCHE SCHOKKEN TE VERMINDEREN. DIT APPARAAT BEVAT GEEN ONDERDELEN DIE DE GEBRUIKER ZELF KAN REPAREREN. LAAT ONDERHOUD OVER AAN EEN GEKWALIFICEERDE MONTEUR. Dit symbool geeft aan dat er in het product LET OP sprake is van een 'gevaarlijk spanning' die elektrische schokken of persoonlijk letsel...
  • Seite 43: Voorzorgsmaatregelen

    Voorzorgsmaatregelen • Stel dit apparaat niet bloot aan druppels of • Controleer of de wisselstroomvoorziening in spatten. Plaats geen objecten op het apparaat uw huis overeenkomt met de vereisten op de die gevuld zijn met water, zoals een vaas. identificatiesticker aan de achterkant van het product.
  • Seite 44: Compatibiliteit Van Disc En Indeling

    Compatibiliteit van disc en indeling • Als de disc niet is afgesloten, duurt het langer voordat het afspelen begint en worden mogelijk Dit product ondersteunt geen DRM-bestanden niet alle aanwezige bestanden afgespeeld. (beveiligde media). • Als een bestand is gecodeerd in de indeling CD-R Discs VBR (Variable Bit Rate), (d.w.z.
  • Seite 45 Inhoud Bedankt voor het aanschaffen van dit componentsysteem van SAMSUNG. Neem tijd om deze instructies te lezen. Door deze instructies kunt u het systeem gemakkelijk bedienen en optimaal profiteren van de functies. Veiligheidswaarschuwingen ....2 Een nummer of alle nummers herhalen ..........
  • Seite 46: Omschrijving

    Omschrijving Voor-/bovenpaneel 5V 500mA AUX IN Knop POWER (Aan/uit) AUX IN-AANSLUITING 1. Gebruik de audiokabel (niet bijgeleverd) voor Druk op deze knop om uw product in of het aansluiten van de AUX IN-aansluiting op ce uit te schakelen. speler naar de audio-uitgang op het externe knop FUNCTION analoge component. 2. Druk op om naar de invoermodus AUX te Knop STOP (Stoppen) schakelen.
  • Seite 47: Achterpaneel

    Achterpaneel 1. ONLY FOR SERVICE (ALLEEN VOOR SERVICE) 3. 2.0 CH aansluitingen voor • Deze aansluiting is uitsluitend voor luidsprekerconnectoren De aansluitingen voor de luidsprekerconnector servicedoeleinden. Gebruik deze niet. bevinden zich op de achterkant van het systeem. 2. Aansluiting voor FM-antenneconnector 1.
  • Seite 48: Afstandsbediening

    Afstandsbediening FUNCTION POWER (Aan-Uit) SLEEP (De sluimertijd voor het uitschakelen TIMER CLOCK van het product instellen.) TIMER ON/OFF (TIMER AAN/UIT) REPEAT (Herhalen) +10 USB REC Achteruit zoeken Vooruit zoeken STOP AFSPELEN/PAUZE Overslaan/RDS PTY* Overslaan/RDS WEERGAVE* MUTE (Het geluid tijdelijk uitschakelen. Druk opnieuw om het geluid opnieuw in te schakelen.) TUNING/ALBUM VOLUME (–) VOLUME (+) INVOEREN MO/ST TUNING MODE TUNING/ALBUM Dit product beschikt mogelijk niet over de RDS-functie. Batterijen in de afstandsbediening plaatsen • Plaats batterijen in de afstandsbediening zodat de polariteiten (+, -) overeenkomen met het diagram in het batterijvak.
  • Seite 49: Cd/Mp3/Wma-Cd Afspelen

    CD/MP3/WMA-CD afspelen Hiermee kunt u 12 cm cd’s afspelen zonder een adapter. • Als er langer dan 3 minuten geen knoppen op het product of de afstandsbediening worden ingedrukt Dit product is ontworpen voor het afspelen van audio- wanneer het product zich in de modus Pause bevindt, cd’s, cd’s, cd-r’s, cd-rw’s of mp3/wma-cd’s.
  • Seite 50: Een Specifiek Muziekfragment Op Een

    Een USB-apparaat afspelen Een specifiek muziekfragment op een cd zoeken Sluit een extern opslagapparaat, bijvoorbeeld een USB-flashgeheugen, of een externe HDD (Hard Disk Drive) aan op het product. U kunt bestanden met een Wanneer u naar een cd luistert, kunt u snel zoeken mp3/wma-indeling afspelen.
  • Seite 51: Naar De Radio Luisteren

    Naar de radio luisteren De gewenste station opslaan • DIR: alle nummers in de geselecteerde map herhaald afspelen. • ALL: alle nummers herhaald afspelen. U kunt maximaal 15 FM-stations opslaan. • RANDOM:alle nummers worden in willekeurige volgorde afgespeeld. Selecteer FM door op de toets FUNCTION (Functie) te drukken.
  • Seite 52: Bluetooth Gebruiken

    Selecteer "[Samsung] MICRO xxxxxx " in de • Een Bluetooth-apparaat kan, afhankelijk van het lijst. gebruik, in de volgende gevallen ruis of storingen • Wanneer het product is verbonden met het veroorzaken: Bluetooth-apparaat, verschijnt Device name ;...
  • Seite 53 • Wanneer u de Microcomponent hebt • Wanneer het Bluetooth-apparaat na het uitgeschakeld en de koppeling is verbroken, verbreken van de verbinding weer binnen wordt de koppeling niet automatisch hersteld. het effectieve bereik komt, kunt u de U moet het apparaat opnieuw koppelen om Microcomponent opnieuw opstarten om de opnieuw verbinding te maken.
  • Seite 54: Knop Tv

    Microcomponent uit te schakelen. Activeer de modus SoundConnect of SoundShare Het momenteel aangesloten apparaat wordt op uw Samsung-tv voordat u deze functie activeert. losgekoppeld. Druk op de knop FUNCTION op het hoofdapparaat of • De aangesloten tv wacht een bepaalde tijd op...
  • Seite 55: Timerfunctie

    Timerfunctie Resultaat: REC N wordt weergegeven. U kunt op de Met de timer kunt u het systeem op bepaalde tij- knop , of . te selecteren REC Y of REC N en ver- den automatisch in- of uitschakelen. volgens op ENTER ( ) drukken.
  • Seite 56: Opnamefunctie

    Opnamefunctie U kunt een cd, radio-uitzending of een andere externe 5. U kunt het USB-apparaat veilig verwijderen door bron opnemen op een USB-opslagapparaat. nogmaals op STOP (@) te drukken. Na de opname 1. Sluit een extern USB-opslagapparaat aan op de wordt een map met de naam USB op uw product.
  • Seite 57: De Eq-Modus Selecteren

    De EQ-modus selecteren Softwareupdate Uw Microcomponentsysteem biedt vooraf Samsung kan in de toekomst updates voor de firm- gedefinieerde equalizerinstellingen die zijn geopti- ware van het product aanbieden. maliseerd voor een specifiek muziekgenre. Indien een update wordt aangeboden, kunt u de firm- 1.
  • Seite 58: Problemen Oplossen

    Raadpleeg de onderstaande tabel als de eenheid niet naar behoren functioneert. Als uw probleem niet wordt genoemd of als de onderstaande instructies niet helpen, schakelt u de eenheid uit, haalt u de stekker uit het stopcontact en neemt u contact op met de dichtstbijzijnde erkende dealer of Samsung Electronics-servicecentrum. Symptoom Controle/oplossing • Zit het netsnoer goed in het stopcontact?
  • Seite 59: Specificaties

    - Raadpleeg het etiket dat aan het apparaat is bevestigd voor informatie over de stroomtoevoer en het stroomverbruik. Aankondiging open source - Neem voor vragen en verzoeken met betrekking tot open source contact op met Samsung via e-mail (oss.request@ samsung.com).
  • Seite 60 0771 726 7864 (SAMSUNG) www.samsung.com/se/support 8009 4000 only from landline, toll CYPRUS www.samsung.com/ch/support free 80111-SAMSUNG (80111 726 (German) SWITZERLAND 0848 726 78 64 (0848-SAMSUNG) www.samsung.com/gr/support www.samsung.com/ch_fr/ 7864) only from land line GREECE (+30) 210 6897691 from mobile support (French) and land line 0330 SAMSUNG (7267864) www.samsung.com/uk/support...
  • Seite 61 MM-J320 MM-J330 Mikro-Kompaktanlage MP3-CD/WMA-CD/CD-R/RW Wiedergabe Benutzerhandbuch Unvorstellbare Möglichkeiten Vielen Dank, dass Sie sich für ein Samsung-Produkt entschieden haben. Wenn Sie einen umfassenderen Service nutzen möchten, registrieren Sie bitte Ihr Produkt unter www.samsung.com/register...
  • Seite 62: Sicherheitshinweise

    Sicherheitshinweise UM DIE GEFAHR EINES STROMSCHLAGS ZU REDUZIEREN DARF DAS GEHÄUSE (ODER DIE RÜCKWAND) NICHT ENTFERNT WERDEN. DAS GERÄT ENTHÄLT KEINE VOM BENUTZER REPARIERBAREN ODER ZU WARTENDEN TEILE. LASSEN SIE REPARATUREN NUR VON QUALIFIZIERTEM FACHPERSONAL DURCHFÜHREN. Dieses Symbol weist auf eine „gefährliche ACHTUNG Netzspannung"...
  • Seite 63: Vorsichtsmaßnahmen

    Vorsichtsmaßnahmen • Stellen Sie sicher, dass die Netzspannung in Ihrem • Um das Gerät vollständig abzuschalten, muss der Haushalt mit den auf dem Informationsetikett auf Netzstecker aus der Steckdose gezogen werden. der Geräterückseite angegebenen Anforderungen Aus diesem Grund müssen die Steckdose und übereinstimmt.
  • Seite 64: Kompatible Disks Und Formate

    Kompatible Disks und Formate Secure (DRM) Media Dateien werden von diesem wurde, wird der Start der Wiedergabe verzögert und es werden eventuell nicht alle aufgezeichneten Gerät nicht unterstützt. Dateien wiedergegeben. CD-R Disks • Wenn eine Datei im Variable Bit Rate (VBR) Format codiert ist, (z.
  • Seite 65 Inhalt Vielen Dank, dass Sie sich für eine Mikro-Kompaktanlage der Firma SAMSUNG entschieden haben. Lesen Sie diese Bedienungsanleitung sorgfältig durch, Sie ermöglichen es Ihnen, das Gerät zu bedienen und alle Vorteile seiner Funktionen zu nutzen. Sicherheitshinweise ......... 2 Einen oder alle Titel wiederholen ..10 Vorsichtsmaßnahmen ......
  • Seite 66: Beschreibung

    Beschreibung Vorder-/Oberseite des Geräts 5V 500mA AUX IN POWER Taste AUX-EINGANG Drücken Sie diese Taste, um Ihr Gerät ein- 1. Verwenden Sie ein Audio-Kabel (nicht oder auszuschalten. mitgeliefert), um den Audio Ausgang eines externen Geräts an den AUX IN Anschluss FUNCTION Taste dieses Geräts anzuschließen. 2. Drücken Sie , um auf den AUX Modus STOP Taste umzuschalten.
  • Seite 67: Rückseite Des Geräts

    Rückseite des Geräts 1. ONLY FOR SERVICE 3. Stereo Lautsprecheranschlüsse • Dieser Anschluss dient nur zu Die Lautsprecheranschlüsse befinden sich auf Servicezwecken Bitte nicht verwenden. der Rückseite der Anlage. Um eine fehlerfreie Klangqualität zu erzielen, müssen die 2. UKW-Antennenanschluss Lautsprecherkabel der Kennzeichnung entsprechend an die Lautsprecheranschlüsse auf 1.
  • Seite 68: Einsetzen Der Batterien In Die Fernbedienung

    Fernbedienung FUNCTION POWER (EIN/AUS) SLEEP (Programmieren Sie eine Zeit, zu der TIMER CLOCK das Gerät ausgeschaltet werden soll.) TIMER ON/OFF REPEAT +10 USB REC Rückwärts suchen Vorwärts suchen STOP (STOPP) WIEDERGABE/PAUSE Überspringen/RDS PTY* Überspringen/RDS DISPLAY* MUTE (Schaltet den Ton vorübergehend aus. Drücken Sie die Taste erneut, um den Ton wieder einzuschalten.) TUNING/ALBUM LAUTSTÄRKE (-) VOLUME (+) ENTER MO/ST TUNING MODE TUNING/ALBUM Dieses Produkt verfügt eventuell nicht über die RDS Funktion Einsetzen der Batterien in die Fernbedienung • Legen Sie die Batterien so in die Fernbedienung ein, dass die Pole entsprechend auf die Markierungen...
  • Seite 69: Cd/Mp3/Wma-Cd Wiedergabe

    CD/MP3/WMA-CD Wiedergabe Sie können 12 cm Compact Disks ohne Adapter abspielen. • Das CD-Fach sollte bei Nichtverwendung stets geschlossen bleiben, damit kein Staub in das Mit diesem Gerät können Sie Audio-CDs, CDs, CD-Rs, Gerät eindringen kann. CD-RWs oder MP3/WMA-CDs wiedergeben. • Sie können CDs auch einlegen und • Die Disk-Lade vorsichtig öffnen oder schließen.
  • Seite 70: Einzelne Musikpassagen Auf Einer Cd Suchen

    Einzelne Musikpassagen auf einer Wiedergabe von einem USB-Gerät CD suchen Schließen Sie ein externes Speichergerät, wie einen USB-Flash-Speicher oder eine externe Bei der Wiedergabe einer CD können Sie nach Festplatte an das Gerät an. Sie können Dateien im einer bestimmten Musikpassage innerhalb eines MP3/WMA Format wiedergeben.
  • Seite 71: 10 Titel Überspringen

    Radiosender speichern • DIR: Wiederholt die Wiedergabe aller Titel im Radiosender speichern ausgewählten Ordner. • ALL: Wiederholt die Wiedergabe der gesamten Es können bis zu 15 UKW-Sender gespeichert werden. Disk. Wählen Sie FM (UKW), indem Sie die • RANDOM: Gibt die Titel in zufälliger Reihenfolge wieder.
  • Seite 72: Bluetooth Verwenden

    • Es wird eine Liste der erkannten Geräte Was ist Bluetooth? angezeigt. Bluetooth ist eine Technologie, mit der es möglich Wählen Sie "[Samsung] MICRO xxxxxx" aus der ist, Bluetooth-fähige Geräte einfach über eine kurze Liste. Funkverbindung miteinander zu verbinden. • Wenn das Gerät mit dem Bluetooth Gerät • Ein Bluetooth Gerät kann Störungen erzeugen oder...
  • Seite 73: Trennen Der Verbindung Zwischen Bluetooth-Gerät Und Mikro-Kompaktanlage

    Trennen der Verbindung zwischen Bluetooth-Gerät und Mikro- Kompaktanlage Einschalten des Geräts über Bluetooth Sie können die Verbindung zwischen Wenn das Gerät ausgeschaltet ist, können Sie Ihr Bluetooth-Gerät und Mikro-Kompaktanlage Smart Device über eine Bluetooth-Verbindung mit trennen. Die Anleitung hierzu finden Sie in der dem Gerät verbinden, um es einzuschalten.
  • Seite 74: Tv Soundconnect

    • Wenn die Verbindung zwischen der Mikro- Kompaktanlage und dem Fernsehgerät getrennt ist, Mithilfe der TV SoundConnect Funktion können Sie den Ton wird auf dem Display der Mikro-Kompaktanlage TV Ihres SoundConnect fähigen Samsung Fernsehgeräts über DISCONNECTED ; REQUEST angezeigt. die Micro-Kompaktanlage wiedergeben. Verbindung zwischen Mikro-Kompaktanlage und Anschließen der Mikro-Kompaktanlage an ein...
  • Seite 75: Timer-Funktion

    Timer Funktion 8. Drücken Sie die ENTER ( ) Taste. Ergebnis: CHKREC (Wollen Sie die Aufnahme starten?) Mit der Timer-Funktion können Sie das System zu wird angezeigt. einer bestimmten Uhrzeit automatisch ein- oder 9. Drücken Sie die ENTER ( ) Taste. ausschalten.
  • Seite 76: Aufnahmefunktion

    Aufnahmefunktion Sie können von einer CD, eine Radiosendung oder 4. Drücken Sie zum Beenden der Aufnahme die von einem externen Gerät auf ein USB-Speichergerät STOP (@) Taste. Das Gerät erstellt und aufnehmen. speichert automatisch Dateien im .MP3 Format 1. Schließen Sie ein externes USB-Speichergerät (SAM-XXXX.MP3).
  • Seite 77: Auswahl Des Eq-Modus

    Auswahl des EQ-Modus Aktualisieren der Software Ihre Mikro-Kompaktanlage stellt voreingestellte Samsung kann unter Umständen in der Zukunft Firm- Equalizer-Einstellungen bereit, die für bestimmte ware-Aktualisierungen für dieses Gerät zur Verfügung Musikarten optimiert sind. stellen. 1. Drücken Sie die EQ Taste. Wenn ein Update verfügbar ist, kann die Firmware Jedes Mal, wenn die EQ Taste gedrückt wird, durch Anschließen eines USB-Laufwerks mit dem...
  • Seite 78: Problembehebung

    Wenn das bei Ihnen auftretende Problem nicht aufgeführt ist oder die Anweisungen zu keiner Lösung führen, schalten Sie das Gerät aus, ziehen Sie das Netzkabel aus der Steckdose, und wenden Sie sich an einen autorisierten Händler vor Ort oder an den Samsung Kundendienst. Symptom Überprüfen/Beheben • Ist der Netzstecker sicher angeschlossen?
  • Seite 79: Technische Daten

    (AUX) 1.2 V Eingangsempfindlichkeit *: Nominelle Spezifikation - Samsung Electronics Co., Ltd behält sich das Recht auf unangekündigte Änderungen vor. - Gewicht und Abmessungen können von den Angaben abweichen. - Gestaltung und technische Daten können ohne vorherige Ankündigung geändert werden.
  • Seite 80: Kontakt Zu Samsung World Wide

    Kontakt zu SAMSUNG WORLD WIDE Falls Sie Fragen oder Anregungen zu Samsung-Produkten haben, freuen wir uns über Ihre Kontaktaufnahme mit der Samsung-Kundenbetreuung. Area Contact Centre  Web Site Area Contact Centre  Web Site ` Europe MONTENEGRO 020 405 888 www.samsung.com/support...

Diese Anleitung auch für:

Mm-j320

Inhaltsverzeichnis