Denver Instrument UltraBasic Handbuch
Tragbares ph-messgerät

Verwandte Anleitungen für Denver Instrument UltraBasic

Inhaltszusammenfassung für Denver Instrument UltraBasic
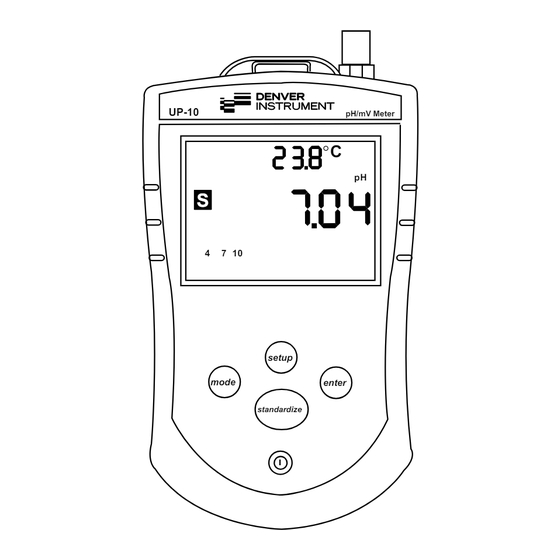
- Seite 1 UltraBasic Portable pH Meter Tragbares pH-Messgerät Operating Instructions/Betriebsanleitung UP-10 pH/mV Meter °C 7 10 setup mode enter standardize...
- Seite 2 English – page 3 Deutsch – Seite 19...
- Seite 19 Inhaltsverzeichnis Garantiehinweise Haftungsausschluss Technische Daten des Messgerätes Zubehör Kurzanleitung für das UltraBasic-Messgerät Inbetriebnahme Installation und Wartung der Elektroden Kalibrieren für pH-Messungen Verwendung des Setup-Menüs im pH-Modus Kalibrieren für Millivolt-Messungen/relative Millivolt (nur Modell UP-10) Verwendung des Setup-Menüs im mV-Modus (Modell UP-10)
-
Seite 20: Garantiehinweise
Die Kosten für die Einsendung gehen zu Ihren Lasten, während die Kosten für die Rücksendung von uns übernommen werden. Schicken Sie die Waage an einen niedergelassenen Händler ein oder an Nord- und Südamerika: Denver Instrument Company 6542 Fig Street Arvada, Colorado 80004 1-800-321-1135... -
Seite 21: Haftungsausschluss
Präzisionsmessgerätes entschieden, das eine sorgfältige Handhabung erfordert. Lesen Sie den gesamten Inhalt dieses Bedienungshandbuches aufmerksam durch, bevor Sie Ihr neues Messgerät von Denver Instrument in Betrieb nehmen. Achtung: Vom Hersteller nicht ausdrücklich genehmigte Änderungen bzw. Modifikationen können zum Verlust... -
Seite 22: Technische Daten Des Messgerätes
Wasserdicht in Schutzart IP-67 bis 1 Meter. Automatische Temperaturkompensation durch Temperaturfühler. Automatische Korrektur der Elektrodensteilheit zwischen 90 und 105%. Zubehör Für Ihr pH-Messgerät ist folgendes Zubehör erhältlich: Ersatz-pH-Einstabmesskette für das Messgerät UltraBasic 301423.1 pH-Einstabmesskette mit ATC-Temperaturfühler, Kunststoffkörper 300728.1 Hochleistungs-pH-Einstabmesskette mit ATC-Temperaturfühler, 300729.1... -
Seite 23: Kurzanleitung Für Das Ultrabasic-Messgerät
Kurzanleitung für das UltraBasic-Messgerät Legen Sie eine 9-Volt-Batterie in Im Display erscheint der aktuelle das Batteriefach ein oder verbinden Messwert in pH, mV oder relative mV. Sie das Netzkabel mit der Steckdose (optional). Betätigen Sie die Taste Setup, um Informationen über die Elektroden- Schließen Sie die Elektrode an... -
Seite 24: Inbetriebnahme
Inbetriebnahme Bedienelemente auf der Vorderseite UP-10 pH/mV Meter °C Setup-Taste: zum Löschen von Puffern, Aufrufen von Elektroden- 7 10 kalibrierdaten oder zur Auswahl Enter-Taste: neuer, automatisch zur Auswahl erkannter Puffer einzelner und Standards . Menüpunkte. setup mode enter Mode-Taste: Standardize-Taste: zum Umschalten standardize zur Eingabe... - Seite 25 Anschlüsse auf der Geräterückseite BNC- Anschluss für pH- Einstab- messkette oder ionen- selektive Elektrode Anschlussbuchse für das Netzkabel Anschlussbuchse für den ATC-Temperaturfühler zur automatischen Temperaturkompensation Batterieeinbau 9-Volt-Batterie Abdeckung für das Batteriefach...
-
Seite 26: Installation Und Wartung Der Elektroden
Um genaueste Messungen zu unter die Einfüllöffnung sinkt, ermöglichen, kann wahlweise sollte Elektrolytlösung nachgefüllt ein ATC-Temperaturfühler werden. an der ATC-Eingangsbuchse angeschlossen werden. Hinweis: Die im Lieferumfang des UltraBasic-Kit enthaltene Elektrode ist mit Gel gefüllt. Sie enthält weder Elektrolytlösung noch hat sie eine Einfüllöffnung. -
Seite 27: Kalibrieren Für Ph-Messungen
Kalibrieren für pH-Messungen Da sich die Empfindlichkeit von Elektroden ändern kann, müssen sowohl das Messgerät als auch die Elektrode kalibriert werden, um Unterschiede auszugleichen. Je häufiger die Kalibrierung vorgenommen wird, um so genauer fallen die Messungen aus. Für exakte Messergebnisse sollte die Kalibrierung täglich oder noch häufiger erfolgen. - Seite 28 7. Als nächstes führt das Messgerät einen Elektrodencheck durch. Im Display werden der Zustand der Elektrode sowie die Steilheit der Elektrode in % angezeigt. 8. Die Anzeige Slope Error bedeutet, dass die Elektrode nicht einwandfrei arbeitet. Die Steilheit der Elektrode sollte zwischen 90 und 105 % liegen.
-
Seite 29: Verwendung Des Setup-Menüs Im Ph-Modus
Verwendung des Setup-Menüs im pH-Modus Mit der Setup-Taste haben Sie die Möglichkeit, alle eingegebenen Puffer/Standards zu löschen, Informationen über die Kalibrierung anzuzeigen oder das gewünschte Pufferset auszuwählen. Hinweis: Wiederholtes Drücken der Setup-Taste bringt Sie wieder in den Messmodus zurück. 1. Betätigen Sie die Setup-Taste, das Messgerät zeigt ein blinkendes Clear-Symbol an. -
Seite 30: Kalibrieren Für Millivolt-Messungen/Relative Millivolt (Nur Modell Up-10)
Kalibrieren für Millivolt-Messungen/ relative Millivolt (nur Modell UP-10) °C Messungen in Millivolt (mV) werden vor allem bei Elektrodenchecks, zur Titration oder zur rel mV Bestimmung von Redoxpotentialen durchgeführt (auch als ORP = Oxidationsreduktionspotential bezeichnet). Redoxpotentialmessungen sind ein Maß für die Oxidations- bzw. Reduktionsfähigkeit einer Lösung. -
Seite 31: Verwendung Des Setup-Menüs Im Mv-Modus (Modell Up-10)
Verwendung des Setup-Menüs im mV-Modus Modell UP-10 1. Um einen zuvor eingegebenen mV-Offset zu löschen und zum absoluten Millivolt-Modus rel mV zurückzukehren, drücken Sie die Setup-Taste. Im Display wird nun ein blinkendes Clear- Symbol und der aktuelle relative mV-Offset angezeigt. Clear 2. -
Seite 32: Fehlerbeseitigung
Fehlerbeseitigung °C 1. Liegt das Signal der Elektrode außerhalb des Messbereichs, wird im Display “- - -” angezeigt. Dazu kann es kommen, wenn die Elektrode nicht in eine Lösung eintaucht. 2. Stellt das Messgerät einen Fehler bei der Temperaturmessung fest, wird im Display - - - angezeigt. - Seite 33 5. Um den ordnungsgemäßen Betrieb des Messge- rätes zu testen, stecken Sie den Kurzschluss- stecker in die BNC-Eingangsbuchse. Betätigen Sie die Mode-Taste, um in den mV-Modus zu gelangen, und notieren Sie den angezeigten Messwert in Millivolt. Prüfen Sie, ob das Mess- gerät im mV-Modus arbeitet und nicht im relati- ven mV-Modus.
-
Seite 34: C-Kennzeichnung
C-Kennzeichnung Das Gerät erfüllt die Anforderungen 73/23/EWG »Elektrische der Richtlinien des Rates der Betriebsmittel Europäischen Union: zur Verwendung innerhalb bestimmter 89/336/EWG »Elektromagnetische Spannungsgrenzen«. Verträglichkeit (EMV)«: Zugehörige Europäische Normen: Fundstellen zu 89/336/EWG: EG-Amtsblatt Nr. 2001/C 105/03 EN 60950 Sicherheit von Einrichtungen der EN 61326-1 Elektrische Betriebs- Informationstechnik, mittel füt Messtechnik,...