Herunterladen Inhalt Inhalt Diese Seite drucken

Werbung

Verfügbare Sprachen
  • DE

Verfügbare Sprachen

  • DEUTSCH, seite 1
Bad-Heizung
Bathroom Heater
Calefacción de baño
Chauffage de salle de bains
Stufa da bagno
10033016 10033017 10033018 10033019
Hinweis: Dieses Produkt ist nur für gut isolierte Räume
oder für den gelegentlichen Gebrauch geeignet.
Note: This product is only suitable for well insulated
spaces or occasional use.
Advertencia: Este producto está indicado únicamente
en lugares abrigados o para una utilización punctual.
Remarque : Ce produit ne peut être utilisé que dans des
locaux bien isolés ou de manière occasionnelle.
Nota: Questo prodotto è adatto solo per spazi ben
isolati o uso occasionale.

Werbung

Inhaltsverzeichnis
loading

Inhaltszusammenfassung für Klarstein 10033016

  • Seite 1 Chauffage de salle de bains Remarque : Ce produit ne peut être utilisé que dans des Stufa da bagno locaux bien isolés ou de manière occasionnelle. Nota: Questo prodotto è adatto solo per spazi ben isolati o uso occasionale. 10033016 10033017 10033018 10033019...
  • Seite 3: Inhaltsverzeichnis

    Bedienungsanleitung und weitere Informationen rund um das Produkt zu erhalten: INHALTSVERZEICHNIS Technische Daten 3 Konformitätserklärung 3 Produktdatenblatt 4 Sicherheitshinweise 5 Geräteübersicht 8 Bedienfeld 9 Bedienung 10 Hinweise zur Entsorgung 14 TECHNISCHE DATEN Artikelnummer 10033016 10033017 Leistung (Watt) 1000/2000 Stromversorgung 220-240 V ~ 50/60 Hz Zubehör Rollen weiß Rollen schwarz Artikelnummer 10033018 10033019 KONFORMITÄTSERKLÄRUNG Hersteller: Chal-Tec GmbH, Wallstraße 16, 10179 Berlin, Deutschland.
  • Seite 4: Produktdatenblatt

    PRODUKTDATENBLATT Artikelnummer(n) 10033016 10033017 Angabe Symbol Wert Einheit Angabe Einheit Wärmeleistung Nur bei elektrischen Speicher-Einzelraumheizgeräten: Art der Regelung der Wärmezufuhr Nennwärmeleistung Manuelle Regelung der Wärmezufuhr mit nein integriertem Thermostat Mindestwärmeleistung Manuelle Regelung der Wärmezufuhr nein (Richtwert) mit Rückmeldung der Raum- und/oder Außentemperatur...
  • Seite 5: Sicherheitshinweise

    SICHERHEITSHINWEISE • Lesen Sie alle Anweisungen, bevor Sie dieses Gerät benutzen. • Lassen Sie das Gerät nicht unbeaufsichtigt, wenn es in Betrieb ist. • Diese Heizung wird während der Benutzung heiß. Berühren Sie nicht die heißen Oberflächen. VORSICHT: Verbrennungsgefahr! Einige Teile dieses Produktes können sehr heiß werden und Verbrennungen verursachen.
  • Seite 6 • Fassen Sie das Heizelement nicht mit bloßen Händen an. Wenn es versehentlich berührt wird, entfernen Sie Fingerabdrücke mit einem weichen Tuch, da sich diese sonst in das Element einbrennen und einen vorzeitigen Ausfall der Heizung verursachen. • Ersetzen Sie das Heizelement nicht oder versuchen Sie nicht, es zu entfernen. •...
  • Seite 7: Abmessungen

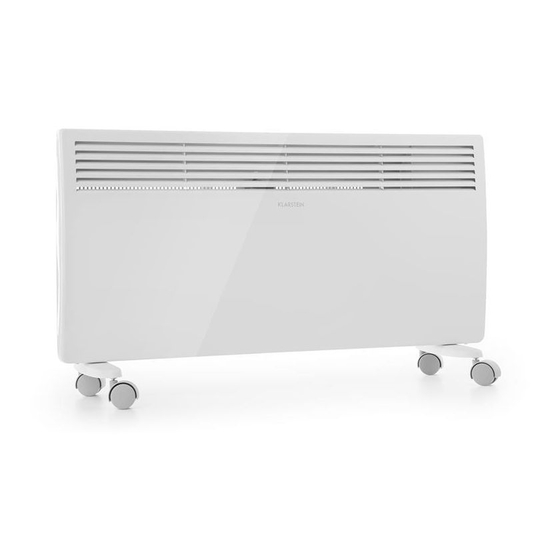
    MONTAGE Artikelnummer Produkt 10033016 Bad-Heizkörper aus Metall weiß 10033017 Badheizkörper aus Metall schwarz 10033018 weiße Rollen 10033019 schwarze Rollen Abmessungen L (mm) H (mm) L1 (mm) H1 (mm) Heizgerät an der Wand montieren und demontieren Wandmontage Heizgerät von der Wand abnehmen...
  • Seite 8: Geräteübersicht

    Rollen installieren und entfernen Knopf drücken Wenn die Montage abgeschlossen ist, Drücken Sie den Knopf nach oben, um hören Sie einen Klick. die Rollen abzunehmen. GERÄTEÜBERSICHT Luftaustritt Steuereinheit Schalter Lenkrollenhalter...
  • Seite 9: Bedienfeld

    BEDIENFELD Betriebsanzeige Heizleistung Heizungsanzeige Anzeige halbe Heizleistung (LO) Anzeige volle Heizleistung (HI) Anzeige Fenster offen (WO) Anzeige Manueller Modus (M) Anzeige Auto-Modus (A) Timer-Anzeige Einstelltaste Aufwärts (+) Einstelltaste Abwärts (-) Programm bestätigen (OK) Programm-Einstellungen (Set) Grad Celsius-Symbol (°C) Temperaturanzeige Minutenanzeige Stundenanzeige Wochentaganzeige Taste Auto-/Manueller Modus...
  • Seite 10: Bedienung

    BEDIENUNG Inbetriebnahme • Nehmen Sie die Heizung vorsichtig aus dem Karton. Bitte bewahren Sie den Karton für die Lagerung außerhalb der Saison auf. • Stellen Sie sicher, dass der Ein/Aus-Schalter (21) ausgeschaltet ist, bevor Sie das Gerät anschließen. • Achten Sie darauf, dass die Heizung gemäß der Montageanleitung vollständig montiert ist.
  • Seite 11 • Erfolgt nach Beendigung der Einstellung 10 Sekunden lang keine Aktion, speichert das System automatisch die Einstellung und verlässt das Menü. Timer einstellen Den Timer im Manuellen Modus einstellen (24-Stunden-Timer) Drücken Sie die Taste Auto-/Manueller Modus (19), um den manuellen Modus auszuwählen.
  • Seite 12 Teilleistung und volle Leistung einstellen • Drücken Sie die Heizleistungs-Taste (2), um die Leistung in Teil- oder Volllast zu ändern. • Bei Vollast wird in der Anzeige volle Heizleistung (5) das „HI” eingeblendet und in der Anzeige halbe Heizleistung (4) das „LO” ausgeblendet. •...
  • Seite 13: Kindersicherung

    Signalton • Jedes Mal, wenn Sie eine Taste drücken, ertönt ein Signalton, bei längerem Drücken ertönt er nur einmal. Kindersicherung • Wenn das Gerät in Betrieb ist, drücken Sie gleichzeitig die Aufwärts- (10) und Abwärts (1 1)-Taste für 3 Sekunden. Das System wird gesperrt. Die Temperaturanzeige (15) zeigt zunächst „[ ]”...
  • Seite 14: Hinweise Zur Entsorgung

    HINWEISE ZUR ENTSORGUNG Befindet sich die linke Abbildung (durchgestrichene Mülltonne auf Rädern) auf dem Produkt, gilt die Europäische Richtlinie 2012/19/EU. Diese Produkte dürfen nicht mit dem normalen Hausmüll entsorgt werden. Informieren Sie sich über die örtlichen Regelungen zur getrennten Sammlung elektrischer und elektronischer Gerätschaften.
  • Seite 15: Technical Data

    Technical Data 15 Declaration of Conformity 15 Product Data Sheet 16 Safety Instructions 17 Device overview 20 Control panel 21 Operation 22 Disposal Considerations 26 TECHNICAL DATA Item number 10033016 10033017 Rated Power (Watt) 1000/2000 Power supply 220-240 V ~ 50/60 Hz Accessories Castors white Castors black Artikelnummer 10033018...
  • Seite 16: Product Data Sheet

    PRODUCT DATA SHEET Item number(s): 10033016 10033017 Item Symbol Value Unit Item Unit Heat output Type of heat input, for electric storage local space heaters only Nominal heat output manual heat charge control, with integrated thermostat Minimum heat output manual heat charge control with room and/or...
  • Seite 17: Safety Instructions

    SAFETY INSTRUCTIONS • Read all instructions before using this unit. • Do not leave this unit unattended when in use. • This heater will get hot when in use. Do not touch hot surfaces. CAUTION: Risk of burns! Some parts of this product can become very hot and cause burns. Particular attention has to be given when children and vulnerable people are present.
  • Seite 18 • Do not handle the element with bare hands. If it is inadvertently touched, remove finger marks with a soft cloth and methylated spirits or alcohol, otherwise the marks will burn into the element causing premature heater failure. • Do not replace or attempt to replace the element in this product. •...
  • Seite 19 ASSEMBLY Item number Product 10033016 Bathroom metal panel heater white 10033017 Bathroom metal panel heater black 10033018 Castors white 10033019 Castors black Dimensions L (mm) H (mm) L1 (mm) H1 (mm) Mounting and dismounting the heater on the wall Wall mounted mode Take down the heater from wall...
  • Seite 20: Device Overview

    Rollen installieren und entfernen Push button If the installation is complete, an Press the button up, take down the acoustic click sounds. caster. DEVICE OVERVIEW Air Outlet Control Unit Switch Castor Wheel Stand...
  • Seite 21: Control Panel

    CONTROL PANEL Power indicator Heater element power Heating indicator Half Heating indicator (LO) Full Heating indicator (HI) Window Open Indicator (WO) Manual mode indicator (M) Auto mode indicator (A) Timer indicator Upwards adjustment (+) button Downwards adjustment (-) button Program Confirm (OK) Program Set (Set) Degrees Celsius symbol (°C) Temperature indicator...
  • Seite 22: Operation

    OPERATION Initial operation • Carefully remove the heater from the box. Please keep the carton for off-season storage. • Make sure the power switch (21) is turned off before pluggin it in. • Make sure that the heater is completely installed according to the installation instructions.
  • Seite 23 Setting the timer Setting the Timer in Manual Mode (24-hour timer) Press the Auto/Manual mode button (19) to select the manual mode. The display shows “M” in manual mode (7). Press the “Set” button (13) to set the hour of the timer to stop the heating. Press the up (10) and down (1 1) buttons to select the hour (if the selected hour is less than the current hour, the system is automatically activated the next day).
  • Seite 24 Manual Mode and Auto Mode • Press the Auto/Manual mode button (19) to change the mode to Manual or Auto. • In manual mode, the display in manual mode (7) shows an “M” while the “A” is hidden. • In auto mode, the display in auto mode (8) shows the “A” and the “M” is hidden. Shutdown memory function •...
  • Seite 25 Unlock child lock Switch off the device with the start/stop button (20). The unit switches to the resting stage. Press the up (10) and down (1 1) buttons for 3 seconds and the child lock is unlocked.
  • Seite 26: Disposal Considerations

    DISPOSAL CONSIDERATIONS According to the European waste regulation 2012/19/ EU this symbol on the product or on its packaging indicates that this product may not be treated as household waste. Instead it should be taken to the appropriate collection point for the recycling of electrical and electronic equipment.
  • Seite 27: Fiche Technique

    Fiche de données produit 28 Consignes de sécurité 29 Aperçu de l‘appareil 32 Panneau de commande 33 Utilisation 34 Informations sur le recyclage 38 FICHE TECHNIQUE Numéro d'article 10033016 10033017 Puissance (watts) 1000/2000 Alimentation 220-240 V ~ 50/60 Hz Accessoire Roulettes blanches Roulettes noires Numéro d'article...
  • Seite 28: Fiche De Données Produit

    FICHE DE DONNÉES PRODUIT Référence (s) du produit 10033016 10033017 Donnée Symbole Valeur Unité Donnée Unité Puissance calorifique Uniquement pour les radiateurs électriques à accumulation : Type de régulation de l'apport de chaleur Puissance calorifique Pnom Régulation manuelle de l'apport de chaleur nominale avec thermostat intégré...
  • Seite 29: Consignes De Sécurité

    CONSIGNES DE SÉCURITÉ • Lisez toutes les instructions avant d’utiliser cet appareil. • Ne laissez pas l‘appareil sans surveillance lorsqu‘il est en marche. • Ce radiateur devient chaud pendant l‘utilisation. Ne touchez pas les surfaces chaudes. ATTENTION : risque de brûlure ! Certaines parties de cet appareil peuvent devenir très chaudes pendant le fonctionnement et causer des brûlures.
  • Seite 30 • Ce produit est adapté à une utilisation intérieure et extérieure. N‘utilisez pas ce radiateur à proximité immédiate d‘une baignoire, d‘une douche ou d‘une piscine. • Ce produit ne doit pas être exposé aux intempéries pendant une longue période. • Ne touchez pas la fiche avec des mains mouillées ou humides. •...
  • Seite 31 MONTAGE Numéro d‘article Produit 10033016 Corps du radiateur de salle de bains en métal blanc 10033017 Corps du radiateur de salle de bains en métal noir 10033018 Roulettes blanches 10033019 Roulettes noires Dimensions L (mm) H (mm) L1 (mm) H1 (mm) Montage et démontage du radiateur sur un mur Montage mural Démonter le radiateur du mur...
  • Seite 32: Aperçu De L'appareil

    Installation et démontage des roulettes Appuyez sur le bouton Lorsque vous avez terminé le montage, Appuyez sur le bouton vers le haut pour vous pouvez entendre un clic. démonter les roulettes. APERÇU DE L‘APPAREIL Unité de Sortie d‘air commande Interrupteur Support de roulettes directrices...
  • Seite 33: Panneau De Commande

    PANNEAU DE COMMANDE Témoin de marche Puissance de chauffage Témoin de chauffage Témoin de puissance de chauffage moyenne (LO) Témoin de puissance maximale de chauffage (HI) Témoin de fenêtre ouverte (WO) Témoin de mode manuel (M) Témoin de mode auto (A) Affichage de la minuterie Touche de réglage avant (+) Touche de réglage arrière (-)
  • Seite 34: Utilisation

    UTILISATION Mise en marche • Retirez soigneusement le radiateur de l‘emballage. Veuillez conserver le carton pour ranger l‘appareil hors saison. • Assurez-vous que l‘interrupteur marche/arrêt (21) est éteint avant de connecter l‘appareil. • Assurez-vous que le chauffage est complètement installé conformément aux instructions d‘installation.
  • Seite 35 avant (10) et arrière (1 1), lorsque l‘affichage de la température (15) clignote. • Si vous n‘effectuez aucune action dans les 10 secondes après la fin du réglage, le système enregistre automatiquement le réglage et quitte le menu. Réglage de la minuterie Réglage de la minuterie en mode manuel (minuterie 24 heures) Appuyez sur la touche Auto / Manual Mode (19) pour sélectionner le mode manuel.
  • Seite 36 fonctionnement prédéfinie, il s‘éteint en 1 seconde sans aucune action lorsque vous appuyez sur la touche marche / arrêt (20). Réglage de la puissance intermédiaire et de la puissance maximale • Appuyez sur la touche de réglage de la puissance de chauffage (2) pour passer à la puissance intermédiaire ou totale.
  • Seite 37: Verrouillage Parental

    l‘appareil. Sur le témoin de fenêtre ouverte (6), le témoin de contrôle „WO“ est désactivé. Le chauffage se trouve en mode de fonctionnement normal. Signal sonore • Chaque fois que vous appuyez sur une touche, un bip retentit. Un sseul son est émis lors d‘un appui long Verrouillage parental •...
  • Seite 38: Informations Sur Le Recyclage

    INFORMATIONS SUR LE RECYCLAGE Vous trouverez sur le produit l’image ci-contre (une poubelle sur roues, barrée d‘une croix), ce qui indique que le produit se trouve soumis à la directive européenne 2012/19/ UE. Renseignez-vous sur les dispositions en vigueur dans votre région concernant la collecte séparée des appareils électriques et électroniques.
  • Seite 39: Datos Técnicos

    Hoja de datos del producto 40 Indicaciones de seguridad 41 Visión general del aparato 44 Panel de control 45 Utilización 46 Indicaciones para la retirada del aparato 50 DATOS TÉCNICOS Número de artículo 10033016 10033017 Potencia (vatios) 1000/2000 Suministro eléctrico 220-240 V ~ 50/60 Hz Accesorios Ruedas blancas Ruedas negras Número de artículo...
  • Seite 40: Hoja De Datos Del Producto

    HOJA DE DATOS DEL PRODUCTO Denominación del modelo 10033016 10033017 Dato Símbolo Valor Unidad Dato Unidad Potencia térmica Solo con disposítivos de acumulación de calor eléctricos para abastecimiento local: Tipo de regulación del abastecimiento de calor Potencia térmica nominal Pnom Regulación manual del abastecimiento de calor...
  • Seite 41: Indicaciones De Seguridad

    INDICACIONES DE SEGURIDAD • Lea atentamente estas indicaciones antes de utilizar este aparato. • No deje el aparato en marcha si no se encuentra bajo supervisión. • Este radiador alcanza temperaturas muy elevadas durante su uso. No toque las superficies calientes. ATENCIÓN: Existe riesgo de quemaduras ! Algunas piezas de este producto pueden alcanzar temperaturas muy elevadas y provocar quemaduras.
  • Seite 42 • No toque la resistencia con las manos mojadas. Si se ha tocado por accidente, retire las manchas de dedos con un paño suave; de lo contrario, estas se quedarán marcadas en la resistencia y provocarán una merma anticipada del radiador. •...
  • Seite 43 MONTAJE Número de artículo Producto 10033016 Calefactor de baño de metal en color blanco 10033017 Calefactor de baño de metal en color negro 10033018 Ruedas blancas 10033019 Ruedas negras Dimensiones L (mm) H (mm) L1 (mm) H1 (mm) Montar y desmontar el calefactor de la pared...
  • Seite 44: Visión General Del Aparato

    Instalar y desmontar las ruedas Pulsar botón Cuando haya finalizado el montaje Presione el botón hacia arriba para escuchará un clic desmontar las ruedas VISIÓN GENERAL DEL APARATO Salida de Unidad de aire control Interruptor Soporte de las ruedas giratorias...
  • Seite 45: Panel De Control

    PANEL DE CONTROL Indicador de funcionamiento Potencia de calefacción Indicador de calefacción Indicador de potencia de calefacción media (LO) Indicador de potencia de calefacción completa (HI) Indicador de ventana abierta (WO) Indicador de modo manual (M) Indicador de modo automático (A) Indicador del temporizador Botón de configuración hacia adelante Botón de configuración hacia atrás (-)
  • Seite 46 UTILIZACIÓN Puesta en marcha • Desembale la calefacción con cuidado de su caja. Guarde la caja para almacenar el aparato cuando no lo utilice. • Asegúrese de que el interruptor on/off (21) esté desactivado antes de conectar el aparato. • Asegúrese de que la calefacción se monte conforme a las instrucciones de montaje. •...
  • Seite 47 guarda automáticamente la configuración y abandona el menúsystème enregistre automatiquement le réglage et quitte le menu. Ajustar el temporizador Configurar el temporizador en modo manual (temporizador de 24 horas) Pulse el botón de modo auto/manual (19) para seleccionar el modo manual. En el indicador de modo manual (7), aparece „M“.
  • Seite 48 tiempo de funcionamiento predeterminado, el aparato se apaga al pulsar el botón start/stop (20) sin realizar ninguna acción en 1 segundo Ajustar potencia parcial y potencia total • Pulse el botón de potencia de calefacción (2) para modificar la potencia a carga parcial o total.
  • Seite 49 Eliminar detección automática de ventana abierta • Pulse dos veces el botón start/stop (20) para encender y apagar. En el indicador de ventana abierta (6), se desactiva el indicador luminoso „WO“. La calefacción se encuentra en modo normal. Señal acústica •...
  • Seite 50: Indicaciones Para La Retirada Del Aparato

    INDICACIONES PARA LA RETIRADA DEL APARATO Si el aparato lleva adherida la ilustración de la izquierda (el contenedor de basura tachado) entonces rige la normativa europea, directiva 2012/19/UE. Estos productos no pueden depositarse en los contenedores destinados a la basura común.
  • Seite 51: Dati Tecnici

    Dichiarazione di conformità 51 Scheda informativa del prodotto 52 Avvertenze di sicurezza 53 Descrizione del dispositivo 56 Pannello di controllo 57 Utilizzo 58 Smaltimento 62 DATI TECNICI Numero articolo 10033016 10033017 Potenza (Watt) 1000/2000 Alimentazione 220-240 V ~ 50/60 Hz Accessori Rotelle bianche Rotelle nere Numero articolo...
  • Seite 52: Scheda Informativa Del Prodotto

    SCHEDA INFORMATIVA DEL PRODOTTO Identificazione del modello (i) 10033016, 10033017 Indicazione Simbolo Valore Unità Indicazione Unità Potenza termica Solo per gli apparecchi per il riscaldamento d'ambiente locale elettrici ad accumulo: Tipo di controllo dell´apporto termico Potenza termica nominale Pnom Controllo manuale del carico termico con...
  • Seite 53: Avvertenze Di Sicurezza

    AVVERTENZE DI SICUREZZA • Leggere tutte le indicazioni prima di utilizzare il dispositivo. • Non lasciare il dispositivo privo di controllo quando è in funzione. • Questa stufa diventa molto calda durante l’utilizzo. Non toccare le superfici bollenti. ATTENZIONE: pericolo di ustione! Alcuni componenti di questo prodotto possono diventare estremamente caldi e causare ustioni.
  • Seite 54 • Non toccare l’elemento riscaldante a mani nude. Se viene toccato involontariamente, rimuovere immediatamente con un panno umido le impronte digitali lasciate, altrimenti si imprimono sull’elemento riscaldante, causando un prematuro malfunzionamento del dispositivo. • Non sostituire l’elemento riscaldante e non cercare di toglierlo. •...
  • Seite 55 MONTAGGIO Numero articolo Prodotto 10033016 Stufa da bagno in metallo bianco 10033017 Stufa da bianco in metallo nero 10033018 Rotelle bianche 10033019 Rotelle nere Dimensioni L (mm) H (mm) L1 (mm) H1 (mm) Montare la stufa alla parete e smontarla Montaggio a parete Rimuovere la stufa dalla parete...
  • Seite 56: Descrizione Del Dispositivo

    Montare e smontare le rotelle Premere il tasto A montaggio terminato si sente un clic Premere il tasto verso l’alto per togliere le rotelle DESCRIZIONE DEL DISPOSITIVO Uscita Unità di dell’aria controllo Interruttore Supporto rotelle orientabili...
  • Seite 57: Pannello Di Controllo

    PANNELLO DI CONTROLLO Spia di funzionamento Potenza riscaldante Spia riscaldamento Spia riscaldamento livello basso (LO) Spia riscaldamento livello elevato (HI) Spia finestra aperta (WO) Spia modalità manuale (M) Spia modalità automatica (A) Spia timer Tasto di regolazione avanti (+) Tasto di regolazione indietro (-) Confermare programma (OK) Impostazioni programma (set) Simbolo gradi Celsius (°C)
  • Seite 58 UTILIZZO Messa in funzione • Togliere la stufa dal cartone con cura. Conservare il cartone per riporre il dispositivo in caso di tempi prolungati di non utilizzo. • Prima di collegare la spina, assicurarsi che l’interruttore On/Off sia spento. • Assicurarsi che la stufa sia completamente montata secondo le istruzioni del manuale.
  • Seite 59 Impostare il timer Impostare il timer in modalità manuale (timer 24 ore) Premere il tasto modalità automatica/manuale (19) per selezionare la modalità manuale. Nell’indicazione della modalità manuale (7) compare “M”. Premere “Set” (13), per impostare l’ora di spegnimento della stufa. Selezionare l’ora con Avanti (10) e Indietro (1 1) (se l’ora impostata è...
  • Seite 60 • In caso di potenza parziale, nell’indicazione della potenza parziale (5) comparirà “LO” nell’indicazione della potenza totale (4) scomparirà “HI”. Modalità manuale e automatica • Premere il tasto modalità automatica/manuale (19) per passare da una modalità all’altra. • In modalità manuale, l’indicazione della modalità manuale (7) mostra “M”, mentre “A”...
  • Seite 61 Protezione per i bambini • A dispositivo in funzione, tenere premuti contemporaneamente Avanti (10) e Indietro (1 1) per 3 secondi. Il sistema è bloccato. L’indicazione della temperatura (15) mostra “[ ]” e dopo 5 secondi mostra la temperatura ambiente. •...
  • Seite 62: Smaltimento

    SMALTIMENTO Se sul prodotto è presente la figura a sinistra (il bidone dei rifiuti con le ruote), si applica la direttiva europea 2012/19/ UE. Questi prodotti non possono essere smaltiti con i rifiuti normali. Informarsi sulle disposizioni vigenti per la raccolta di dispositivi elettrici ed elettronici.

Diese Anleitung auch für:

1003301810033019

Inhaltsverzeichnis