Herunterladen Inhalt Inhalt Diese Seite drucken

Werbung

Verfügbare Sprachen
  • DE

Verfügbare Sprachen

VDP
PLC010
HANDH
HELD SIZE
RGB D
DMX-CONTR
CONTR
RÔLEUR DM
CONTR
ROLADOR D
RGB D
DMX-CONTR
USER M
MANUAL
GEBRU
IKERSHAND
NOTICE
E D'EMPLOI
MANUA
AL DEL USUA
BEDIEN
NUNGSANLE
22/01/201
10
0
RGB DMX C
CONTROLLE
ROLLER VOO
OR PRO LED
MX RVB POU
UR LA SÉRI
DMX RGB PA
ARA LA SER
ROLLER FÜR
R DIE PRO L
DLEIDING
ARIO
ITUNG
ER FOR PRO
O LED SERI
D-REEKS
IE PRO LED
D
RIE PRO LE
ED
LED-SERIE
3
6
 
1
0
 
1
4
 
1
7
 
1
IES
©Vellema
an nv

Werbung

Inhaltsverzeichnis
loading

Inhaltszusammenfassung für HQ Power VDPLC010

  • Seite 1 PLC010 HANDH HELD SIZE RGB DMX C CONTROLLE ER FOR PRO O LED SERI RGB D DMX-CONTR ROLLER VOO OR PRO LED D-REEKS CONTR RÔLEUR DM MX RVB POU UR LA SÉRI IE PRO LED CONTR ROLADOR D DMX RGB PA ARA LA SER RIE PRO LE RGB D...
  • Seite 2 VDPLC010 terminator eindweerstand résistance de terminaison terminación Terminierung How to turn the controller line from 3-pins into 5-pins (plug and socket): Controller line van 3-pin naar 5-pin aanpassen (stekker en contact): Modifier la ligne du contrôleur de 3 broches en 5 broches (fiche et contact): Modificar la línea del controlador de 3 polos y 5 polos (conector y contacto):...
  • Seite 3: Ge Neral Guide

    • This device is design ned for professio onal use on stag ge, in discos, th heatres, etc. The e VDPLC010 sh hould only be used indoors s with the adapt tor included or o one with the sa me rating.
  • Seite 4: Installation

    Plug the DC adaptor into a suitable mains outlet. • Connect an XLR cable to the DMX output connector [4] of the VDPLC010 and the other side to the male XLR connector of a DMX-controllable light source (not incl.). When light sources with both in- and output XLR-type connectors are present, multiple light sources can be linked through serial linking.
  • Seite 5: Operation

    Move the power switch [1] to the ON-position (I). • Use the push-buttons on the front of the VDPLC010 to set the desired output. 4 Modes are available. Refer to the end of this paragraph for an overview of the default settings.
  • Seite 6 VDPLC e) Defau ult values • Defa ult values at sw witch on of the d device are indica ated in the table e below. Note th hat when chang mode es, the values s et by the user a are memorized.
  • Seite 7 VDPLC 2. Vei iligheidsins structies Lees dez ze handleiding g zorgvuldig d oor alvorens h het toestel te i installeren, te gebruiken of onderho ouden. Bewaar r deze handlei ding voor late ere raadplegin Houd dit toe estel uit de buur rt van kinderen en onbevoegde Wees voorzi...
  • Seite 8 12VDC-ingang [2]. • Koppel de voedingsadapter aan het lichtnet. • Sluit een XLR-kabel aan op de DMX-uitgang [4] van de VDPLC010 en de XLR-aansluiting van een DMX-gestuurd verlichtingtoestel (niet meegeleverd). Toestellen uitgerust met zowel een XLR-in- als –...
  • Seite 9 VDPLC010 a) Blackoutfunctie • Druk op BLACKOUT [9] om het dimniveau van alle aangesloten toestellen in een enkele beweging op 0% in te stellen. De led onderaan de toets licht op. • Tijdens de blackoutfunctie blijven alle andere functies actief. U kunt dus het signaal wijzigen.
  • Seite 10 VDPLC 9. Tec chnische sp pecificaties aanstuur rprotocol DMX512 (1990 uitgangsk kanalen 12/16 (selectee erbaar) uitgang vrouwelijke 3-p pin XLR Sound-to o-Lightcircuit voeding 12 VDC/100 mA voedings sadapter 85~240 VAC/5 0~60 Hz, 100 m verbruik max. 100 mW gebruikso omstandigheden temperatuur <...
  • Seite 11: Directives Générales

    • Toute modification est interdite pour des raisons de sécurité. Les dommages occasionnés par des modifications par le client ne tombent pas sous la garantie. • N’utiliser votre VDPLC010 qu’à sa fonction prévue. Tout autre usage peut causer des courts-circuits, des brûlures, des électrochocs etc. Un usage impropre annule d'office la garantie.
  • Seite 12 • Insérer le bloc secteur dans une prise de courant. • Connecter un câble XLR à la sortie DMX [4] du VDPLC010 et à l’entrée DMX d’un projecteur (non inclus). Les projecteurs munis d’une entre et d’une sortie XLR peuvent être interconnectés de façon sérielle.
  • Seite 13: Entretien

    VDPLC010 o TAP : Enfoncer 4 fois le bouton SPEED [12]. La vitesse moyenne à laquelle vous enfoncez le bouton sera la vitesse de transition des séquences de poursuite. o SOUND-TO-LIGHT (S2L) : Enfoncer 1 fois le bouton SPEED [12] pour une transition pilotée par le son. La LED au bas du bouton SPEED [12] s’allume lorsque cette option est sélectionnée.
  • Seite 14 Gracias p por haber comp rado el VDPLC0 010 HQ-Power ! Lea atentame ente las instrucc ciones del manu antes de usarlo. Si el ap parato ha sufrido o algún daño en...
  • Seite 15: Instalación

    • Conecte el adaptador de red a la red. Conecte un cable XLR a la salida DMX [4] del VDPLC010 y a la entrada DMX de un foco (no incl.). Es posible interconectar los focos equipados con una entrada y una salida XLR en serie. Use un cable blindado de doble hilo conductor (no incl.).
  • Seite 16 7. Uso • Ponga el interruptor ON/OFF [1] en la posición I. • Seleccione una de las 4 funciones con los botones del panel de control del VDPLC010. Véase el capítulo « ajustes de fábrica » al final de este parágrafo.
  • Seite 17 VDPLC 8. Lim mpieza y ma antenimien • Aprie ete bien las tuer rcas y los tornill os y verifique q que no hay seña ales de oxidación • No da añe los cables d de alimentación . Contacte con u un técnico espe ecializado para in nstalar el apara...
  • Seite 18 VDPLC Verwenden S Sie das Gerät n ur im Innenbe ereich. Schütze en Sie das Gerät t vor Regen und Feuchte. Set tzen Sie das Ge rät keiner Flüss sigkeit wie z.B. T Tropf- oder Spr itzwasser, aus. Trennen Sie das Gerät bei N Nichtbenutzung und vor jeder R...
  • Seite 19 Netzteils in den 12VDC-EEingang [2]. • Verbinden Sie das Netzteil mit dem Netz. Verbinden Sie ein XLR-Kabel mit dem DMX-Ausgang [4] des VDPLC010 und die XLR-Anschlüsse der DMX-gesteuerten Beleuchtungsanlage (nicht mitgeliefert). Geräte, die über einen XLR-Ein- und –Ausgang verfügen können in Serie miteinander verbunden werden. Verwenden Sie dafür ein zweipoliges abgeschirmtes Kabel (nicht mitgeliefert).
  • Seite 20: Reinigung Und Wartung

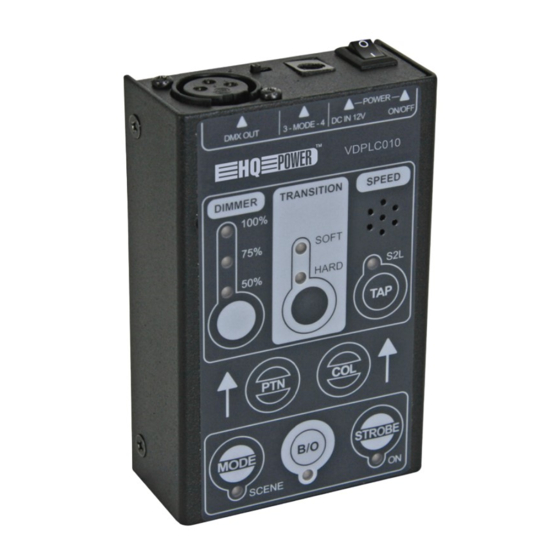
    VDPLC010 a) Blackout-Funktion • Drücken Sie BLACKOUT [9] um den Dimmpegel aller angeschlossenen Geräte in einer einzigen Bewegung auf 0% einzustellen. Die LED unter der Taste leuchtet. • Während der Blackout-Funktion bleiben alle anderen Funktionen aktiv. Sie können also das Signal ändern.
  • Seite 21: Technische Daten

    VDPLC010 9. Technische Daten Bedienprotokoll DMX512 (1990) Ausgangskanäle 12/16 (wählbar) Ausgang 3-pol. XLR-Buchse Sound-to-Light Kreis Stromversorgung 12 VDC/100 mA Netzteil 85~240 VAC/50~60 Hz, 100 mA Stromverbrauch max. 100 mW Betriebsbedingungen Temperatur < 40°C, RH < 80% Abmessungen (BxTxH) 70 × 110 x 33 mm...
  • Seite 22 • Valt niet onder waarborg: Velleman® Service and Quality Warranty - alle rechtstreekse of onrechtstreekse schade na de levering Velleman® has over 35 years of experience in the electronics world veroorzaakt aan het toestel (bv. door oxidatie, schokken, val, stof, and distributes its products in more than 85 countries.
  • Seite 23 - toute réparation ou modification effectuée par une tierce personne Todos nuestros productos responden a normas de calidad rigurosas y sans l’autorisation explicite de SA Velleman® ; - frais de transport disposiciones legales vigentes en la UE. Para garantizar la calidad, de et vers Velleman®...

Inhaltsverzeichnis