Herunterladen Inhalt Inhalt Diese Seite drucken

Werbung

Verfügbare Sprachen
  • DE

Verfügbare Sprachen

  • DEUTSCH, seite 82
VIDEO ENTRY KIT
LIVIPR
LIVIMN-B-N
LIVI-AS
English
MADE IN
Français
ITALY
Italiano
Español
Português
LIVISTAR-B-N
Deutsch
Türk
INSTALLATION MANUAL
FG00902M07 - ver. 1 - 07/2017

Werbung

Inhaltsverzeichnis
loading

Inhaltszusammenfassung für Motostar LIVI series

  • Seite 1 VIDEO ENTRY KIT LIVIPR LIVIMN-B-N LIVI-AS English MADE IN Français ITALY Italiano Español Português LIVISTAR-B-N Deutsch Türk INSTALLATION MANUAL FG00902M07 - ver. 1 - 07/2017...
  • Seite 2: General Notes

    General Notes Read the instructions carefully before beginning the installa- • 83,5 tion and carry out the actions as specified by the manufacturer. The installation, programming, commissioning and maintenance • of the product must only be carried out by qualified technicians, properly trained in compliance with the regulations in force, inclu- ding health and safety measures and the disposal of packaging.
  • Seite 3: Technical Features

    Technical Features Type LIVIMN-B-N Power supply by BUS (VDC) 15÷20 Consumption (mA max) Consumption in stand by (mA) <1 Local power supply (VDC) 16÷18 Consumption (mA max) Consumption of single LED (mA) (panic, disabling ring) CL.RES Storage temperature (°C) -25 ÷ +70 Operating temperature (°C) 0 ÷...
  • Seite 4 Setting melodies ☞ All the programming stages described below must be carried out in sequence: 1- Going into Programming. Press button 5 times in 5 secs. A short beep confirms that you have entered programming mode. 2- Programming the melody associated with a call from the entry panel. To listen to the melodies in sequence, press key .
  • Seite 5: Installation

    LIVI-AS Installation The power supplier must ALWAYS be installed horizontally. The device can be installed on a DIN rail (EN 50022) in an appropriate electric panel. NOTE. Proper ventilation is required if the power supplier is in- stalled in a metal container. 43,5 43,5 Technical features...
  • Seite 6: Wall Mounting

    LIVIPR Wall Mounting With the Allen wrench unscrew the blocking screws and remove the plate A. Fix the given plugs and screw the entry panel B at the desired height considering the position of the lens of the camera C. Run the hose with the system conductors B. Extract the plastic terminal cover and wire the connections D.
  • Seite 7 During installation of the recessed box use the provided spacer to prevent deformation F B. With the Allen wrench unscrew the blocking screws and remove the entry panel plate A. Introduce the cable connections in the special hole B and fix the entry panel on the frame as shown in figure G;...
  • Seite 8 Accessories K LIVIPR-PS single button A, LIVIPR-TP Wall roof B, Recessed box LIVIPR-SI 3, Recessed frame LIVIPR-CI d. Personalized labels, dimensions 53x13x0,3 mm 53x33x0,3 mm Technical features Type LIVIPR Power supply [V AC] 16-18 Consumption [mA] LED PROG Consumption in stand by [mA] Storage temperature [°C] -25 ÷...
  • Seite 9: Initial Programming

    Programming The kit is pre-configured to manage a single call originating from a single entry panel. One or more receivers answering the same call can be added, by following the below “Call button programming” procedure. Initial programming Accessing programming. Press the PROG button A for at least 3 seconds and re- >3’’...
  • Seite 10: Reprogramming Procedure

    Reprogramming procedure Accessing programming. Press the PROG button A for at least 3 seconds and re- >3’’ lease it (within 6 seconds) as soon as the PROG LED flashes and the backlighting on <6’’ the buttons comes on as shown in figure B. PROG PROG beep...
  • Seite 11 Programming an intercom group Programming an intercommunicating group must be carried out AFTER assigning the call key to all of the receivers. Assigning intercommunicating groups >8’’ With the SW3 jumper inserted, press the PROG key for at least 8 seconds and release <11’’...
  • Seite 12: Connection Examples

    Connection examples 001DC002AC 001DC002AC 001DC01LUXO LIVIMN-B-N BOUT LOCAL CL.RES 001CS2PLCO LIVIPR 001DC002AC LIVI-AS – BOUT...
  • Seite 13 001DC002AC 001DC002AC 001DC002AC LIVIMN-B-N 001DC01LUXO BOUT LOCAL CL.RES LIVI-AS 001DC002AC LIVIMN-B-N 001DC01LUXO – BOUT LOCAL CL.RES LIVIPR 001CS2PLCO LIVIMN-B-N 001DC01LUXO BOUT BOUT LOCAL CL.RES...
  • Seite 14 Distances N° Master N° Slave LIVI-AS LIVIPR VCM/1D UTP/CAT 5 2 x 2,5 mm ≤100 m ≤30 m – ≤25 m – ≤60 m VCM/1D UTP CAT5 N° Master N° Slave...
  • Seite 16 è un marchio registrato di Label Habitat SaS - 10 rue Léo Lagrange - 27950 Saint Marcel - France www.motostar-smarthome.com contact@motostar-smarthome.com...
  • Seite 17 VIDEO KIT LIVIPR LIVIMN-B-N LIVI-AS English Français MADE IN ITALY Italiano Español Português LIVISTAR-B-N Deutsch Türk MANUEL D'INSTALLATION FG00902M07 - ver. 1 - 07/2017...
  • Seite 18: Instructions Générales

    Instructions générales Lire attentivement les instructions, avant de commencer l'instal- • 83,5 lation et effectuer les interventions comme indiqué par le fabricant. L'installation, la programmation, la mise en service et l'entre- • tien du produit ne doivent être effectués que par un personnel technique qualifié...
  • Seite 19: Caractéristiques Techniques

    Pour l’installation par encastrement, consulter la notice du kit à encastrer. Caractéristiques techniques Type LIVIMN-B-N Alimentation : via BUS (VDC) 15÷20 Absorption (mA max) Absorption en veille (mA) <1 Alimentation locale (VDC) 16÷18 Absorption (mA max) CL.RES Absorption simple LED (mA) (panique, désactivation sonnerie) Température de stockage (°C) -25 ÷...
  • Seite 20 Configuration des mélodies ☞ Effectuer, l’une après l’autre, toutes les phases de programmation décrites ci-après : 1- Entrée en mode programmation. Appuyer 5 fois sur le bouton en 5 s. Un signal sonore bref confirme l’entrée en mode programmation. 2- Programmation de la mélodie associée à l’appel provenant du poste externe. Pour écouter les mélodies l’une après l’autre, appuyer sur la touche .
  • Seite 21: Installation

    LIVI-AS Installation L’alimentateur doit TOUJOURS être installé à l’horizontale. L’ap- pareil peut être installé sur rail DIN (EN 50022) dans un tableau électrique prévu à cet effet. NOTE. Pourvoir à une correcte aération au cas où l’alimentateur serait installé dans un boîtier métallique. 43,5 43,5 Caractéristiques techniques...
  • Seite 22 LIVIPR Installation murale À l’aide de la clé à six pans, dévisser les vis de blocage et retirer la plaque A. Fixer les chevilles fournies et visser le poste exté- rieur B à la hauteur souhaitée en tenant compte du positionne- ment de l’objectif de la caméra C.
  • Seite 23 Lors de la mise en place du boîtier à encastrer, éviter de pos- sibles déformations en utilisant la douille fournie et prévue à cet effet FB. À l’aide de la clé à six pans, dévisser les vis de blocage et retirer la plaque du poste extérieur A.
  • Seite 24 Accessoires K Bouton simple A LIVIPR-PS, Visière de protection murale LIVIPR-TP B, Boîtier à encastrer LIVIPR-SI 3, Cadre pour encastrement LIVIPR-CI D. Dimensions ètiquettes personnalisées 53x13x0,3 mm 53x33x0,3 mm Caractéristiques techniques Type LIVIPR Alimentation [V AC] 16-18 Absorption [mA] LED PROG Absorption en veille [mA] Température de stockage [°C] -25 ÷...
  • Seite 25 Programmation Le kit est pré-configuré pour traiter un seul appel en provenance d’un seul poste externe. Il est possible d’ajouter un ou plusieurs postes internes qui répondent au même appel à l’aide de la procédure “Programmation des touches d’appel” au-dessous. Première programmation Entrée en Programmation.
  • Seite 26 Procédure de Reprogrammation Entrée en Programmation. Appuyer pendant au moins 3 secondes sur la touche >3’’ PROG A et la relâcher (dans les 6 secondes) dès que la led PROG clignote et que le <6’’ rétroéclairage des touches s’allume comme illustré à la figure B. PROG PROG beep...
  • Seite 27 Programmation d’un groupe d’intercommunication La programmation du groupe intercommunicant doit être effectuée PAR LA SUITE à l’attribution de la touche d’appel à tous les postes internes. Attribution des groupes intercommunicants >8’’ Avec le cavalier SW3 activé, appuyer pendant au moins 8 s sur la touche PROG et la <11’’...
  • Seite 28: Exemples De Raccordement

    Exemples de raccordement 001DC002AC 001DC002AC 001DC01LUXO LIVIMN-B-N BOUT LOCAL CL.RES 001CS2PLCO LIVIPR 001DC002AC LIVI-AS – BOUT...
  • Seite 29 001DC002AC 001DC002AC 001DC002AC LIVIMN-B-N 001DC01LUXO BOUT LOCAL CL.RES LIVI-AS 001DC002AC LIVIMN-B-N 001DC01LUXO – BOUT LOCAL CL.RES LIVIPR 001CS2PLCO LIVIMN-B-N 001DC01LUXO BOUT BOUT LOCAL CL.RES...
  • Seite 30 Distances N° Master N° Slave LIVI-AS LIVIPR VCM/1D UTP/CAT 5 2 x 2,5 mm ≤100 m ≤30 m – ≤25 m – ≤60 m VCM/1D UTP CAT5 N° Master N° Slave...
  • Seite 32 è un marchio registrato di Label Habitat SaS - 10 rue Léo Lagrange - 27950 Saint Marcel - France www.motostar-smarthome.com contact@motostar-smarthome.com...
  • Seite 33 KIT VIDEOCITOFONICO LIVIPR LIVIMN-B-N LIVI-AS English MADE IN Français ITALY Italiano Español Português LIVISTAR-B-N Deutsch Türk MANUALE DI INSTALLAZIONE FG00902M07 - ver. 1 - 07/2017...
  • Seite 34: Avvertenze Generali

    Avvertenze generali Leggere attentamente le istruzioni prima di iniziare l’installazione • 83,5 ed eseguire gli interventi come specificato dal costruttore, L’installazione, la programmazione, la messa in servizio e la ma- • nutenzione del prodotto deve essere effettuata soltanto da perso- nale tecnico qualificato ed opportunamente addestrato nel rispetto delle normative vigenti ivi comprese le osservanze sulla prevenzione infortuni e lo smaltimento imballaggi,...
  • Seite 35 Caratteristiche tecniche Tipo LIVIMN-B-N Alimentazione da BUS (VDC) 15÷20 Assorbimento (mA max) Assorbimento in stand by (mA) <1 Alimentazione locale (VDC) 16÷18 Assorbimento (mA max) CL.RES Assorbimento singolo LED (mA) (panico, esclusione suoneria) Temperatura di stoccaggio (°C) -25 ÷ +70 Temperatura di funzionamento (°C) 0 ÷...
  • Seite 36 Configurazione melodie ☞ Bisogna eseguire, in successione, tutte le fasi di programmazione descritte di seguito: 1- Ingresso in Programmazione. Premere per 5 volte il pulsante entro 5 s. Un breve segnale acustico conferma l’ingresso in programmazione. 2- Programmazione della melodia associata alla chiamata dal posto esterno. Per ascoltare in sequenza le melodie premere il tasto .
  • Seite 37: Installazione

    LIVI-AS Installazione L’alimentatore deve essere installato SEMPRE in orizzontale. L’apparecchio è installabile su guida DIN (EN 50022) in un appo- sito quadro elettrico. NOTA. Provvedere ad una corretta areazione nel caso l’alimenta- tore venga installato in un contenitore metallico. 43,5 43,5 Caratteristiche tecniche Tipo...
  • Seite 38 LIVIPR Montaggio da parete Tramite la chiave a brugola svitare le viti di bloccaggio e togliere la placca A. Fissare i tasselli in dotazione e avvitare il posto esterno B all’altezza desiderata tenendo conto del posiziona- mento dell’obiettivo della telecamera C. Far passare la tubazio- ne con i conduttori d’impianto B.
  • Seite 39 Nella messa in opera della scatola d’incasso si potranno evitare possibili deformazioni utilizzando l’apposito distanziale in dota- zione F B. Tramite la chiave a brugola svitare le viti di bloccaggio e togliere la placca del posto esterno A. Introdurre i cavi di collegamento nell’apposito foro B e fissare il posto esterno sulla cornice G;...
  • Seite 40: Caratteristiche Tecniche

    Accessori K Pulsante singolo LIVIPR-PS A, Tettuccio da parete LIVIPR-TP B, Scatola d’incasso LIVIPR-SI C, Cornice da incasso LIVIPR-CI 4. Dimensioni cartellini porta nome 53x13x0,3 mm 53x33x0,3 mm Caratteristiche tecniche Tipo LIVIPR Alimentazione [V AC] 16-18 Assorbimento [mA] LED PROG Assorbimento in stand-by [mA] Temperatura di stoccaggio [°C] -25 ÷...
  • Seite 41 Programmazione Il kit è pre-configurato per gestire una sola chiamata proveniente da un posto esterno. È possibile aggiungere uno o più derivati interni che rispondono alla medesima chiamata seguendo la procedura “Programmazione dei tasti di chiamata” di seguito descritta. Prima Programmazione Ingresso in Programmazione.
  • Seite 42 Procedura di Riprogrammazione >3’’ Ingresso in Programmazione. Premere per almeno 3 secondi il tasto PROG A e <6’’ rilasciarlo (entro 6 secondi) non appena il LED PROG lampeggia e la retroilluminazione dei tasti si accende come illustrato in figura B. PROG PROG beep...
  • Seite 43 Programmazione di un gruppo intercomunicante La programmazione del gruppo intercomunicante deve essere effettuata SUCCESSIVAMENTE all’assegnazione a tutti i derivati interni del tasto di chiamata. Assegnazione dei gruppi intercomunicanti >8’’ Con il jumper SW3 inserito, premere per almeno 8 s il tasto PROG e rilasciarlo (entro 11 <11’’...
  • Seite 44: Esempi Di Collegamento

    Esempi di collegamento 001DC002AC 001DC002AC 001DC01LUXO LIVIMN-B-N BOUT LOCAL CL.RES 001CS2PLCO LIVIPR 001DC002AC LIVI-AS – BOUT...
  • Seite 45 001DC002AC 001DC002AC 001DC002AC LIVIMN-B-N 001DC01LUXO BOUT LOCAL CL.RES LIVI-AS 001DC002AC LIVIMN-B-N 001DC01LUXO – BOUT LOCAL CL.RES LIVIPR 001CS2PLCO LIVIMN-B-N 001DC01LUXO BOUT BOUT LOCAL CL.RES...
  • Seite 46 Distanze N° Master N° Slave LIVI-AS LIVIPR VCM/1D UTP/CAT 5 2 x 2,5 mm ≤100 m ≤30 m – ≤25 m – ≤60 m VCM/1D UTP CAT5 N° Master N° Slave...
  • Seite 48 è un marchio registrato di Label Habitat SaS - 10 rue Léo Lagrange - 27950 Saint Marcel - France www.motostar-smarthome.com contact@motostar-smarthome.com...
  • Seite 49 KIT DE VIDEO LIVIPR LIVIMN-B-N LIVI-AS English MADE IN Français ITALY Italiano Español Português LIVISTAR-B-N Deutsch Türk MANUAL DE INSTALACIÓN FG00902M07- ver. 1 - 07/2017...
  • Seite 50: Advertencias Generales

    Advertencias generales Lea detenidamente las instrucciones antes de comenzar la • 83,5 instalación y lleve a cabo las operaciones de la manera especi- ficada por el fabricante. La instalación, la programación, la puesta en servicio y el man- • tenimiento del producto deben ser realizados únicamente por personal técnico cualificado y debidamente formado de acuerdo con las normas vigentes, incluidas las medidas de prevención de accidentes y la eliminación del material de embalaje.
  • Seite 51: Características Técnicas

    porte metálico, presione sobre el gancho de plástico y levante el terminal E. Para la instalación empotrada, consulte el manual del kit de empotrar. Características técnicas Tipo LIVIMN-B-N Alimentación por BUS (VCC) 15÷20 Absorción (mA máx.) Absorción en stand-by (mA) <1 Alimentación local (VCC) 16÷18...
  • Seite 52 Configuración de las melodía ☞ Es necesario efectuar, en secuencia, todas las fases de programación que se describen a continuación: 1- Entrada en Programación. Pulsar 5 veces el botón dentro de 5 s. Una breve señal sonora confirma que se ha entrado en programación. 2 - Programación de la melodía asociada a la llamada desde la placa de calle.
  • Seite 53: Instalación

    LIVI-AS Instalación El alimentador debe instalarse SIEMPRE en horizontal. El aparato puede instalarse en guía DIN (EN 50022) dentro de un cuadro eléctrico adecuado. NOTA. Garantice una correcta ventilación si se instala el alimen- tador en una caja metálica. 43,5 43,5 Características técnicas Tipo...
  • Seite 54: Instalación Sobre Pared

    LIVIPR Instalación sobre pared Usando la llave Allen, desenrosque los tornillos de fijación y quite la placa A. Fije los tacos suministrados y atornille la placa ex- terna B a la altura deseada, teniendo en cuenta la colocación del objetivo de la cámara C. Pase el tubo con los conductores de la instalación B.
  • Seite 55 Durante la instalación de la caja empotrable se podrán evitar po- sibles deformaciones utilizando el distanciador suministrado F B. Usando la llave Allen, desenrosque los tornillos de fijación y quite la placa de la placa externa A. Introduzca los cables de conexión por el orificio correspondiente B y fíjela la placa externa contra el marco G;...
  • Seite 56 Accesorios K Botón único A LIVIPR-PS, Visera de superficie LIVIPR-TP B, Caja empotrable LIVIPR-SI 3, Marco empotrable LIVIPR-CI 4. Letreros personalizados: Dimensiones 53x13x0,3 mm 53x33x0,3 mm Características técnicas Tipo LIVIPR Alimentación [V AC] 16-18 Absorción [mA] LED PROG Absorción en stand-by [mA] Temperatura de almacena [°C] -25 ÷...
  • Seite 57 Programación El kit viene preconfigurado para gestionar una sola llamada procedente de una única placa de calle. Pueden añadirse uno o varios re- ceptores que responden a la misma llamada, siguiendo el procedimiento “Programación de las teclas de llamada” descrito después. Primera programación Entrada en la modalidad de Programación.
  • Seite 58 Procedimiento de Reprogramación Entrada en la modalidad de Programación. Pulse durante al menos 3 s el botón >3’’ PROG A y suéltelo (antes de 6 s) en cuanto parpadee el led PROG y se encienda la <6’’ retroiluminación de los botones, tal y como se muestra en la figura B. PROG PROG beep...
  • Seite 59 Programación de un grupo intercomunicante La programación del grupo intercomunicador se debe efectuar DESPUÉS de atribuir el pulsador de Llamada a todos los receptores internos. Atribución de los grupos intercomunicadores >8’’ Con el puente SW3 puesto, presionar durante por lo menos 8 s el pulsador PROG 1 y <11’’...
  • Seite 60: Ejemplos De Conexión

    Ejemplos de conexión 001DC002AC 001DC002AC 001DC01LUXO LIVIMN-B-N BOUT LOCAL CL.RES LIVIPR 001CS2PLCO 001DC002AC LIVI-AS – BOUT...
  • Seite 61 001DC002AC 001DC002AC 001DC002AC LIVIMN-B-N 001DC01LUXO BOUT LOCAL CL.RES LIVI-AS 001DC002AC LIVIMN-B-N 001DC01LUXO – BOUT LOCAL CL.RES LIVIPR 001CS2PLCO LIVIMN-B-N 001DC01LUXO BOUT BOUT LOCAL CL.RES...
  • Seite 62 Distancias N° Master N° Slave LIVI-AS LIVIPR VCM/1D UTP/CAT 5 2 x 2,5 mm ≤100 m ≤30 m – ≤25 m – ≤60 m VCM/1D UTP CAT5 N° Master N° Slave...
  • Seite 64 è un marchio registrato di Label Habitat SaS - 10 rue Léo Lagrange - 27950 Saint Marcel - France www.motostar-smarthome.com contact@motostar-smarthome.com...
  • Seite 65 KIT VIDEO LIVIPR LIVIMN-B-N LIVI-AS English MADE IN Français ITALY Italiano Español Português LIVISTAR-B-N Deutsch Türk MANUAL DE INSTALAÇÃO FG00902M07- ver. 1 - 07/2017...
  • Seite 66: Avisos Gerais

    Avisos gerais Leia com atenção as instruções antes de iniciar a instalação • 83,5 e realize as operações conforme o especificado pelo fabricante. A instalação, a programação, a colocação em serviço e a ma- • nutenção do produto devem ser realizadas apenas por pessoal técnico qualificado e com formação adequada, cumprindo a legislação aplicável inclusive as normas sobre a prevenção de acidentes e a eliminação das embalagens.
  • Seite 67 carregue no gancho plástico e levante o terminal E. Para a instalação de embutir, consulte o manual do kit de em- butir. Características técnicas Tipo LIVIMN-B-N Alimentação com BUS (VDC) de 15 a 20 Consumo (mA máx.) Consumo em stand by (mA) <1 Alimentação local (VDC) de 16 a 18...
  • Seite 68 Configuração de melodias ☞ É preciso executar uma após a outra, todas as fases de programação descritas a seguir: 1- Entrada na programação. Prema 5 vezes o botão dentro de 5 s. Um breve aviso sonoro confirma a entrada na programação. 2- Programação da melodia associada à...
  • Seite 69 LIVI-AS Instalação O alimentador deve ser instalado SEMPRE na horizontal. O apa- relho pode ser instalado na guia DIN (EN 50022), num quadro eléctrico específico. NOTA. Providencie uma ventilação adequada se o aparelho for instalado numa caixa metálica. 43,5 43,5 Características técnicas Tipo LIVI-AS...
  • Seite 70 LIVIPR Instalação de parede Com a chave allen desaperte os parafusos de fixação e extraia a placa A. Fixe as buchas fornecidas e aparafuse a placa botoneira B à al- tura desejada tendo em conta a posição da objectiva da câmara de vídeo C.
  • Seite 71 Ao instalar a caixa de embutir podem-se evitar possíveis defor- mações utilizando o específico espaçador fornecido F B. Com a chave allen desaperte os parafusos de fixação e extraia a placa da placa botoneira A. Introduzir os cabos de ligação no furo apropriado B e correção a placa botoneira externa na moldura G;...
  • Seite 72 Acessórios K Botão simples A LIVIPR-PS, Tecto de parede LIVIPR-TP B, Caixa de embutir LIVIPR-SI 3, Moldura de embutir LIVIPR-CI 4. Características técnicas Tipo LIVIPR Alimentação [V AC] 16-18 Consumo [mA] LED PROG Consumo em stand by [mA] Temperatura de armazenagem [°C] -25 ÷...
  • Seite 73 Programação O kit foi pré-configurado para gerir uma única chamada proveniente de uma única placa botoneira. É possível acrescentar um ou mais derivados internos que respondam à mesma chamada seguindo o processo “Programação das teclas de chamada” depois descrita. Primeira programação Entrada em Programação.
  • Seite 74 Processo de Reprogramação Entrada em Programação. Prima durante pelo menos 3 seg. a tecla PROG A e >3’’ solte-a (dentro de 6 seg.) assim que o led PROG piscar e a retroiluminação das teclas <6’’ se acender, como ilustrado na figura B. PROG PROG beep...
  • Seite 75 Programação de um grupo de intercomunicação A programação do grupo intercomunicante deve ser feita DEPOIS da atribuição a todos os derivados internos da tecla de chamada. Atribuição dos grupos intercomunicantes >8’’ Com o jumper SW3 inserido, prema por ao menos 8 seg. a tecla PROG e solte-a <11’’...
  • Seite 76: Exemplos De Ligação

    Exemplos de ligação 001DC002AC 001DC002AC 001DC01LUXO LIVIMN-B-N BOUT LOCAL CL.RES LIVIPR 001CS2PLCO 001DC002AC LIVI-AS – BOUT...
  • Seite 77 001DC002AC 001DC002AC 001DC002AC LIVIMN-B-N 001DC01LUXO BOUT LOCAL CL.RES LIVI-AS 001DC002AC LIVIMN-B-N 001DC01LUXO – BOUT LOCAL CL.RES LIVIPR 001CS2PLCO LIVIMN-B-N 001DC01LUXO BOUT BOUT LOCAL CL.RES...
  • Seite 78 Distâncias N° Master N° Slave LIVI-AS LIVIPR VCM/1D UTP/CAT 5 2 x 2,5 mm ≤100 m ≤30 m – ≤25 m – ≤60 m VCM/1D UTP CAT5 N° Master N° Slave...
  • Seite 80 è un marchio registrato di Label Habitat SaS - 10 rue Léo Lagrange - 27950 Saint Marcel - France www.motostar-smarthome.com contact@motostar-smarthome.com...
  • Seite 81 VIDEO KIT LIVIPR LIVIMN-B-N LIVI-AS English MADE IN Français ITALY Italiano Español Português LIVISTAR-B-N Deutsch Türk INSTALLATIONSANLEITUNG FG00902M07- ver. 1 - 07/2017...
  • Seite 82: Allgemeine Hinweise

    Allgemeine Hinweise Lesen Sie aufmerksam die Anweisungen, bevor Sie mit dem • 83,5 Einbau beginnen, und führen Sie die vom Hersteller genannten Arbeiten aus. Die Installation, Programmierung, Inbetriebnahme und War- • tung des Produktes dürfen ausschließlich von qualifiziertem und entsprechend geschultem Fachpersonal unter Einhaltung der geltenden Normen, einschließlich der Unfallverhütungs- und Abfallentsorgungsvorschriften, durchgeführt werden.
  • Seite 83: Technische Eigenschaften

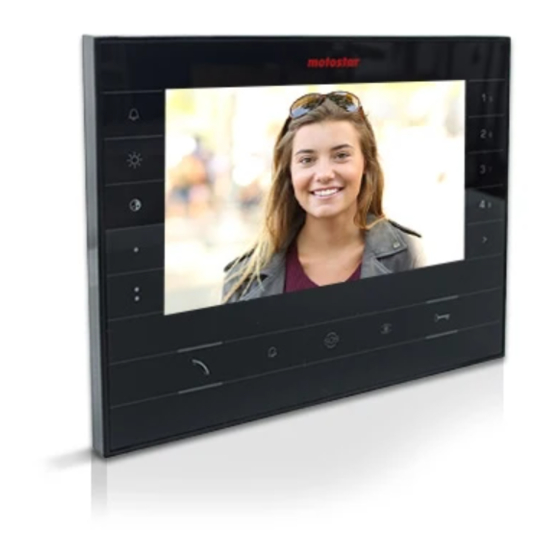
    können Sie das Videoterminal in die Metallhalterung einhängen CD. Um das Gerät aus der Metallhalterung zu entfernen, drücken Sie auf den Kunststoffhaken und heben Sie das Terminal an E. Für die Unterputzmontage siehe die Anleitung des Kits für die Un- terputzmontage.
  • Seite 84: Klingeltöne Einstellen

    Klingeltöne einstellen ☞ Alle im Folgenden beschriebenen Schritte nacheinander durchführen: 1- Eingang im Programmiermodus. Innerhalb von 5 Sek. 5 Mal die Taste drücken . Ein kurzer Piepton bestätigt, dass der Eingang auf Programmiermodus geschaltet wurde. 2 - Programmierung des der anrufenden Außenstation zugeordneten Klingeltons. Um die Melodien hintereinander abzuspielen, die Taste drücken.
  • Seite 85: Technische Daten

    LIVI-AS Installation Das Netzgerät muss IMMER horizontal installiert werden. Das Netzgerät kann auf einer DIN-Schiene (EN 50022) in einem se- paraten Schaltschrank montiert werden. HINWEIS: Falls das Netzgerät in einem Metallgehäuse installiert wird, für ausreichende Belüftung sorgen. 43,5 43,5 Technische Daten LIVI-AS Spannungsversorgung [V AC] Max.
  • Seite 86: Montage Aufputzgehäuse

    LIVIPR Montage Aufputzgehäuse Mit dem Inbusschlüssel die Befestigungsschrauben herausdre- hen und die Frontplatte abnehmen A. Die beiliegenden Dübel befestigen und die Außenstation, unter Berücksichtigung der Objektivstellung der Kamera B, in der gewünschter Höhe an- schrauben C. Wie in B dargestellt, das Leerrohr mit den An- schlussleitungen durchführen.
  • Seite 87: Montage Tastenmodule

    Beim Einsetzen des Unterputzkastens können Verformungen ver- mieden werden, wenn man den beiliegenden Abstandshalter F B benutzt. Mit dem Inbusschlüssel die Befestigungsschrauben herausdre- hen und die Frontplatte der Außenstation abnehmen A. Die Anschlusskabel durch die Aussparung ziehen B und die Außen- station, wie in G dargestellt, auf dem Abdeckrahmen befesti- gen;...
  • Seite 88 Zubehör K Einzeltaste A LIVIPR-PS, Regenschutz, Wandmontage LIVIPR-TP B, Unterputzkasten LIVIPR-SI 3, Unterputzrahmen LIVIPR-CI 4. Individuelle Namensschilder: Abmessungen 53x13x0,3 mm 53x33x0,3 mm Technische Daten LIVIPR Spannungsversorgung [V AC] 16-18 Stromaufnahme [mA] LED PROG Stromaufnahme im Standby [mA] Lagertemperatur [°C] -25 ÷ +70 Betriebstemperatur [°C) -15 ÷...
  • Seite 89: Erstprogrammierung

    Programmierung Das Kit ist so vorkonfiguriert, dass es nur einen Anruf von nur einer Außenstation verwaltet. Es ist möglich, eine oder mehrere Innensprechstellen für die Beantwortung von ein und demselben Anruf hinzuzufügen. Gehen Sie, wie unter “Pro- grammierung der Anruftasten” beschrieben, vor. Erstprogrammierung Zugang zur Programmierung.
  • Seite 90: Neuprogrammierung

    Neuprogrammierung Zugang zur Programmierung. Die Taste PROG A mindestens 3 Sek. gedrückt halten >3’’ und loslassen (innerhalb von 6 Sek.), sobald die Led-Anzeige PROG blinkt und die Hin- <6’’ tergrundbeleuchtung der Tasten wie in Abbildung B dargestellt aufleuchtet. PROG PROG beep Programmierung der Ruftasten.
  • Seite 91 Programmierung einer Intercom-Gruppe Die Programmierung der Intercom-Gruppe erfolgt NACHDEM allen Innenstationen eine Ruftaste zugeordnet wurde. Zuordnung der Intercom-Gruppen >8’’ Bei eingeschaltetem Jumper SW3 mindestens 8 Sek. lang die PROG-Taste drücken und <11’’ (innerhalb von 11 Sek.) loslassen, 1 sobald die PROG-LED blinkt und die Hintergrund- PROG beleuchtung der Tasten angeht 2.
  • Seite 92: Anschlussbeispiele

    Anschlussbeispiele 001DC002AC 001DC002AC 001DC01LUXO LIVIMN-B-N BOUT LOCAL CL.RES LIVIPR 001CS2PLCO 001DC002AC LIVI-AS – BOUT...
  • Seite 93 001DC002AC 001DC002AC 001DC002AC LIVIMN-B-N 001DC01LUXO BOUT LOCAL CL.RES LIVI-AS 001DC002AC LIVIMN-B-N 001DC01LUXO – BOUT LOCAL CL.RES LIVIPR 001CS2PLCO LIVIMN-B-N 001DC01LUXO BOUT BOUT LOCAL CL.RES...
  • Seite 94 Abstände N° Master N° Slave LIVI-AS LIVIPR VCM/1D UTP/CAT 5 2 x 2,5 mm ≤100 m ≤30 m – ≤25 m – ≤60 m VCM/1D UTP CAT5 N° Master N° Slave...
  • Seite 96 è un marchio registrato di Label Habitat SaS - 10 rue Léo Lagrange - 27950 Saint Marcel - France www.motostar-smarthome.com contact@motostar-smarthome.com...

Diese Anleitung auch für:

Livistar-b-nLivimn-b-nLivi-asLivipr

Inhaltsverzeichnis