Werbung
Quicklinks
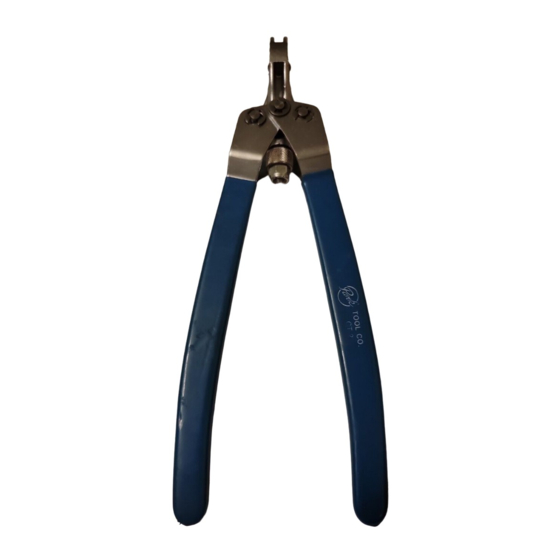
Park Tool Co.
6 Long Lake Rd. St. Paul, MN 55115 (USA) www.parktool.com
The CT-2 Plier Type Chain Tool quickly and easily separates and assembles chains
used on derailleur-equipped road and mountain bikes. Long handles provide out-
standing leverage for pressing tough rivets in and out of the chain. Compatible with
5 to 10-speed derailleur chains. Also works with some 1/8" single-speed chains.
INSTRUCTIONS
The procedures for separating and assembling derailleur chains vary significantly,
depending on the type of connection system used by the chain manufacturer. Al-
ways consult the chain manufacturer for instructions specific to the type and model
of chain. Below are general instructions for using the CT-2 on three chain types:
Chain Using a Connecting Rivet
With this type of chain, the CT-2 is used to press out one of the original rivets. A
special replacement connecting rivet is then pressed back in to reassemble the
chain (Figure 1).
Separation:
a. Thread knurled nut (Ref. #8) counterclockwise until it contacts the nylon
lock nut (Ref. #9).
b. Place link of chain into main body (Ref. #1).
c. Squeeze handles (Ref. #5) of CT-2 until chain tool pin (Ref. #6) makes con-
tact with chain rivet. Continue squeezing handles to push rivet out back-
side of chain. The CT-2 will only push the rivet out far enough to allow the
chain link to be separated. It will not push the rivet out completely.
d. Remove chain from CT-2 and separate chain link by hand.
Assembly:
a. Set any link of chain (other than the link already separated) in main
body of CT-2. Lightly squeeze handles together just until chain tool pin
makes contact with chain rivet. Then thread the knurled nut clockwise
until it just contacts the main body. The knurled nut will now act as a
"stop" so the CT-2 will only press the replacement rivet into the chain
the proper amount.
b. Join separated link together.
c. Insert pilot end of replacement rivet into separated chain link.
d. Place assembled chain link and replacement rivet into main body of CT-2.
e. Squeeze handles until chain tool pin makes contact with replacement
rivet. Continue squeezing handles to press replacement rivet into chain.
An equal amount of replacement rivet (not including the pilot) should
be showing on each side of the chain.
f. Remove CT-2 from chain and remove pilot of replacement rivet accord-
ing to manufacturer's instructions.
Chain Using Reusable Rivets
This type of chain uses reusable rivets, which are partially pressed out of the chain
with the CT-2 during separation and then pressed back in during assembly (Fig. 2).
Separation:
a. Thread knurled nut (Ref. #8) counterclockwise until it contacts the nylon
lock nut (Ref. #9).
b. Place link of chain into main body (Ref. #1).
c. Squeeze handles (Ref. #5) of CT-2 until chain tool pin (Ref. #6) makes con-
tact with chain rivet. Continue squeezing handles to push rivet out back-
side of chain. The CT-2 will only push the rivet out far enough to allow the
chain link to be separated. It will not push the rivet out completely.
d. Remove chain from CT-2 and separate chain link by hand.
Assembly:
a. Set any link of chain (other than the link already separated) in main body
of CT-2. Lightly squeeze handles together just until chain tool pin makes
contact with chain rivet. Then thread the knurled nut clockwise until it just
contacts the main body. The knurled nut will now act as a "stop" so the
CT-2 will only press the rivet back into the chain the proper amount.
b. Join separated link together.
c. Place assembled chain link into main body of CT-2.
d. Squeeze handles until chain tool pin makes contact with chain rivet.
Continue squeezing handles to press rivet into chain. An equal amount
of rivet should be showing on each side of the chain.
e. Remove CT-2 from chain.
CT-2 Plier Type Chain Tool
Chain Using a Master Link
This type of chain uses a special master link to separate and assemble the chain
(Fig. 3). Separation and assembly does not require a chain tool. The process is
performed by hand or with a Park Tool Master Link Pliers (MLP-1). The CT-2 is
only used to remove links when shortening the chain length.
Shortening Chain Length:
a. Separate chain at master link according to chain manufacturer's
instructions.
b. Determine length of chain to be removed and place appropriate link of
chain into main body of CT-2.
c. Squeeze handles (Ref. #5) until chain tool pin (Ref. #6) makes contact
with chain rivet. Continue squeezing handles to push rivet out backside
of chain. The CT-2 will only push the rivet out far enough to allow the
chain link to be separated. It will not push the rivet out completely.
d. Remove chain from CT-2 and separate chain link by hand.
e. Assemble chain with master link according to manufacturer's instructions.
Loosening Tight Links
A tight link can sometimes develop during the assembly of a chain. To remove
the tight link, simply use hands and thumbs to flex the link back and forth slightly
until it pivots freely.
CT-2 KETTENZANGE
Mit der CT-2 Kettenzange lassen sich Schaltungsketten schnell und sicher öffnen
und verschließen. Durch die überragende Hebelwirkung lassen sich auch fest-
sitzende Kettenbolzen spielend leicht verarbeiten. Geeignet für 5-fach bis 10-fach
Schaltungsketten sowie für einige 1/8" Single Speed Ketten.
ANLEITUNG
Das Vorgehen beim Öffnen und Schließen von Ketten unterscheidet sich erhe-
blich in Abhängigkeit vom jeweils verwendeten Verschluss-System des Herstell-
ers. Beachten Sie immer die spezifischen Montageanweisungen des Herstellers
für das jeweilige Kettenmodell. Nachfolgend finden Sie allgemeine Anleitungen
zum Gebrauch der CT-2 Kettenzange für drei verschiedene Verschluss-Systeme:
Kette mit speziellem Verschlussbolzen
Bei diesem Kettentyp wird ein vorhandener Kettenbolzen mit der CT-2 vollstän-
dig herausgedrückt. Mit einem speziellen Verbindungsbolzen wird die Kette
wieder geschlossen (Abb. 1).
Kette öffnen:
a. Drehen Sie die Rändelschraube (Ref. #8) solange gegen den Uhrzeigers-
inn, bis sie die Hutmutter (Ref. #9) berührt.
b. Platzieren Sie ein Kettenglied im Kettenfach (Ref. #1)
c. Drücken Sie die beiden Griffe (Ref. #5) soweit zusammen, bis der Nietstift
(Ref. #6) den Kettenbolzen berührt. Drücken Sie anschließend die Griffe
soweit wie möglich zusammen. Damit wird der Kettenbolzen weitgehend
aus dem Kettenglied heraus gepresst, jedoch nicht komplett entfernt.
d. Entfernen Sie die Kette aus dem Kettenfach und öffnen Sie diese von Hand.
Kette verschließen:
a. Platzieren Sie zunächst ein vollständiges Kettenglied im Kettenfach
und drücken Sie die Griffe der CT-2 leicht zusammen bis der Nietstift
den Kettenbolzen leicht berührt. Drehen Sie in dieser Position die
Rändelmutter (Ref. #8) im Uhrzeigersinn, bis sie den Zangenkorpus
leicht berührt. Sie dient jetzt als Stopper beim Schließen der Kette und
gewährleistet den richtigen Abstand für den neuen Verschlussbolzen.
b. Fügen Sie das geöffnete Kettenglied zusammen.
c. Stecken Sie den Verschlussbolzen mit der Führungsspitze voran in das
Kettenglied.
d. Setzen Sie das Kettenglied mit dem Verschlussbolzen in das Kettenfach.
e. Drücken Sie die Griffe zusammen bis der Nietstift den Verschlussbolzen
berührt. Drücken Sie weiter, so dass der Verschlussbolzen vollständig
in das Kettenglied gepresst wird. Dieser soll gleichmäßig auf beiden
Seiten hervorstehen (ohne Beachtung der Führungsspitze).
f. Nehmen Sie die Kette aus dem Kettenfach und entfernen Sie die Füh-
rungsspitze wie vom Kettenhersteller vorgeschrieben.
Werbung

Verwandte Anleitungen für Park Tool CT-2


Inhaltszusammenfassung für Park Tool CT-2
- Seite 1 Continue squeezing handles to push rivet out backside With this type of chain, the CT-2 is used to press out one of the original rivets. A of chain. The CT-2 will only push the rivet out far enough to allow the special replacement connecting rivet is then pressed back in to reassemble the chain link to be separated.
- Seite 2 Chaine utilisant un rivet de connexion (ampoule): Bei diesem Kettentyp wird ein vorhandener Kettenbolzen beim Öffnen der Kette nur Avec ce type de chaine, le CT-2 est utilisé pour extraire l’un des rivets originaux. Un teilweise heraus- und beim Wiederverschließen wieder hineingedrückt (Abb. 2).
- Seite 3 Coloque el eslabón en el CT-2(Ref. 1). e. Remonter le maillon d’attache rapide sur la chaine comme spécifié par c. Apriete los mangos (Ref. # 5) del CT-2 hasta que el punzón de la herra- le fabriquant. mienta (Ref. # 6) entra en contacto con remache de la cadena. Continué...
- Seite 4 Circlip 1/4” Handle Chain Tool Pin Plunger 802B Knurled Nut 113A Lock Nut Made in the USA Repair Kit (sold separately) © 2010 Park Tool Co. ® The color BLUE is a registered trademark and trade dress of Park Tool Co.