Zanussi ZDH8353W Benutzerinformation
Vorschau ausblenden
Andere Handbücher für ZDH8353W:
- Benutzerinformation (53 Seiten) ,
- Montageanweisung (4 Seiten) ,
- Benutzerinformation (25 Seiten)

Verwandte Anleitungen für Zanussi ZDH8353W


Inhaltszusammenfassung für Zanussi ZDH8353W
- Seite 1 User Manual GETTING STARTED? EASY. ZDH8353W EN User Manual Tumble Dryer DE Benutzerinformation Wäschetrockner...
-
Seite 2: Safety Information
SAFETY INFORMATION Before the installation and use of the appliance, carefully read the supplied instructions. The manufacturer is not responsible if an incorrect installation and use causes injuries and damages. Always keep the instructions with the appliance for future reference. - Read the supplied instructions. - Seite 3 The appliance can be installed as freestanding or below the • kitchen counter with correct space (Refer to the Installation leaflet). Do not install the appliance behind a lockable door, a sliding • door or a door with a hinge on the opposite side, where the appliance door can not be fully opened.
-
Seite 4: Safety Instructions
Fabric softeners, or similar products, should be used as • specified by the fabric softener instructions. Remove all objects from pockets such as lighters and matches. • Never stop a tumble dryer before the end of the drying cycle • unless all items are quickly removed and spread out so that the heat is dissipated. - Seite 5 • Do not use water spray and steam to clean the appliance. • Clean the appliance with a moist soft cloth. Only use neutral detergents. Do not use abrasive products, abrasive cleaning pads, solvents or metal objects. COMPRESSOR WARNING! Risk of damage to the appliance.
-
Seite 6: Easy Start
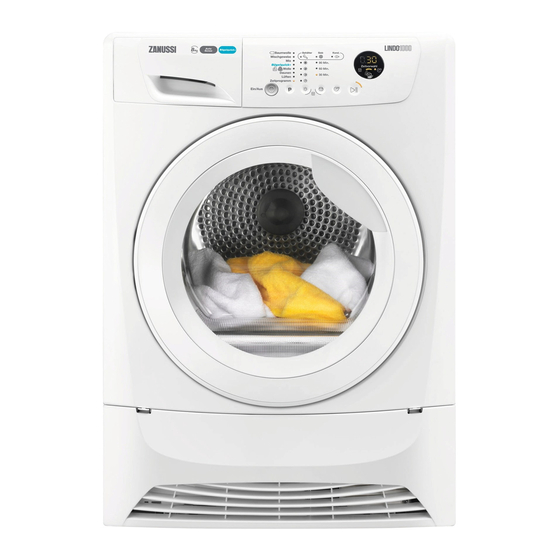
EASY START PRODUCT DESCRIPTION Water container Control panel Appliance door Primary Filter Bottom cover with the airflow slots WARNING! Do not put any object on the bottom cover Buttons to open the bottom cover Adjustable feet Heat exchanger door Knob to lock the heat exchanger door Rating plate For ease of loading laundry or ease of installation, the door is reversible. -
Seite 7: Programme Table
Touch the touchpads with your finger in the area with the symbol or name of the option. Do not wear gloves when you operate with the control panel. Make sure that the control panel is always clean and dry. Indicators Indicators Description Time Drying... - Seite 8 Load (max.) Programmes Type of load Fabric mark Easy care fabrics for which a minimum of ironing is neces- 1kg (or 5 sary. The drying results can be different from one type of Strijkvrij+ (Easy fabric to the another. Shake the items before you put them shirts)/ Iron+) in the appliance.
- Seite 9 ANTI-KREUK 90' (ANTICREASE 90') from creases. The laundry can be removed during the anticrease phase. Extends of 60 minutes the standard anticrease phase (30 minutes) at the end of the drying cycle. This function prevents the laundry from creases. TIJD (TIME) The laundry can be removed during the anticrease This option is applicable only to the Tijd (Time phase.
-
Seite 10: Buzzer On/Off
SETTINGS The child lock indicator comes on. It is possible to deactivate the child lock option while a programme operates. Press and hold the same touchpads until the child lock indicator goes off. BUZZER ON/OFF To deactivate or activate the acoustic signals, press A. -
Seite 11: Hints And Tips
2. Press the on/off button to activate the CAUTION! Make sure that when appliance. you close the door, the laundry 3. Set the programme. does not catch between the appliance door and the rubber STAND-BY FUNCTION seal. To decrease the energy consumption, this function 2. -
Seite 12: Care And Cleaning
• Only dry laundry that is suitable for tumble • Do not dry large and small items together. Small drying. Refer to the fabric label on the items. items can be trapped inside the large items and remain wet. Fabric label Description Laundry is suitable for tumble drying. -
Seite 13: Cleaning The Condenser
You can use the water from the water container as an alternative to distilled water (e.g. for steam ironing). Before you use the water, remove dirt residues with a filter. CLEANING THE CONDENSER CLEANING THE CONTROL PANEL AND CAUTION! Do not touch the metal HOUSING surface with bare hands. -
Seite 14: Troubleshooting
TROUBLESHOOTING Problem Possible solution You cannot activate the appliance. Make sure that the mains plug is connected to the mains socket. Check fuse in fuse box (domestic installation). The programme does not start. Press Start/Pauze (Start/Pause). Make sure that the appliance door is closed. The appliance door does not close. -
Seite 15: Technical Data
TECHNICAL DATA Height x Width x Depth 850 x 600 x 600 mm (maximal 680 mm) Max. depth with the appliance door open 1090 mm Max. width with the appliance door open 950 mm Adjustable height 850 mm (+ 15 mm - feet regulation) Drum volume 118 l Maximum load volume... -
Seite 16: Environment Concerns
Energy con- Programme Spun at / residual humidity Drying time sumption Kastdroog (Cupboard 1400 rpm / 50% 130 min. 1,67 kWh Dry) 1000 rpm / 60% 154 min. 1,99 kWh Strijkdroog (Iron Dry) 1400 rpm / 50% 97 min. 1,21 kWh 1000 rpm / 60% 118 min. -
Seite 17: Sicherheitshinweise
SICHERHEITSHINWEISE Lesen Sie vor der Montage und dem Gebrauch des Geräts zuerst die Gebrauchsanleitung. Der Hersteller übernimmt keine Verantwortung für Verletzungen und Beschädigungen durch unsachgemäße Montage. Bewahren Sie die Gebrauchsanleitung griffbereit auf. - Lesen Sie bitte die mitgelieferte Anleitung. SICHERHEIT VON KINDERN UND SCHUTZBEDÜRFTIGEN PERSONEN WARNUNG! Erstickungs- und Verletzungsgefahr sowie Gefahr einer... - Seite 18 Wenn der Wäschetrockner auf einer Waschmaschine • aufgestellt wird, muss die Befestigung mithilfe des Bausatzes Wasch-Trocken-Säule erfolgen. Der Bausatz Wasch-Trocken Säule, der bei Ihrem autorisierten Lieferanten erhältlich ist, kann nur für die in der mitgelieferten Anleitung aufgeführten Geräte verwendet werden. Lesen Sie die Anleitung aufmerksam vor der Montage (siehe Montageanleitung).
-
Seite 19: Sicherheitsanweisungen
Benutzen Sie das Gerät niemals ohne Filter. Reinigen Sie den • Flusenfilter vor oder nach jedem Gebrauch. Trocknen Sie keine ungewaschenen Wäschestücke im • Trockner. Wäschestücke, die mit Speiseöl verschmutzt sind oder die mit • Aceton, Alkohol, Kerosin, Fleckentfernern, Terpentin und Wachsentfernern behandelt worden sind, müssen vor dem Trocknen in dem Wäschetrockner in heißem Wasser und zusätzlichem Waschmittel gewaschen werden. -
Seite 20: Elektrischer Anschluss
• Die Geräterückseite muss gegen die Wand • Setzen oder stellen Sie sich niemals auf die zeigen. geöffnete Gerätetür. • Überprüfen Sie den waagrechten Stand des • Trocknen Sie keine tropfnassen Wäschestücke Geräts mit einer Wasserwaage, wenn es an im Trockner. seinen endgültigen Platz gestellt wird. -
Seite 21: Einfaches Starten
EINFACHES STARTEN GERÄTEBESCHREIBUNG Behälter Bedienfeld Gerätetür Hauptfilter Untere Abdeckung mit Lüftungsschlitzen WARNUNG! Bedecken Sie die untere Abdeckung nicht mit einem Gegenstand Tasten zum Öffnen der unteren Abdeckung Schraubfüße Zugangstür zum Wärmetauscher Verriegelungsknopf für die Wärmetauschertür Typenschild Für eine einfachere Beladung und Montage lässt sich der Türanschlag wechseln. - Seite 22 Kontrolllampen Berühren Sie mit dem Finger den Touchpad-Bereich, in dem das entsprechende Symbol oder der Name der gewünschten Option angezeigt wird. Tragen Sie beim Bedienen des Bedienfelds keine Handschuhe. Achten Sie darauf, dass das Bedienfeld immer sauber und trocken ist. Kontrolllampen Kontrolllampen Beschreibung...
- Seite 23 Beladung (max.) Programme Beladung Pflegesymbol Pflegeleichte Textilien, die nur leicht gebügelt werden müs- sen. Das Trocknungsergebnis kann je nach Gewebeart un- 1 kg (oder 5 Strijkvrij+ terschiedlich ausfallen. Schütteln Sie jedes Wäschestück (Leichtbügeln Hemden)/ leicht aus, bevor Sie es in das Gerät legen. Nehmen Sie die Wäsche unmittelbar nach Abschluss des Programms aus dem Gerät und hängen Sie sie auf Kleiderbügel.
- Seite 24 OPTIONEN Knitterfalten. Während der Knitterschutzphase kann DROOGTEGRAAD (TROCKENGRAD) die Wäsche aus dem Gerät entnommen werden. Mit dieser Funktion kann die Wäsche stärker getrocknet werden. Es stehen 4 Optionen zur ANTI-KREUK 30' (KNITTERSCHUTZ 30') Verfügung: Knitterschutzphase (30 Minuten) am Ende des •...
- Seite 25 Programme Anti- Anti- Anti- kreuk 90' kreuk 60' kreuk 30' (Knitter- (Knitter- (Knitter- schutz schutz schutz 90') 60') 30') Dekbed (Dau- ■ nen) Opfrissen (Auf- ■ ■ ■ frischen) Tijd (Zeitges- teuertes Trock- ■ ■ ■ ■ nen) EINSTELLUNGEN 2. Warten Sie etwa 8 Sekunden. 3.
-
Seite 26: Täglicher Gebrauch
5. Zur Bestätigung der Einstellung halten Sie die • höchster Trocknungsgrad Tasten (B) und (D) ca. 2 Sekunden lang • stärkerer Trocknungsgrad gleichzeitig gedrückt. • voreingestellter Trocknungsgrad 4. Drücken Sie die Taste (F) wiederholt, bis die Kontrolllampe des gewünschten Grads leuchtet. -
Seite 27: Standby-Funktion
STANDBY-FUNKTION nehmen. Für optimales Endergebnis empfehlen wir jedoch, die Knitterschutzphase möglichst Um den Energieverbrauch zu senken, wird das vollständig durchzuführen. Gerät über diese Funktion in folgenden Fällen automatisch ausgeschaltet: Am Ende der Knitterschutzphase passiert Folgendes: • Wenn innerhalb von 5 Minuten nach dem Einschalten des Geräts kein Programm •... -
Seite 28: Reinigung Und Pflege
Pflegeetikett Beschreibung Die Wäsche kann bei niedrigeren Temperaturen getrocknet werden. Die Wäsche ist nicht trocknergeeignet. REINIGUNG UND PFLEGE REINIGEN DES SIEBS LEEREN DES WASSERBEHÄLTERS Das Wasser aus dem Wasserbehälter kann als destilliertes Wasser (z. B. zum Dampfbügeln) verwendet werden. Bevor Sie das Wasser weiterverwenden, sollten Sie es filtern, um Schmutzrückstände zu entfernen. -
Seite 29: Fehlersuche
REINIGEN DES KONDENSATORS BEDIENFELD UND GEHÄUSE REINIGEN ACHTUNG! Berühren Sie die Verwenden Sie einen handelsüblichen neutralen Metalloberfläche nicht mit bloßen Reiniger zur Reinigung des Bedienfelds und Händen. Verletzungsgefahr. Tragen Gehäuses. Sie Schutzhandschuhe. Gehen Sie Verwenden Sie zur Reinigung ein feuchtes Tuch. vorsichtig vor, damit die Trocknen Sie die gereinigten Flächen mit einem Metalloberfläche nicht beschädigt... - Seite 30 Störung Mögliche Abhilfe Kontrollieren Sie die Sicherung der Hausinstalla- tion. Das Programm startet nicht. Drücken Sie Start/Pauze (Start/Pause). Achten Sie darauf, dass die Gerätetür geschlos- sen ist. Die Gerätetür schließt nicht. Vergewissern Sie sich, dass das Sieb ordnungs- gemäß eingesetzt ist. Stellen Sie sicher, dass die Wäsche nicht zwi- schen der Gerätetür und der Gummidichtung eingeklemmt ist.
-
Seite 31: Technische Daten
Einstellen des Restfeuchtegrads der • Die Raumtemperatur ist zu niedrig oder zu hoch Wäsche“ für eine bessere Einstellung). (die optimale Raumtemperatur liegt zwischen 19 • Die Lüftungsschlitze sind verstopft. °C und 24 °C). TECHNISCHE DATEN Höhe x Breite x Tiefe 850 x 600 x 600 mm (max. - Seite 32 VERBRAUCHSWERTE Energiever- Programm U/min / Restfeuchte Trockenzeit brauch Katoen (Koch-/Buntwäsche) 8 kg Kastdroog (Schrank- 1400 U/min / 50% 130 Min. 1,67 kWh trocken) 1000 U/min / 60% 154 Min. 1,99 kWh Strijkdroog (Bügel- 1400 U/min / 50% 97 Min. 1,21 kWh trocken) 1000 U/min / 60% 118 Min.
- Seite 36 WWW.ZANUSSI.COM/SHOP...