Werbung
Quicklinks
Einbauanleitung
Fitting instructions
Instructions de montage
Instrucciones de montaje
Istruzioni di montaggio
Monteringsanvisning
Inbouwinstrukties
Instruções de montagem
3 D93 653 060
Der Amplifier BSA 160 eignet sich zum Anschluß an Autoradios mit
"PREAMP OUTPUT" nach DIN 45 326 oder Cinch-Anschluß.
Für den Anschluß an Autoradios mit Lautsprecherausgängen das Adapter-
kabel 7 607 873 000 (Lautsprecherstecker
den.
Sicherheitshinweise
Einbau- und Anschlußvorschriften
Für die Dauer des Anschlusses und der Gerätemontage ist der
Minuspol der Batterie abzuklemmen.
Der BSA 160 wird an einem geeigneten Montageort z. B. an der
Spritzwand, unter der Instrumententafel, unter den Sitzen oder im
Kofferraum montiert. Bei der Wahl des Montageortes auf ausrei-
chende Wärmeableitung achten. Vor dem Bohren der Befestigung-
slöcher sicherstellen, daß keine verlegten Kabel oder Fahrzeug-
teile beschädigt werden, Fig. 1.
Alle Kabel sind zur Störsicherheit in genügendem Abstand von
Kabelbäumen zu verlegen.
Nur Lautsprecher mit 4 Ω Impendanz verwenden. Max. Belastbar-
keit (Musikleistung) beachten.
Lautsprecheranschlußkabel bis 16 mm
Lautsprecher nicht an Masse schließen, nur die bezeichneten
Klemmen verwenden.
Plus-/Minus-Anschluß
Beiliegendes Pluskabel zur Batterie legen und über Sicherungshalter
anschließen. An scharfkantigen Löchern beiliegende Kabeldurch-
führungen verwenden.
Beiliegendes Minuskabel an einen störfreien Massepunkt (Karosserie-
schraube, Karosserieblech) sicher anschrauben (nicht am Minuspol der
Batterie). Kontaktfläche des Massepunktes metallisch blank kratzen und
mit Graphitfett einfetten.
Anschlußbeispiele
1 BSA 160 an Autoradios mit DIN-Ausgang
2 BSA 160 an Autoradios mit DIN-Ausgang
Anschluß an Autoradios mit Cinch-Ausgang
Beim Anschluß über die Cinch- oder Lautsprecherbuchsen des Autora-
dios muß die Schaltleitung angeschlossen werden.
GAIN ADJ
Der Einstellbereich des Gain Adjustreglers reicht von 0,3 V bis 2 V.
Bei Anschluß von Blaupunkt-Autoradios ist der Regler auf 2 V einzustel-
len.
Bei Anschluß eines Autoradios anderer Hersteller ist die Eingangs-
empfindlichkeit entsprechend den Herstellerangaben anzupassen.
Lautsprecheranschluß
2 x 80 W
1 x 160 W
D
GB
F
E
I
S
NL
P
7 607 783 511
D
DIN-Buchse) verwen-
2
verwenden.
Technische Daten
Max. Power:
Sinus Leistung:
Klirrfaktor:
Frequenzgang:
Kanaltrennung:
Signal Rauschabstand:
Eingänge:
Ausgänge:
Abmessungen (B x H x T):
Änderungen vorbehalten
The amplifier BSA 160 can be connected to car radios equipped with a
PREAMP OUTPUT (DIN 45 326) or Cinch socket.
Use the adapter cable 7 607 873 000 (speaker plug
connect the amplifier to a car radio with loudspeaker outputs.
Safety Notes
Installation and connecting instructions
Disconnect the negative terminal of the battery during installation.
Select a suitable mounting place in the car for the BSA 160, e.g. at the
splashboard, below the dashboard, below the seats or in the boot. Make
sure the selected mounting place provides sufficient heat dissipation.
Prior to drilling the mounting holes, make sure that no cables and parts
of the vehicle will be damaged, fig. 1.
Leave ample clearance between the cables and other harnesses.
Use only loudspeakers having an impedance of 4 Ω. Observe the rated
maximum capacity (music power) of the selected loudspeakers.
Use speaker cables with a cross section between of up to 16 mm
Do not connect the loudspeakers to ground, use only the marked
Fig. 2
terminals.
Fig. 3
Fig. 4
Plus/minus connection
Route the enclosed positive cable to the battery and connect it via the
fuse contact. Use the enclosed cable ducts at sharp-edged holes.
Screw the enclosed positive cable to an interference-free ground spot
(chassis screw or plate). Do not connect it to the negative terminal of
the battery. The contact area of the ground source must be blank and
lubricated with graphite grease.
Examples
1 BSA 160 to car radios with DIN output
2 BSA 160 to car radios with DIN output
Connection to car radios with Cinch output
Fig.5
When connecting the amplifier via Cinch or loudspeaker sockets, the
Fig.6
switching line must be connected.
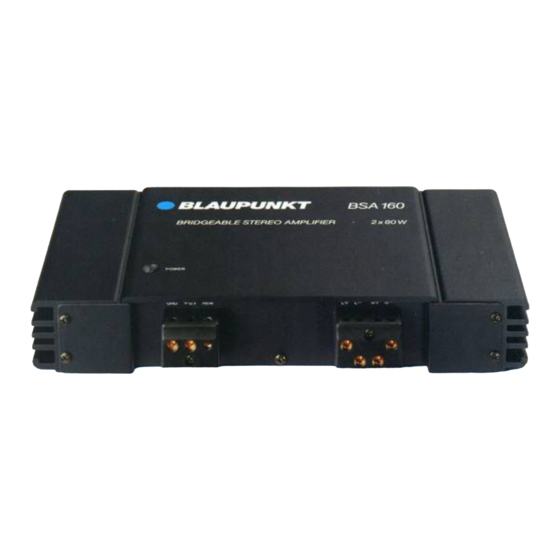
Amplifier
BSA 160
2 x 80 W oder 1 x 160 W an 4 Ω
2 x 40 W oder 1 x 100 W
bei 0,1 % Klirr. (DIN 45500)
0,02 % bei 1 W, 1 kHz, 4 Ω
10 Hz - 90 kHz (-3 dB)
8 pol. DIN, 2 x Cinch (RCA), vergoldet
2 x Lautsprecher, 4 Ω, vergoldet
GB
> 60 dB / 1 kHz
> 100 dB (A)
270 x 45 x 130 mm
DIN socket) to
2
.
Fig. 2
Fig. 3
Fig. 4
Werbung

Verwandte Anleitungen für Blaupunkt BSA 160


Inhaltszusammenfassung für Blaupunkt BSA 160
- Seite 1 Disconnect the negative terminal of the battery during installation. Beiliegendes Pluskabel zur Batterie legen und über Sicherungshalter Select a suitable mounting place in the car for the BSA 160, e.g. at the anschließen. An scharfkantigen Löchern beiliegende Kabeldurch- splashboard, below the dashboard, below the seats or in the boot. Make führungen verwenden.
-
Seite 2: Recommandations De Sécurité
Consignes de montage et de branchement conexión del aparato. Instalar el BSA 160 en un lugar de montaje adecuado, p.ej. en el Débrancher le pôle négatif de la batterie pendant toute la durée des salpicadero, debajo del tablero de instrumentos, debajo de los asientos travaux de branchement et de montage de l’appareil. -
Seite 3: Avvertenze Di Sicurezza
Kontrollera innan fästhålen borras att inga kabelstammar eller andra Il BSA 160 (dimensioni: 270 x 130 x 45 mm) viene montato in un luogo delar i bilen skadas. Fig. 1. adatto, come ad es. sulla plancia del cruscotto, sotto il cruscotto, sotto il För att undvika störningar skall alla ledningar dras långt ifrån befintliga... -
Seite 4: Veiligheidsinstructies
7 607 873 000 (luidsprekersteker DIN-bus) gebruiken. duração, deve-se separar o pólo negativo da bateria. O BSA 160 é montado num local de montagem adequado, como por ex. Veiligheidsinstructies na parede separadora do motor, sob o painel de instrumentos, sob os assentos ou no compartimento da mala. - Seite 5 Abbildungen / Illustrations / Illustraciones / Illustrazioni / Illustrationer / Afbeeldingen / Illustraçoes Fig. 1 Fig. 2...
- Seite 6 Fig. 3 Fig. 4 Fig.5 Fig. 6...