Herunterladen Inhalt Inhalt Diese Seite drucken

Werbung

Verfügbare Sprachen
  • DE

Verfügbare Sprachen

  • DEUTSCH, seite 40
CENTRIFUGA
I
MANUALE D'USO E MANUTENZIONE
JUICE EXTRACTOR
GB
INSTRUCTION AND MAINTENANCE MANUAL
CENTRIFUGEUSE
F
MANUEL D'UTILISATION
OBST UND GEMÜSE ZENTRIFUGE
D
BEDIENUNGS- UND WARTUNGSANLEITUNG
LICUADORA
E
MANUAL DE USO Y MANTENIMIENTO
ES500
ES500S
ES700
START
START

Werbung

Inhaltsverzeichnis
loading

Inhaltszusammenfassung für Ceado ES500S

  • Seite 1 CENTRIFUGA MANUALE D’USO E MANUTENZIONE JUICE EXTRACTOR INSTRUCTION AND MAINTENANCE MANUAL CENTRIFUGEUSE MANUEL D'UTILISATION OBST UND GEMÜSE ZENTRIFUGE BEDIENUNGS- UND WARTUNGSANLEITUNG LICUADORA MANUAL DE USO Y MANTENIMIENTO ES500 ES500S ES700 START START...
  • Seite 2: Juice Extractor

    CENTRIFUGA Questo apparecchio è una centrifuga professionale per la preparazione di succhi di frutta e di verdura con eliminazione automatica delle scorie. Come tutti gli elettrodomestici deve essere utilizzato con particolare prudenza per evitare lesioni alle persone e danni all'apparecchio. Leggere perciò...
  • Seite 3: Obst Und Gemüse Zentrifuge

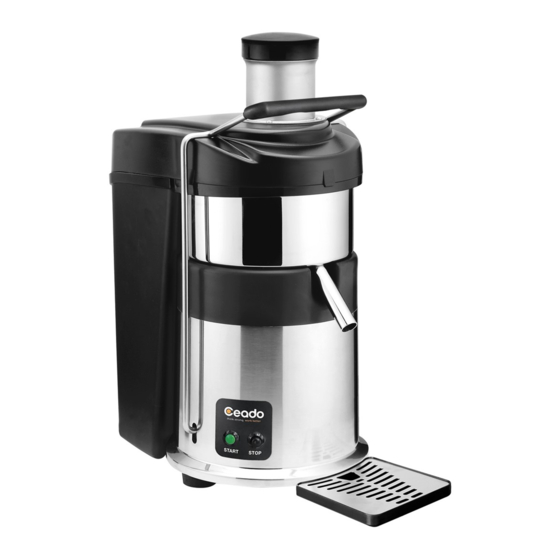
    OBST UND GEMÜSE ZENTRIFUGE Dieses Gerät ist eine Profizentrifuge mit automatischem Tresterauswurf und dient zur Zubereitung von Frucht- und Gemüsesäften. Wie alle anderen Hausgeräte muss man bei der Verwendung des Gerätes besonders vorsichtig sein, um Körperverletzungen zu vermeiden und das Gerät nicht zu beschädigen. Daher muss man die vorliegenden Anweisungen vor der Inbetriebnahme gründlich lesen und die Sicherheitsvorschriften befolgen.
  • Seite 4 CENTRIFUGA Componenti principali (Fig. 1 - Fig. 2 - Fig. 3) Base Cestello Vasca Ritentore di polpa Beccuccio Disco dentato Voluta Pulsante START Maniglia di chiusura Pulsante STOP Pestello Albero motore Tubo di alimentazione Girante Vaso portascorie Fig. 2 Fig. 1 Modello ES700 con doppio tubo di alimentazione ø...
  • Seite 5 Modello ES500 con tubo di alimentazione ø 77 mm Modello ES500S con tubo di alimentazione ø 50 mm ø 77 mm ø 50 mm START START Fig. 3 Fig. 4 NORME DI SICUREZZA AVVERTENZE GENERALI 1. Leggere attentamente le seguenti istruzioni prima di utilizzare l'apparecchio.
  • Seite 6: Conservare Queste Istruzioni

    8. In caso di incendio utilizzare estintori ad Anidride Carbonica (CO 2 ). Non utilizzare acqua o estintori a polvere. 9. Non immergere mai l’apparecchio nell'acqua! 10. È severamente vietato smontare l'apparecchio o cercare di intervenire in qualsiasi modo all'interno dello stesso. 11.
  • Seite 7: Installazione

    La dichiarazione di conformità CE di questo apparecchio è disponibile nella sezione Prodotti del nostro sito web www.ceado.com. INSTALLAZIONE Prima di installare l'apparecchio attenersi scrupolosamente alle Norme di sicurezza sopra indicate. Assicurarsi che la tensione della rete di alimentazione corrisponda a quella indicata sulla targa dell'apparecchio e che l'impianto elettrico sia dotato di messa a terra ed interruttore differenziale.
  • Seite 8 Assicurarsi che la centrifuga sia assemblata correttamente. Assicurarsi che il cestello sia completamente pulito prima di ogni utilizzo. Accertarsi che la maniglia di chiusura sia agganciata alla voluta. Posizionare un recipiente sotto il beccuccio della vasca. Avviare il motore premendo il pulsante “START”. Fig.
  • Seite 9: Pulizia E Manutenzione

    Fig. 6 PULIZIA E MANUTENZIONE Suggerimento: per ridurre al minimo le operazioni di pulizia suggeriamo di posizionare un sacchetto di plastica biodegradabile all’interno del vaso portascorie ripiegando l’orlo del sacchetto sopra e all’esterno del vaso portascorie (vedi Fig. 5). Utilizzando questo sistema, al termine delle operazioni si potrà...
  • Seite 10 Per smontare questi componenti, sganciare la maniglia di chiusura e togliere nell’ordine il pestello, la voluta, il cestello, il ritentore di polpa e la vasca (Fig. 8, Fig. 9). Montare nell’ordine inverso facendo attenzione di: posizionare il beccuccio di convogliamento del succo nell'apposita rientranza della base, posizionare correttamente il ritentore di polpa, posizionare il cestello nella vasca, verificando il corretto posizionamento del trascinatore del cestello sulla girante e posizionare la voluta sulla vasca.
  • Seite 11 Per la pulizia periodica completa si possono smontare gli elementi del cestello svitando il dado del cestello (Fig. 10). Per smontare gli elementi del cestello, tenere fermo con una mano il cestello e svitare il dado con una chiave a tubo numero 13 (Fig. 10). Spingere in seguito la vite del cestello estraendola.
  • Seite 12 ES500 ES700 Fig. 9 Fig. 8...
  • Seite 13: Guasti E Rimedi

    Dado le quantità precise di ogni succo non sono determinanti per il successo di una determinata miscela. * Solo per i modelli ES500 ed ES500S NOTA! Per ottenere la massima resa di Fig. 10 succo premere sempre pestello lentamente.
  • Seite 14 Problema Soluzione Controllare che il tubo di alimentazione sia vuoto. • Controllare che la spina sia inserita. • Controllare che l’interruttore di protezione a muro sia • acceso. L ’apparecchio non si Controllare che la maniglia di chiusura sia agganciata •...
  • Seite 15: Condizioni Di Garanzia

    SMALTIMENTO Corretto smaltimento del prodotto (rifiuti elettrici ed elettronici) (Applicabile nei paesi dell’Unione Europea ed in quelli con sistema di raccolta differenziata in conformità con la direttiva europea 2012/19/UE e successivi aggiornamenti) Questo prodotto è stato realizzato con materiali e componenti di prima qualità...
  • Seite 16 JUICE EXTRACTOR Main parts (Fig. 1 - Fig. 2 - Fig. 3) Motor housing Basket Bowl Pulp retainer Spout Grating disc Juicer cover START button Locking arm STOP button Food pusher Motor shaft Feed chute Drive disc Pulp container Fig. 2 Fig.
  • Seite 17 Model ES500 with feed chute ø 77 mm Model ES500S with feed chute ø 50 mm ø 77 mm ø 50 mm START START Fig. 3 Fig. 4 SAFETY RECOMMENDATIONS GENERAL INSTRUCTIONS 1. Read the following instructions carefully before using the appliance.
  • Seite 18 8. In case of fire use CO 2 extinguishers. Do not use water or powder extinguishers. 9. Never place the appliance in water! 10. Do not disassemble the appliance or attempt to perform any repairs inside it. 11. Always unplug the appliance before performing any maintenance or cleaning and when it is not in use.
  • Seite 19: Installation

    The EC declaration of conformity for this appliance is available in the Products section of our website www.ceado.com. INSTALLATION Comply with the safety recommendations indicated above and hereafter when installing the appliance. Make sure that the mains voltage is as indicated on the rating label of the appliance and that the electrical system is grounded and equipped with a switch.
  • Seite 20 Ensure that the juice extractor is correctly assembled. Ensure that the basket is properly cleaned before each use. Check to see that locking arm is hooked on to the juicer cover. Place a container under the spout of the bowl. Turn on the motor by pushing the START button.
  • Seite 21: Cleaning And Maintenance

    Fig. 6 CLEANING AND MAINTENANCE Suggestions: to reduce the cleaning procedures to a minimum we suggest placing a biodegradable plastic bag inside the pulp container, folding the top of the bag over the edge of the pulp container (see Fig. 5). By using this method, once you have finished using the appliance, you can put the waste directly in a composting or waste bin.
  • Seite 22 To disassemble these components, unhook the locking arm and remove in this order; food pusher, juicer cover, basket, pulp retainer, and bowl (Fig. 8, Fig. 9). Reassemble in the reverse order taking care to place the juice spout in the appropriate slot of the motor housing, place the pulp retainer correctly, place the basket in the bowl, making sure that the basket’s clutch disc is correctly inserted on the drive disc and position the juicer cover on the bowl.
  • Seite 23 For a periodic deep-cleaning you can disassemble the parts of the basket by unscrewing the nut under the basket (Fig. 10). To disassemble the parts of the basket, hold the basket still with one hand and unscrew the nut with a pipe wrench number 13 (Fig. 10). Pull the screw out of the basket. Wash all of the parts in warm water with dish soap, removing any residues with the brush.
  • Seite 24 ES500 ES700 Fig. 9 Fig. 8...
  • Seite 25: Troubleshooting

    * Only for ES500 and ES500S models NOTE! To obtain a high yield of juice always Fig. 10 press the food pusher lightly.
  • Seite 26 Problem Solution Make sure the feed chute is empty. • Make sure it is plugged in. • Make sure the safety circuit breaker is closed. • Make sure the locking arm is correctly hooked onto the • The appliance does not turn juicer cover.
  • Seite 27: Warranty

    DISPOSAL Correct disposal of this product (waste electrical and electronic equipment) (Applicable in the European Union and other countries with separate collection systems in conformity with European Directive 2012/19/EU and subsequent updates) This product has been made from high-quality parts and materials, which can be re-used and recycled.
  • Seite 28 CENTRIFUGEUSE Composants principaux (Fig. 1 - Fig. 2 - Fig. 3) Socle-moteur Panier Cuve Anneau de rétention de la pulpe Râpe Couvercle Bouton poussoir START Poignée de serrage Bouton poussoir STOP Poussoir Axe moteur Goulotte d’introduction Disque d’entraînement Conteneur à pulpe Fig.
  • Seite 29 Modèle ES500 avec goulotte d'introduction ø 77 mm Modèle ES500S avec goulotte d'introduction ø 50 mm ø 77 mm ø 50 mm START START Fig. 3 Fig. 4 NORMES DE SÉCURITÉ INSTRUCTIONS GÉNÉRALES 1. Lire attentivement les instructions suivantes avant toute utilisation de l'appareil.
  • Seite 30 8. En cas d'incendie, utiliser des extincteurs à Anhydride Carbonique (CO 2 ). Ne pas utiliser de l’eau ou d’extincteurs à poudre. 9. Ne jamais plonger l’appareil dans l'eau°! 10. Il est strictement interdit de démonter l'appareil ou de tenter d’intervenir, de quelque façon que ce soit, à...
  • Seite 31 La déclaration de conformité CE de cet appareil est disponible dans la section Produits de notre site web www.ceado.com. INSTALLATION Avant d'installer l'appareil, observer scrupuleusement les Normes de sécurité indiquées ci-dessus. S'assurer que la tension du secteur d'alimentation correspond à celle indiquée sur l’étiquette de l'appareil et que l'installation électrique est munie de mise à...
  • Seite 32 dernière pour centrifuger les carottes et pour optimiser le rendement du jus en coupant les fruits en morceaux plus petits. S'assurer que la centrifugeuse est montée correctement. Avant toute utilisation, s'assurer que le panier est tout à fait propre. S'assurer que la poignée de serrage est bien accrochée au couvercle. Placer un récipient sous le bec de la cuve.
  • Seite 33: Nettoyage Et Entretien

    Fig. 6 NETTOYAGE ET ENTRETIEN Conseil : Pour réduire au minimum les opérations de nettoyage, on conseille de positionner un ° sachet en plastique biodégradable à l'intérieur du conteneur à pulpe en repliant le bord du sachet sur et à l'extérieur du conteneur à pulpe (voir Fig. 5). En utilisant ce système, on pourra, à la fin des opérations, jeter les déchets directement dans les récipients pour les déchets biodégradables.
  • Seite 34 Pour démonter ces composants, décrocher la poignée de serrage et enlever dans l'ordre le poussoir, le couvercle, le panier, l'anneau de rétention de la pulpe et la cuve (Fig. 8, Fig. 9). Monter dans l'ordre opposé en faisant attention de placer le bec dans son logement du socle- moteur.
  • Seite 35 Pour le nettoyage périodique complet démonter les éléments du panier en dévissant l’écrou du panier (Fig. 10). Pour démonter les éléments du panier, saisir avec une main le panier et dévisser l'écrou avec une clé à pipe numéro 13 (Fig. 10). Ensuite, pousser la vis du panier en l'extrayant. Les laver dans de l'eau tiède avec du liquide vaisselle en enlevant les éventuels résidus solides avec la brosse.
  • Seite 36 ES500 ES700 Fig. 9 Fig. 8...
  • Seite 37: Conseils Pratiques

    * Seulement pour les modèles sont pas déterminantes pour le succès d'un ES500 et ES500S certain mélange. Fig. 10 NOTA ! Pour avoir le rendement maximum °...
  • Seite 38 Problème Solution Contrôler si la goulotte d’introduction est vide. • Contrôler si la fiche est branchée. • Contrôler si l'interrupteur de protection du secteur est • allumé. Contrôler que la poignée de serrage est correctement • L'appareil ne s'allume pas. accroché...
  • Seite 39: Conditions De Garantie

    ÉLIMINATION Comment éliminer ce produit (déchets d’équipements électriques et électroniques) (Applicable dans les pays de l’Union Européenne et aux autres pays disposant de systèmes de collecte sélective en conformité avec la Directive européenne 2012/19/UE et mises à jour ultérieures) Les matériaux et pièces composant ce produit sont d’excellente qualité et peuvent être recyclés et réutilisés.
  • Seite 40 ZENTRIFUGE Hauptkomponenten (Abb. 1 - Abb. 2 - Abb. 3) Untersatz Zentrifugalkorb Kessel Fruchtfleisch-Filtersieb Saftauslauf Reibe mit Zähnen Deckel START Taste Anziehgriff STOP Taste Stößel Motorwelle Einfüllstutzen Laufrad Tresterbehälter Abb. 2 Abb. 1 Modell ES700 mit Doppeleinfüllstutzen ø 77 mm und ø 50 mm...
  • Seite 41 Modell ES500 mit Einfüllstutzen ø 77 mm Modell ES500S mit Einfüllstutzen ø 50 mm ø 77 mm ø 50 mm START START Abb. 3 Abb. 4 SICHERHEITSVORSCHRIFTEN ALLGEMEINE HINWEISE 1. Die folgenden Anweisungen vor der Benutzung des Gerätes gründlich lesen.
  • Seite 42 8. Bei Bränden Kohlendioxyd- Feuerlöscher (CO 2 ) verwenden. Kein Wasser bzw. Pulverfeuerlöscher einsetzen. 9. Das Gerät NICHT in Wasser eintauchen! 10. Es ist strengstens untersagt, das Gerät auseinanderzubauen bzw. Eingriffe an den Innenteilen vorzunehmen. 11. Vor Durchführung von Wartungs- und Reinigungsarbeiten und wenn das Gerät nicht gebraucht wird, stets den Stecker aus der Steckdose ziehen.
  • Seite 43 Die CE-Konformitätserklärung dieses Geräts steht im Abschnitt Produkte unserer Web-Site www.ceado.com zur Verfügung. INSTALLATION Vor der Installation des Gerätes muss man die zuvor genannten Sicherheitsvorschriften befolgen. Sich vergewissern, dass die Netzspannung mit den Geräteschilddaten übereinstimmt und dass die elektrische Anlage geerdet und mit einem Differentialschalter ausgestattet ist.
  • Seite 44 Vergewissern Sie sich, dass die Zentrifuge korrekt zusammengesetzt ist und der Korb vor jedem Einsatz vollständig gereinigt wurde. Vergewissern Sie sich, dass der Anziehgriff am Deckel eingehakt sind. Einen Behälter unter den Kesselauslauf stellen. Den Motor mit der START-Taste einschalten. Abb.
  • Seite 45: Reinigung Und Wartung

    Abb. 6 REINIGUNG UND WARTUNG Tipp: Um die Reinigungsarbeiten aufs Minimum zu reduzieren empfehlen wir, einen biologisch abbaubaren Plastikbeutel in den Tresterbehälter zu geben und den Beutelrand nach außen zu biegen (siehe Abb. 5). Dieses System ermöglicht es, die Abfälle nach Beendigung der Arbeit direkt in die Behälter für Flüssigabfälle zu entsorgen.
  • Seite 46 Zur Entfernung der einzelnen Bauteile, muss der Anziehgriff ausgehakt und dann zuerst der Stößel, dann der Deckel, der Korb, das Fruchtfleischsieb und dann der Kessel entfernt werden (Abb. 8, Abb. 9). In umgekehrter Reihenfolge wieder einbauen und folgendes beachten: Den Saftauslauf in die Öffnung am Untersatz einsetzen, das Fruchtfleischsieb korrekt anlegen, den Korb im Kessel einsetzen.
  • Seite 47: Informationen Über Frucht- Und Gemüsesäfte

    Benützen Sie niemals Bleichlauge bzw. Reinigungsmittel mit Chlor. Zur periodischen Reinigung können die Korbteile entfernt werden, indem die Korbmutter abgeschraubt wird (Abb. 10). Entfernen der Korbteile muss der Korb mit einer Hand festgehalten und die Mutter mit einem Steckschlüssel Nr. 13 (Abb. 10) abgeschraubt werden. Danach die Schraube durch Drücken entfernen.
  • Seite 48 ES500 ES700 Abb. 9 Abb. 8...
  • Seite 49: Korrektes Zentrifugieren

    Saftrezepte keine genaue Wissenschaft sind, garantiert die genaue Menge jedes einzelnen Saftes nicht immer den Erfolg einer * Nur bei den Modellen bestimmten Mischung. ES500 und ES500S Abb. 10 HINWEIS! Um einen optimalen Saftertrag zu erzielen, muss der Stößel immer langsam hinuntergedrückt werden.
  • Seite 50 Problem Lösung Kontrollieren Sie, dass der Einfüllstutzen leer ist. • Kontrollieren, dass der Stecker eingesteckt wurde. • Kontrollieren, dass der Wandschutzschalter eingeschalten ist. • Kontrollieren, dass der Anziehgriff korrekt am Deckel • Das Gerät schaltet sich nicht eingehakt ist. ein. Wenn das Problem nach einer längeren, starken •...
  • Seite 51: Garantiebedingungen

    ENTSORGUNG Korrekte Entsorgung dieses Produkts (Elektromüll) (Gemäß der europäischen Richtlinie 2012/19/EU und nachfolgenden Aktualisierungen, in Ländern der Europäischen Union und anderen Ländern mit einem getrennten Sammelsystem anzuwenden) Dieses Produkt wurde aus hochwertigen Materialien und Teilen hergestellt, die für das Recycling tauglich sind und wiederverwendet werden können.
  • Seite 52 LICUADORA Componentes principales (Fig. 1 - Fig. 2 - Fig. 3) Carrocería Filtro Recipiente Retentor de pulpa Pico vertedor Disco dentado Tapa Botón START Manilla de cierre Botón STOP Empujador Eje motor Tubo de entrada Rotor Contenedor de residuos Fig. 2 Fig.
  • Seite 53 Modelo ES500 con tubo de entrada de ø 77 mm Modelo ES500S con tubo de entrada de ø 50 mm ø 77 mm ø 50 mm START START Fig. 3 Fig. 4 NORMAS DE SEGURIDAD ADVERTENCIAS GENERALES 1. Leer atentamente las siguientes instrucciones antes de utilizar el aparato.
  • Seite 54 8. Si se produce un incendio utilizar extintores de Anhídrido Carbónico (CO 2 ). No utilizar agua o extintores de polvo. 9. ¡No sumergir nunca el aparato en el agua! 10. Está absolutamente prohibido desmontar el aparato o tratar de intervenir de alguna manera en el interior del mismo.
  • Seite 55: Instalación

    La declaración de conformidad CE de este equipo se encuentra a disposición en la sección Productos de nuestro sitio web www.ceado.com. INSTALACIÓN Antes de instalar el aparato respetar escrupulosamente las Normas de Seguridad anteriormente indicadas. Asegurarse que la tensión de la red de alimentación corresponda a la indicada en la placa del aparato y que la instalación eléctrica esté...
  • Seite 56 Asegurarse que la licuadora esté montada correctamente. Asegurarse que el cesto esté completamente limpio antes de utilizarlo. Comprobar que la manilla de cierre esté enganchada en la tapa. Colocar un recipiente debajo del pico vertedor del recipiente. Activar el motor pulsando el botón START. Fig.
  • Seite 57: Limpieza Y Mantenimiento

    Fig. 6 LIMPIEZA Y MANTENIMIENTO Sugerencia: para reducir al mínimo las operaciones de limpieza, aconsejamos que se coloque una bolsita de plástico biodegradable dentro del contenedor de residuos doblando el borde de la bolsita hacia la parte externa de dicho contenedor (véase Fig. 5). Utilizando este sistema, al cabo de las operaciones se podrán tirar directamente los residuos en los contenedores de desechos húmedos.
  • Seite 58 Para desmontar estos componentes, desenganchar la manilla de cierre y sacar los componentes en el siguiente orden: el empujador, la tapa, el filtro, el retentor de pulpa y el recipiente (Fig. 8, Fig. 9). Montar en el orden contrario prestando atención que: se posicionen el pico vertedor del zumo en la correspondiente sede de la carrocería, se posicione correctamente el retentor de pulpa, el filtro en el recipiente, verificando el correcto posicionamiento del arrastrador del filtro en el rotor y colocar la tapa en el recipiente.
  • Seite 59 Para la limpieza periódica completa se pueden desmontar los elementos del filtro desenroscando la tuerca del mismo (Fig. 10). Para desmontar los elementos del filtro, sujetar con una mano el filtro y desenroscar la tuerca con una llave tubular número 13 (Fig. 10). Después, empujar el tornillo del filtro extrayéndolo.
  • Seite 60 ES500 ES700 Fig. 9 Fig. 8...
  • Seite 61: Averías Y Soluciones

    éxito de una determinada mezcla. * Sólo para los modelos ES500 y ES500S NOTA: Para obtener el máximo rendimiento Fig. 10 de zumo, apretar siempre el empujador lentamente.
  • Seite 62 Problema Solución Controlar que el tubo de entrada esté vacío. • Controlar que se haya conectado el enchufe. • Controlar que el interruptor de protección de pared esté • encendido. Controlar que la manilla de cierre esté enganchada • El aparato no se enciende. correctamente en la tapa.
  • Seite 63: Condiciones De Garantía

    ELIMINACIÓN Eliminación correcta de este producto (material eléctrico y electrónico de descarte) (Aplicable en la Unión Europea y en países con sistemas de recogida selectiva de residuos en conformidad con la directiva europea 2012/19/UE y actualizaciones posteriores) Este producto está elaborado con materiales y piezas de gran calidad apropiados para su reciclaje y reutilización.
  • Seite 64 Ceado S.r.l. Tel.: (00-39) 041 50 30 767 Fax: (00-39) 041 50 38 413 E-mail: info@ceado.com http://www.ceado.com Cod. 80412 - 05/2018...

Diese Anleitung auch für:

Es500Es700Es300

Inhaltsverzeichnis