Herunterladen Inhalt Inhalt Diese Seite drucken

DGM L-2231WD Benutzerhandbuch

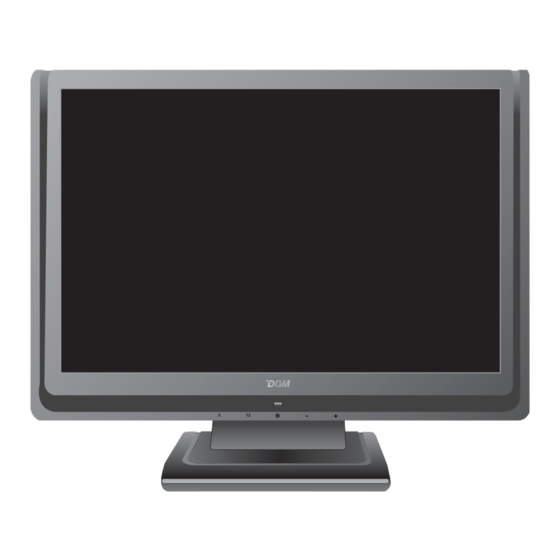
22" wide screen lcd monitor
Inhaltsverzeichnis

Werbung

Verfügbare Sprachen
  • DE

Verfügbare Sprachen

  • DEUTSCH, seite 16

Werbung

Inhaltsverzeichnis
loading

Inhaltszusammenfassung für DGM L-2231WD

  • Seite 2: Before You Start

    Before You Start ※ Assembling the base to your monitor step by step. STEP 1 STEP 2 ※ Disassembling your monitor and the base step by step. STEP 1 STEP 2 Before You Start...
  • Seite 3: Inhaltsverzeichnis

    Contents Contents........................1 English ........................4 ◇ Notice............................4 ◇ Safety Information........................4 ◇ Precaution............................4 Package Contents ..........................4 Hardware Installation.........................5 Input ............................5 Control Buttons ..........................5 OSD (On-Screen Display) Menu Mode .....................6 Troubleshooting..........................7 Supported Timing ..........................7 Specification ............................8 Francais ........................9 ◇ Avertissement ..........................9 ◇...
  • Seite 4 Espanol ........................19 ◇ Noticia............................19 ◇ Informacion de Seguridad......................19 ◇ Precaucion...........................19 Contenidos del Paquete ........................19 Instalacion de Hardware........................20 Entrada ............................20 Botones de control ..........................20 Menu de Modo de OSD (Exhibicion sobre la Pantalla) ..............21 Solucion de Problemas ........................22 Tiempo apoyado..........................22 Especificación ...........................23 Italiano........................
  • Seite 5 Dutch ......................... 34 ◇ Opmerking ...........................34 ◇ Veiligheidsinformatie ........................34 ◇Voorzorgen ............................34 Verpakkingsinhoud ..........................34 Hardware installatie...........................35 Input ............................35 Controleknoppen ..........................35 OSD (op-scherm weergave) menu modus ..................36 Problemen oplossen .........................37 Ondersteunde tijdopneming ......................37 Specificatie ............................38 繁體中文 ........................39 ◇注意事項 ............................39 ◇安全事項 ............................39 ◇警示...
  • Seite 6: English

    English ◇ Notice ‧ All Information in this manual may change from time to time without prior notice. ‧ To ensure safety operation of this product, please read the following menu carefully before using this product. ◇ Safety Information ‧ Do not place anything wet on the monitor or the power cord. ‧...
  • Seite 7: Hardware Installation

    Hardware Installation Be carefully to your LCD monitor, it’s very exquisite but easy to broken. Turn off LCD’s and PC’s power before you set it up. Follow our installation step by step. Input AC input:This is for connecting the power cable. VGA port : This can be connected with the D-Sub 15 pin signal Cable.
  • Seite 8: Osd (On-Screen Display) Menu Mode

    OSD (On-Screen Display) Menu Mode Press the OSD button to access menu, and press Increase / Decrease button for adjustment. BRIGHTNESS Adjust the brightness of the display. CONTRAST Adjust the difference between light and dark area. PHASE The phase of the dot clock is adjusted. CLOCK The ratio of dividing frequency of the dot clock is adjusted.
  • Seite 9: Troubleshooting

    Troubleshooting Make sure that your monitor is properly installed if you have encountered any trouble using this product. ˙ There is no picture on the screen. Check: 1.Power saving mode. Press any key and move the mouse to deactivate the mode. 2.Signal cable connector pins.
  • Seite 10: Specification

    Specification Input Signals VGA compatible analog RGB Composite sync supported DVI* DDWG compliant Single Link TMDS Digital Visual Interface (DVI) Compatibility Up to 1680X1050@60Hz(Non-interlaced) Connector D-sub 15-pins DVI* DVI-D* Audio* Stereo Phone Jack Power A/C Input Power Voltage Built-in universal power supply:100-240 VAC, 50/60 Hz Consumption Active <...
  • Seite 11: Francais

    Français ◇ Avertissement ‧ L’information dans ce manuel est sujette à modification sans notification. ‧ Veuillez lire et suivre les informations et précautions suivantes avant d’utiliser l’appareil.. ◇ Information de sécurité ‧ Ne placez aucun objet mouillé sur le moniteur ou le cordon d’alimentation. ‧...
  • Seite 12: Installation Du Materiel

    Installation du matériel Prenez soin de votre moniteur LCD. Eteignez votre moniteur LCD et votre ordinateur avant de commencer l’installation. Suivez les étapes ci-dessous pour compléter l’installation. Entrée Entrée en C.A:Pour connecter le câble d’alimentation Port VGA : Peut être connecté avec le câble D-Sub 15 broches.
  • Seite 13: Mode De Menu Osd (On-Screen Display)

    Mode de menu OSD (On-Screen Display) Appuyez sur la touche OSD pour accéder le menu, et appuyez sur les touches Augmenter/Diminuer pour l’ajustement. Ajuste la luminosité de l’image. BRIGHTNESS Ajuste la différence entre les régions claires et foncées. CONTRAST PHASE La phase de l'horloge de point est ajustée.
  • Seite 14: Depannage

    Dépannage Assurez-vous que le moniteur est installé correctement lorsque vous avez des problèmes avec ce produit. ‧Il n’y a pas d’image sur l’écran. Vérifie: 1. Mode Économie d'énergie. Appuyez sur une touche et utilisez souris pour désactiver ce mode. 2. Les broches du connecteur de câble de signal. Lorsqu’il y a des broches abîmées, contactez votre revendeur.
  • Seite 15: Caractéristiques

    Caractéristiques Signaux d’entrée VGA compatible analogique RGB Composite sync accepté DVI* Interface Digital Visual (DVI) conforme DDWG Single Link TMDS Compatibilité Jusqu’à 1680X1050@60Hz(sans entrelacement) Connecteur D-sub 15-broches DVI* DVI-D* Audio* Prise téléphone stéréo Alimentation Entrée A/C Alimentation Voltage Alimentation universelle intégrée:100-240 VAC, 50/60 Hz Consommation Active <...
  • Seite 16: Deutsch

    Deutsch ◇ Hinweise ‧ Eine jederzeitige Änderung aller Informationen in diesem Benutzerhandbuch ohne Vorbenachrichtigung ist vorbehalten. ‧ Für einen sicheren Betrieb dieses Gerätes lesen Sie die folgende Anleitung bitte sorgfältig durch, bevor Sie das Gerät in Betrieb nehmen. ◇ Sicherheitsvorkehrungen ‧...
  • Seite 17: Hardware-Installation

    Hardware-Installation Seien Sie vorsichtig beim Umgang mit diesem LCD-Monitor. Trotz seinem einzigarten Design kann er aber auch leicht beschädigt werden. Schalten Sie die Stromzufuhr zum LCD-Bildschirm und zum PC aus, bevor Sie das Gerät aufstellen. Befolgen Sie den Installationsvorgang Schritt für Schritt. Eingangsanschluß...
  • Seite 18: Osd-Menu-Modus (Anzeige Auf Dem Bildschirm)

    OSD-Menü-Modus (Anzeige auf dem Bildschirm) Drücken Sie die OSD-Taste. Um auf das Menü zuzugreifen, und drücken Sie die Erhöhen / Verringern Taste zum Einstellen. (Helligkeit) Zum Einstellen der Helligkeit auf dem Bildschirm. BRIGHTNESS CONTRAST Reguliert die Differenz zwischen helle und dunkele Fläche. PHASE Die Phase des Punkttaktgebers wird justiert.
  • Seite 19: Fehlersuche

    Fehlersuche Falls Schwierigkeiten auftreten, stellen Sie wie nachstehend beschrieben sicher, dass der Monitor richtig installiert wurde. ˙ Der Bildschirm bleibt leer. Nachprüfen: 1. Energiesparmodus. Zum Deaktivieren dieses Modus drücken Sie auf eine beliebige Taste oder bewegen Sie die Maus. 2. Anschlußpins des Steckers des Signalkabels. Falls Pins verbogen sind oder fehlen, wenden Sie sich an die Verkaufsstelle.
  • Seite 20: Spezifikationen

    Spezifikationen Eingangssignale VGA kompatibles analog RGB Composite Sync unterstützt DVI* DDWG konformes Single Link TMDS Digital Visual Interface (DVI) Kompatibilität Bis zu 1680X1050@60Hz (zeilensprungfrei) Anschlüsse D-Sub 15-Pin DVI* DVI-D* Audio* Stereobuchse Power A/C Eingang Netz Spannung Integrierter Universal-Netzversorgung:100-240 VAC, 50/60 Hz Verbrauch Aktiv <...
  • Seite 21: Espanol

    Español ◇ Noticia ‧ Toda información del presente manual puede cambiarse por tiempo a tiempo sin pre aviso. ‧ Para asegurar la seguridad de operación del producto, por favor leer el siguiente menú con cuidado antes usar el producto. ◇ Información de Seguridad ‧...
  • Seite 22: Instalacion De Hardware

    Instalación de Hardware Cuidado con su monitor de LCD, es muy exquisito pero fácil de romperse. Apagar el corriente de LCD y de PC antes de colocarlo. Sigue nuestra instalación paso por paso. Entrada AC Input: Para la conexión del cabo eléctrico. Puerto VGA: Para la conexión con el cabo de signal D-Sub de 15 pinzas.
  • Seite 23: Menu De Modo De Osd (Exhibicion Sobre La Pantalla)

    Menú de Modo de OSD (Exhibición sobre la Pantalla) Oprimir el botón OSD para tener acceso al menu y oprimir el botón Aumento/Disminución para ajustes. Modificar la iluminosidad de la exhibición BRIGHTNESS CONTRAST Modificar la diferencia entre la luz y la área oscura PHASE La fase del reloj del punto se ajusta.
  • Seite 24: Solución De Problemas

    Solución de Problemas Hace seguro que su monitor está bien instalado, si Ud. ha encontrado cualquier problemas del uso sobre este producto. ˙ Que no hay dibujo sobre la pantalla. Revise: Modo de reservación de energía. Apretar cualquier tecla y mover el ratón para desactivar el modo.
  • Seite 25: Especificación

    Especificación VGA compatible análogo RGB Signos input Compuesto sync apoyado DVI* DDWG para Interface Visual Digital Single Link TMDS (DVI) Compatibilidad Hasta 1680×1050@60Hz (No-entreface) Conector D-sub 15-pinzas DVI* DVI-D* Audio* Jaque de Fono Stereo Energía eléctrica Input A/C Voltage Incorporada fuente universal de energía eléctrica: Energía eléctrica 100-240 VAC, 50/60 Hz Consumo...
  • Seite 26: Italiano

    Italiano ◇ Notifica ‧ Le informazioni di questo manuale possono cambiare di tanto in tanto senza preavviso. ‧ Per garantire la sicurezza nell’operazione di questo prodotto, leggere attentamente il seguente menu prima di usare il prodotto. ◇ Informazioni per la sicurezza ‧...
  • Seite 27: Installazione Dello Hardware

    Installazione dello Hardware Maneggiate il nostro monitor LCD con molta cura, è un prodotto molto fine, ma delicato e facile a rompersi. Spegnete la corrente dell’LCD e del PC prima d’installarlo. Seguite i nostri passi per l’installazione un passo per volta. Ingresso Ingresso CA:È...
  • Seite 28: Modalita Menu Osd (On-Screen Display)

    Modalità Menu OSD (On-Screen Display) Premere il tasto OSD per accedere menu, poi premere I tasti Aumentare / Diminuire per eseguire la regolazione. Regola la luminosità del display. BRIGHTNESS Regola la differenza fra le zone chiare e scure. CONTRAST La fase dell'orologio del puntino è registrata. PHASE Il rapporto di divisione della frequenza dell'orologio del puntino è...
  • Seite 29: Ricerca Guasti

    Ricerca Guasti Se incontrate dei problemi nell’uso di quesdto prodotto, assicuratevi che il monitor sia stato installato nel modo corretto. ˙ Sullo schermo non appare alcuna figura. Controllare: 1. Modalità risparmio corrente. Premere un tasto qualsiasi e spostare il mouse per disattivare questa modalità.
  • Seite 30: Specifiche

    Specifiche Segnali d’ingresso RGB analogico VGA compatibile Composite Sync supportato DVI* Single Link TMDS Digital Visual Interface (DVI) – DDWG compatibile Compatibilità Fino a 1680X1050@60Hz (Non-interallacciato) Connettori D-Sub a 15-Pin DVI* DVI-D* Audio* Presa Stereo Alimentazione Ingresso CA Alimentazione Tensione Alimentatore universale incorporato: 100-240 VAC, 50/60 Hz Consumo...
  • Seite 31: Portugues

    Português ◇ Aviso ‧ Toda informação no este manual cambiará ocasionalmente sem aviso prévio. ‧ Para assegurar á operação de segurança do este produto, favor ler o seguinte menu cuidadosamente antes de usar este produto. ◇ Informação de segurança ‧ No colocar artigos molhadas no ou cordão elétrico. ‧...
  • Seite 32: Instalacao Do Hardware

    Instalação do hardware Tenha cuidado com o seu monitor LCD, é muito exquisito empero vulnerável. Desliga o LCD e o PC antes de instalar-o. Siga nossa instalação passo a passo. Input AC Input: Para a conexão do cabo elétrico. Porto VGA: Para a conexão com o cabo de sinal D-Sub de 15 pinos.
  • Seite 33: Modo Do Menu Osd (On-Screen Display)

    Modo do menu OSD (On-Screen Display) Pressionar o botão OSD para ter acesso no menu e pressionar o botão Aumentar/Reduzir para ajustamentos. Ajustamento de brilho da imagem. BRIGHTNESS CONTRAST Ajustamento de contraste entre as areas escura e clara. PHASE A fase do relógio de ponto é ajustada. CLOCK A relação de freqüência divisora do relógio de ponto é...
  • Seite 34: Localizador E Reparador De Defeitos

    Localizador e Reparador de Defeitos Esteja certo que o seu monitor está bem instalado se você há encontrado problemas no uso deste produto. ˙ Não há imagem na pantalha. Revisar: 1. Modo de salvamento de energia. Pressionar qualquer tecla e mover o mouse para desmobilizar o modo.
  • Seite 35: Especificação

    Especificação VGA compatível análogo RGB Sinais input Composto sync apoiado DVI* DDWG para Interface Visual Digital Single Link TMDS (DVI) Compatibilidade Até 1680×1050@60Hz (Não-entreface) Conector D-sub 15-pinos DVI* DVI-D* Audio* Jaque de Fone Stereo Energia elétrica Input A/C Energia elétrica Voltagem Incorporada fonte universal de energia elétrica: 100-240 VAC, 50/60 Hz...
  • Seite 36: Dutch

    ◇ Opmerking ‧ Alle informatie in deze handleiding kan soms veranderen zonder voorafgaande verwittiging. ‧ Om een veilige bediening van dit produkt te verzekeren, gelieve eerst het volgende menu grondig door te lezen vooraleer u dit produkt gebruikt. ◇ Veiligheidsinformatie ‧...
  • Seite 37: Hardware Installatie

    Hardware installatie Wees voorzichtig met uw LCD monitor, het is iets heel aardig, maar het kan ook snel stukraken. Schakel de stroom van de LCD en de computer uit vooraleer u het instelt. Volg onze installatie stap per stap op. Input AC input:dit is om het stroomsnoer te verbinden.
  • Seite 38: Osd (Op-Scherm Weergave) Menu Modus

    OSD (Op-scherm weergave) menu modus Druk op de OSD knop om het menu binnen te gaan, en druk op de toename/afname knop voor een aanpassing. past de helderheid van de display aan. Brightness past het verschil tussen het lichte en het donkere gebied aan. Contrast past de fase van de pixel klok aan.
  • Seite 39: Problemen Oplossen

    Problemen oplossen Vergewis er uzelf van dat de monitor naar behoren werd geïnstalleerd, als u enige problemen bent tegengekomen tijdens het gebruik van dit produkt. ˙ Er is geen foto op het scherm. Ga na: 1. Stroom besparingsmodus. Druk op eender welke toets en beweeg de muis om de modus uit te schakelen. 2.
  • Seite 40: Specificatie

    Specificatie VGA compatibel analoog RGB Input Signals samengestelde sync ondersteund DVI* DDWG overeenkomstig enkele link TMDS digitaal visuele interface (DVI) Compatibiliteit Computer Tot 1680X 1050 @ 60Hz toe (Niet-opengewerkt) Verbinder D-sub 15-pinnen DVI* DVI-D* Audio Stereo telefoon Stroom A/C input Stroom Voltage Ingebouwde universele stroomvoorraad:...
  • Seite 41: 繁體中文

    繁體中文 ◇注意事項 ‧ 所有使用手冊中之資訊,將不定時更新並不予通知。 ‧ 請詳讀此使用手冊,以確保安全使用本產品。 ◇安全事項 ‧ 請勿放置任何潮濕物品於螢幕或電源上。 ‧ 在插入電源線前,請先確保本產品電源為關閉狀態。 ‧ 請確認電源線與所有線材、訊號接頭皆已接妥。 ‧ 請勿嘗試自行拆卸本產品,您可能因而觸電受傷,如有需要,您可向所購買的經銷商查詢,或與我們連絡。 ◇警示 ‧ 請勿將本產品直接曝曬於陽光下,或高溫熱源處。 ‧ 切勿讓液體濺灑到螢幕上。 ‧ 請勿將液晶螢幕靠近有磁場的電器用品。 ‧ 請勿使用有害的化學清潔劑或強力清潔劑來清潔螢幕。請用軟質刷毛和溫和的清潔劑。 ‧ 不可在液晶螢幕上堆放雜物,放置於不良通風處可能導致機器高溫。 ‧ 請勿直接用手指觸碰螢幕表面,皮膚所含的油脂是相當不易被清除的。. 包裝 本產品包裝包含下列物件,若有缺件,請向您購買之商店或經銷商聯絡,如有任何疑問歡迎來電。 1. 22 吋液晶寬螢幕顯示器 2. 電源線 3. 訊號線 音源線為選配 4. 音源線 DVI 線為選配...
  • Seite 42: 硬體安裝

    硬體安裝 請小心對待您的液晶螢幕,它是非常精緻的產品。在安裝前請務必先將液晶螢幕及電腦的電源關閉,以免發生危險。請依照 指示一步一步地安裝。 輸入 電源埠:這裡用來連接電源。 電腦輸入埠 : 這裡用來連接 D-Sub 15 孔 VGA 影像訊號線。 DVI 數位埠 : DVI 影像訊號線接頭。 Audio In 埠:這裡用來連接音源線。 *注意: DVI 功能為選配功能。 控制按鍵介紹 本產品有 5 控制按鍵,包括"Auto Adjust", "OSD menu","Power","Adjust <->","Adjust <+>"。各控制按鍵之功能請詳見下列敘述: 自動調整 (功能)-- 功能選項按鍵 : 於 OSD 中為向上選擇功能按鍵。 熱鍵...
  • Seite 43: Osd 視控模式

    OSD 視控模式 按下 OSD 鍵進入功能目錄,並按下- / +控制鍵以調整設定。 調整螢幕的亮度 BRIGHTNESS 調整螢幕明暗的對比 CONTRAST PHASE 調整像素頻率的相位 CLOCK 調整像素的頻率 調整螢幕左右的位置 H-POSITION 調整螢幕上下的位置 V-POSITION 恢復出廠預設值 RESET 調整色溫 COLOR TEMPERATURE 調整紅色色溫 GREEN 調整綠色色溫 調整藍色色溫 BLUE 語言支援 LANGUAGE 其他 MISCELLANEOUS 儲存設定及離開 EXIT OSD Miscellaneous (其他) 返回主選項 RETURN 調整螢幕左右的位置...
  • Seite 44: 簡易故障排除

    簡易故障排除 確定您的螢幕以妥善安裝,如有下列問題: ․ 沒有螢幕畫面? 檢查:1. 是否已進入省電模式,按下任何一鍵或移動滑鼠來離開省電模式。 2. 訊號接頭是否接妥,如有訊號針腳針頭斷裂,請聯絡經銷商。 ․ 影像看起來太暗或太亮? 檢查:進入 OSD 功能模式調整亮度。 ․ 你該何時做調整? 檢查:當解析度頻率變更時。 ․ 文字看不清楚? 檢查:是否設定為支援的顯示模式。 支援顯示模式 Display Mode Resolution Vertical Frequency (Hz) Horizontal Frequency (KHz) 640x350 70.08 31.46 640x480 59.94 31.5 640x480 37.5 640x480 72.81 37.9 720x400 70.08 31.46...
  • Seite 45: 產品規格表

    產品規格 訊號輸入 VGA 類比裝置支援 RGB DVI* 支援 TMDS 的數字訊號 相容性 最高支援 1680X1050@60Hz 連接線 D-sub 15 針 DVI* DVI-D* 音源線 立體聲音源 電源線 A/C 輸入接頭 電源 電壓 內建交流變壓器: 100-240 VAC, 50/60 Hz 耗電 作業中< 54 瓦 (最大值) 省電模式 待命 < 3 瓦 內建揚聲器...
  • Seite 46: 简体中文

    简体中文 ◇注意事项 ‧ 所有使用手册中之信息,将不定时更新并不予通知。 ‧ 请详读此使用手册,以确保安全使用本产品。 ◇安全事项 ‧ 请勿放置任何潮湿物品于屏幕或电源上。 ‧ 在插入电源线前,请先确保本产品电源为关闭状态。 ‧ 请确认电源线与所有线材、讯号接头皆已接妥。 ‧ 请勿尝试自行拆卸本产品,您可能因而触电受伤,如有需要,您可向所购买的经销商查询,或与我们连络。 ◇警示 ‧ 请勿将本产品直接曝晒于阳光下,或高温热源处。 ‧ 切勿让液体溅洒到屏幕上。 ‧ 请勿将液晶屏幕靠近有磁场的电器用品。 ‧ 请勿使用有害的化学清洁剂或强力清洁剂来清洁屏幕。请用软质刷毛和温和的清洁剂。 ‧ 不可在液晶屏幕上堆放杂物,放置于不良通风处可能导致机器高温。 ‧ 请勿直接用手指触碰屏幕表面,皮肤所含的油脂是相当不易被清除的。. 包装 本产品包装包含下列对象,若有缺件,请向您购买之商店或经销商联络,如有任何疑问欢迎来电。 1. 22 吋液晶宽屏幕显示器 2. 电源线 3. 讯号线 音源线为选配 4. 音源线 DVI 线为选配...
  • Seite 47: 硬件安装

    硬件安装 请小心对待您的液晶屏幕,它是非常精致的产品。在安装前请务必先将液晶屏幕及计算机的电源关闭,以免发生危险。请依 照指示一步一步地安装。 输入 电源埠:这里用来连接电源。 计算机输入端口 : 这里用来连接 D-Sub 15 孔 VGA 影像讯号线。 DVI 数位端口 : DVI 影像讯号线接头。 Audio In 埠:这里用来连接音源线。 *注意: DVI 功能为选配功能。 控制按键介绍 本产品有 5 控制按键,包括"Auto Adjust", "OSD menu","Power","Adjust <->","Adjust <+>"。各控制按键之功能请详见下列叙述: 自动调整 (功能)-- 功能选项按键 : 于 OSD 中为向上选择功能按键。 热键...
  • Seite 48: Osd 视控模式

    OSD 视控模式 按下 OSD 键进入功能目录,并按下- / +控制键以调整设定。 调整屏幕的亮度 BRIGHTNESS CONTRAST 调整屏幕明暗的对比 调整像素频率的相位 PHASE 调整像素的频率 CLOCK 调整屏幕左右的位置 H-POSITION 调整屏幕上下的位置 V-POSITION 恢复出厂默认值 RESET COLOR TEMPERATURE 调整色温 调整红色色温 调整绿色色温 GREEN 调整蓝色色温 BLUE 语言支持 LANGUAGE 其他 MISCELLANEOUS 储存设定及离开 EXIT OSD Miscellaneous (其他) 返回主选项 RETURN 调整屏幕左右的位置...
  • Seite 49: 简易故障排除

    简易故障排除 确定您的屏幕以妥善安装,如有下列问题: ․ 没有屏幕画面? 检查:1. 是否已进入省电模式,按下任何一键或移动鼠标来离开省电模式。 2. 讯号接头是否接妥,如有讯号针脚针头断裂,请联络经销商。 ․ 影像看起来太暗或太亮? 检查:进入 OSD 功能模式调整亮度。 ․ 你该何时做调整? 检查:当分辨率频率变更时。 ․ 文字看不清楚? 检查:是否设定为支持的显示模式。 支持显示模式 Display Mode Resolution Vertical Frequency (Hz) Horizontal Frequency (KHz) 640x350 70.08 31.46 640x480 59.94 31.5 640x480 37.5 640x480 72.81 37.9 720x400 70.08 31.46...
  • Seite 50: 产品规格表

    产品规格 讯号输入 置 VGA 模拟装 支持 RGB DVI* 支持 TMDS 的数字讯号 兼容性 最高支持 1680X1050@60Hz 连接线 D-sub 15 針 DVI* DVI-D* 音源线 立体声音源 电源线 A/C 输入接头 电源 电压 内建交流变压器: 100-240 VAC, 50/60 Hz 耗电 作业中< 54 瓦 (最大值) 省电模式 待命 < 3 瓦 内建扬声器...
  • Seite 51 G1610MABWDG01 V1.0...

Inhaltsverzeichnis