Herunterladen Inhalt Inhalt Diese Seite drucken

Werbung

Verfügbare Sprachen

Verfügbare Sprachen

ll presente prodotto è adatto solo ad ambienti
correttamente isolati o ad un uso occasionale.
This product is only suitable for well insulated
Dieses Produkt ist nur für Räume geeignet, die korrekt isoliert
wurden oder für einen gelegentlichen Gebrauch.
Leggere il manuale d'uso. Conservare con cura le istruzioni per ogni futura consultazione.
IT
Please retain these instructions in a safe place for further reference.
EN
Es wird gebeten, diese Gebrauchsanleitung für ein zukünftiges Nachschlagen sorgfältig aufzubewahren.
DE
CALYPSO DIGITAL
spaces or occasional use.
1

Werbung

Inhaltsverzeichnis
loading

Inhaltszusammenfassung für Aurora CALYPSO DIGITAL

  • Seite 1 CALYPSO DIGITAL ll presente prodotto è adatto solo ad ambienti correttamente isolati o ad un uso occasionale. This product is only suitable for well insulated spaces or occasional use. Dieses Produkt ist nur für Räume geeignet, die korrekt isoliert wurden oder für einen gelegentlichen Gebrauch.
  • Seite 2 Volume Volume Volume...
  • Seite 4 ITALIANO MANUALE DI INSTALLAZIONE E D’USO Si prega di leggere attentamente queste istruzioni, prima di utilizzare il prodotto, in modo da evitare danneg- giamenti o comunque il verificarsi di situazioni di pericolo. Qualsiasi utilizzo del prodotto diverso da quanto indicato nel presente manuale può causare incendi, pericoli elettrici o ferite e rende nulla qualsiasi garanzia. La garanzia non si applica ad alcun difetto, deterioramento, perdita, ferimento o danneggiamento riconducibili ad un uso non corretto del prodotto.
  • Seite 5 sere prestata in presenza di bambini o persone vulnerabili. • Assicuratevi che l’alimentazione di rete corrisponda ai dati di tar- ga: 230V AC, 50Hz. • Questa unita ha un livello di protezione IP21 ed e adatta ad es- sere utilizzata in un bagno, escludendo le zone 1 e 2 (figura 1). Accertarsi che l’unita non sia accessibile dalla vasca da bagno, dalla doccia o da una piscina.
  • Seite 6: Descrizione Del Prodotto

    specializzato al fine di evitare qualunque rischio di danneggia- mento. • Il termoventilatore deve essere posizionato in modo tale che la presa di alimentazione sia sempre raggiungibile. • Il termoventilatore è costruito in doppio isolamento elettrico (clas- se II) e, pertanto, non richiede il collegamento di terra. •...
  • Seite 7: Accensione E Spegnimento

    3. u so Del termoventilatore • Accensione e spegnimento Il prodotto viene alimentato appena si inserisce la spina in una presa di corrente. Se il prodotto è nuovo o vi è stata una interruzione della tensione di alimentazione superiore a 5 minuti il simbolo delle ore lampeggia affinchè si possa procedere con l'impostazione dell'orario.
  • Seite 8: Selezione Della Modalità Di Funzionamento

    ACCENSIONE Sul display si accende il simbolo Premere il pulsante di “STAND-BY” della modalità aria fredda. per accendere il termoventilatore in L’indicatore luminoso sotto al tasto modalità aria fredda. STAND-BY si accende. SPEGNIMENTO In qualsiasi modalità di funzio- namento premere il pulsante di “STAND-BY”...
  • Seite 9 Modalità Aria fredda • Il prodotto funziona come un ventilatore e gli elementi riscaldanti sono disattivati. • Il simbolo si accende sul display a conferma dell'attivazione di questa modalità. • Il termostato viene escluso e non influisce sul funzionamento del ventilatore. Modalità...
  • Seite 10: Regolazione Della Temperatura

    Premere il tasto "+" per selezionare Procedere come illustrato sopra per l'ora successiva impostare la temperatura desiderata utilizzando il tasto "MODE" e confer- mando con il tasto "SELECT". Dopo aver visualizzato ed eventual- Il display indica per 5" la scritta mente modificato tutte le ore del "donE"...
  • Seite 11: Risoluzione Dei Problemi

    5. r isoluzione Dei Problemi • In caso di surriscaldamento il sistema di protezione dell’apparecchio disattiva automaticamente l’elemento riscal- dante ed il motore, facendo così interrompere il funzionamento del termoventilatore . In questo caso il prodotto non funziona. In questo caso: Spegnere il termoventilatore e lasciarlo raffreddare per circa 15/20 minuti Rimuovete eventuali altre cause di surriscaldamento (per es.
  • Seite 12 Informazioni obbligatorie per gli apparecchi per il riscaldamento d’ambiente locale elettrici Identificativo del modello: CALYPSO DIGITAL Sim- Dato Valore Unità Dato Unità bolo Potenza termica Tipo di potenza termica, solo per gli apparecchi per il riscaldamento d’ambiente locale elettrici ad accumulo (indicare una sola opzione)
  • Seite 13: For Your Safety

    ENGLISH INSTALLATION AND OPERATING MANUAL Before operating the heater, please read these instructions thoroughly to avoid damage and hazardous situa- tions. Any use of this heater other than that stipulated in this instruction manual may cause fire, electric shock or injury, and voids all warranties. Warranty does not apply to any defect, deterioration, loss, injury or damage caused by, or as a result of, the misuse or abuse of this heater.
  • Seite 14 on the rating plate: 230V~, 50Hz. • This unit has an IP21 protection level and is suitable for use in ba- throom excluding Zones 1 & 2 (picture 1). Do not use this heater in the immediate surroundings of a bath, a shower or a swimming pool.
  • Seite 15: Product Description

    gulations in force in the country of installation. • When you use the product , never place the power cable around the grille because this could cause a damage to the power cable and make the heater dangerous (picture 6). •...
  • Seite 16 Plug the heater into a power outlet to turn it on. If the product is new or has not been powered for more than 5 minutes, the display shows a flashing time symbol. Use the "+" and "-" buttons to set the Press the "SELECT"...
  • Seite 17: Operating Mode Selection

    STAND-BY In any operating mode, press the "STAND-BY" key to turn off the fan. The display shows the current time. The backlight turns off 30 " after pressing the last button • Operating Mode Selection You can select one of the following 5 operating modes: Icon Mode Description...
  • Seite 18 Frost Free • The product measures room temperature and lights up when the temperature level drops below 7 ° C. • The icon appears on the display to confirm that this mode is activated. • The thermostat is automatically set to 7 ° C and can not be changed. •...
  • Seite 19: Troubleshooting

    After displaying and editing all the Display shows "donE" for 5 " to con- hours of the day, at 23 o'clock (from firm the storage 23:00 to 23:59), a further pression of the "+" key stores the program. Note: You can store the settings and exit programming mode, at any time, wi- thout having to display all the hours of the day by pressing the "PROG"...
  • Seite 20: Legal Notice

    present behind the grid. • If the product requires repairing, contact an authorised technical service centre. • When replacing the power cable, use a 2x0,75mm2 H05VV-F HAR type. This operation must be performed by qualified personnel and never by the end user in order to avoid damaging the appliance and jeopardising personal safety.
  • Seite 21 Information requirements for electric local space heaters Model identifier(s): CALYPSO DIGITAL Item Symbol Value Unit Item Unit Heat output Type of heat input, for electric storage local space heaters only (select one) Nominal heat manual heat charge control, with integrated thermostat...
  • Seite 22 DEUTSCH INSTALLATIONS UND BEDIENUNGSANLEITUNG Bitte lesen Sie diese Anweisungen vor der Verwendung des Produkts aufmerksam durch, um Schäden oder in jedem Fall das Auftreten von Gefahrensituationen zu vermeiden. Jegliche Verwendung des Produkts, die von den Vorgaben in diesem Handbuch abweicht, kann Brände, elektrische Gefahren oder Verletzungen verursa- chen und macht die Garantie nichtig.
  • Seite 23 Kinder im Alter zwischen 3 und 8 Jahren dürfen das Produkt nicht anschließen, einstellen, reinigen oder an ihm Wartungsarbeiten ausführen. • ACHTUNG: Einige Teile dieses Produkts können sehr heiß werden und Verbrennungen verursachen. Besondere Auf- merksamkeit muss bei Anwesenheit von Kindern oder verlet- zbaren Personen geboten werden.
  • Seite 24 dem Gerät geschrieben oder wird durch das Symbol illustriert • Verwenden Sie den Heizlüfter nicht in Zimmern, die mit explo- siven Gasen, durch Lösungsmittel und Lacke erzeugte Dämpfe oder in jedem Fall entzündlichen Dämpfen/Gasen gesättigt sind. • Wenn das Kabel beschädigt ist, müssen Sie es ersetzen. Führen Sie diese Maßnahmen nicht allein aus, bringen Sie den Heizlüfter in ein befugtes Reparaturzentrum, da der Eingriff von Fachperso- nal erforderlich ist, um jegliches Risiko von Beschädigungen zu...
  • Seite 25: Einschalten Und Ausschalten

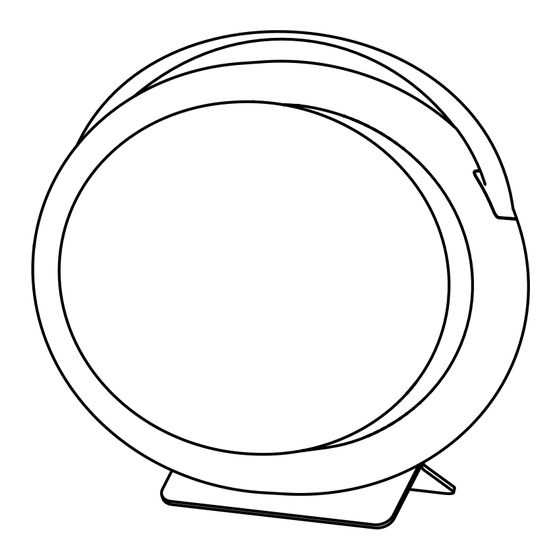
    stens 1m Abstand vom Luftaustrittsgitter. 2. b eschreibung Des roDukts • Mit Bezug auf Abbildung 4: Transportgriff Luftaustrittsgitter Bedienfeld Luftansauggitter • Das Bedienfeld umfasst die folgenden Elemente (Abbildung 5): Einschalten/Stand-by Reduzierung Auswahl des Betriebsmodus Tagesprogrammierung Erhöhung Auswahl der Leistung Multifunktionsdisplay Leuchtbetriebsanzeige Leuchtanzeige des Programmmodus 3.
  • Seite 26 Verwenden Sie Tasten “+” und “–“, Drücken Sie die Taste “SELECT”, um die gewünschten Minuten ein- um die gewünschten Minuten zu be- zustellen. stätigen. Das Display zeigt die eingestellte Stunde an. Das Produkt ist in Stand-by. Um die Stunde abzuändern, ist es ausreichend, die Tasten "+" und "-" zusammen für 5 Sekunden zu drücken. Die Zif- fern der Uhrzeit beginnen zu blinken und das Einstellungsverfahren kann wie oben beschrieben durchgeführt werden.
  • Seite 27: Auswahl Des Betriebsmodus

    AUSSCHALTEN Drücken Sie in jedem Betriebsmo- dus die “STAND-BY”-Taste, um den Heizlüfter auszuschalten. Das Display zeigt die aktuelle Uhrzeit an. Die Hintergrundbeleuchtung schal- tet sich 30 nach dem Drücken der letzten Taste aus • Auswahl des Betriebsmodus Es ist möglich, einen der 5 Betriebsmodi auszuwählen: Symbol Modus Beschreibung...
  • Seite 28 Frostschutz-Modus • Das Produkt misst die Umgebungstemperatur und schaltet sich ein, falls die Temperatur unter 7°C fällt. • Das Symbol schaltet sich auf dem Display zur Bestätigung der Aktivierung dieses Modus ein. • Der Thermostat wird automatisch auf den Wert 7°C eingestellt und kann nicht verändert werden. •...
  • Seite 29: Einstellung Der Temperatur

    Nach der Anzeige und möglicherwei- Das Display zeigt für 5 Sekunden die se Abänderungen aller Stunden des Schrift "donE" zu Bestätigung der er- Tages speichert nach Erreichen der folgten Speicherung an 23 (Zeitfenster von 23:00 bis 23:59) das nachfolgende Drücken der Taste "+"...
  • Seite 30: Wartung

    Schalten Sie den Heizlüfter erneut ein und überprüfen Sie den korrekten Betrieb. 6. w artung • Dieses Produkt erfordert keine spezielle Wartung. • Wir empfehlen, das Produkt mindestens alle 6 Monate mit einem trockenen Tuch zu reinigen und einen Stau- bsauger zu verwenden, um mögliche Verschmutzungen, die sich auf dem Luftaustrittsgitter abgesetzt haben, abzusaugen.
  • Seite 31 Obligatorische Informationen für elektrische Geräte für das Heizen von Räumen Modellkennung: CALYPSO DIGITAL Daten Symbol Wert Einheit Daten Einheit Thermische Leistung Art der thermischen Leistung, nur für elektrische Speichergeräte für das Heizen von Räumen (nur eine Option angeben) Thermische manuelle Kontrolle der thermischen Belastung, mit integrier-...
  • Seite 32 CALYPSO DIGITAL_R4_20180627...

Inhaltsverzeichnis