Herunterladen Inhalt Inhalt Diese Seite drucken
Olimpia splendid LIMPIA 6 Hinweise Für Die Verwendung Und Pflege

Olimpia splendid LIMPIA 6 Hinweise Für Die Verwendung Und Pflege

Vorschau ausblenden Andere Handbücher für LIMPIA 6:

Werbung

Verfügbare Sprachen
  • DE

Verfügbare Sprachen

  • DEUTSCH, seite 32
LIMPIA 6
On/O
C
TEMP
%RH
TUMID
1 2 4 8
Timer
TIMER
MIST+/-
Heat
ISTRUZIONI PER USO E MANUTENZIONE
INSTRUCTION FOR USE AND MAINTENANCE
MODE D'EMPLOI ET D'ENTRETIEN
HINWEISE FÜR DIE VERWENDUNG UND PFLEGE
INSTRUCCIONES PARA EL USO Y EL MANTENIMIENTO

Werbung

Inhaltsverzeichnis
loading

Inhaltszusammenfassung für Olimpia splendid LIMPIA 6

  • Seite 1 LIMPIA 6 On/O TEMP TUMID 1 2 4 8 Timer TIMER MIST+/- Heat ISTRUZIONI PER USO E MANUTENZIONE INSTRUCTION FOR USE AND MAINTENANCE MODE D'EMPLOI ET D'ENTRETIEN HINWEISE FÜR DIE VERWENDUNG UND PFLEGE INSTRUCCIONES PARA EL USO Y EL MANTENIMIENTO...
  • Seite 2 QUANDO SI UTILIZZANO APPARECCHIATURE ELETTRICHE, È SEMPRE NECESSARIO SEGUIRE PRECAUZIONI DI SICUREZZA DI BASE PER RIDURRE RISCHI DI INCENDIO, SCOSSE ELETTRICHE E INFORTUNI A PERSONE, INCLUSO QUANTO SEGUE: Questo prodotto deve essere utilizzato unicamente secondo le specifiche in- dicate nel presente manuale. L’utilizzo diverso da quanto specificato potrebbe comportare gravi infortuni.
  • Seite 3 37 - Utilizzare acqua potabile o distillata nella tanica. Le aree con acque dure richiederanno la pulizia più frequente. 38 - Se si forma umidità sulle pareti o finestre della stanza, spegnere l’umidificatore. La stanza presenta molta umidità e una maggiore umidificazione potrebbe causare danni. LIMPIA 6...
  • Seite 4 1- CARATTERISTICHE PRINCIPALI E FUNZIONAMENTO • 3 livelli di emissione. • Nebbia calda/fresca. • Finestra trasparente per verificare il livello dell’acqua. • Vano per aggiunta aroma. Uscita nebbia Coperchio decorativo Finestra livello acqua Tanica dell’acqua Filtro purificatore (se fornito a corredo) Coperchio Tappo della tanica Galleggiante...
  • Seite 5: Istruzioni Prima Dell'uso

    È importante versare nient’altro che acqua nella fissare SALDAMENTE il tappo tanica. dopo avere riempito la tanica con acqua. 5. Fissare la tanica alla base dell’unità. 6. Prima di ACCENDERE l’umidificatore accertarsi che vi sia acqua nella vasca. LIMPIA 6...
  • Seite 6: Istruzioni Per L'uso

    3- ISTRUZIONI PER L’USO A) ON/OFF Premere il pulsante per ACCENDERE e SPEGNERE. B) Nebbia calda/fredda Premere il pulsante ON/OFF per selezionare nebbia calda (icona sole accesa) o fresca (icona sole spenta). C) Impostazione emissione nebbia Premere il pulsante MIST per regolare il livello di emissione su basso, medio o alto. Si consiglia di impostare un livello di emissione di nebbia basso per l’uso notturno.
  • Seite 7: Manutenzione Giornaliera

    • Trasduttore ultrasonico. Se si utilizza acqua dura, distillata o acqua di rubinetto, oc- corre pulire settimanalmente il trasduttore. • Filtro aria. Rimuovere la griglia, pulire il filtro. Reinstallare griglia e filtro. • Filtro purificatore (se fornito a corredo). Risciacquare con acqua pulita e lasciare asciugare. LIMPIA 6...
  • Seite 8 5b- DECALCIFICAZIONE • In base all’utilizzo e al tipo di acqua, potrebbe essere richiesta la pulizia settima- nale o in ogni altra settimana per ottimizzare le prestazioni dell’unità. • Se si vive in un’area con acque dure, si consiglia di utilizzare acqua distillata o di ammorbidire l’acqua per l’umidificatore.
  • Seite 9 • Imballare l’unità nel suo cartone originale e conservare in luogo fresco e asciutto. NOTA: SE SI RISCONTRA UN PROBLEMA NON TENTARE DI APRIRE DA SOLI L’ALLOGGIAMENTO DEL MOTORE. QUESTA OPERAZIONE POTREBBE ANNULLARE LA GARANZIA E CAUSARE DANNI ALL’UMIDIFICATORE O LESIONI PERSONALI. LIMPIA 6...
  • Seite 10: Guida Per La Risoluzione Dei Problemi

    6- GUIDA PER LA RISOLUZIONE DEI PROBLEMI PROBLEMA SOLUZIONE Vapore d'acqua e umidità non • Spina di alimentazione: Scollegare e quindi riprovare. vengono prodotti. • Interruzione di corrente: Quando la corrente torna, riprovare. • Installazione della tanica: Accertarsi che la tanica sia collegata correttamente. • La superficie del disco ultrasonico è sporca: Pulire il disco ultrasonico.
  • Seite 12 WHEN USING ELECTRICAL APPLIANCES, BASIC SAFETY PRECAUTIONS SHOULD ALWAYS BE FOLLOWED TO REDUCE THE RISK OF FIRE, ELECTRIC SHOCK, AND INJURY TO PERSONS, INCLUDING THE FOLLOWING: This product should be used only in accordance with the specifications outlined in this manual. Usage other than what has been specified here may result in serious injury.
  • Seite 13 37 - Use clean or distilled water in tank. Hard water areas will require more frequent cleaning. 38 - If moisture forms on the walls or windows of the room, turn off the humidifier. The room already has plenty of humidity and additional moisture may cause damage. LIMPIA 6...
  • Seite 14 1- MAIN FEATURES AND OPERATING • 3 emission levels. • Warm/cool mist. • Transparent window to verify water level. • Flavour addition compartment. Mist outlet Decorative cover Water level window Water tank Purifier filter (if provided) Cover Water tank cap Float switch Body Control panel...
  • Seite 15 It is important to FIRMLY water into the tank. secure cap after filing the tank with water. 5. Attach tank to base of unit. 6. Before turning ON the humidifier make sure there is water in the Bowl. LIMPIA 6...
  • Seite 16 3- OPERATING INSTRUCTIONS A) ON/OFF Press the button to TURN ON and TURN OFF the appliance. B) Hot/cool mist Press the ON/OFF button to select warm mist (sun icon turned on) or fresh (sun icon turned off). C) Mist emission setting Press the MIST button to adjust the emission level to low, medium or high.
  • Seite 17: Daily Maintenance

    • Ultrasonic Transducer. If you use the hard water, distilled or tap water, you should clean the transducer weekly. • Air filter. Remove the grid, clean the filter. Reinstall grid and filter. • Purifier filter (if provided). Rinse with clean water and let it dry. LIMPIA 6...
  • Seite 18 5b- DESCALING • Depending on usage and water type, cleaning to remove scale may be required weekly or every other week to optimize unit performance. • If you live in a hard water area, we recommend the use of distilled water or soften water for your humidifier.
  • Seite 19 • Pack the unit in its original carton and store in a cool, dry location. NOTE: IF YOU EXPERIENCE A PROBLEM DO NOT ATTEMPT TO OPEN THE MO- TOR HOUSING YOURSELF. DOING SO MAY VOID YOUR WARRANTY AND CAUSE DAMAGE TO THE HUMIDIFIER OR PERSONAL INJURY. LIMPIA 6...
  • Seite 20: Troubleshooting Guide

    6- TROUBLESHOOTING GUIDE PROBLEM SOLUTION Water vapor and humidity are • Power plug: Unplug and then try again. not produced. • Power Failure: When the power is returned, try again. • Tank Installation: Make sure the tank is correctly attached. • The surface of the ultrasonic disk is dirty: Clean ultrasonic disk. Air blows but water vapor is not • Excessive Water: Remove a certain amount of water from the tank. produced.
  • Seite 22 QUAND L’ON UTILISE DES APPAREILS ÉLECTRIQUES, IL EST TOUJOURS NECESSAIRE D’ADOPTER DES PRECAUTIONS DE SECURITE DE BASE POUR REDUIRE LES RISQUES D’INCENDIE, D’ÉLECTROCUTIONS ET D’ACCIDENTS CORPORELS, Y COMPRIS LES PRECAUTIONS SUIVANTES: Ce produit doit être utilisé uniquement selon les spécifications indiquées dans le présent manuel.
  • Seite 23 37 - Utiliser de l’eau potable ou distillée dans le réservoir. Les régions à eaux dures néces- sitent un nettoyage plus fréquent. 38 - S’il se forme de l’humidité sur les murs ou les fenêtres de la pièce, éteindre l’humidificateur. La pièce présente beaucoup d’humidité et une humidification pourrait entraîner des dommages. LIMPIA 6...
  • Seite 24 1- CARACTERISTIQUES PRINCIPALES ET FONCTIONNEMENT • 3 niveaux d’émission. • Brume chaude/fraîche. • Fenêtre transparente pour vérifier le niveau d’eau. • Compartiment pour l’ajout d’arômes. Sortie brume Couvercle décoratif Fenêtre de niveau d’eau Réservoir de l’eau Filtre purificateur (si fourni en dotation) Couvercle Bouchon du...
  • Seite 25 SOLIDEMENT dans le réservoir. le bouchon après avoir rempli le réservoir avec de l’eau. 5. Fixer le réservoir à la base de l’unité. 6. Avant d’ALLUMER l’humidificateur, s’assurer qu’il y a de l’eau dans le bac. LIMPIA 6...
  • Seite 26: Instructions Pour L'utilisation

    3- INSTRUCTIONS POUR L’UTILISATION A) ON/OFF Appuyer sur la touche pour ALLUMER et ÉTEINDRE. B) Brouillard chaud/froid Appuyer sur le bouton ON/OFF pour sélectionner l’option brouillard chaud (icône soleil allumée) ou froid (icône soleil éteinte). C) Paramétrage de l’émission de brouillard Appuyer sur la touche MIST pour régler le niveau d’émission sur faible, moyen ou fort.
  • Seite 27: Entretien Quotidien

    • Filtro aria. Retirer la grille et nettoyer le filtre. Remettre la grille et le filtre en place. • Filtro purificatore (se fornito a corredo). Rincer à l’eau claire et laisser sécher. LIMPIA 6...
  • Seite 28 5b- DETARTRAGE • En fonction de l’utilisation et du type d’eau, le nettoyage pourrait être nécessaire toutes les semaines ou toutes les deux semaines pour optimiser les perfor- mances de l’unité. • Dans une région à eaux dures, il est conseillé d’utiliser de l’eau distillée ou d’adoucir l’eau pour l’humidificateur.
  • Seite 29 • Emballer l’unité dans son carton d’origine et conserver dans un endroit frais et sec. NOTE :SI L’ON CONSTATE UN PROBLEME, NE PAS ESSAYER D’OUVRIR PAR SOI MEME LE LOGEMENT DU MOTEUR. CETTE OPERATION POURRAIT ANNULER LA GARANTIE ET CAUSER DES DOMMAGES A L’HUMIDIFICA- TEUR OU LESIONS PERSONNELLES. LIMPIA 6...
  • Seite 30: Guide Pour La Resolution Des Problemes

    6- GUIDE POUR LA RESOLUTION DES PROBLEMES PROBLEME SOLUTION La vapeur d'eau et humidité ne • Fiche d’alimentation: Débrancher puis réessayer. sont pas produits. • Interruption de courant : Quand l’électricité est rétablie, réessayer. • Installation du réservoir : s’assurer que le réservoir est branché correctement. • La surface du disque à ultrasons est encrassée : Nettoyer le disque à ultrasons. L'air souffle mais la vapeur d'eau •...
  • Seite 32 BEI VERWENDUNG ELEKTRISCHER GERÄTE IST ES STETS ERFORDER- LICH, DIE GRUNDLEGENDEN SICHERHEITSVORKEHRUNGEN ZU BEACH- TEN, UM GEFAHREN FÜR PERSONEN DURCH BRAND, ELEKTRISCHEN STROMSCHLAG UND UNFÄLLE ZU REDUZIEREN, IM EINZELNEN: Dieses Produkt ist ausschließlich den in diesem Handbuch angegebenen Spe- zifikationen gemäß zu verwenden. Eine von den Spezifikationen abweichende Verwendung könnte zu schweren Unfällen führen.
  • Seite 33 37 - Verwenden Sie Trinkwasser oder Aqua-Dest. im Tank. Gebiete mit hartem Wasser er- fordern eine häufigere Reinigung. 38 - Bei Bildung von Feuchtigkeit an den Wänden oder Fenstern des Raums schalten Sie den Befeuchter aus. Der Raum weist eine hohe Luftfeuchtigkeit auf, und eine weitere Befeuchtung könnte Schäden verursachen. LIMPIA 6...
  • Seite 34: Haupteigenschaften Und Betrieb

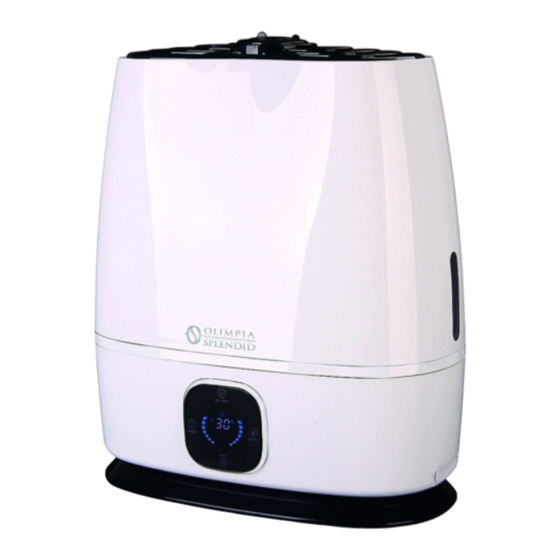
    1- HAUPTEIGENSCHAFTEN UND BETRIEB • 3 Ausgabelevels. • Heißer/kalter Nebel. • Durchsichtiges Fenster zur Kontrolle des Wasserstands. • Öffnung für die Zugabe von Aroma. Nebelaustritt Dekorationsdeckel Wasserstandsfenster Wassertank Reinigungsfilter (falls mitgeliefert) Deckel Wassertankver- Schwimmer schluss Korpus Bedientafel Aromaöffnung Luftfilter FÜR DEN HÄUSLICHEN GEBRAUCH...
  • Seite 35 Behälter. UNLÖSBAR zu verschließen, nachdem der Behälter mit Wasser gefüllt worden ist. 5. Befestigen Sie den Behälter am Sockel der Einheit. 6. Stellen Sie vor dem EINSCHALTEN des Befeuchters sicher, dass sich Wasser in der Wanne befindet. LIMPIA 6...
  • Seite 36 3- BETRIEBSANLEITUNG A) ON/OFF Die Taste drücken, um EIN- und AUSZUSCHALTEN. B) Heißer/kalter Nebel Die Taste ON/OFF drücken, um warmen Nebel (Sonnen-Icon leuchtet) oder kühlen Nebel (Sonnen-Icon ausgeschaltet) zu wählen. C) Einstellung der Nebelausgabe Die Taste MIST drücken, um die Ausgabestufe auf niedrig, mittel oder hoch einzustellen. Es wird geraten, eine niedrige Ausgabestufe des Nebels für die Nacht einzustellen.
  • Seite 37: Tägliche Wartung

    • Ultraschallgeber. Bei Verwendung von hartem Wasser, Aqua-Dest. oder Leitungswas- ser ist der Geber wöchentlich zu reinigen. • Luftfilter. Das Gitter entfernen, den Filter säubern. Filter und Fitter erneut einbauen. • Reinigungsfilter (falls mitgeliefert). Mit sauberem Wasser spülen und trocknen las- sen. LIMPIA 6...
  • Seite 38 5b- ENTKALKUNG • Je nach der Verwendung und dem Wassertyp könnte die Reinigungsanforderung wöchentlich oder in jeder weiteren Woche zur Optimierung der Leistung der Ein- heit erfolgen. • Wenn Sie in einer Gegend mit hartem Wasser leben, empfiehlt sich die Verwen- dung von Aqua-Dest oder die Enthärtung des Wassers für den Befeuchter.
  • Seite 39 Ort auf. HINWEIS: VERSUCHEN SIE BEIM AUFTRETEN EINES PROBLEMS NICHT, DEN SITZ DES MOTORS SELBSTSTÄNDIG ZU ÖFFNEN: DIESER EINGRIFF KÖNNTE ZUM VERFALL DER GARANTIE FÜHREN UND ZU SCHÄDEN AM BEFEUCHTER ODER VERLETZUNGEN VON PERSONEN FÜHREN. LIMPIA 6...
  • Seite 40: Anleitung Zur Behebung Von Problemen

    6- ANLEITUNG ZUR BEHEBUNG VON PROBLEMEN PROBLEM LÖSUNG Es werden keine Wasserdampf • Versorgungsstecker: Trennen und erneut versuchen. und keine Feuchtigkeit • Stromausfall: Versuchen Sie es erneut, sobald der Strom zurückkehrt. produziert. • Installation des Wasserbehälters: Stellen Sie sicher, dass der Behälter korrekt angeschlossen ist. • Die Oberfläche der Ultraschallscheibe ist verschmutzt: Reinigen Sie die Ultraschallscheibe.
  • Seite 42 SIEMPRE QUE SE UTILIZAN APARATOS ELÉCTRICOS, ES NECESARIO TOMAR PRECAUCIONES BÁSICAS DE SEGURIDAD PARA REDUCIR LOS RIESGOS DE INCENDIO, DESCARGAS ELÉCTRICAS Y ACCIDENTES A PERSONAS, INCLUYENDO LAS SIGUIENTES: Este aparato se debe utilizar exclusivamente según las especificaciones conte- nidas en el presente manual. Cualquier uso diferente de lo especificado podría comportar graves accidentes.
  • Seite 43 37 - Utilice agua potable o destilada en el bidón. En zonas con aguas duras se requiere una limpieza más frecuente. 38 - Si se forma humedad en las paredes o ventanas de la habitación, apague el humidifi- cador. La habitación es muy húmeda y una mayor humidificación podría provocar daños. LIMPIA 6...
  • Seite 44 1- CARACTERÍSTICAS PRINCIPALES Y FUNCIONAMIENTO • 3 niveles de emisión. • Niebla caliente/fresca. • Ventana transparente para verificar el nivel del agua. • Caja para añadir aromas. Salida de niebla Tapa decorativa Ventana nivel del agua Bidón de agua Filtro purificador (si suministrado) Tapa Tapón del bidón...
  • Seite 45: Instrucciones Antes Del Uso

    FIRMEMENTE el tapón, después de llenar el bidón de agua. 5. Fije el bidón a la base de la unidad. 6. Antes de ENCENDER el humidificador, verifique que haya agua en la cuba. LIMPIA 6...
  • Seite 46: Instrucciones De Uso

    3- INSTRUCCIONES DE USO A) ON/OFF Presione el botón para ENCENDER y APAGAR. B) Niebla caliente/fría Presione el botón ON/OFF para seleccionar niebla caliente (icono sol encendido) o fresca (icono sol apagado). C) Regulación de emisión de niebla Presione el botón MIST para ajustar el nivel de emisión sobre bajo, medio o alto. Se recomienda configurar un nivel de emisión de niebla bajo para el uso nocturno.
  • Seite 47: Mantenimiento Diario

    • Transductor ultrasónico. Si se utiliza agua dura, destilada o de grifo, es necesario limpiar semanalmente el transductor. • Filtro del aire. Quite la rejilla, limpie el filtro. Reinstale la rejilla y el filtro griglia e filtro. • Filtro purificador (si suministrado). Enjuague con agua limpia y deje secar. LIMPIA 6...
  • Seite 48 5b- DESCALCIFICACIÓN • En función del uso y del tipo de agua, puede ser necesaria una limpieza semanal o en cualquier momento para optimizar las prestaciones de la unidad. • Si vive en una zona con aguas duras, se recomienda utilizar agua destilada o ablandar el agua para el humidificador.
  • Seite 49 • Embale la unidad en su caja original y consérvela en un lugar fresco y seco. NOTA: SI SE OBSERVA UN PROBLEMA, NO INTENTE ABRIR EL ALOJAMIENTO DEL MOTOR. ESTA OPERACIÓN ANULA LA GARANTÍA Y PUEDE PRO- VOCAR DAÑOS AL HUMIDIFICADOR Y LESIONES PERSONALES. LIMPIA 6...
  • Seite 50: Guía Para La Resolución De Problemas

    6- GUÍA PARA LA RESOLUCIÓN DE PROBLEMAS PROBLEMA SOLUCIÓN No se produce vapor de agua y • Clavija de alimentación: desconecte y reinténtelo. humedad. • Interrupción de la corriente: reinténtelo cuando vuelve la corriente. • Instalación del bidón: verifique que el bidón esté conectado correctamente. • La superficie del disco ultrasónico está sucia: limpie el disco ultrasónico. Se sopla aire, pero no se produce • Agua en exceso: extraiga una cierta cantidad de agua del bidón. vapor de agua. • Puede haber residuos de detergente, ingredientes de aceite de cosméticos, etc.; lave el bidón y reinténtelo. •...

Inhaltsverzeichnis