Herunterladen Inhalt Inhalt Diese Seite drucken
Axis Q3505-VE Installationsanleitung

Axis Q3505-VE Installationsanleitung

Fixed dome network camera
Vorschau ausblenden Andere Handbücher für Q3505-VE:
Inhaltsverzeichnis

Werbung

Verfügbare Sprachen
  • DE

Verfügbare Sprachen

  • DEUTSCH, seite 41
AXIS Q3505–VE Fixed Dome Network Camera
Installation Guide

Werbung

Inhaltsverzeichnis
loading

Inhaltszusammenfassung für Axis Q3505-VE

  • Seite 1 AXIS Q3505–VE Fixed Dome Network Camera Installation Guide...
  • Seite 2 Low Voltage (LVD) Directive 2006/95/EC. See Safety Every care has been taken in the preparation of this on page 3. document. Please inform your local Axis office of any • Restrictions of Hazardous Substances (RoHS) Directive inaccuracies or omissions. Axis Communications AB cannot 2011/65/EU.
  • Seite 3 FAQ database. この装置は、クラスB 情報技術装置です。この装置 Search by product, category, or phrase は、家庭環境で使用することを目 的としています • report problems to Axis support staff by logging in to が、この装置がラジオやテレビジョン受信機に近 your private support area 接して使用されると、 受信障害を引き起こすこと • chat with Axis support staff (selected countries only) があります。...
  • Seite 5: Hazard Levels

    AXIS Q3505–VE Fixed Dome Network Camera Safety Information Read through this Installation Guide carefully before installing the product. Keep the Installation Guide for future reference. Hazard Levels DANGER Indicates a hazardous situation which, if not avoided, will result in death or serious injury.
  • Seite 6 Battery The Axis product uses a 3.0 V BR/CR2032 lithium battery as the power supply for its internal real-time clock (RTC). Under normal conditions this battery will last for a minimum of five years. Low battery power affects the operation of the RTC, causing it to reset at every power-up. When the battery needs replacing, a log message will appear in the product’s server report.
  • Seite 7 AXIS Q3505–VE Fixed Dome Network Camera Dome Cover NO TICE TICE TICE • Be careful not to scratch, damage or leave fingerprints on the dome cover because this could decrease image quality. If possible, keep the protective plastic on the dome cover until the installation is complete.
  • Seite 9: Installation Steps

    AXIS Q3505–VE Fixed Dome Network Camera Installation Guide This Installation Guide provides instructions for installing AXIS Q3505–VE Fixed Dome Network Camera on your network. For other aspects of using the product, see the User Manual available at www.axis.com Installation Steps 1.
  • Seite 10: Hardware Overview

    AXIS Q3505–VE Fixed Dome Network Camera Hardware Overview Note 3–9 mm lens: Pressing the lens too hard while cleaning may cause the lens to move down. If this happens while the camera is in operation, re-calibrate the optics by clicking Calibrate from the Server Maintenance web page (System Options >...
  • Seite 11: Led Indicators

    AXIS Q3505–VE Fixed Dome Network Camera 16. Status Led 17. Function button 18. Spring in unit casing 19. Heater Caution! Caution! The heater may be hot Caution! LED Indicators Indication Color Status Unlit Connection and normal operation Amber Steady during startup. Flashes during firmware upgrade.
  • Seite 12 When a signal is received the state changes and the input becomes active (shown under System Options > Ports & Devices). Audio Connector The Axis product has the following audio connectors: • Audio in (pink) – 3.5 mm input for a mono microphone, or a line-in mono signal.
  • Seite 13 Audio connector - See Connectors on page 14 I/O connector - See Connectors on page 14 Power connector - Connector for AC and DC power for connection to the AXIS T8051 Power Converter AC/DC to DC (not included) wires. Wires...
  • Seite 14: Specifications

    AXIS Q3505–VE Fixed Dome Network Camera Specifications Product Temperature Humidity Classification AXIS Q3505–VE IEC 60529 IP66 – 40 °C to 55 °C 10-100% RH (non-condensing) and IP67 (– 40 °F to 131 °F) NEMA 250 4X-rated Connectors I/O Connector 4–pin terminal block for: •...
  • Seite 15 AXIS Q3505–VE Fixed Dome Network Camera 12 V max 50 mA I/O configured as input I/O configured as output Audio Connector 3.5 mm audio connectors (stereo) 1 Tip 2 Ring 3 Sleeve Audio Input Balanced Microphone Hot Ground Balanced Microphone Cold (-)
  • Seite 16: Install The Hardware

    (see Attach Mounting Bracket to Wall on page 17). Use an appropriate conduit adaptor as required (see www.axis.com for optional accessories). See Hardware Overview on page 10. Mounting Bracket The mounting bracket has 4 mounting patterns.
  • Seite 17 AXIS Q3505–VE Fixed Dome Network Camera Attach Mounting Bracket to Wall 1. Attach the mounting bracket (see Mounting Bracket on page 16) to the wall with appropriate screws. 2. To route the cables see Route the Cables on page 16.
  • Seite 18 AXIS Q3505–VE Fixed Dome Network Camera 3. Tighten the 4 tamper proof screws to attach the unit casing to the mounting bracket using the Resitorx key TR20. 4. Connect the cable to the camera unit. 5. Pull the springs aside in the unit casing and attach camera unit to the unit casing.
  • Seite 19: Access The Product

    AXIS Q3505–VE Fixed Dome Network Camera 2. Slip the grooves in the black shield, over the screws on either side of the camera’s optic holder. Align the screws in the dome cover with the holes in the unit casing and tighten using the Resitorx key TR20.
  • Seite 20: Reset To Factory Default Settings

    AXIS Q3505–VE Fixed Dome Network Camera 3. Click Perform auto focus to focus the camera automatically. 4. If more adjustments are needed, go to the Advanced tab. Note • Movements in front of the camera should be avoided during automatic focusing.
  • Seite 21: Further Information

    Further Information The User Manual is available at www.axis.com Visit www.axis.com/techsup to check if there is updated firmware available for your network product. To see the currently installed firmware version, go to Setup > About. Visit Axis learning center www.axis.com/academy for useful trainings, webinars, tutorials and guides.
  • Seite 23: Niveaux De Risques

    AXIS Q3505–VE Fixed Dome Network Camera Informations sur la sécurité Lisez attentivement ce guide d'installation avant d'installer l'appareil. Conservez le guide d'installation pour toute référence ultérieure. Niveaux de risques DANGER Indique une situation dangereuse qui, si elle n'est pas évitée, entraînera le décès ou des blessures graves.
  • Seite 24 éviter d'endommager le produit. Batterie Le produit Axis utilise une batterie au lithium BR/CR2032 3,0 V comme alimentation de son horloge en temps réel interne (RTC). Dans des conditions normales, cette batterie a une durée de vie minimale de cinq ans.
  • Seite 25 AXIS Q3505–VE Fixed Dome Network Camera AVERTISSEMENT • Risque d'explosion si la batterie est remplacée de façon incorrecte. • Remplacez-la uniquement par une batterie identique ou une batterie recommandée par Axis. • Mettez au rebut les batteries usagées conformément aux réglementations locales ou aux instructions du fabricant de la batterie.
  • Seite 27: Procédures D'installation

    AXIS Q3505–VE Fixed Dome Network Camera Guide d'installation Ce guide d'installation explique comment installer la caméra réseau AXIS Q3505–VE à dôme fixe sur votre réseau. Pour toute autre information relative à l'utilisation du produit, reportez-vous au manuel de l'utilisateur disponible sur le site www.axis.com Procédures d’installation...
  • Seite 28: Aperçu Du Matériel

    AXIS Q3505–VE Fixed Dome Network Camera Aperçu du matériel Note Objectif 3–9 mm : Si vous appuyez trop fort sur l'objectif en le nettoyant, il peut s'abaisser. Si cela se produit alors que la caméra est en marche, recalibrez le système optique en cliquant sur Calibrate (Calibrer) dans la page Web Server Maintenance (Maintenance du serveur) (System Options >...
  • Seite 29 AXIS Q3505–VE Fixed Dome Network Camera 15. Protection étanche 16. Voyant d'état 17. Bouton Fonction 18. Clips de fixation 19. Régulateur de chaleur Attention Attention ! ! ! Le régulateur de chaleur peut être chaud. Attention Voyants Voyant Indication Couleur Branchement et fonctionnement normal État...
  • Seite 30 (sous System Options > Ports & Devices (Options du système > Ports et dispositifs)). Connecteur audio Le produit Axis dispose des connecteurs audio suivants : • Entrée audio (rose) : entrée de 3,5 mm pour microphone mono ou signal d'entrée mono.
  • Seite 31 Appuyez à nouveau pour les éteindre. Les voyants s'éteignent automatiquement après 10 secondes. Câble multiple (vendu séparément) Le câble multiple peut être acheté auprès d'un revendeur Axis pour connecter un équipement externe au produit Axis. Le câble fournit les connecteurs suivants : Connecteur audio - Cf. Connecteurs page 32 Connecteur E/S - Cf.
  • Seite 32: Caractéristiques Techniques

    AXIS Q3505–VE Fixed Dome Network Camera Câbles Caractéristiques Rouge + CC ou CA Noir – CC ou CA Caractéristiques techniques Produit Classification Température Humidité Humidité relative de 10 à 100 % AXIS Q3505–VE IEC 60529 IP66 De – 40 °C à 55 °C et IP67 (–...
  • Seite 33 AXIS Q3505–VE Fixed Dome Network Camera 3–4 Configurable Entrée numérique – Connectez-la à la 0 à 30 V CC (entrée ou broche 1 pour l’activer ou laissez-la sortie) flotter (déconnectée) pour la désactiver. Sortie numérique – Connectée à la 0 à 30 V CC max., drain broche 1 lorsqu'elle est activée, flotte...
  • Seite 34: Installation Du Matériel

    Pour ce faire, détachez le clip de verrouillage et le couvercle latéral du support de fixation après avoir fixé le support au mur (cf. Fixation du support au mur page 35). Utilisez un adaptateur de conduit approprié si nécessaire (cf. www.axis.com pour la liste des accessoires en option). Cf. Aperçu du matériel page 28.
  • Seite 35 AXIS Q3505–VE Fixed Dome Network Camera Support de fixation Le support de fixation dispose de 4 configurations de montage. Les configurations de montage suivent la norme des options de montage suivantes : • : boîtier carré de 4 po •...
  • Seite 36 AXIS Q3505–VE Fixed Dome Network Camera Connexion des câbles et fixation du boîtier de l’unité au support de fixation 1. Insérez la carte mémoire SD dans la caméra (en option). 2. Acheminez le câble réseau et le joint du câble noir à travers les trous du boîtier de l'unité...
  • Seite 37 AXIS Q3505–VE Fixed Dome Network Camera Réglage de l'angle de la caméra Lignes sur le support optique qui indiquent un incrément de l'angle d'inclinaison de 10° Petites lignes sur la monture optique qui indiquent un incrément sur le plan panoramique de 3°...
  • Seite 38 Utilisez les outils fournis sur le CD d'installation et de gestion pour attribuer une adresse IP, configurer le mot de passe et accéder au flux de données vidéo. Ces informations sont également disponibles sur les pages d'assistance technique du site www.axis.com/techsup Focus & Zoom (Mise au point & zoom) Si vous avez sélectionné...
  • Seite 39 AXIS Q3505–VE Fixed Dome Network Camera Note • Les mouvements devant la caméra doivent être évités pendant la mise au point automatique Dans l'onglet Advanced (Avancé), la mise au point peut être réglée manuellement : 1. Cliquez sur Open iris (Ouvrir l'iris) pour ouvrir l'iris en position maximale. La plus petite profondeur de champ est ainsi obtenue et offre les meilleures conditions pour une mise au point correcte.
  • Seite 40: Informations Sur La Garantie

    Pour obtenir plus de renseignements Le Manuel de l'utilisateur est disponible à l'adresse suivante : www.axis.com Consultez le site www.axis.com/techsup pour vérifier si des mises à jour des logiciels sont disponibles pour votre appareil réseau. Pour connaître la version du micrologiciel actuellement installée, reportez-vous à...
  • Seite 41: Gefährdungsstufen

    AXIS Q3505–VE Fixed Dome Network Camera Sicherheitsinformation Lesen Sie das Installationshandbuch sorgfältig durch bevor sie das Produkt installieren. Bewahren Sie das Installationshandbuch für zukünftige Zwecke auf. Gefährdungsstufen GEFAHR Weist auf eine gefährliche Situation hin, welche, falls nicht verhindert, zu Tod oder schweren Verletzungen führt.
  • Seite 42 Produkts wenn ein Batteriewechsel erforderlich ist. Weitere Informationen über den Serverbericht finden Sie auf den Setup-Seiten des Produkts, oder wenden Sie sich an den Axis-Support. Die Batterie sollte nur bei Bedarf ersetzt werden. Wenden Sie sich in diesem Fall an den Axis Support unter www.axis.com/techsup.
  • Seite 43 AXIS Q3505–VE Fixed Dome Network Camera WARNUNG • Explosionsgefahr bei fehlerhaftem Batteriewechsel. • Die Batterie darf nur durch eine identische Batterie oder eine von Axis empfohlene Batterie ersetzt werden. • Verbrauchte Batterien sind gemäß den örtlichen Vorschriften oder den Anweisungen des Herstellers zu entsorgen.
  • Seite 45: Installationsschritte

    AXIS Q3505–VE Fixed Dome Network Camera Installationsanleitung In dieser Anleitung wird die Installation der festen Dome-Netzwerk-Kamera AXIS Q3505–VE in Ihrem Netzwerk beschrieben. Weitere Informationen zur Nutzung dieses Produkts finden Sie im Benutzerhandbuch unter www.axis.com. Installationsschritte 1. Stellen Sie sicher, dass die Packungsinhalte, Werkzeuge und andere notwendige Materialien für die Installation in Ordnung sind.
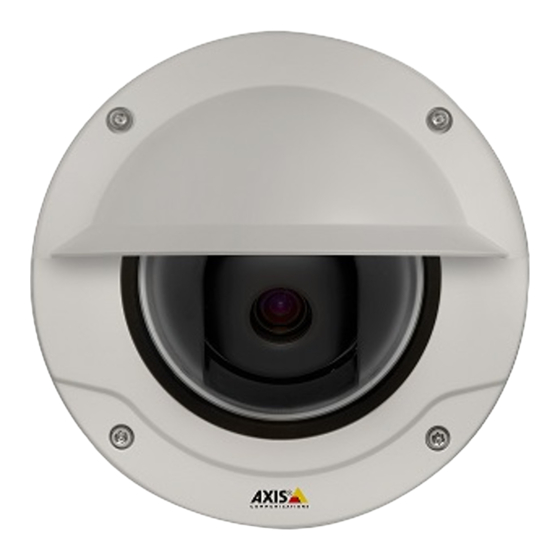
  • Seite 46: Übersicht Über Die Hardware

    AXIS Q3505–VE Fixed Dome Network Camera Übersicht über die Hardware Beachten 3–9-mm-Objektiv: Zu hoher Druck bei der Reinigung kann dazu führen, dass sich das Objektiv nach unten verstellt. Geschieht dies während sich die Kamera in Betrieb befindet, können Sie die Kamera neu kalibrieren, indem Sie auf der Website Server Maintenance (Serverwartung) unter System Options (Systemoptionen) >...
  • Seite 47: Led-Anzeigen

    AXIS Q3505–VE Fixed Dome Network Camera 14. Kuppelabdeckung 15. Wetterschutz 16. Status-LED 17. Funktionstaste 18. Feder im Kameragehäuse 19. Heizelement V V V orsicht! orsicht! orsicht! Das Heizelement ist unter Umständen heiß. LED-Anzeigen Farbe Bedeutung Leuchtet nicht Anschluss und Normalbetrieb...
  • Seite 48: Anschlüsse Und Tasten

    Status und der Eingang wird aktiviert (siehe System Options > Ports & Devices (Systemoptionen > Anschlüsse & Geräte)). Audioanschlüsse Das Axis Produkt ist mit den folgenden Audioanschlüssen ausgestattet: • Audioeingang (rosa) – 3,5-mm-Anschluss für ein Monomikrofon oder ein Monosignal.
  • Seite 49 Drücken Sie die Taste erneut, erlöschen die LEDs. Die LEDs werden nach zehn Sekunden automatisch ausgeschaltet. Mehrfachkabel (separat erhältlich) Das Mehrfachkabel zum Anschluss von Zubehör an das Axis Produkt erhalten Sie von Ihrem Axis Händler. Das Kabel weist folgende Anschlüsse auf: Audioanschlüsse - Siehe Anschlüsse auf Seite 50.
  • Seite 50: Technische Daten

    AXIS Q3505–VE Fixed Dome Network Camera Netzanschluss - Anschluss für Wechsel- und Gleichstrom für die Verbindung mit den Leitungen des Spannungsumformers AXIS T8051 (Wechsel-/Gleichstrom zu Gleichstrom, nicht im Lieferumfang enthalten). Leitungen Technische Daten Gleichstrom (+) oder Wechselstrom Schwarz Gleichstrom (-) oder Wechselstrom...
  • Seite 51 AXIS Q3505–VE Fixed Dome Network Camera 3–4 Konfigurierbar Digitaleingang – Zum Aktivieren mit 0 bis max. 30 V DC (Ein- oder Pin 1 verbinden; zum Deaktivieren nicht Ausgang) anschließen. Digitalausgang – Bei Aktivierung mit 0 bis max. 30 V DC, Pin 1 verbunden;...
  • Seite 52: Installieren Der Hardware

    Sie die Halterung an der Wand angebracht haben. (Siehe Anbringen der Halterung an der Wand auf Seite 53). Verwenden Sie ggf. einen passenden Rohradapter. (Optionales Zubehör finden Sie unter www.axis.com.) Siehe Übersicht über die Hardware auf Seite 46.
  • Seite 53: Anbringen Der Halterung An Der Wand

    AXIS Q3505–VE Fixed Dome Network Camera Montagehalterung Die Montagehalterung weist vier Montagemuster auf. Die Montagmuster folgen der Norm für die folgenden Montageoptionen: • : Quadratische 4"-Anschlussdose • : Standard-US-Doppelverteilerdose • : Achteckige 4"-Anschlussdose • : Standard-US-Anschlussdose Anbringen der Halterung an der Wand 1.
  • Seite 54: Anschließen Der Kabel Und Anbringen Des Kameragehäuses An Der Halterung

    AXIS Q3505–VE Fixed Dome Network Camera Anschließen der Kabel und Anbringen des Kameragehäuses an der Halterung 1. Setzen Sie die SD-Speicherkarte in die Kameraeinheit ein (optional). 2. Führen Sie das Netzwerkkabel mithilfe des mitgelieferten Anschlussstücks durch die schwarze Kabeldichtung in einer der Bohrungen am Kameragehäuse. Ziehen Sie das Netzwerkkabel ein wenig zurück, bis die Kabeldichtung korrekt um das Kabel sitzt.
  • Seite 55: Einstellen Des Kamerawinkels

    AXIS Q3505–VE Fixed Dome Network Camera Einstellen des Kamerawinkels Markierungslinien auf der Optikhalterung, die eine Erhöhung des Neigungswinkels um 10° angeben Feine Markierungslinien auf der Optikhalterung, die eine Erhöhung des Schwenkwinkels um 3° angeben Markierungslinien auf der Optikhalterung, die eine Erhöhung des Schwenkwinkels um 15°...
  • Seite 56: Abschluss Der Installation

    Verwenden Sie die bereitgestellten Tools der Installations- und Management-Software-CD, um eine IP-Adresse zuzuordnen, ein Passwort einzurichten und auf den Videostream zuzugreifen. Diese Information finden Sie ebenso auf den Support-Seiten unter www.axis.com/techsup/ Focus & Zoom Führen Sie die folgenden Anweisungen zum Einstellen von Fokus und Zoom durch, wenn Sie Optical zoom for monitoring (Optischer Zoom für die Überwachung) ausgewählt haben:...
  • Seite 57 AXIS Q3505–VE Fixed Dome Network Camera Beachten • Bei automatischer Fokussierung sollten Bewegungen vor der Kamera vermieden werden. Auf der Registerkarte Advanced (Erweitert) kann der Fokus manuell eingestellt werden: 1. Klicken Sie auf Open iris (Blende öffnen), um die Blende in der Maximalstellung zu öffnen.
  • Seite 58: Zurücksetzen Auf Werkseinstellungen

    Firmware-Version zu sehen, gehen Sie auf Setup > About (Einrichten > Über). Besuchen Sie das Axis-Schulungszentrum www.axis.com/academy für anregende Schulungen, Webinare, Lernprogramme und Anleitungen. Garantieinformationen Informationen zur Garantie der Axis Produkte und hierzu verbundene Informationen, finden Sie unter www.axis.com/warranty/...
  • Seite 59: Livelli Di Pericolo

    AXIS Q3505–VE Fixed Dome Network Camera Informazioni di Sicurezza Leggere questa Guida all'Installazione prima di installare il prodotto. Conservare la Guida all'Installazione per usi futuri. Livelli di pericolo PERICOLO Indica una situazione pericolosa che, se non evitata, provoca morte o lesioni gravi.
  • Seite 60 • Durante il trasporto del prodotto Axis, utilizzare l'imballaggio originale o equivalente per evitare danni al prodotto. Batteria Il prodotto Axis utilizza una batteria al litio da 3,0 V BR/CR2032 come alimentazione per il suo real-time clock (RTC) interno. In condizioni normali questa batteria avrà una durata minima di cinque anni.
  • Seite 61 • Rischio di esplosione se la batteria viene sostituita in modo errato. • Sostituire solo con una batteria identica o una batteria consigliata da Axis. • Smaltire le batterie usate in base alle normative locali o alle istruzioni del produttore della batteria.
  • Seite 63: Procedure Di Installazione

    Guida all'installazione La presente Guida all'installazione fornisce le istruzioni necessarie per installare la telecamera di rete a cupola fissa AXIS Q3505–VE nella rete in uso. Per ulteriori informazioni sull’utilizzo del prodotto, consultare la Guida per l'utente disponibile all'indirizzo www.axis.com Procedure di installazione 1.
  • Seite 64: Panoramica Dell'hardware

    AXIS Q3505–VE Fixed Dome Network Camera Panoramica dell'hardware Nota Obiettivo da 3–9 mm: se durante la pulizia si esercita una pressione eccessiva sull'obiettivo, è possibile che questo si sposti verso il basso. Se tale evento si verifica durante il funzionamento della telecamera, calibrare nuovamente l'ottica facendo clic su Calibrate (Calibra) nella pagina Web Server Maintenance (Manutenzione server): selezionare System Options >...
  • Seite 65: Indicatori Led

    AXIS Q3505–VE Fixed Dome Network Camera 14. Coperchio della cupola 15. Schermo di protezione dagli agenti atmosferici 16. Led di stato 17. Tasto Funzione 18. Molla nel casing dell’unità 19. Riscaldatore Attenzione! Attenzione! Attenzione! Il riscaldatore potrebbe essere caldo Indicatori LED...
  • Seite 66 Dopo la ricezione del segnale lo stato cambia e l’ingresso diventa attivo (visualizzato in System Options > Ports & Devices (Opzioni di Sistema > Porte e Dispositivi)). Connettore audio Il prodotto Axis dispone dei seguenti connettori audio:...
  • Seite 67 • Ripristino del prodotto alle impostazioni predefinite di fabbrica. Consultare pagina 76. • Collegamento a un servizio AXIS Video Hosting System o AXIS Internet Dynamic DNS Service. Per ulteriori informazioni su questi servizi, consultare il Manuale Utente. Tasto Funzione Il tasto Funzione può essere utilizzato per più finalità: •...
  • Seite 68: Dati Tecnici

    AXIS Q3505–VE Fixed Dome Network Camera Multicable (venduto separatamente) È possibile acquistare il Multicable presso il proprio rivenditore Axis per collegare un apparecchio esterno al prodotto Axis. Il cavo fornisce i seguenti connettori: Connettore audio - Consultare Connettori alla pagina 68...
  • Seite 69 AXIS Q3505–VE Fixed Dome Network Camera Uscita CC Può essere utilizzato anche per alimentare 12 V CC una periferica ausiliaria. Carico massimo = 50 mA Nota: questo pin può essere usato solo come uscita alimentazione. 3–4 Configura- Ingresso digitale – Collegare al pin 1 per...
  • Seite 70: Installazione Dell'hardware

    è stata fissata alla parete (consultare Attach Mounting Bracket to Wall on page 17). Utilizzare un adattatore per canalina appropriato secondo la necessità (per gli accessori opzionali, visitare il sito www.axis.com). Consultare Hardware Overview on page 10.
  • Seite 71 AXIS Q3505–VE Fixed Dome Network Camera Staffa di montaggio La staffa di montaggio ha 4 diversi schemi di montaggio. La disposizione è standard per ciascuna delle seguenti opzioni di montaggio: • : scatola quadrata da 4" • : scatola di giunzione per unità doppia, a dimensioni standard USA •...
  • Seite 72 AXIS Q3505–VE Fixed Dome Network Camera Collegamento dei cavi e fissaggio dell'alloggiamento dell'unità alla staffa di montaggio 1. Inserire la scheda di memoria SD nell'unità telecamera (opzionale). 2. Spingere il cavo di rete attraverso la relativa guarnizione nera in uno dei fori dell'alloggiamento dell'unità, utilizzando la protezione fornita.
  • Seite 73 AXIS Q3505–VE Fixed Dome Network Camera Regolazione dell'angolazione della telecamera Linee sul supporto dell'ottica che indicano un incremento dell'angolo di inclinazione di 10° Linee piccole sul montaggio dell'ottica che indicano un incremento della rotazione di 3° Linee sul montaggio dell'ottica che indicano un incremento della rotazione di 15°...
  • Seite 74: Completamento Dell'installazione

    Utilizzare le utility contenute nel CD del software d'installazione e gestione per assegnare un indirizzo IP, impostare la password ed accedere al flusso video. Queste informazioni sono disponibili anche sulle pagine dedicate all'assistenza sul sito www.axis.com/techsup/ Messa a fuoco e zoom Se avete selezionato Installazione con zoom ottico seguire le istruzioni di seguito riportate per impostare lo zoom e la messa a fuoco.
  • Seite 75 AXIS Q3505–VE Fixed Dome Network Camera Nota • Evitare i movimenti davanti alla telecamera durante la messa a fuoco automatica. Nella scheda Advanced (Avanzate) la messa a fuoco può essere regolata manualmente: 1. Fare clic su Open iris (Apri diaframma) per aprire il diaframma fino alla sua posizione massima.
  • Seite 76: Ripristino Dei Valori Predefiniti Di Fabbrica

    Setup (Impostazioni) > About (Informazioni su). Visitare il Centro di apprendimento Axis alla pagina www.axis.com/academy per servizi di formazione utili, webinar, tutorial e guide. Informazioni sulla garanzia Per informazioni sulla garanzia del prodotto Axis e informazioni ad esso relative, consultare la pagina www.axis.com/warranty/...
  • Seite 77: Niveles De Peligro

    AXIS Q3505–VE Fixed Dome Network Camera Información de seguridad Lea esta Guía de instalación con atención antes de instalar el producto. Guarde la Guía de instalación para poder consultarla en otro momento. Niveles de peligro PELIGRO Indica una situación peligrosa que, si no se evita, provocará...
  • Seite 78 Batería Este producto de Axis utiliza una batería de litio BR/CR2032 de 3,0 V como fuente de alimentación del reloj interno en tiempo real. En condiciones normales, esta batería durará un mínimo de cinco años.
  • Seite 79 ADVERTENCIA • La sustitución incorrecta de la batería implica riesgo de explosión. • Sustituya la batería con una batería idéntica u otra batería recomendada por Axis. • Deseche las baterías usadas de conformidad con la normativa local o las instrucciones del fabricante.
  • Seite 81: Contenido Del Paquete

    Guía de instalación Esta Guía de instalación incluye las instrucciones necesarias para instalar la cámara de red domo fija AXIS Q3505–VE en su red. Para conocer otros aspectos de uso del producto, consulte el Manual del usuario disponible en www.axis.com Pasos de la instalación...
  • Seite 82: Información General Del Hardware

    AXIS Q3505–VE Fixed Dome Network Camera Información general del hardware Nota Objetivo de 3–9 mm: Si se presiona el objetivo con demasiada fuerza al limpiarlo, este podría bajarse. Si esto sucede mientras la cámara está funcionando, vuelva a calibrar el sistema óptico haciendo clic en Calibrate (Calibrar) en la página web Server Maintenance...
  • Seite 83 AXIS Q3505–VE Fixed Dome Network Camera 14. Cubierta del domo 15. Parasol 16. LED de estado 17. Botón de función 18. Muelle en carcasa de unidad 19. Calentador ¡Cuidado! ¡Cuidado! ¡Cuidado! El calentador puede estar caliente. Indicadores LED Color Indicación...
  • Seite 84 (se indica en System Options > Ports & Devices (Opciones del sistema > Puertos y dispositivos)). Conector de audio El producto de Axis integra los siguientes conectores de audio: • Entrada de audio (rosa): Entrada de 3,5 mm para micrófono mono, o entrada de línea de señal mono.
  • Seite 85 Los LED se apagarán automáticamente después de 10 segundos. Multicable (se vende por separado) El multicable se puede adquirir en cualquier distribuidor de Axis para conectar el equipo externo al producto de Axis. El cable proporciona los siguientes conectores: Conector de audio - Vea Conectores en la página 86.
  • Seite 86: Especificaciones

    AXIS Q3505–VE Fixed Dome Network Camera Cables Especificaciones Rojo + CC o CA Negro –CC o CA Especificaciones Producto Temperatura Humedad Clasificación AXIS Q3505–VE IEC 60529 IP66 – 40 °C a 55 °C Humedad relativa del 10 al 100 % (sin condensación) e IP67 Clasificación...
  • Seite 87 AXIS Q3505–VE Fixed Dome Network Camera 12 V max 50 mA E/S configurada como entrada E/S configurada como salida Conector de audio Conectores de audio de 3,5 mm (estéreo) 1 Punta 2 Anillo 3 Manguito Entrada Equilibrado caliente Entrada de micrófono...
  • Seite 88: Instalación Del Hardware

    (vea Fijación del soporte de montaje a la pared en la página 89). Utilice un adaptador para conexiones según sea necesario (vea www.axis.com para conocer los accesorios opcionales). Vea Información general del hardware en la página 82.
  • Seite 89 AXIS Q3505–VE Fixed Dome Network Camera • : caja de conexiones de salida doble de tamaño estándar para EE. UU. • : caja octogonal de 10,16 cm • : caja de conexiones de salida única de tamaño estándar para EE. UU.
  • Seite 90 AXIS Q3505–VE Fixed Dome Network Camera A A A VISO VISO VISO Si no se tira del cable hacia atrás, podría filtrarse agua y dañar el producto. 3. Apriete los cuatro tornillos a prueba de manipulaciones para fijar la carcasa de la unidad al soporte de montaje utilizando la llave Resitorx TR20.
  • Seite 91 AXIS Q3505–VE Fixed Dome Network Camera Ajuste de ángulo de la cámara Las líneas en el soporte del sistema óptico indican un incremento en el ángulo vertical de 10° Las líneas pequeñas en el montaje del sistema óptico indican un incremento en horizontal de 3°...
  • Seite 92: Acceso Al Producto

    Utilice las herramientas suministradas en el CD del software de instalación y gestión para asignar una dirección IP, establecer la contraseña y acceder a la transmisión de vídeo. Esta información también está disponible en las páginas de asistencia técnica en www.axis.com/techsup/ Enfoque y zoom Si ha seleccionado Optical zoom for installation (Zoom óptico para la instalación), siga las...
  • Seite 93 AXIS Q3505–VE Fixed Dome Network Camera Nota • Deben evitarse los movimientos delante de la cámara durante el enfoque automático. En la pestaña Advanced (Configuración avanzada), se puede ajustar el enfoque manualmente: 1. Haga clic en Open iris (Abrir iris) para abrir el iris hasta su máxima posición. Con esto se consigue la menor profundidad de campo posible y, por tanto, las condiciones óptimas de enfoque.
  • Seite 94: Restablecimiento A La Configuración Predeterminada De Fábrica

    Más información El Manual de usuario se encuentra disponible en www.axis.com. Visite www.axis.com/techsup para comprobar si existe un firmware actualizado disponible para su producto de red. Para ver la versión del firmware instalado actualmente, vaya a Setup > About (Configuración > Acerca de).
  • Seite 95: Información De La Garantía

    AXIS Q3505–VE Fixed Dome Network Camera Información de la garantía Para obtener más información acerca de la garantía del producto Axis e información relacionada, visite www.axis.com/warranty/...
  • Seite 97 AXIS Q3505–VE Fixed Dome Network Camera 安 安 安 全 全 全 情 情 情 報 報 報 本製品を設置する前に、このインストールガイドをよくお読みください。インストー ルガイドは、後で参照できるように保管しておいてください。 危 危 危 険 険 険 レ レ レ ベ ベ ベ ル ル ル 回避しない場合、死亡または重傷につながる危険な状 危 危 危 険 険 険...
  • Seite 98 AXIS Q3505–VE Fixed Dome Network Camera 安 安 安 全 全 全 手 手 手 順 順 順 注 注 注 記 記 記 • 本製品は、お使いになる地域の法律や規制に準拠して使用してください。 • 本製品は乾燥した換気のよい環境に保管してください。 • 本製品に衝撃または強い圧力を加えないでください。 • 本製品を不安定なブラケット、表面、または壁に設置しないでください。 • 本製品を設置する際には、適切な工具のみを使用してください。過剰な力 がかかると、製品が損傷することがあります。 • 化学薬品、腐食剤、噴霧式クリーナーは使用しないでください。清掃には、 きれいな水に浸した清潔な布を使用してください。 • 製品の技術仕様に準拠したアクセサリーのみを使用してください。これらの...
  • Seite 99 AXIS Q3505–VE Fixed Dome Network Camera 警 警 警 告 告 告 • バッテリーは、正しく交換しないと爆発する危険があります。 • 交換用バッテリーとしては、同一品またはAxisが推奨するバッテリーのみを 使用してください。 • 使用済みバッテリーは、地域の規制またはバッテリーメーカーの指示に 従って廃棄してください。 ド ド ド ー ー ー ム ム ム カ カ カ バ バ バ ー ー ー 注 注 注 記 記 記...
  • Seite 101 AXIS Q3505–VE Fixed Dome Network Camera イ イ イ ン ン ン ス ス ス ト ト ト ー ー ー ル ル ル ガ ガ ガ イ イ イ ド ド ド このインストールガイドでは、AXIS Q3505–VE固定ドームネットワークカメラを、お 使いのネットワークにインストールする手順について説明します。製品の使用法につ www.axis.com いては、 で入手出来るユーザーズマニュアルを参照してください。 設 設 設 置 置 置 手 手 手 順 順 順...
  • Seite 102 AXIS Q3505–VE Fixed Dome Network Camera ハ ハ ハ ー ー ー ド ド ド ウ ウ ウ ェ ェ ェ ア ア ア の の の 概 概 概 要 要 要 注意 3~9 mmのレンズ: クリーニング時にレンズを強く押しすぎると、レンズが後 退する場合があります。カメラの稼働中にこの状況になった場合は、光学 部品の再較正を行う必要があります。[Server [Server Maintenance]...
  • Seite 103 AXIS Q3505–VE Fixed Dome Network Camera 13. カメラユニット 14. ドームカバー 15. ウェザーシールド 16. ステータスLED 17. 機能ボタン 18. ユニットケーシング内のスプリング 19. ヒーター 注 注 注 意 意 意 ! ! ! ヒーターは高温になることがあります。 LED イ イ イ ン ン ン ジ ジ ジ ケ ケ ケ ー ー ー タ タ タ ー ー ー...
  • Seite 104 AXIS Q3505–VE Fixed Dome Network Camera 色 色 色 カ カ カ メ メ メ ラ ラ ラ の の の 位 位 位 置 置 置 ブ ブ ブ ザ ザ ザ ー ー ー 橙色: 点滅 中程度の間隔 水平ではない...
  • Seite 105 コ コ コ ン ン ン ト ト ト ロ ロ ロ ー ー ー ル ル ル ボ ボ ボ タ タ タ ン ン ン コントロールボタンは、以下の用途で使用します。 114ページ 製品を工場出荷時の設定にリセットする。 を参照してください。 • AXIS Video Hosting SystemサービスまたはAXIS Internet Dynamic DNSサービ • スに接続する。これらのサービスの詳細については、ユーザーズマニュ アルを参照してください。 機 機 機 能 能 能 ボ ボ ボ タ タ タ ン ン ン 機能ボタンには、以下のような機能があります。...
  • Seite 106 I/O コ コ コ ネ ネ ネ ク ク ク タ タ タ ‑ ‑ ‑ を参照してください。 電 電 電 源 源 源 コ コ コ ネ ネ ネ ク ク ク タ タ タ ‑ ‑ ‑ ACおよびDC電源のコネクタ。AXIS T8051電力コンバータAC/DCを DCワイヤー (非付属品) に接続します。...
  • Seite 107 AXIS Q3505–VE Fixed Dome Network Camera 3– 入力または 0~30 V DC (最大) デジタル入力 – 動作させるにはピン1 出力として に接続し、動作させない場合はフロー 設定 ト状態 (未接続) のままにします。 デジタル出力 – 動作させるにはピン 0~30 V DC (最大)、 オ ー プ ン ド レ イ 1に接続し、動作させない場合はフ ロート状態 (未接続) にします。誘導負 ン、100 mA 荷...
  • Seite 108 AXIS Q3505–VE Fixed Dome Network Camera 音 音 音 声 声 声 コ コ コ ネ ネ ネ ク ク ク タ タ タ 3.5 mm音声コネク タ (ステレオ) 1 先端部 2 リング 3 スリーブ 音 音 音 声 声 声 入 入 入...
  • Seite 109 AXIS Q3505–VE Fixed Dome Network Camera 取 取 取 り り り 付 付 付 け け け ブ ブ ブ ラ ラ ラ ケ ケ ケ ッ ッ ッ ト ト ト 取り付けブラケットは、4種類のパターンで取り付けることができます。取り付けパ ターンは、以下の取り付けオプションの基準に従って設定されています。 : 4インチの正方形ボックス • : 標準サイズの米国ダブルギャングジャンクションボックス...
  • Seite 110 AXIS Q3505–VE Fixed Dome Network Camera ケ ケ ケ ー ー ー ブ ブ ブ ル ル ル の の の 接 接 接 続 続 続 と と と ユ ユ ユ ニ ニ ニ ッ ッ ッ ト ト ト ケ ケ ケ ー ー ー シ シ シ ン ン ン グ グ グ の の の 取 取 取 り り り 付 付 付 け け け ブ ブ ブ ラ ラ ラ ケ ケ ケ ッ ッ ッ ト ト ト へ へ へ...
  • Seite 111 AXIS Q3505–VE Fixed Dome Network Camera 3. いじり止めヘックスローブレンチTR20を使用して4本のいたずら防止ネジを 締め、ユニットケーシングを取り付けブラケットに取り付けます。 4. ケーブルをカメラユニットに接続します。 5. ユニットケーシング内のスプリングを横に引き、カメラユニットをユニッ トケーシングに取り付けます。 カ カ カ メ メ メ ラ ラ ラ ア ア ア ン ン ン グ グ グ ル ル ル の の の 調 調 調 整 整 整...
  • Seite 112 AXIS Q3505–VE Fixed Dome Network Camera ド ド ド ー ー ー ム ム ム カ カ カ バ バ バ ー ー ー の の の 取 取 取 り り り 付 付 付 け け け 1. ドームカバーのガスケットが汚れておらず、しっかりと固定されている...
  • Seite 113 AXIS Q3505–VE Fixed Dome Network Camera フォーカスとズームは、以下の手順で設定します。 1. [Video [Video [Video & & & Audio Audio ‑ Focus Audio Focus Focus & & & Zoom] Zoom] Zoom] ( ( ( ビ ビ ビ デ デ デ オ オ オ と と と 音 音 音 声 声 声 ‑ フ フ フ ォ ォ ォ ー ー ー カ カ カ ス ス ス と と と ズ ズ ズ ー ー ー ム ム ム ) ) ) に移動します。...
  • Seite 114 AXIS Q3505–VE Fixed Dome Network Camera [Video & & & Audio Audio ‑ ‑ ‑ Focus Focus & & & Zoom] Zoom] ( ( ( ビ ビ ビ デ デ デ オ オ オ と と と 音 音 音 声 声 声 ‑ ‑ ‑ フ フ フ ォ ォ ォ ー ー ー カ カ カ ス ス ス と と と ズ ズ ズ ー ー ー ム ム ム ) ) ) に移動...
  • Seite 115 AXIS Q3505–VE Fixed Dome Network Camera 関 関 関 連 連 連 情 情 情 報 報 報 www.axis.com ユーザーズマニュアルは、 で入手できます。 www.axis.com/techsup にアクセスして、ご使用のネットワーク製品の新しいファー ムウェアがリリースされていないかを確認してください。現在インストールされてい るファームウェアのバージョンを確認するには、[Setup [Setup [Setup ‑ ‑ ‑ About] About] About] ( ( ( 設 設 設 定 定 定 ‑ ‑ ‑ バ バ バ ー ー ー ジ ジ ジ ョ ョ ョ...
  • Seite 116 Installation Guide Ver. M1.3 AXIS Q3505–VE Fixed Dome Network Camera Date: July 2014 © Axis Communications AB, 2014 Part No. 58823...

Inhaltsverzeichnis