Herunterladen Inhalt Inhalt Diese Seite drucken

Werbung

Verfügbare Sprachen
  • DE

Verfügbare Sprachen

  • DEUTSCH, seite 35
CIP37186AT
|
INDOOR IP CAMERA
EN
|
Instruction manual
FR
|
Mode d' e mploi
DE
|
Bedienungsanleitung
NL
|
Gebruiksaanwijzing
PL
|
Instrukcja obsługi
CS
|
Návod na použití

Werbung

Inhaltsverzeichnis
loading

Inhaltszusammenfassung für Smartwares CIP-37186AT

  • Seite 1 Instruction manual Mode d’ e mploi Bedienungsanleitung Gebruiksaanwijzing Instrukcja obsługi Návod na použití CIP37186AT INDOOR IP CAMERA...
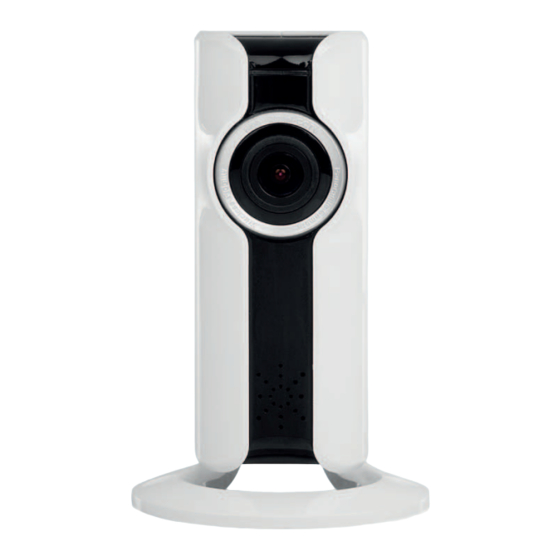
  • Seite 2 PARTS DESCRIPTION / ONDERDELENBESCHRIJVING / DESCRIPTION DES PIÈCES / TEILEBESCHREIBUNG / DESCRIPCIÓN DE LAS PIEZAS / DESCRIÇÃO DOS COMPONENTES / DESCRIZIONE DELLE PARTI / BESKRIVNING AV DELAR / OPIS CZĘŚCI / POPIS SOUČÁSTÍ / POPIS SÚČASTÍ...
  • Seite 3: Parts Description

    Connecting a camera our website, www.smartwares.eu. Please search for "CIP-31786AT". 1. On the "my devices" tab, tap on the "plus" (+) sign in the top right Inserting a MicroSD card corner.
  • Seite 4: App Functions

    Instruction manual Android APP FUNCTIONS • On the "My devices" tab, you can see and manage all the 5a. Exit the app, and go to the Wi- 5. Select your camera-ID from the camera's that are linked to your account. If you tap the three dots Fi settings on your mobile device.
  • Seite 5 For a more detailed description of all functionality, please check bottom, or choosing a date. the help function in the app or download the extended user Troubleshooting manual from our website, www.smartwares.eu. Please search for • I can't see my camera-ID in the list during setup. "CIP-31786AT".
  • Seite 6: Description Des Pièces

    Si vous avez oublié votre mot de passe, touchez "Forgot reportez-vous à la fonction d'aide de l'app ou téléchargez le manuel password" et suivez les instructions de l'app. utilisateur complet sur notre site Web : www.smartwares.eu. Connexion d'une caméra Recherchez "CIP-31786AT".
  • Seite 7 Manuel d'instructions 4.Vérifiez si la LED de notification clignote et confirmez dans l'app. Si 8. Nommez votre caméra (par ex. "salon"). Vous pouvez alors la LED ne clignote pas, référez-vous au chapitre "Réinitialisation de accéder à votre caméra. Vous découvrez la vue en direct, depuis caméra".
  • Seite 8 à la fonction d'aide de l'app ou téléchargez le configuration. manuel utilisateur complet sur notre site Web : – Assurez-vous que votre caméra est à moins de 1m de votre www.smartwares.eu. Recherchez "CIP-31786AT". dispositif mobile. – Tentez de réinitialiser la caméra. Voir le paragraphe "réinitialisation de caméra".
  • Seite 9: Teilebeschreibung

    App beschrieben. Alternativ haben Sie die Möglichkeit, die Mail auf den Link zum Bestätigen Ihrer E-Mail-Adresse. Sie ausführliche Bedienungsanleitung von unserer Homepage können ihren Account erst nach Bestätigen der angegebenen E- www.smartwares.eu herunterzuladen. Suchen Sie nach dem Mail-Adresse nutzen. Schlüsselwort "CIP-31786AT". •...
  • Seite 10: Funktionen Der App

    Bedienungsanleitung 1. Tippen Sie im Reiter "Meine Geräte" auf das Pluszeichen (+) oben 5c. Wechseln Sie nach einem rechts. Tippen Sie auf "Neues Gerät hinzufügen". erfolgreichen Verbindungsaufbau 2.Tippen Sie auf das Bild, das Ihrer Kamera entspricht. zurück in die SW360-App. 3.
  • Seite 11 Alternativ haben Sie die Möglichkeit, die – Versuchen Sie, die Kamera zurückzusetzen. Siehe Abschnitt ausführliche Bedienungsanleitung von unserer Homepage "Kamera zurücksetzen". www.smartwares.eu herunterzuladen. Suchen Sie nach dem – Versuchen Sie, den Standort-Dienst an Ihrem mobilen Schlüsselwort "CIP-31786AT". Endgerät zu aktivieren und versuchen Sie es erneut.
  • Seite 12: Beschrijving Van De Onderdelen

    • Tip als u uw wachtwoord bent vergeten "Forgot password" aan en gebruikershandleiding via onze website www.smartwares.eu. Zoek volg de aanwijzingen in de app. hiervoor op 'CIP-31786AT'. Een camera aansluiten Een MicroSD-kaart plaatsen 1.
  • Seite 13 Gebruiksaanwijzing 4.Controleer of de mededelingsled knippert en bevestig in de app. APP-FUNCTIES Zie als de led niet knippert de paragraaf 'De camera resetten'. • In de tab 'Mijn toestellen' kunt u alle aan uw account gekoppelde camera's zien en beheren. Als u de drie puntjes naast de naam Android van uw camera aantipt, krijgt u de volgende opties: 5a.
  • Seite 14 Filmopnames direct in uw mobiele toestel op te slaan. help-functie in de app of download de uitgebreide • De opgenomen filmbeelden kunnen worden bekeken door de gebruikershandleiding via onze website www.smartwares.eu. tijdbalk aan de onderzijde te schuiven of een datum te kiezen. Zoek hiervoor op 'CIP-31786AT'. Problemen oplossen •...
  • Seite 15: Opis Części

    Jeśli konto zostało już utworzone wcześniej, podaj nazwę aplikacji lub pobierając rozszerzony podręcznik użytkownika z naszej użytkownika i hasło, po czym kliknij przycisk Sign in. witryny internetowej www.smartwares.eu. Należy wyszukać modelu • Jeśli nie pamiętasz hasła, naciśnij przycisk Forgot password, „CIP-31786AT”.
  • Seite 16 Instrukcje użytkowania 3. Podłącz kamerę za pomocą adaptera USB, aby ją włączyć. 6. W aplikacji SW360 wybierz identyfikator SSID sieci Odczekaj 30 sekund, aż dioda LED kamery zacznie migać. Upewnij bezprzewodowej, z którą chcesz ostatecznie połączyć kamerę. się, że kamera znajduje się w niewielkiej odległości (1 m) od Wprowadź...
  • Seite 17 – Upewnij się, że kamera znajduje się w odległości nie rozszerzony podręcznik użytkownika z naszej witryny większej niż 1 m od urządzenia przenośnego. internetowej www.smartwares.eu. Należy wyszukać modelu – Spróbuj zresetować kamerę. Patrz ustęp „resetowanie „CIP-31786AT”. kamery”.
  • Seite 18: Popis Součástí

    Připojení kamery z našich webových stránek: www.smartwares.eu. Vyhledejte prosím 1. Na kartě „my devices“ (moje zařízení) klepněte na tlačítko „plus“ (+) „CIP-31786AT“.
  • Seite 19 Návod k použití Android FUNKCE APLIKACE • V kartě „My devices“ (Má zařízení) můžete zobrazit a spravovat 5a. Ukončete aplikaci a ve svém 5. V seznamu vyberte ID vaší všechny kamery propojené s vaším účtem. Pokud klepnete na tři mobilním zařízení přejdete do kamery.
  • Seite 20 • Nahranou stopu lze prohlížet posouvání časové lišty v dolní části nápovědy v aplikaci nebo si stáhněte rozšířený návod k použití z nebo volbou data. našich webových stránek: www.smartwares.eu. Vyhledejte Řešení potíží prosím „CIP-31786AT“. • Během nastavení nevidím ID mojí kamery.
  • Seite 22 Use only power supplies listed in the user instuctions Information for power adapter: Model: JYH09-0501000-BE Input: 100-240V~ 50/60Hz 0.3A Output: DC 5V 1.0A Supplier: Shenzhen Juyuanhai Electronics Co., Ltd.
  • Seite 23 CIP-37186AT manual Adding a new device 1. Connect the camera to the mains power, and wait for it start up. Open the SW360 app. After logging in, tap the + button. 2. Plug in the camera with the USB adapter to power it up. Please wait for 30 seconds until the LED on the camera starts flashing.
  • Seite 24 5. When the connection is successful, the LED will turn green and the camera will say "Connection is successful". 6. Please give your camera a name (for instance "living room"). Now you will be able to access your camera. You can watch the live view from anywhere in the world through the app on your mobile device.
  • Seite 25 Preview and playback 1. Your data usage information. 2. Tap to turn scanmode on or off. In scanmode the camera will automatically pan from left to right. 3. Tap to switch from panorama perspective to square perspective. 4. Tap to mute or unmute the audio from the camera. 5.
  • Seite 26 5. Tap this button to make a recording of the live footage on the camera. You can view your recordings from the personal center. Tap again to stop the recording. • Drag the video feed to look around. • Double tap to zoom in or out. Pinch to zoom in or out. •...
  • Seite 27 Een nieuw apparaat toevoegen 1. Steek de stekker van de camera in het stopcontact en wacht tot deze opstart. Open de SW360 app. Na het inloggen tikt u op de + toets. 2. Sluit de camera met de USB adapter aan om hem aan te zetten. Wacht 30 seconden tot de LED op de camera begint te knipperen.
  • Seite 28 4. Kies in de SW360 app de SSID van het draadloze netwerk waar u de camera op wilt aansluiten. Voer het bijbehorende wachtwoord in. Let op: Een 5Ghz Wi-Fi netwerk wordt niet ondersteund. 5. Als de verbinding tot stand is gebracht, wordt de LED groen en zegt de camera "Verbinding is gelukt".
  • Seite 29 Voorvertoning en afspelen 1. Informatie over uw gegevensgebruik. 2. Tikken om de scanmodus aan of uit te zetten. In de scanmodus pant de camera automatisch van links naar rechts. 3. Tik om te wisselen van panorama perspectief naar vierkant perspectief. 4.
  • Seite 30 5. Tik op deze toets om een opname van de live beelden op de camera te maken. U kunt uw opnames bekijken via het persoonlijke centrum. Tik nogmaals om de opname te stoppen. Live Stem Schermafbeeldingen Opname • Sleep het camerabeeld om rond te kijken. •...
  • Seite 31 Ajouter un nouvel appareil 1. Branchez la caméra à l'alimentation secteur et attendez qu'elle démarre. Ouvrez l'application SW360. Après vous être connecté, appuyez sur le bouton +. 2. Branchez la caméra avec l'adaptateur USB pour la mettre sous tension. Attendez 30 secondes jusqu'à...
  • Seite 32 4. Dans l’application SW360, choisissez le SSID du réseau sans fil auquel vous voulez connecter la caméra. Saisissez le mot de passe correspondant. Remarque : Un réseau Wi-Fi 5 GHz n'est pas pris en charge. 5. Lorsque la connexion est réussie, la LED verte s’allume et la caméra affiche « Connexion établie ». 6.
  • Seite 33 Prévisualisation et lecture 1. Vos informations d'utilisation des données. 2. Appuyez pour activer ou désactiver le scanmode. En scanmode la caméra pivotera automatiquement de gauche à droite. 3. Appuyez pour basculer de la vue panoramique à la perspective carrée. 4. Appuyez pour activer ou désactiver le son de la caméra. 5.
  • Seite 34 5. Appuyez sur ce bouton pour créer un enregistrement d'une transmission en ligne sur la caméra. Vous pouvez visionner vos enregistrements à partir d’un centre personnel. Appuyez de nouveau pour arrêter l'enregistrement. • Faites glisser le flux vidéo pour regarder aux alentours. •...
  • Seite 35 Neues Gerät hinzufügen 1. Verbinden Sie die Kamera mit dem Strom und warten Sie, bis sie startet. Öffnen Sie die SW360- App. Nach dem Anmelden tippen Sie die +-Taste an. 2. Stecken Sie die Kamera mit dem USB-Adapter an, um sie mit Strom zu versorgen. Warten Sie bitte 30 Sekunden lang, bis die LED an der Kamera zu blinken beginnt.
  • Seite 36 Android dem Aufkleber auf der Rückseite der 3. Wählen Sie Ihre Kamera-ID aus der Kamera. Liste aus. Sie finden die Kamera-ID auf 4. In der SW360-App wählen Sie die SSID des Drahtlos-Netzwerks aus, die Sie letztendlich mit der Kamera verbinden möchten. Geben Sie das korrespondierende Passwort ein. Hinweis: Ein 5 GHz- WiFi-Netzwerk wird nicht unterstützt.
  • Seite 37 Voransicht und Abspiel 1. Informationen zur Datennutzung. 2. Tippen, um den Scan-Modus ein- oder auszuschalten. Im Scan-Modus schwenkt die Kamera automatisch von links nach rechts. 3. Tippen Sie, um von der Panorama-Perspektive zur rechtwinkligen Perspektive zu wechseln. 4. Tippen Sie, um die Audioausgabe der Kamera stumm- oder einzuschalten. 5.
  • Seite 38 Sie können auch Daten antippen, um zu einem speziellen Tag zurückzukehren. Ein blauer Balken zeigt eine Aufzeichnung an. Ziehen Sie diesen Balken nach rechts, um zeitlich zurückzugehen. 3. Tippen Sie diese Taste an, um die Sprachfunktion zu nutzen. Ihre Sprache ist über die Kamera-Lautsprecher hörbar.
  • Seite 39 Dodawanie nowego urządzenia 1. Podłącz kamerę do zasilania sieciowego i zaczekaj, aż się uruchomi. Otwórz aplikację SW360. Po zalogowaniu się naciśnij przycisk +. 2. Podłącz kamerę za pomocą zasilacza USB, aby ją włączyć. Odczekaj 30 sekund, aż LED kamery zacznie migać. Upewnij się, że kamera znajduje się w bliskiej odległości (1m) od urządzenia mobilnego.
  • Seite 40 4. W aplikacji SW360 wybierz identyfikator SSID sieci bezprzewodowej, do której chcesz podłączyć kamerę. Wprowadź odpowiednie hasło. Uwaga: Sieć Wi-Fi 5GHz nie jest obsługiwana. 5. Po nawiązaniu połączenia LED zmieni kolor na zielony, a kamera powie „Połączenie pomyślne”. 6. Proszę nadać kamerze nazwę (na przykład „salon”). Teraz będziesz mieć dostęp do swojej kamery. Możesz oglądać...
  • Seite 41 Podgląd i odtwarzanie 1. Twoje informacje o wykorzystaniu danych. 2. Stuknij, aby włączyć lub wyłączyć tryb skanowania. W trybie skanowania kamera przesunie się automatycznie od lewej do prawej strony. 3. Stuknij, aby przełączyć z perspektywy panoramy na kwadratową perspektywę. 4. Stuknij, aby wyciszyć lub włączyć dźwięk z kamery. 5.
  • Seite 42 5. Dotknij tego przycisku, aby zrobić nagranie na żywo z kamery. Możesz zobaczyć swoje nagrania w osobistym centrum. Stuknij ponownie, aby zatrzymać nagrywanie. • Przeciągnij kanał wideo, aby się rozejrzeć. • Kliknij dwukrotnie, aby powiększyć lub pomniejszyć. Ściśnij, aby powiększyć lub pomniejszyć.
  • Seite 43: Maintenance

    Smartwares | General_Safety_Instruction | version 2 | EN - DE - IT - NL - FR - ES DISPOSAL ENTSORGUNG SMALTIMENTO Correct Disposal of This Product (Waste Electrical & Electronic Equipment) Korrekte Entsorgung dieses Produkts (Elektro- und Elektronik-Altgeräte) Corretto smaltimento di questo prodotto (Rifiuti di apparecchiature elettriche (in der Europäischen Union und anderen europäischen Ländern mit getrennten Sam-...
  • Seite 44 Smartwares | General_Safety_Instruction | version 2 | PT - PL - TR - SE - CS - SK ELIMINAÇÃO UTYLIZACJA ATMA Eliminação correta deste produto (Resíduos de Equipamento Elétrico e Eletrónico) Prawidłowa utylizacja tego produktu (zużyty sprzęt elektryczny i elektroniczny) Bu Ürünün Doğru Şekilde Atılması...
  • Seite 45 Smartwares | General_Safety_Instruction | version 2 | FI - NO - DA - HU - EL - HR HÄVITYS AVHENDING BORTSKAFFELSE Tämän tuotteen asianmukainen hävitys (Sähkö- ja elektroniikkalaiteromu) Korrekt avhending av dette produktet (avfall fra elektrisk og elektronisk utstyr) Korrekt bortskaffelse af dette produkt (skrald fra elektrisk og elektronisk (Soveltuu Euroopan unionin maissa ja muissa Euroopan maissa, joissa on erilli- (gjelder i EU og andre europeiske land med kildesortering).
  • Seite 46: Обща Безопасност

    Smartwares | General_Safety_Instruction | version 2 | RO - BG - SL - RU - UA - RS ELIMINARE VARSTVO OKOLJA ИЗХВЪРЛЯНЕ (Eliminarea corectă a acestui produs (deșeuri electrice și electronice) Правилно изхвърляне на продукта (Отпадъци от електрическо и електронно...

Inhaltsverzeichnis