hager TJ060B Bedienungsanleitung
Inhaltsverzeichnis
Verfügbare Sprachen
Verfügbare Sprachen
Inhaltsverzeichnis

Verwandte Anleitungen für hager TJ060B


Inhaltszusammenfassung für hager TJ060B
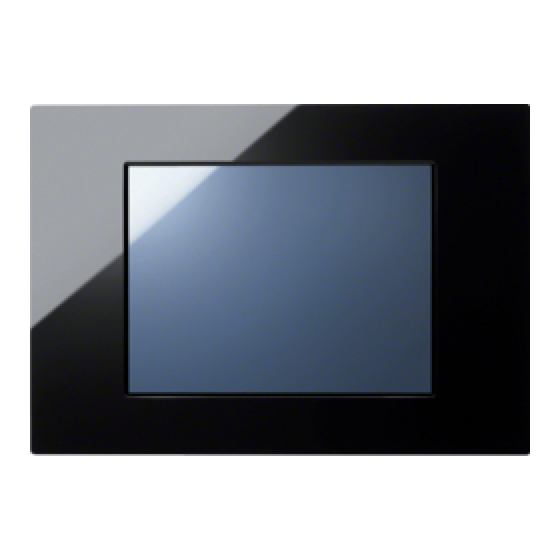
- Seite 1 KNX Touch Panel 8” / 15” 6T7339c 1/32...
-
Seite 2: Inhaltsverzeichnis
Table of contents // Inhaltsverzeichnis 1. BEFORE YOU BEGIN 1.1 W ELCOME 1.2 S AFETY 1.3 S AFETY INSTRUCTIONS 2. PRODUCT DESCRIPTION 2.1 T ECHNICAL DATA 2.2 R BIOS ESET TO DEFAULT CONFIGURATION 2.3 T 8” : M OUCH PANEL OUNTING AND NSTALLATION 2.4 T... -
Seite 17: Bevor Sie Beginnen
5. Bevor Sie beginnen 5.1 Willkommen Vielen Dank, dass Sie sich für ein Markenprodukt der Firma hager entschieden haben. Auf den folgenden Seiten erhalten Sie grundlegende Informationen über das von Ihnen gewählte Produkt. Lesen Sie diese Informationsbroschüre bitte sorgfältig. Informationen über die eingebauten Komponenten erhalten Sie über die mitgelieferten Handbücher der einzelnen Hersteller. -
Seite 18: Sicherheitshinweise
5.3 Sicherheitshinweise Bedeutung der Warnsymbole Gefährliche Spannung: Das Blitzsymbol mit einem Pfeil am Ende in einem gleichseitigem Dreieck warnt Sie vor nicht isolierter gefährlicher Spannung innerhalb des Produkts, die einen elektrischen Schlag verursachen kann. Hinweise: Das Ausrufungszeichen in einem Dreieck macht Sie auf wichtige Bedienungs- und Wartungshinweise für Ihr Gerät aufmerksam. -
Seite 19: Produktbeschreibung
6. Produktbeschreibung 6.1 Technische Daten 8“ TFT 15“ TFT Interior–PC zur Gebäudeautomatisierung 8“ TFT, 800 x 600, 15“ TFT, 1024x768, max. 350 cd/m² max. 250 cd/m² resistiver-Touch Unterputzmontage/ Hohlraummontage Intel ATOM, 1,6 GHz AMD Sempron, 1 GHz Schnittstellen: 3x Ethernet 10/100 Mbps, 2x Schnittstellen: 2x Ethernet 10/100 Mbps USB 2.0, PS2, DVI, CF-Socket (intern), 4x USB 2.0, 1x RS-232, CF-Socket Typ II... -
Seite 20: Bios-Konfiguration Auf Herstellereinstellungen Zurücksetzen
6.2 BIOS-Konfiguration auf Herstellereinstellungen zurücksetzen Wenn die „Default-Werte“ in BIOS gewählt wurden bzw. „optimized Settings“ sind unbedingt vor dem Speichern diese Werte einzustellen: BIOS: PowerOn after PowerFail: ON Mit dieser Einstellung ist sichergestellt, dass das System nach einem Stromausfall oder Wegnahme der Versorgungsspannung anschließend wieder startet ohne den Ein-/Aus-Taster zudrücken. -
Seite 21: Montage Und Einbau Knx Touch Panel
6.3 Montage und Einbau KNX Touch Panel 8’’ Einbau des Unterputzgehäuse: Zum Einbau des Unterputzgehäuses stehen Ihnen folgende Optionen zur Verfügung: A) mit den vorhandenen Einputzlaschen in massivem Mauerwerk. mit den im Rahmen vorhandenen Löchern zur Montage in Hohlraumwänden. Ausbau des Touch Panel 8’’ aus dem Unterputzkasten: Entfernen Sie die 4 Schrauben und nehmen Sie das Touch Panel 8’’... - Seite 22 Einbau des Touch Panels nur durch autorisiertes Fachpersonal und Elektriker. Hager kann keine Haftung für die montierte Unterputzkasten und deren Funktion übernehmen. Eine Prüfung durch Fachpersonal ist erforderlich. Montage nur im spannungsfreien Zustand der Zuleitungen. Schritt 1) Anschluss der Versorgungsleitungen an das Gerät: Bevor Sie das Gerät in den Unterputzkasten einbauen, müssen alle benötigten...
- Seite 23 Schritt 2) Endmontage des Gerätes Montieren Sie mit den mitgelieferten Schrauben M5 den Touch Panel 8’’ in den Unterputzkasten. Drücken Sie anschließend die Front mit den Schnappnieten in die dafür vorgesehenen Bohrungen. Setzen Sie jetzt die Zuleitung wieder unter Spannung. Das Gerät sollte bei einwandfreier Spannungsversorgung starten.
-
Seite 24: Montage Und Einbau Knx Touch Panel
6.4 Montage und Einbau KNX Touch Panel 15’’ Einbau des Unterputzgehäuses: Zum Einbau des Unterputzgehäuses stehen Ihnen folgende Optionen zur Verfügung: A) mit den vorhandenen Einputzlaschen in massivem Mauerwerk. B) mit den im Rahmen vorhandenen Löchern zur Montage in Hohlraumwänden. Ausbau des 15’’... - Seite 25 Einbau des Touch Panels nur durch autorisiertes Fachpersonal und Elektriker. Hager kann keine Haftung für die montierte Unterputzkasten und deren Funktion übernehmen. Eine Prüfung durch Fachpersonal ist erforderlich. Montage nur im spannungsfreien Zustand der Zuleitungen. Schritt 1) Anschluss der Versorgungsleitungen an das Gerät: Zum Anschluss der Leitungen hängen Sie das Gerät in die Führungsschiene ein.
- Seite 26 Schritt 2) Endmontage des Gerätes Montieren Sie mit den mitgelieferten Schrauben M5 den Touch Panel 15’’ in den Unterputzkasten. Drücken Sie anschließend die Front mit den Schnappnieten in die dafür vorgesehenen Bohrungen. Setzen Sie jetzt die Zuleitung wieder unter Spannung. Das Gerät sollte bei einwandfreier Spannungsversorgung starten.
-
Seite 27: Reinigung Und Pflege Des Touch Panels
6.5 Reinigung und Pflege des Touch Panels Auf dem Desktop bzw. auf dem mitgelieferten Datenträger befindet sich Software mit dem Namen Touchblocker. Durch diese Software wird der Touch Panel für 60 Sekunden blockiert. In dieser Zeit haben Sie die Möglichkeit den Touch mit einem weichen Tuch ohne Reinigungsmitteln zu säubern. -
Seite 28: Knx/Eib Schnittstelle
6.6 KNX/EIB Schnittstelle Anwendung Die Schaltung dient der Herstellung einer bidirektionalen Datenverbindung zwischen dem KNX Touch Panel und dem Installationsbus EIB/KNX. USB-Anschluss EIB/KNX galvanisch getrennt. Schaltung kompatibel mit dem KNX Medium TP1 (EIB), die Firmware unterstützt Protokoll EMI1. Belegung Anschlüsse USB-Buchse (K1): Anschluss von USB-Stecker (B-Serie) -
Seite 29: Lieferumfang
7. Lieferumfang § KNX Touch Panel § Touch Panel Frontplatte § Unterputzkasten, optional, sofern nicht vorab geliefert § Flashdisk (eingebaut) § Montagematerial § Bedienungsanleitung § Spannungsversorgungsverbinder § Reinigungstuch 29/ 32... -
Seite 30: Technische Zeichnung
8. Technische Zeichnung KNX Touch Panel 8’’ KNX Touch Panel 8’’ KNX Touch Panel KNX Touch Panel 30/ 32... - Seite 32 31/ 32...