Inhaltsverzeichnis
Werbung
Verfügbare Sprachen
Verfügbare Sprachen
Quicklinks
Werbung
Inhaltsverzeichnis

Verwandte Anleitungen für Märklin MAXI V 60 Series


Inhaltszusammenfassung für Märklin MAXI V 60 Series
- Seite 1 Baureihe V 60...
- Seite 2 Exploitation Vorbild Seite 5 Prototype Page 5 dans le réel Page 6 Grootbedrijf Blz. 6 Betrieb Seite 7 Operation Page 15 Fonctionnement Page 23 Exploitatie Blz. 31 Betrieb auf Operation on Exploitation Bedrijf op der Anlage Seite 39 a layout Page 39 sur réseau Page 39...
- Seite 3 Vorbild...
-
Seite 4: Vorbild Prototype
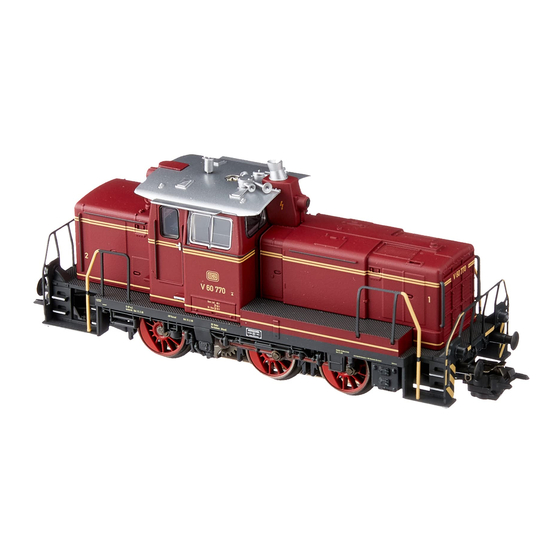
Vorbild Prototype Die Diesel-Rangierlokomotive der Baureihe 260 (V 60) The Class 260 (V 60) Diesel Switch Engine Zu dem umfangreichen Neubeschaffungsprogramm an Diesel-Lokomotiven The extensive new diesel locomotive program on the German Federal Railroad bei der Deutschen Bundesbahn in den 50er-Jahren des 20. Jahrhunderts, in the 1950s included the popular classes V 100 and V 200. - Seite 5 Exploitation dans le réel Grootbedrijf La locomotive diesel de manoeuvre de la série 260 (V 60) De diesel-rangeerlocomotief van de serie 260 (V60) Dans le cadre de l’ambitieux programme de renouvellement des moyens de Tot het omvangrijke aankoopprogramma van nieuwe diesellocomotieven bij traction diesel développé...
-
Seite 6: Betrieb
Betrieb 2.1 Funktion Diese Lok mit eingebauter • 80 Digital- (4 Delta-) Adressen • Eingebaute Geräuschelektronik, • Befahrbarer Mindestradius: Digital-Elektronik bietet: über Codierschalter einstellbar. bei der nur im Digital-Betrieb mit 600 mm. Dieser Radius kann Eingestellte Adresse ab Werk: 60 der Control-Unit 6021 das jedoch nur mit erheblich vermin- •... -
Seite 7: Einstellen Der Betriebsart Oder Digital-/Delta-Adresse
Betrieb 2.2 Einstellen der Betriebsart 2.2.2 Digital-/Delta-Adresse Hinweis: 2.2.1 Betriebsart einstellen oder Digital-/Delta-Adresse einstellen Die Digitaladressen 24, 60, 72 und 78 entsprechen den vier Delta- Schritt 2: Adressen. Schritt 1: Schritt 2: Vorderbau abnehmen (=> S. 40) Die analoge Betriebsart wird am Die Digital-/Delta-Adresse wird an den Schaltern 1 bis 8 des 10-fach Schalter 10 (Bezeichnung „0“) des... - Seite 8 Betrieb Digital Digital Digital – 2 3 – 5 – 7 – – – 2 3 – 5 – – 8 – – 2 3 – 5 – – – – – – 3 – 5 – 7 – – –...
-
Seite 9: Einstellen Der Fahrparameter
Betrieb 2.3 Einstellen P1: Anfahr-/ Bremsverzögerung Hinweis: der Fahrparameter (gemeinsam) Die beiden Potis zum Einstellen Linksanschlag: minimale Verzögerung. der Fahrparameter auf der unteren Rechtsanschlag: maximale Verzöge- Digital-Platine nicht mit dem Poti 1. Vorderbau abnehmen (=> S. 40) rung. zur Lautstärkeregelung auf der oberen Platine verwechseln. -
Seite 10: Betrieb Mit Den Einzelnen
Betrieb 2.4 Betrieb mit den einzelnen Codierschalter auf der Rückseite dieses nach links über die Stellung „0“ hin- Drücken der Taste „f3“: Versorgungs-Systemen Gerätes in folgende Stellung gebracht weg: Fahrtrichtungswechsel. Einschalten des Geräuschs eines werden: Signalhorns. Anschließend unbe- 2.4.1 Digital Hinweis: dingt durch ein weiteres Betätigen Schalter:... -
Seite 11: Fahren Der Lok Mit Delta
Betrieb 2.4.2 Fahren der Lok mit Delta 2.4.3 Fahren mit Wechselspannung 2.4.4 Fahren mit Gleichspannung Im Betrieb mit Gleichspannung ist die Zum Fahren der Lok mit Märklin In der Betriebsart „Wechselspannung“ Gleichspannungs-Fahrgeräte werden fahrtrichtungsabhängige Beleuchtung Delta wird an dem Handregler kann die Lok z.B. -
Seite 12: Lautstärke Einstellen
Betrieb 2.5 Einstellen der 2.5.1 Lautstärke einstellen 2.5.2 Codierschalter auf der Hinweis: Geräuschelektronik Sound-Elektronik Dieser Codierschalter befindet sich auf der oberen Sound- Hinweis: Dieses Poti befindet sich auf der oberen Sound-Elektronik. Die Soundelektronik wird mit dem Elektronik. Verwechseln Für die nachfolgenden Einstell- Sie ihn auf keinen Fall mit dem arbeiten ist der Vorderbau der Lok Verwechseln Sie auf keinen Fall... - Seite 13 Betrieb Nur zu Ihrer Information nachfolgend die Funktion der einzelnen Schalter: Schalter Stellung = on Stellung = off Bemerkung Muss immer auf „on“ stehen! Darf nie auf „off stehen! Nie verändern! Muss immer auf „on“ stehen! Darf nie auf „off stehen! Nie verändern! F3: Signalhorngeräusch einer F3: Signalhorngeräusch einer...
- Seite 14 Operation 2.1 Function This locomotive has a built-in digital • 80 Digital (4 Delta) addresses can • Built-in sound effects circuit, • Minimum radius for operation: electronic circuit and offers the follo- be set with coding switches. which can be used to turn on the 600 mm / 23-5/8“.
-
Seite 15: Setting The Mode Of Operation
Operation 2.2 Setting the Mode of 2.2.1 Setting the Mode of 2.2.2 Setting Digital/Delta Important: Operation or Digital/Delta Operation Address The digital addresses 24, 60, 72, Address nd 78 correspond to the four Delta addresses. Step 2: Step 2: Step 1: The analog mode of operation is set The Digital/Delta address is set with Remove the front hood (=>... - Seite 16 Operation Digital Digital Digital – 2 3 – 5 – 7 – – – 2 3 – 5 – – 8 – – 2 3 – 5 – – – – – – 3 – 5 – 7 – – –...
- Seite 17 Operation 2.3 Setting the Running P1: Acceleration/braking delay Important: Characteristics (together) Do not confuse the two potentio- Left stop: minimum delay meters for setting the running Right stop: maximum delay characteristics on the lower digital 1. Removing the front hood circuit board with the potentio- (=>...
- Seite 18 Operation 2.4 Operation with the Operating the locomotive with the Important: Pressing button “f3”: Different Power Systems 6021 Control Unit: On the 6021 Control Unit two arrows Turns the sound of a horn on. Now to the right of the address display quickly turn this function off by 2.4.1 Digital Entering the locomotive address.
- Seite 19 Operation 2.4.2 Operating the locomotive 2.4.3 Operating the locomotive All other functions (sound effects, In operation with direct current the with Delta on alternating current Telex) are always turned off in AC headlights change direction with the power operation. direction of travel and are on all of To operate the locomotive with Märklin When the locomotive is operated with the time.
-
Seite 20: Adjusting Volume
Operation 2.5 Adjusting the Sound This potentiometer has a stop at the Important: These coding switches 2.5.1 Adjusting Volume Effects Circuit two end points. Never try to turn the are located on the upper electronic potentiometer with force past these circuit for sound effects. - Seite 21 Operation The function of the individual switches is given below only for your information: Switch Setting = on Setting = off Note Must always remain at “on”! Must never be at “off”! Do not change this! Must always remain at “on” Must never be at “off”! Do not change this! F3: Sound of a horn for a...
- Seite 22 Fonctionnement 2.1 Fonctionnement Utilisation de cette locomotive • Détection automatique du mode • Feux de signalisation, s’inversant peut être télécommandé qu’en équipée d'une électronique Digital: d’exploitation: conventionnel, en fonction du sens de la marche, exploitation digitale avec la Control Delta ou Digital. La sélection entre commutables en exploitation Digi- Unit 6021.
-
Seite 23: Réglage De L'adresse
Fonctionnement 2.2 Réglage du mode 2.2.1 Réglage du mode 2.2.2 Réglage de l’adresse Remarque: d’exploitation ou de d’exploitation Digital/Delta Les adresse Digital 24, 60, 72 et 78 l’adresse Digital /Delta correspondent aux 4 adresses Delta. Etape 2 : Etape 2 : Etape 1: Le mode d’exploitation analogique L’adresse Digital / Delta est réglée à... - Seite 24 Fonctionnement Digital Digital Digital – 2 3 – 5 – 7 – – – 2 3 – 5 – – 8 – – 2 3 – 5 – – – – – – 3 – 5 – 7 – – –...
- Seite 25 Fonctionnement 2.3 Réglage des P1: temporisation d'accélération-frei- Remarque : Ne pas confondre les paramètres de marche nage (commune). deux potentiomètres pour le régla- A fond contre la butée gauche: ge des paramètres de marche temporisation minimale. situés sur la platine Digital 1.
- Seite 26 Fonctionnement 2.4 Exploitation avec des Remarque: Une pression sur la touche „f3“ : Sélecteur: systèmes d'alimentation sur la Control Unit 6021, le sens de Activation du bruitage de l’avertisseur séparés Position: marche est indiqué par les deux sonore suivie ensuite impérativement flèches situées à...
- Seite 27 Fonctionnement 2.4.2 Conduite de la locomotive Toutes les autres fonctions (bruitage, Toutes les autres fonctions (bruitage, Indication: en mode Delta Telex) sont toujours désactivées en Telex) sont toujours désactivées en Les régulateurs de vitesse H0 à ten- exploitation Delta. exploitation à courant alternatif. sion continue fournissent une tension L'adresse qui a été...
-
Seite 28: Réglage Du Niveau Sonore
Fonctionnement 2.5 Réglage du bruiteur potentiomètres pour le réglage 2.5.2 Clavier de codage sur la Remarque: des paramètres de marche situés platine de bruiteur ce clavier de codage se trouve sur la platine Digital inférieure. sur la platine de bruitage supér- Il faut enlever l’avant-corps de la L’électronique de bruitage est réglée ieure. - Seite 29 Fonctionnement A titre informatif, voici la fonction de chaque sélecteur: Sélecteur Position = on Position = off Remarque Doit toujours être sur „on“! Ne peut jamais être sur „off“! Ne jamais modifier! Doit toujours être sur „on“! Ne peut jamais être sur „off“! Ne jamais modifier! F3: bruitage d’avertisseur sonore F3: bruitage d’avertisseur sonore...
- Seite 30 Exploitatie 2.1 Werking Deze loc met ingebouwde digitaal- • 80 digitale- (4 Delta -) adressen • Ingebouwde geluidselektronica. • Berijdbare minimumradius: elektronica biedt u: instelbaar met de codeerschake- Alleen bij digitaalbedrijf met de 600 mm. Deze radius kan echter laar. Vanaf de fabriek is het adres Control Unit 6021 kan het bedrijfs- alleen met strek verminderde snel- •...
- Seite 31 Exploitatie 2.2 Instellen van het 2.2.1 Bedrijfssysteem instellen 2.2.2 Digitaal-/DELTA-adres Opmerking: bedrijfssysteem of het instellen de digitale adressen 24, 60, 72 en 78 digitale-/DELTA adres. komen overeen met de vier Delta Stap 2: Stap 2: adressen. het analoge bedrijfssysteem wordt Het digitale-/Delta adres wordt met Stap 1: met schakelaar 10 (gemerkt met “0“)
- Seite 32 Exploitatie Digital Digital Digital – 2 3 – 5 – 7 – – – 2 3 – 5 – – 8 – – 2 3 – 5 – – – – – – 3 – 5 – 7 – – –...
- Seite 33 Exploitatie 2.3 Instellen van de P1: optrek-/afremvertraging Opmerking: rij-parameters (gemeenschappelijk) de beide potentiometers voor het linkeraanslag: minimale vertraging. instellen van het rijgedrag op de rechteraanslag: maximale vertraging. onderste printplaat niet 1. Voorste opbouw verwijderen verwisselen met de potentiometer (zie pag. 40). P2: maximumsnelheid voor het geluidsvolume op de linkeraanslag: minimale maximum-...
- Seite 34 Exploitatie 2.4 Het bedrijf met de schakelaars op de achterzijde van de Het verdraaien van de regelknop Indrukken van toets “f3“: inschakelen verschillende Control Unit op de volgende wijze naar links, door de stand „0”: van het geluid van een signaalhoorn. bedrijfssystemen ingesteld worden: omkeren van de rijrichting.
- Seite 35 Exploitatie 2.4.2 Rijden van de loc met Delta 2.4.3 Rijden van wisselspanning 2.4.4 Rijden van gelijkspanning Bij gebruik met gelijkspanning is de rijrichtingafhankelijke verlichting inge- Om met de loc binnen Märklin Delta Bij het wisselstroombedrijf kan de loc Rijregelaars voor gelijkspanning wor- schakeld.
- Seite 36 Exploitatie 2.5 Instellen van de meter in geen geval met één van 2.5.2 Codeerschakelaar op de Opmerking: geluidselektronica de potentiometers op de onderste geluidsprintplaat de 8-voudige codeerschakelaar printplaat voor het instellen van bevindt zich op de bovenste het rijgedrag. De geluidselektronica wordt met de printplaat.
- Seite 37 Exploitatie Alleen ter informatie, onderstaand de functie van de verschillende schakelaars: schakelaar stand = on stand = off opmerking Moet altijd op “on” staan Moet altijd op “off” staan! Nooit veranderen! Moet altijd op “on” staan! Moet altijd op “off” staan! Nooit veranderen! F3: signaalhoorngeluid van F3: signaalhoorngeluid van...
- Seite 38 3. Betrieb auf der Anlage Operation on a layout Exploitation sur réseau Bedrijf op een modelbaan 3.1 Anschluss der Gleisanlage 3.1 Connections between the track 3.1 Connexion des voies ferrées 3.1 Aansluiting van de sporen Um Spannungsverluste auf der An- layout and the transformer Pour éviter des pertes de potentiel Om spanningsverlies op de model-...
-
Seite 39: Wartung
Wartung Maintenance Entretien Onderhoud Vorbau entfernen Fahrgestell ölen (nach 40 Betriebsstunden) Removing the front hood Oiling the frame (after 40 hours of operation) Enlever l'avant-corps Graisser le châssis (après 40 heures de fonctionnement) Voorste opbouw verwijderen Drijfwerk oliën (na ongeveer 40 bedrijfsuren) - Seite 40 Wartung Maintenance Entretien Onderhoud Haftreifen wechseln Changing Traction Tires Changement des bandages d’adhérence Vervangen van antislipbanden 591 500...
-
Seite 41: Pflegehinweis
Wartung Maintenance Entretien Onderhoud 4.4 Pflegehinweis 4.4 Remarque sur l’entretien Diese Lok kann auch im Außenbereich eingesetzt werden. Ein Betrieb bei Cette locomotive peut également être mise en service à l’air libre. Une utilisa- schlechten Witterungsbedingungen (Schnee oder Regen) wird nicht empfohlen. tion par mauvais temps (neige ou pluie) n’est pas recommandée. - Seite 42 Wartung Maintenance Entretien Onderhoud Vorschläge für passende Wagen: Suggestions for suitable cars: Propositions de wagons adaptés: Voorstellen voor passende wagens: 58561 58957 58292...
- Seite 43 This device complies with Part 15 of the FCC Rules. Operation is subject to the following two conditions: (1) This device may not cause harmful interference, and (2) this device must accept any interference received, including interference that may cause undesired operation. Gebr.