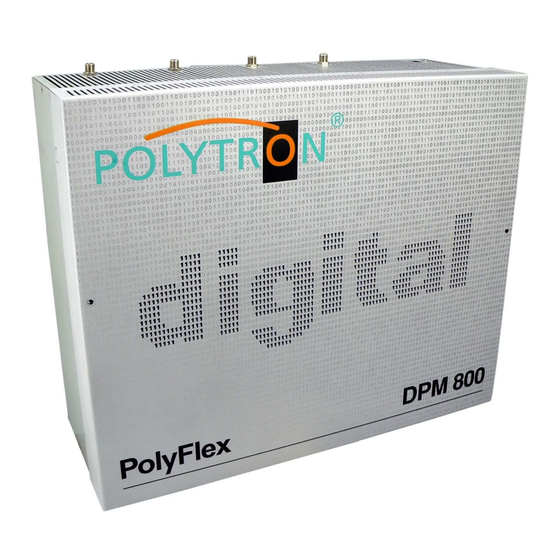
Polytron PolyFlex DPM 800 Bedienungsanleitung
Kopfstelle
Inhaltsverzeichnis
Quicklinks
Inhaltsverzeichnis

Verwandte Anleitungen für Polytron PolyFlex DPM 800

Inhaltszusammenfassung für Polytron PolyFlex DPM 800
- Seite 1 PolyFlex Kopfstelle PolyFlex Headend Bedienungsanleitung/ User manual 0901135 V4.0...
-
Seite 2: Inhaltsverzeichnis
Ablehnung der Produkthaftung seitens des Herstellers führen. Für part of the manufacturer. The editor is grateful for suggestions. Verbesserungsvorschläge ist der Verfasser dankbar. Editor: Verfasser: Polytron-Vertrieb GmbH Polytron-Vertrieb GmbH Postfach 10 02 33 Postfach 10 02 33 75313 Bad Wildbad... -
Seite 3: Sicherheitsvorkehrungen
Sicherheitsvorkehrungen Safety precautions Vor dem Arbeiten am Grundgerät DPM bitte un- Before working on the base unit DPM please read bedingt folgende Sicherheitsbestimmungen sorg- the following safety precautions carefully! fältig lesen! ATTENTION The unit should only be opened ACHTUNG Das Öffnen des Gerätes sollte nur von by qualified persons. - Seite 4 ACHTUNG Diese Baugruppe enthält ESD-Bauteile! ATTENTION This unit equipped with ESD- (ESD = Elektrostatisch empfindliches components! (ESD Electrostatic Bauteil) Sensitive Device) An electrostatic discharge is an electrical current Eine elektrostatische Entladung ist ein elektrischer pulse, which can flow triggered by large tension Stromimpuls, der - ausgelöst durch große Span- difference also...
-
Seite 5: Beschreibung / Description
Like grammen. Wie in den anderen Polytron Kopfstellen all Polytron headends, the DPM integrates an output sind in der DPM das Ausgangssammelfeld, ein Ver- collecting field, an amplifier, and a power supply unit. - Seite 6 Die Digital-Module besitzen einen Schalter um den The digital modules are equipped with a switch to ac- Programmiermodus (Setup) zu aktivieren. Die Mas- tivate the programming mode (Set-up). The master ter-Module besitzen einen weiteren Schalter zum Ak- modules have a second switch to activate the LNB tivieren der LNB-Fernspeisspannung.
- Seite 7 2.2 Mastermodule 2.2 Master modules DPM-PS/ -PSI/ -PS Conax/ CryptoWorks DPM-PS/ -PSI/ -PS Conax/ CryptoWorks DPM-PS ME DPM-PS ME DPM-PT/ -PTI/ -PT ME DPM-PT/ -PTI/ -PT ME Bei den Modulen DPM-PS Master handelt es sich um The modules DPM-PS Master are DVB-S reception DVB-S-Empfangsmodule zur Umsetzung von QPSK modules for conversion of QPSK modulated pro- modulierten Programmen in AV-Signale.
- Seite 8 2.3 Slavemodul DPM-SL 2.3 Slave module DPM-SL The Slave modules DPM-SL receive the data stream Die Slave-Module DPM-SL empfangen den Daten- from the master module and don't need an integrated strom vom Master-Modul und benötigen daher keinen tuner. From this data stream a channel is selected eigenen Tuner.
- Seite 9 2.4 Modul DPM-AV 2.4 Module DPM-AV Die DPM-AV Master-Module dienen zur Aufberei- The DPM AV modules are for the processing of au- tung von Audio-/Video-Signalen. dio/video signals. AV Slave modules are for the processing of au- Die AV-Slave-Module dienen zur Aufbereitung von dio/video signals, controlled by an AV Master mod- Audio-/Video-Signalen, gesteuert von einem ule.
- Seite 10 2.5 Modul DPM-FM 2.5 Modul DPM-FM Das DPM-FM-Modul dient zum Einschleifen des The module DPM-FM is used for connecting the Rundfunk-FM-Bereiches. Das Modul wird zwischen broadcast FM range. The module is switched be- Ausgangssammelfeld und Ausgangsverstärker ge- tween output combiner and output amplifier. It is sup- schaltet.
- Seite 11 2.6 Modulatoren 2.6 Modulators Die Modulatoren der DPM-Serie ermöglichen die The DPM series modules are for modulation of AV Modulation von AV-Signalen der Master- oder Slave- signals from the Master- or Slave Modules into free Module in frei programmierbare TV-Kanäle. programmable TV channels.
-
Seite 12: Vorbereitungen / Preparations
Preparations 3 Vorbereitungen Headend Grounding Kopfstelle erden Ground the Headend by connecting the earth Kopfstation über die Erdungsklemme terminals to the equipotential bonding rail Potenzialausgleichschiene verbinden. Grounding Coaxial Cables Koaxialkabel erden Remove the insulation of the coaxial cable Den weißen PVC-Außenmantel des near the terminal. -
Seite 13: Inbetriebnahme / Commissioning
4 Inbetriebnahme 4 Commissioning 4.1 Einbau der Module Installing the modules Montageuntergrund gemäß der Beschreibung auf Prepare assembly ground according to the de- der beiliegenden Bohrschablone vorbereiten. scription on the enclosed drilling jig. Die beiden Kreuzschlitzschrauben (Bild 11/8) der Unscrew the two cross-head screws (Figure10/8) Masseschiene (Bild 11/7) lösen und diese nach of the mass rail (Figure 11/7) and pull it down- unten herausziehen. - Seite 14 HF-Eingänge mit den entsprechenden HF-Kabeln Connect the HF-entries with the appropriate HF- verbinden. cables. Gerät mit dem dazugehörigen Netzverbindungs- Connect the device with the accompanying net- kabel mit dem Netz verbinden. work cable to the network. Module gemäß Abschnitt 4.2 programmieren. Program modules according to chapter 4.2.
-
Seite 15: Programmierung Der Module
4.2 Programmierung der Module 4.2 Programming of modules Nach der Bestückung der Grundeinheit und dem After assembly of the base unit and construction of Aufbau der Eingangsverteilung erfolgt die Program- the entrance distribution, programming of the mod- mierung der Module auf die gewünschten Ausgangs- ules to the desired output channels takes place at kanäle. -
Seite 16: Master Module
4.2.2 Master Module 4.2.2 Master Module DPM-PS und DPM-PT DPM-PS und DPM-PT Beschreibung Screen Type - Seite 24 Description Screen Type – Page 24 Bild 13 Programmierfenster Master-Modul Figure 13 Programming window Master-Module 1. TV oder Messgerät am Ausgang anschließen, 1. - Seite 17 Figure 14 CHANNEL Setup-window Bild 14 CHANNEL Setup-Fenster 9. Mark a program from the indicated list by keys 9. Mit den Tasten ▲▼ einen Sender aus der ange- ▲▼. zeigten Liste markieren. Jump into the field Transponder with the button Mit der Taste MENU in das Feld Transponder MENU, set the fields Language, Subtitle and springen und die gewünschten Felder Langu-...
- Seite 18 4.2.3 ME Master Module 4.2.3 ME Master Modules DPM-PS ME und DPM-PT ME DPM-PS ME and DPM-PT ME Figure 15 CHANNEL Setup-Window Bild 15 Programmierfenster ME Master-Modul 1. Connect the TV or measuring instrument at the 1. TV oder Messgerät am Ausgang anschließen, output, turn it on and adjust channel 69.
- Seite 19 Bild 16 CHANNEL Setup-Fenster Figure 14 CHANNEL Setup-Window 9. Mit den Tasten ▲▼ einen Sender aus der ange- 9. Mark a program from the indicated list by keys zeigten Liste markieren. ▲▼. Mit der Taste MENU in das Feld Transponder Jump into the field Transponder with the button springen und falls vorhanden die gewünschte MENU, set the desired language to the fields...
- Seite 20 Figure 17 Slave Select window Bild 17 Slave Select-Fenster 13. On the right side the maximum quantity of the 13. Auf der rechten Seite wird nun die Anzahl der decryptable channels by the used CAM and card max. möglichen, von dem CAM und Karte zu is shown.
- Seite 21 4.2.4 Slave Modul DPM-SL 4.2.4 Slave Module DPM-SL Beschreibung Screen Type - Seite 24 Description Screen Type – Page 24 Figure 18 Programming window DPM-SL Slave Bild 18 Programmierfenster DPM-SL Slave 1. Die Einstellungen des Slave-Moduls entsprechen 1. The adjustments of the Slave module correspond to them of the appending master module.
- Seite 22 Figure 19 CHANNEL Setup-Window (Slave) Bild 19 CHANNEL Setup-Fenster (Slave) 5. Mark a program from the indicated list by keys 5. Mit den Tasten ▲▼ ein Programm aus der ange- ▲▼. zeigten Liste markieren. 6. Mit der Taste MENU in das Feld Transponder 6.
- Seite 23 4.2.5 Master Modul DPM-AV 4.2.5 Master Module DPM-AV Figure 20 Programming window 1 Master- and 1 Bild 20 Programmierfenster 1 Master- und 1 Slave- Slave Module with twin modulators Modul mit Twinmodulatoren Bild 21 Programmierfenster 1 Master- und 2 Sla- Figure 21 Programming window 1 Master- and 2 veModule mit Singlemodulatoren Slave modules with Single modulators...
- Seite 24 Beschreibung Funktion Screen Type Description Screen Type Operation In Gemeinschaftsanlagen, in denen nur 4:3- bzw. In communal facilities, in which only 4:3 and/or 16:9- 16:9-Fernsehgeräte verwendet werden, empfiehlt es television sets are used, it is advisable to select the sich die Screentype-Einstellung 4:3 bzw. 16:9 zu screen type attitude 4:3 and/or 16:9.
-
Seite 25: Vorgehensweise Software-Update
• • PC mit Betriebssystem XP oder Vista und PC with operating system XP or Vista and serial serieller Schnittstelle interface • • Polytron Update Software Polytron Update Software (z.B. DVB-Update_V201.zip) (i.e. DVB-Update_V201.zip) • • gängiges RS232-Kabel serial RS232-Cable 5.1 Vorgehensweise Software-Update 5.1 Software Update procedure... -
Seite 26: Technische Daten / Technical Data
Technical Data Technische Daten Typ / Type DPM 800 Eingang / Input Steckplätze / Slots LNB-Spannungsversorgung / LNB-DC-Supply +12 VDC / max. 500 mA Versorgungsspannung / Power Supply 180 – 265 VAC / 50/60 Hz Leistungsaufnahme / Power consumption max. 100 W Ausgang / Output Frequenzbereich / Frequency range 47 - 862 MHz... - Seite 27 DPM-PS DPM-PS Typ / Type DPM-PS DPM-PSI DPM-PS ME CryptoWorks Conax Eingang / Input Anschluss / Connection F-Buchse / female, 75 Ω Anschluss / Connection F- Stecker / male, 75 Ω LNB Versorgung / LNB Supply 12 VDC / max. 250 mA schaltbar / switchable Frequenzbereich / Frequency range 950 - 2150 MHz...
- Seite 28 Typ / Type DPM-SL Eingang / Input Transportstrom / Steckerleiste (Stecker) / Edge card connector (male) Transport Stream gemäß DVB / in accordance with DVB AV-Ausgang / AV Output Anschluss / Connection Steckerleiste (Stecker) / Edge card connector (male) Videopegel / Video level / 75 Ω...
- Seite 29 Typ / Type DPM-AV Master DPM-AV Slave Video-Eingangspegel / Video Input Level 1 Vpp / 75 Ohm 1 Vpp / 75 Ohm Audio-Eingangspegel / Audio Input Level 1 Vpp / 10k Ohm 1 Vpp / 10k Ohm AV-Verbindung / AV connection Leistungsaufnahme / Power consumption 0,5 A Gewicht / Weight...
- Seite 30 NOTIZEN / NOTES...
-
Seite 31: Belegungsplan / Assignment Scheme
7 PolyFlex Belegungsplan / Assignment scheme Modulsteckplatz-Nr. / module slot no. Empfangsart / terrest. terrest. terrest. terrest. terrest. terrest. terrest. terrest. reception mode sat. sat. sat. sat. sat. sat. sat. sat. Satellit / satellite horiz. horiz. horiz. horiz. horiz. horiz. horiz. - Seite 32 + 49 (0) 70 81/1702 - 0 Technische Hotline Technical hotline + 49 (0) 70 81/1702 - 12 Telefax + 49 (0) 70 81) 1702 - 50 Internet http://www.polytron.de eMail info@polytron.de Technische Änderungen vorbehalten Subject to change without prior notice Copyright © Polytron-Vertrieb GmbH...