Inhaltsverzeichnis
Werbung
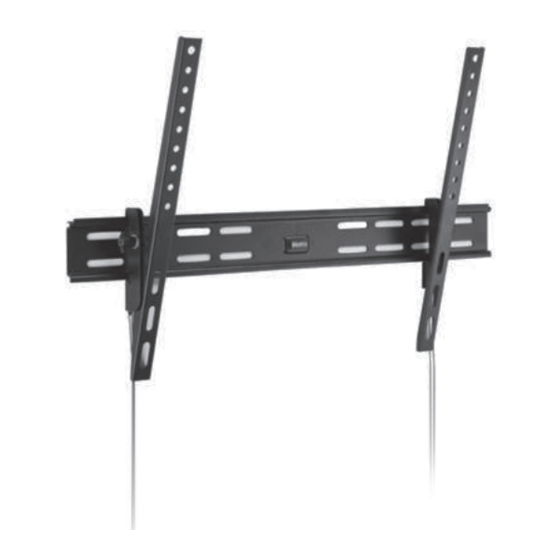
TILTING TV WALL MOUNT FOR MOST 37-INCH TO 80-INCH TVs
SUPPORT DE MONTAGE MURAL INCLINABLE POUR LA PLUPART
DES TÉLÉVISEURS DE 37 À 80 POUCES
NEIGBARE TV-WANDHALTERUNG FÜR DIE MEISTEN FERNSEHER
VON 37 ZOLL BIS 80 ZOLL DIAGONALE (94 CM BIZ 203 CM)
STAFFA DI MONTAGGIO A PARETE CON INCLINAZIONE PER
LA MAGGIOR PARTE DEI TV DA 37 POLLICI A 80 POLLICI
SOPORTE DE TV PARA PARED INCLINABLE PARA LA MAYORÍA
DE LAS PANTALLAS DE 37 A 80 IN (94 CM A 203 CM)
ASIN B01KBEOAIW
1
Werbung
Inhaltsverzeichnis

Verwandte Anleitungen für AmazonBasics ASIN B01KBEOAIW


Inhaltszusammenfassung für AmazonBasics ASIN B01KBEOAIW
- Seite 1 STAFFA DI MONTAGGIO A PARETE CON INCLINAZIONE PER LA MAGGIOR PARTE DEI TV DA 37 POLLICI A 80 POLLICI SOPORTE DE TV PARA PARED INCLINABLE PARA LA MAYORÍA DE LAS PANTALLAS DE 37 A 80 IN (94 CM A 203 CM) ASIN B01KBEOAIW...
-
Seite 2: Specifications
SPECIFICATIONS Display Size: 37" to 80" Maximum Load: 54.4 kg (120 lbs.) Mounting Pattern: 200x100, 200x200, 300x200, 300x300, 400x200, 400x300, 400x400, 600x400 Tilt Range: -3° to 15° down Profile: 1.8" (45.72mm) CAUTION! This product is for indoor use only! Never use the mount outdoors! WARNINGS 1. - Seite 3 • The maximum wall covering thickness; such as gypsum drywall, lath, plastic, etc. should not be greater than 16mm (wood stud walls) or 10mm (masonry walls). • Do not mount to drywall alone. • Examine the wall you want to install the mount to before you start installation.
-
Seite 4: Spécifications
SPÉCIFICATIONS Grandeur de l’écran : 37 po à 80 po Charge maximale : 54,4 kg (120 lbs.) Modèle de montage : 200x100, 200x200, 300x200, 300x300, 400x200, 400x300, 400x400, 600x400 Plage verticale : -3° à 15° vers le bas Profil : 45.72mm (1,8 po) MISE EN GARDE! Ce produit est destiné... - Seite 5 6. IMPORTANT! Choisissez le bon endroit pour installer la plaque murale. • Pour des raisons de sécurité, assurez-vous que le mur peut supporter au moins 5 fois le poids de la télévision et du support. Le fabricant n’assume aucune responsabilité pour les dysfonctionnements attribuables à...
-
Seite 6: Spezifikationen
SPEZIFIKATIONEN Bildschirmgröße: 37“ bis 80“Maximalgewicht: 54.4 kg (120 lbs.) Einbauschablone: 200x100, 200x200, 300x200, 300x300, 400x200, 400x300, 400x400, 600x400 Neigungsbereich: -3° bis 15° nach unten Profil: 45.72mm (1.8“) ACHTUNG! Dieses Produkt ist nur für den Innengebrauch! Verwenden Sie die Halterung niemals im Freien! WARNUNGEN 1. - Seite 7 ausreichender Tragfähigkeit verursacht werden. • Die maximale Stärke der Wandverkleidung, wie zum Beispiel Gipskartonplatten, Holzlatten, Kunststoff usw. darf nicht mehr als 16 mm betragen (Wände mit Holzpfosten) oder 10mm (Wände aus Mauerwerk). • Nicht an einer Trockenbauwand installieren. • Überprüfen Sie die Wand, auf der Sie die Halterung montieren wollen, vor Installationsbeginn.
- Seite 8 SPECIFICHE Dimensione schermo: da 37” a 80” Carico massimo: 54,4 kg (120 lbs.) Dima di montaggio: 200x100, 200x200, 300x200, 300x300, 400x200, 400x300, 400x400, 600x400 Gamma di inclinazione: da -3° a 15° verso il basso Profilo: 45.72mm (1.8”) ATTENZIONE! Questo prodotto è solo per uso interno! Non utilizzare mai il supporto all’esterno! AVVERTENTE 1.
- Seite 9 • Lo spessore di copertura della parete massimo; come la parete a secco di gesso, assicella, plastica ecc. non dovrebbe essere superiore a 16 mm (pareti con montane di legno) o 10mm (pareti in muratura). • Non montare su cartongesso solo. •...
-
Seite 10: Especificaciones
ESPECIFICACIONES Tamaño de la pantalla: De 37 in a 80 in Carga máxima: 54.4 kg (120 lb) Patrón de montaje: 200x100, 200x200, 300x200, 300x300, 400x200, 400x300, 400x400, 600x400 Rango de inclinación: De -3 ° a 15 ° hacia abajo Perfil: 45.72mm (1.8 in) PRECAUCIÓN Este producto está... - Seite 11 El fabricante no se responsabiliza de los fallos causados por paredes de resistencia insuficiente. • El espesor máximo que cubre la pared, tales como paneles de yeso, chapas, plástico, etc., no debe ser mayor de 16 mm (paredes de montantes de madera) o 10mm (paredes de mampostería).
-
Seite 12: Im Lieferumfang Enthaltene Teile
(EN) INCLUDED PARTS (FR) PIÈCES INCLUSES (DE) IM LIEFERUMFANG ENTHALTENE TEILE (IT) PARTI INCLUSE (ES) PARTES INCLUIDAS [WP] (EN) Wall Plate, 1 (FR) Plaque murale, 1 (DE) Wandplatte, 1 (IT) Supporto a parete, 1 (ES) Placa de pared, 1 [MA] (EN) Monitor Arms, 2 (FR) Bras de moniteur, 2 [IT]... - Seite 13 (EN) INCLUDED PARTS (FR) PIÈCES INCLUSES M5 x 6mm (DE) IM LIEFERUMFANG ENTHALTENE TEILE (IT) PARTI INCLUSE (ES) PARTES INCLUIDAS [A] M4 x 12mm, 4 [B] M4 x 22mm, 4 INCLUDED PARTS PIÈCES INCLUSES PARTES INCLUIDAS PARTI INCLUSE IM LIEFERUMFANG ENTHALTENE TEILE [J] M6 x 14mm, 4 [K] M6 x 24mm, 4...
-
Seite 14: Herramientas Necesarias
(EN) NECESSARY TOOLS (FR) OUTILLAGE NÉCESSAIRE NECESSARY OUTILLAGE HERRAMIENTAS TOOLS NÉCESSAIRE NECESARIAS (DE) ERFORDERLICHE WERKZEUGE ATTREZZI ERFORDERLICHE (IT) ATTREZZI NECESSARI NECESSARI WERKZEUGE (ES) HERRAMIENTAS NECESARIAS (EN) Phillips-head Screwdriver (EN) Ratchet Set (FR) Tournevis à tête Phillips (FR) Clé à cliquet à douilles (DE) Kreuzschlitzschraubenzieher (DE) Schaltklinke Hilfsmittel (IT) Cacciavite Phillips... - Seite 15 (EN) ATTACHING THE MONITOR ARMS (MA) (FR) FIXER LES BRAS DE MONITEUR (MA) (DE) BEFESTIGUNG DER MONITORARME (MA) (IT) FISSAGGIO DEGLI SNODI DELLO SCHERMO (MA)(ES) CÓMO FIJAR LOS BRAZOS DE LA PANTALLA (MA) (EN) SELECT THE CORRECT SCREW Before beginning, test several of the screws in your hardware kit to find the correct size and length for your television.
- Seite 16 (EN) ATTACHING THE MONITOR ARMS (MA) Attach each Monitor Arm (MA) to the back of your television as shown. Make sure that each Washer (R for M4 screws, or S for M6 or M8 screws) is placed between the Screw and the Monitor Arm.
- Seite 17 (EN) USING SPACERS Use spacers if the Monitor Arms (MA) do not fit firmly against the back of the television, such as when the back of the television is curved, contains larger recessed mounting holes, or some other obstruction is in the way. Spacers also provide additional room for cables. The Monitor Arms must rest securely on the spacers, and should not be loose.
- Seite 18 (EN) DETERMINE HEIGHT LOCATION OF TELEVISION Measure the distance from the bracket holes to the top and bottom of the TV to determine the center mounting position. Measure from the floor up, and make small marks on the wall to help you determine the desired TV height. Using a level, line up the Installation Template [IT] with your pencil markings and tape it into place.
- Seite 19 (EN) Level (FR) Niveau (DE) Nivellierinstrument (IT) Livella (ES) Nivel [IT] 16" (406 MM) (EN) Height to bottom of TV (FR) Hauteur jusqu’au bas du téléviseur (DE) Höhe zum unteren Teil des TVs (IT) Altezza alla parte inferiore del televisore (SP) Altura hasta la parte inferior del TV (EN) FOR MASONRY INSTALLATIONS, SEE PAGE 25.
- Seite 20 (EN) INSTALLING THE WALL MOUNT IN WOOD (FR) POSER LE SUPPORT MURAL SUR DU BOIS (DE) INSTALLATION DER WANDBEFESTIGUNG IN HOLZ (IT) INSTALLAZIONE DEL SUPPORTO A PARETE SU LEGNO (ES) CÓMO INSTALAR EL SOPORTE DE PARED EN MADERA (EN) FIND THE WOOD STUD Using a stud finder, find the exact location of the stud to which you want to attach the wall mount.
- Seite 21 (EN) DRILL PILOT HOLES Follow directions on the Installation Template [IT] carefully. Drill four holes 3" (77mm) deep using a 1/4" (or 6.5mm) size drill bit in the “A”, “B”, “C” and “D” locations noted on the Installation Template. (FR) PERCER LES TROUS GUIDES Suivre avec attention les instructions figurant sur le gabarit de pose [IT].
- Seite 22 (EN) Use lines on Installation Template (IT) to align Template with stud pencil markings. (FR) Se servir des lignes sur le gabarit de pose (IT) pour aligner le gabarit avec repères de montants au crayon. (DE) Verwenden Sie die Linien auf der Installationsschablone (IT), um die Schablone mit Bolzenbleistiftmarkierungen auszurichten.
- Seite 23 (EN) INSTALL THE WALL PLATE [WP] After you have prepared the holes for mounting the Wall Plate [WP], place the Wall Plate over the holes and screw in four Lag Bolts [BT] with M8 Washers [BW] about half way. Use a level to make sure the Wall Plate is level and make any necessary adjustments. Once straight, tighten all of the Lag Bolts completely (do not over tighten!).
- Seite 24 [WP] [BW] [BT] (EN) DO NOT OVER TIGHTEN LAG BOLTS [BT]! (FR) NE PAS FORCER SUR LES TIRE-FOND [BT] ! (DE) ZIEHEN SIE DIE ANKERBOLZEN [BT] NICHT ZU FEST! (IT) NON SERRARE ECCESSIVAMENTE I BULLONI [BT]! (ES) NO AJUSTE DEMASIADO LOS TIRAFONDOS [BT]!
- Seite 25 (EN) MOUNTING TO SOLID CONCRETE OR CINDER BLOCK (FR) POSE SUR DU BÉTON PLEIN OU DES PARPAINGS (DE) MONTAGE AN FESTBETON ODER SCHLACKENBETONBLOCK (IT) MONTAGGIO SU CALCESTRUZZO O BLOCCHI IN CEMENTO (ES) MONTAJE EN CONCRETO SÓLIDO LADRILLOS DE ESCORIAS (ES) After you have determined your desired TV location, Line up the Installation Template [IT] to ensure you will not drill into any mortar joints.
- Seite 26 (EN) Level (FR) Niveau (DE) Nivellierinstrument (IT) Livella (ES) Nivel [IT] DO NOT DRILL INTO MORTAR JOINTS! DRILL HOLES AT LEAST 1" (25.4 MM) FROM THE JOINTS. (EN) Do not drill into mortar joints! Drill holes at least 1" (25.4 mm) from the joints. USE A NEW DRILL BIT TO ENSURE OPTIMUM HOLDING ABILITY.
- Seite 27 (EN) DRILL PILOT HOLES Carefully drill four holes using a 3/8" (or 10 mm) masonry drill bit in the “A”, “B”, “C” and “D” locations noted on the Installation Template. Each hole should be at least 3-3/4" 3-3/4" (95 mm) deep. Do not drill into (95 MM) mortar joints! Drill TOP holes at least 1"...
- Seite 28 (EN) INSERT ANCHORS Remove Template [IT] and insert Anchors [U10]. (FR) ENFONCER LES CHEVILLES Enlever le gabarit [IT] et enfoncer des chevilles d’ancrage [U10]. (DE) DÜBEL EINFÜGEN Entfernen Sie die Schablone [IT] und führen Sie Dübel [U10]. (IT) INSERIRE I TASSELLI Togliere lo schema [IT] e inserire i tasselli [U10].
- Seite 29 (EN) INSTALL THE WALL PLATE [WP] After you have prepared the holes for mounting the Wall Plate [WP], place the Wall Plate over the holes and screw in four Lag Bolts [BT] with M8 Washers [BW] about half way. Use a level to make sure the Wall Plate is level and make any necessary adjustments. Once straight, tighten all of the Lag Bolts completely (do not over tighten!).
- Seite 30 [U10] [WP] [BW] [BT] (EN) DO NOT OVER TIGHTEN LAG BOLTS [BT]! (FR) NE PAS FORCER SUR LES TIRE-FOND [BT] ! (DE) ZIEHEN SIE DIE ANKERBOLZEN [BT] NICHT ZU FEST! (IT) NON SERRARE ECCESSIVAMENTE I BULLONI [BT]! (ES) NO AJUSTE DEMASIADO LOS TIRAFONDOS [BT]!
- Seite 31 (EN) MOUNTING THE TELEVISION (FR) POSE DU TÉLÉVISEUR (DE) MONTAGE DES FERNSEHERS (IT) MONTAGGIO DEL TELEVISORE (ES) CÓMO INSTALAR EL TELEVISOR (EN) UNDERSTANDING THE LOCKING MECHANISM Your wall mount has a unique feature that enables you to easily lock the Monitor Arms [MA] onto the Wall Plate [WP] so that your TV can’t be removed.
- Seite 32 (EN) MOUNT THE TELEVISION Before you attempt to attach the TV to the wall plate (WP), make sure the monitor arms (MA) are parallel to the television, and the adjustment knob is tightened. Get an assistant to help you lift the TV and guide the Monitor Arms [MA] onto the Wall Plate [WP], as shown. After the arms are engaged on the top rail of the plate, push in from the bottom.
- Seite 33 (IT) MONTAGGIO DEL TELEVISORE Prima di fissare il televisore al supporto a parete (WP), verificare che gli snodi dello scher- mo (MA) siano paralleli al televisore, e la manopola di regolazione viene serrato. Ottenere un assistente per aiutarvi a sollevare il televisore e guidare il monitor arms [MA] sulla piastra a parete [WP], come mostrato.
- Seite 34 [MA] [WP] (EN) Exercise caution when removing the television from the mount to avoid equipment damage or personal injury. (FR) Lors du décrochage du téléviseur, faire preuve de précaution pour éviter les dommages matériels et corporels. (DE) Gehen Sie vorsichtig bei der Abnahme des TVs von der Befestigung um, um das Gerät nicht zu beschädigen oder um keine Körperverletzungen zu verursachen.
- Seite 35 (EN) ADJUSTING THE TILT To adjust the tilt, loosen the tilt mechanism by hand or using a screwdriver as shown. Do not completely loosen the screw. Adjust the TV to the desired position, and tighten the tilt screw again by hand or using the screwdriver. (FR) AJUSTER LE SUPPORT Pour régler l’inclinaison, desserrer le mécanisme d’inclinaison à...
-
Seite 36: Warranty Information
Warranty Information To ob tain a c opy o f t he warrant y f or t his p ro duc t: Visit amazon.com/AmazonBasics/Warranty — o r — Contact Customer Service at 1-866-216-1072 Feedback Love it? Hate it? Let us know wit h a cus tomer review. -
Seite 37: Informations Sur La Garantie
Vous adorez? Vous détestez? Laissez-no u s v otre av is . AmazonBasics s’engage à fournir des produits qui prennent en compte l’avis de la clientèle et répondent aux attentes élevées qu’elle formule. Nous vous encourageons à nous laisser un commentaire afin de nous faire part de votre expérience du produit. -
Seite 38: Garantie
Sa gen S ie es u ns mi t e in er Kun de n re z e n s i on . AmazonBasics möchte Produkte anbieten, die den hohen Erwartungen unserer Kunden gerecht werden. Schreiben Sie eine Rezension und erzählen Sie uns von Ihren Erfahrungen mit dem Produkt. -
Seite 39: Informazioni Sulla Garanzia
P er ot t e n e re u na cop i a d el l a gar a n z i a pe r qu e s to pro do tt o : Visitare amazon.com/AmazonBasics/Warranty — op pu re —... -
Seite 40: Información Sobre La Garantía
Información sobre la garantía Par a ob te ne r u na c o pi a de l a g ar ant ía de este produ cto: Visita amazon.com/AmazonBasics/Warranty — o — ponte en contacto con el servicio de Atención al Cliente a través del +1-866-216-1072 Opinión... - Seite 44 a m a z o n . c o m / A m a z o n B a s i c s M A D E I N C H I N A R E V. 0 9 2 9 1 6...