Märklin BR 96 Gebrauchsanleitung
Vorschau ausblenden
Andere Handbücher für BR 96:
- Bedienungsanleitung (8 Seiten) ,
- Gebrauchsanleitung (45 Seiten)
Inhaltsverzeichnis

Verwandte Anleitungen für Märklin BR 96


Inhaltszusammenfassung für Märklin BR 96
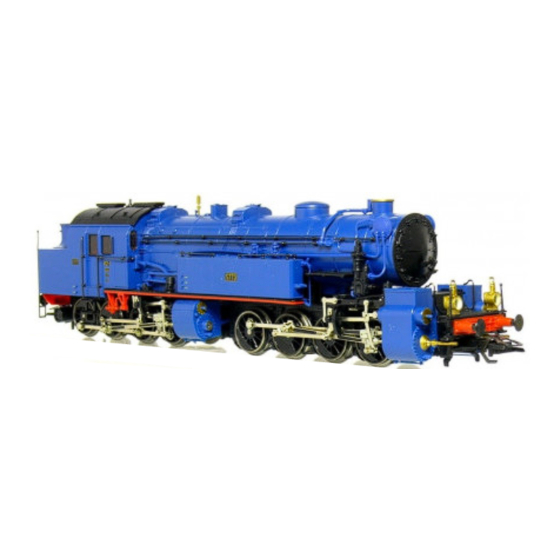
- Seite 1 Modell der BR 96 37966...
- Seite 2 Information zum Vorbild Information about the Prototype Auf drei Steilrampen im Bereich der Bayerischen At the start of this century the locomotives in use on Staatsbahn waren Anfang dieses Jahrhunderts die three steeply graded routes in the area administered by eingesetzten Lokomotiven den Anforderungen bezüglich the Bavarian State Railroad could no longer meet the der erforderlichen Zugleistung nicht mehr gewachsen.
-
Seite 3: Informations Concernant La Locomotive Réele
96 in het goederen- dans le trafic de voyageurs et dans le trafic de archandi- en personenvervoer ingezt. Enkele lokomotieven waren ses sous l’apellation BR 96. Quelques locomotives étaient ook na 1945nog in gebruik in Beieren. encore en service en Bavière près 1945. -
Seite 4: Sicherheitshinweise
• Mfx-Technologie für Mobile Station / nung von 220 V bzw. 110 V einsetzen. -Central Station. • Die Lok darf nur aus einer Leistungsquelle gleich- • Name ab Werk: BR 96 006 zeitig versorgt werden. • Veränderbare Anfahrverzögerung. • Beachten Sie unbedingt die Sicherheitshinweise in •... - Seite 5 Schaltbare Funktionen systems central station 60212 STOP mobile station Spitzensignal function + off Licht-Taste Taste f0 Geräusch: Dampftriebwerk — Taste 3 Taste f2 Geräusch: Lokpfeife — Taste 4 Taste f3 — Taste 2 Taste f4 Bremsenquietschen aus — — Taste 8 Taste f5 Geräusch: Kohle schaufeln —...
- Seite 6 220 volts or 110 volts • Mfx technology for the Mobile Station / Central Station. • This locomotive must never be supplied with power • Name set at the factory: BR 96 006 from more than one transformer. • Adjustable acceleration.
- Seite 7 Controllable Functions systems central station 60212 STOP mobile station Headlights Headlight button Button f0 function + off Locomotive operating sounds — Button 3 Button f2 Locomotive whistle — Button 4 Button f3 — Button 2 Button f4 Squealing brakes off —...
- Seite 8 220 V, respectivement 110 V. Central Station. • La locomotive ne peut être alimentée en courant • Nom en codee en usine: BR 96 006 que par une seule source de courant. • Temporisation d’accélération réglable.
-
Seite 9: Fonctions Commutables
Fonctions commutables systems central station 60212 STOP mobile station Touche éclairage Touche f0 Fanal function + off marche — Touche 3 Touche f2 Bruit de roulement — Touche 4 Touche f3 Sifflet locomotive — Touche 2 Touche f4 — — Touche 8 Touche f5 Grincement de freins désactivé... -
Seite 10: Veiligheidsvoorschriften
220 V dan wel 110 V gebruiken. Central Station. • De loc mag niet vanuit meer dan één stroomvoorzi- • Naam af de fabriek: BR 96 006 ening gelijktijdig gevoed worden. • Instelbare optrekvertraging. • Lees ook aandachtig de veiligheidsvoorschriften in •... -
Seite 11: Verlichtingstoets
Schakelbare functies systems central station 60212 STOP mobile station aan 1) Frontverlichting function + off Verlichtingstoets Toets f0 Rijgeluiden — Toets 3 Toets f2 Geluid locfluit 1 — Toets 4 Toets f3 — Toets 2 Toets f4 Piepende remmen uit —... - Seite 12 220 V o bien 110 V. Station. • La locomotora no deberá recibir corriente eléctrica • Nombre de fabrica: BR 96 006 mas que de un solo punto de abasto. • Arranque lento variable. • Observe bajo todos los conceptos, las medidas de •...
-
Seite 13: Funciones Posibles
Funciones posibles systems central station 60212 STOP mobile station encendido 1) Faros frontales function + off Tecla de luz Tecla f0 Ruido de marcha — Tecla 3 Tecla f2 Silbido de la locomotora — Tecla 4 Tecla f3 — Tecla 2 Tecla f4 Desconectar chirrido de los frenos —... - Seite 14 • Tecnologia mfx per Mobile Station / Central Station. tensione di rete di 220 V o rispettivamente 110 V. • Nome de fabrica: BR 96 006 • La locomotiva non deve venire alimentata nello • Ritardo di avviamento modifi cabile.
- Seite 15 systems Funzioni commutabili central station 60212 STOP mobile station accesa 1) Illuminazione di testa function + off Tasto illuminazione Tasto f0 Rumore di marcia — Tasto 3 Tasto f2 Fischio da locomotiva — Tasto 4 Tasto f3 — Tasto 2 Tasto f4 Stridore dei freni escluso —...
- Seite 16 220 V nätspänning till 110 V - eller tvärt om. • Mfx-teknologi för Mobile Station / Central Station. • Loket får inte samtidigt försörjas av mer än en • Namn fran tillverkaren: BR 96 006 kraftkälla. • Accelerationsfördröjning kan ändras.
- Seite 17 Kopplingsbara funktioner central systems station 60212 STOP mobile station till 1) Frontstrålkastare function + off Belysningsknapp Knapp f0 Körljud — Knapp 3 Knapp f2 Lokvissla — Knapp 4 Knapp f3 — Knapp 2 Knapp f4 Bromsgnissel, från — — Knapp 8 Knapp f5 Ljud: Kol skyfflas —...
- Seite 18 Anvend aldrig transformato- • Mfx-teknologi til Mobile Station / Central Station. rer der er beregnet til en netspænding på • Navn ab fabrik: BR 96 006 220 V eller 110. • Indstillelig opstartforsinkelse. • Lokomotivet må ikke forsynes fra mere end én •...
- Seite 19 Styrbare funktioner systems central station 60212 STOP mobile station Frontbelysning function + off Belysningsknap Knap f0 Kørelyd — Knap 3 Knap f2 Lokomotivfløjte — Knap 4 Knap f3 — Knap 2 Knap f4 Pibende bremser fra — — Knap 8 Knap f5 Lyd: Skovling av kul —...
- Seite 20 Lokparameter einstellen mit der Control Unit Setting Locomotive Parameters with the Control Unit 1. Voraussetzung: Aufbau wie Grafik S. 24. 1. Requirement: Setup as in diagram on page 24. Only Nur die zu verändernde Lok ist auf dem Gleis. the locomotive to be changed can be on the track. 2.
- Seite 21 Réglage des paramètres de la loco avec la Control Unit Locparameters instellen met de Control Unit 1. Condition: Montage comme sur illustration en page 1. Voorwaarde: opbouw zoals tekening op pagina 24. 24. Seule la loco à modifier peut se trouver sur la Alleen de loc die gewijzigd moet worden op de rails.
- Seite 22 Parámetros de la locomotora configurables con el Impostazione dei parametri della locomotiva con la Control Unit Control Unit 1. Condición previa: montaje como el gráfico pág. 24. 1. Predisposizione: assetto come da schema a pag. 24. En la vía debe encontrarse solamente la locomoto- Soltanto la locomotiva da modificare si trova sul binario.
- Seite 23 Lokparametrar ställs in med Control Unit Indstilling af lokomotivparametre med Control Unit 1. Förutsättning: Montering som visas enligt grafik på 1. Forudsætning: Opbygning som på grafikken s. 24. s. 24. Endast det lok som ska ändras ska finnas på Kun det lokomotiv, der skal ændres, er på sporet. spåret.
- Seite 24 Lokparameter mit Control Unit ändern. Changing Locomotive Parameters with the Control Unit. Modification des paramètres avec la Control Unit. Locparameter met de Control Unit. Modificar los parámetros de la locomotora con el Control Unit. Modifica dei parametri della locomotiva con la Control Unit. Lokparametrar ändras med Control Unit.
- Seite 25 Lokparameter verändern mit der Control Unit 6021. Changing Locomotive Parameters with the 6021 Control Unit. Modification des paramètres de la locomotive avec la Control Unit 6021. Locparameter wijzigen met de Control Unit 6021. Modificar los parámetros de la locomotora con el Control Unit 6021. Modifica dei parametri della locomotiva con la Control Unit 6021.
- Seite 26 Parameter • Parameter • Paramètre • Parameter • Register • Register Wert • Value • Valeur • Parámetro • Parametro • Parameter • Parameter Registre • Register Waarde • Valor Registro • Registro Valore • Värde • Værdi Register • Register Adresse •...
- Seite 27 Kolbenstangenschutzrohr einsetzen Übergangsgleis / Steigung und Bogenanfang How to install the cylinder rot protector Transfer rail / gradient and start of bend Insérer le tube de protection de la lige de piston Rail de transition / montée et début de courbe Beschermbuis cilinderstang plaatsen Overgangsrail / Steiging en boogbegin Colocar el tubo protector de la biela...
- Seite 28 Gehäuse abnehmen Removing the body Enlever le boîtier Kap afnemen Retirar la carcasa Smontare il mantello Kåpan tas av Overdel tages af...
- Seite 29 Motor-Bürsten auswechseln Changing motor brushes Changer les balais du moteur Koolborstels vervangen Cambio de las escobillas Sostituzione delle spazzole del motore Motorborstar byts Motorkul udskiftes 601 460...
- Seite 30 Schmierung nach etwa 40 Betriebsstunden Graissage après environ 40 heures de marche Nur sparsam ölen (max. 1 Tropfen). Lubrifiez en très petite quantité (1 goutte max.). Lubrication after approximately 40 hours of Smering na ca. 40 bedrijfsuren Oil sparingly (max. 1 drop). Slechts spaarzaam oliën (max.
- Seite 31 Engrase a las 40 horas de funcionamiento Smörjning efter ca. 40 driftstimmar Engrasar poco (máx. 1 gota). Smörj endast sparsamt (max 1 droppe). Lubrificazione dopo circa 40 ore di funzionamento Smøring efter ca. 40 driftstimer Si lubrifichi soltanto con parsimonia (al max. 1 goccia). Giv kun lidt olie (maks.
- Seite 32 Glühlampen auswechseln Changing light bulbs Changer les ampoules Gloeilamp vervangen Sustituir la bombilla Cambiare la lampadina Glödlampor byts Elpærer skiftes 610080...
- Seite 33 Haftreifen auswechseln Changing traction tires Changer les bandages d’adhérence Antislipbanden vervangen Cambio de los aros de adherencia Sostituzione delle cerchiature di aderenza Slirskydd byts Friktionsringe udskiftes 7153 2,5 mm...
- Seite 34 Kupplung austauschen Exchanging the close coupler Remplacement de l’attelage court Omwisselen van de kortkoppeling Enganches cortos Sostituzione del gancio corto Utbyte av kortkoppel Udskiftning af kortkoblingen 701 630...
- Seite 35 Schleifer auswechseln Changing the pickup shoe Changer le frotteur Vervangen van het sleepcontact Cambio del patín toma-corriente Sostituzione del pattino Byt släpsko Udskiftning af slæbesko 206 370 2 mm...
- Seite 36 Gehäuse aufsetzen Replace body Remontage de la chaudière et de l‘abri Kap opzetten Poner la carcasa Applicare del mantello Sätt lokkàpan på plats Aftages sættes på...
- Seite 38 1 Aufbau 231 867 26 Decoder 132 832 27 Leiterplatte Schnittstelle 611 626 2 Führerhaus 231 869 28 Feldmagnet 389 000 3 Glasteile 106 041 29 Anker 386 820 4 Pfeife 702 360 30 Motorschild 386 940 5 Dach 210 473 31 Motorbürsten 601 460 6 Laterne...
- Seite 39 57 Druckfeder 214 330 58 Treibradsatz mit Haftreifen 445 700 59 Haftreifen 7 153 60 Treibradsatz 445 600 61 Treibradsatz 445 650 62 Treibradsatz 445 690 63 Bremsattrappe vorne 490 000 64 Senkschraube 756 100 65 Distanzring 206 262 66 Sechskantmutter 499 830 67 Kuppelstange 215 456...
- Seite 40 This device complies with Part 15 of the FCC Rules. Operation is subject to the following two conditions: (1) This device may not cause harmful interference, and (2) this device must accept any interference received, including interfe- rence that may cause undesired operation. Gebr.