Herunterladen Inhalt Inhalt Diese Seite drucken
Inhaltsverzeichnis

Werbung

Verfügbare Sprachen
  • DE

Verfügbare Sprachen

  • DEUTSCH, seite 1
NUMAN Mini One
Benutzerhandbuch
www.numanaudio.com

Werbung

Inhaltsverzeichnis
loading

Inhaltszusammenfassung für Numan Mini One

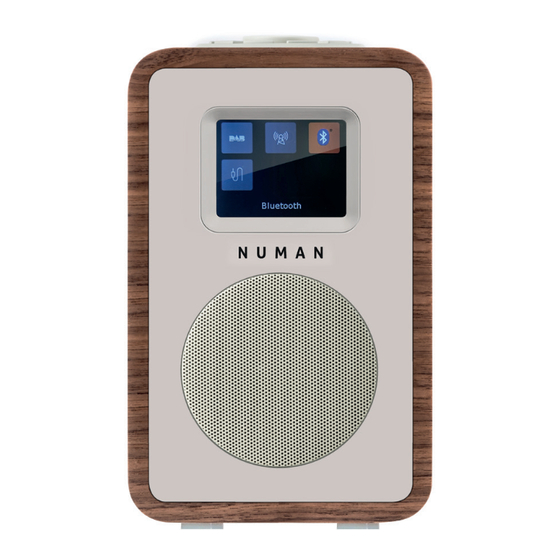
  • Seite 1 NUMAN Mini One Benutzerhandbuch www.numanaudio.com...
  • Seite 2 Wir freuen uns, dass Sie sich für ein NUMAN-Produkt entschieden haben. Wir wünschen Ihnen damit viel Freude und Musikgenuss! Bitte nehmen Sie sich ein wenig Zeit für diese Anleitung, um alle Möglichkeiten und Funktionen Ihres neuen Gerätes kennenzulernen. Bitte bewahren Sie diese Anleitung an einem sicheren Ort auf, um später noch einmal hineinschauen zu können.
  • Seite 3: Inhaltsverzeichnis

    INHALT Technische Daten und Lieferumfang ....................4 Sicherheitshinweise ..........................5 Geräteübersicht ............................ 7 Bildschirmanzeigen ..........................9 Inbetriebnahme und Grundeinstellungen ..................12 DAB Radio-Modus ..........................14 FM Radio-Modus ..........................20 AUX und BT-Modus ..........................22 Alarme, Schlummern und Sleeptimer ....................23 Systemeinstellungen .........................
  • Seite 4: Technische Daten Und Lieferumfang

    TFT-Display Funktionen und Anschlüsse: FM mit RDS, Bluetooth, DAB | DAB+, AUX LIEFERUMFANG 1x NUMAN Mini One 1x Netzteil DC 9 V 1.5 A 1x Benutzerhandbuch WICHTIGER HINWEIS ZUM LADEN DER AKKUS Um die Akkus aufladen zu können, stellen Sie den Schalter, der sich im Batteriefach befindet auf ON. Stellen Sie den Schalter auf OFF, wenn Sie die Akkus längere Zeit nicht benutzen.
  • Seite 5: Sicherheitshinweise

    SICHERHEITSHINWEISE Lesen Sie sich alle Hinweise vor der Benutzung sorgfältig durch und bewahren Sie die Bedienungsanleitung zum Nachschlagen an einem sicheren Ort auf. • Benutzen Sie das Radio nicht in der Nähe von Wasser oder Dampf. Achten Sie darauf, dass kein Wasser auf das Gerät tropft und Stellen Sie keine mit Wasser gefüllten Gegenstände, wie Vasen darauf ab.
  • Seite 6 • Verlegen Sie das Netzkabel so, dass keiner darauf tritt und es nicht abgeknickt wird, insbesondere am Stecker und an der Stelle, an der das Kabel aus dem Gerät kommt. • Wenn das Gerät kaputt ist lassen Sie es reparieren. Versuchen Sie nicht das Gerät selbst zu reparieren. Das Öffnen oder Entfernen von Abdeckungen führt dazu, dass Sie sich gefährlicher Spannung oder anderen Gefahren aussetzen.
  • Seite 7: So Benutzen Sie Den Drehregler Oben Am Ge

    Netzanschluss | DC Eingang (9 V) Mini-USB-Anschluss für Software Update (nur Servicepersonal) AUX-Anschluss Line-out-Anschluss Kopfhöreranschluss SO BENUTZEN SIE DEN DREHREGLER OBEN AM GE- HÄUSE Drücken Sie kurz am Regler, um das Gerät einzuschal- ten. Drehen Sie am Regler, um durch ein Menü oder eine Liste zu blättern.
  • Seite 8 Drehregler: Auswahl | Lautstärke | Schlummern | Stummschaltung | Ein- und Ausschalten Sleeptimer einstellen Musikquelle auswählen Alarmfunktion | Wecker Weiterführende Informationen Menü | Im Menü einen Schritt zurück Sender speichern Sendersuche | Zurück-Taste Sendersuche | Vorwärts-Taste Abspielen | Pause (in verschiedenen Modi) Steuerung am Gehäuse (oben) Display ein- und ausschalten...
  • Seite 9: Bildschirmanzeigen

    Standby: Der Standby-Bildschirm zeigt die Zeit das Datum und aktive Alarme an. Modus: Wenn Sie mit der SOURCE-Taste durch die Modi schalten, zeigt das NUMAN Mini One einen separa- ten Bildschirm für jeden Modus an. Nach einer Sekunde wird der ausgewählte Modus gestartet und das Gerät versucht den zuletzt eingestellten Sender bzw.
  • Seite 10 MENÜS Das NUMAN Mini One verfügt über 3 Arten von Menüs. Benutzen Sie den Drehregler und wählen Sie eine Option aus. Ein Balken an der Seite zeigt an, dass unter den sichtbaren weitere Auswahlmöglichkeiten zur Verfügung stehen.
  • Seite 11 Zusätzlich hat jeder Modus 2 finale Optionen: Systemeinstellungen > Hauptmenü > Das Symbol [>] zeigt, dass ein Untermenü vorhanden ist. Die Systemeinstellungen ermöglichen Zugriff auf allen wichtigen Systemeinstellungen wie Zeit, Sprache und Software-Update. Menüs mit mehr Optionen, die nicht auf einen Bildschirm passen, haben einen Balken am rechten Seitenrand. Das Hauptmenü...
  • Seite 12: Inbetriebnahme Und Grundeinstellungen

    INBETRIEBNAHME UND GRUNDEINSTELLUNGEN SCHNELLSTART Das NUMAN Mini One lässt sich ganz einfach in Betrieb nehmen. Um DAB oder FM Radio zu hören, brauchen Sie lediglich eine Steckdose (220 V). 1. Stellen Sie das Gerät auf einen ebenen Untergrund. 2. Ziehen Sie die Antenne aus.
  • Seite 13: Automatische Zeiteinstellung

    AUTOMATISCHE ZEITEINSTELLUNG Beim Auto-Update werden Daten über DAB, FM oder das Internet gesendet. Das Update funktioniert nur, wenn sich das Radio im entsprechenden Modus befindet. Wählen Sie daher einen Modus, den Sie regelmäßig benut- zen (z. B. den FM-Modus). MANUELLE ZEITEINSTELLUNG Falls sie „No update“...
  • Seite 14: Sender Suchen

    DAB RADIO-MODUS Im DAB-Modus empfängt das Radio DAB und DAB+ und zeigt Informationen zum Sender und zum abgespielten Titel an. m den DAB-Modus aufzurufen, drücken Sie auf SOURCE, bis der Bildschirm DAB anzeigt oder wählen Sie: MENU > Main menu > DAB. SENDER SUCHEN Falls Sie das Radio zum ersten Mal benutzen oder die Senderliste leer ist, führt das Radio automatisch einen kompletten Sendersuchlauf aus und sucht nach verfügbaren Sender.
  • Seite 15: Sender Speichern Und Aufrufen

    Um unerwünschte Sender mit schlechtem Empfang aus der Liste zu löschen wählen Sie: Menu > Prune invalid. SENDER SPEICHERN UND AUFRUFEN Auf dem NUMAN Mini One lassen sich bis zu 10 Lieblingssender speichern. Sender speichern: Halten Sie die PRESET-Taste gedrückt, bis das Display die Liste der Speicherplätze 1-10 an- zeigt, die entweder leer oder mit einem Sender belegt sind.
  • Seite 16: Sender Manuell Einstellen

    SENDER MANUELL EINSTELLEN Neben dem automatischen Scan können Sie bestimmte Sender und Frequenzen auch manuell suchen. Das kann sinnvoll sein, wenn Sie die Antenne nachjustieren und die beste Empfangsfrequenz herausfinden möchten oder einen speziellen Sender suchen. Manuelle Sendereinstellung: Drücken Sie MENU >...
  • Seite 17: Information Zum Aktuell Gespielten Titel Oder Sender

    Wenn ein Sender | Frequenz ausgewählt ist, scannt das NUMAN Mini One auch nach allen DAB-Sender auf der gewählten Frequenz und aktualisiert die Senderliste mit den neu gefundenen Sendern. Um einen der gefundenen Sender zu hören, kehren Sie auf den Hauptbildschirm zurück und wählen Sie die gewünschte Station aus der Liste aus.
  • Seite 18 Vollbild-Ansicht des Slidshow-Bildschirms: Normale Ansicht:...
  • Seite 19 Um weitere Informationen aufzurufen, drücken Sie auf INFO. Jedes Mal wenn Sie die Taste drücken wird eine weitere Information in der folgenden Reihenfolge angezeigt: DLS-Text > DL PLus Informationen (werden nur dargestellt wenn Sie vom Sender übertragen werden) > Programmtyp > Informationen zum Interpreten > Sender- nummer | Frequenz >...
  • Seite 20: Sender Speichern

    Scan bei jedem Sender oder nur bei Sendern mit einem starken Signal stoppt. Alternativ können Sie den Drehregler am Gerät nutzen, um manuell in 50 kHz-Schritten nach Sendern zu suchen. SENDER SPEICHERN Das NUMAN One Mini speichert bis zu 10 Sender. Das Speichern der Sender funktioniert genauso wie bereits im DAB Radio-Modus beschrieben.
  • Seite 21: Informationen Zum Aktuell Gespielten Titel

    INFORMATIONEN ZUM AKTUELL GESPIELTEN TITEL Während Sie einen FM-Sender abspielen zeigt der Bildschirm, sofern ein RDS-Signal übermittelt wird, den Sen- dernamen und Informationen zur Sendung auf dem Bildschirm an. Falls kein RDS-Signal übermittelt wird, zeigt der Bildschirm die aktuelle Frequenz an. Um weitere Informationen aufzurufen, drücken Sie auf INFO.
  • Seite 22: Aux Und Bt-Modus

    • Drücken Sie SOURCE bis AUX auf dem Bildschirm erscheint. • Passen Sie die Lautstärke am NUMAN Mini One und, falls nötig, am externen Gerät an. Der Bildschirm zeigt an, dass das NUMAN Mini One mit einem externen Gerät verbunden ist.
  • Seite 23: Alarme, Schlummern Und Sleeptimer

    ALARME, SCHLUMMERN UND SLEEPTIMER Neben Uhr und Kalender bietet das Gerät zwei unterschiedlichen Alarmen mit Schlummerfunktion. Daneben kann ein Sleeptimer eingestellt werden, der das Gerät nach einer bestimmten Zeit ausschaltet. Als Signal kann für beide Alarme entweder der Summer oder eine Audioquelle gewählt werden. Die Einstellungen für Uhr, Kalender, Alarme, Schlummerfunktion und Sleeptimer sind über das Systemeinstel- lungs-Menü...
  • Seite 24: Alarm Einstellen

    ALARM EINSTELLEN Drücken Sie auf Alarm und benutzen Sie den Drehregler, um Alarm 1 oder 2 auszuwählen. Drücken Sie auf den Regler, um die Alarmeinstellung zu bestätigen. Um die Alarmeinstellung zu verlassen, drücken Sie auf MENU. Andernfalls wechselt die Alarm-Ansicht nach einer gewissen Zeit automatisch wieder zum Hauptbildschirm. Das Alarm-Menü...
  • Seite 25 Sender oder einen der gespeicherten Sender auszuwählen. • Dauer - 15 | 30 | 45 | 60 | 90 | 120 Minuten. Falls der Alarm nicht ausgeschaltet wird, wechselt das NUMAN One Mini nach dieser Zeit automatisch in den Standby-Modus.
  • Seite 26: Sleep Timer

    SLEEPTIMER Um den Sleeptimer einzustellen während das Gerät eingeschaltet ist, drücken Sie auf SLEEP. Wählen Sie dann eine der folgenden Optionen: Aus, 15, 30, 45, 60 Minuten. Benutzen Sie dazu den Drehregler oder drücken Sie mehrmals hintereinander auf SLEEP. Drücken Sie dann auf den Regler, um die Auswahl zu bestätigen. Sobald Sie die Auswahl bestätigt haben kehrt das Display wieder zum Hauptbildschirm zurück.
  • Seite 27: Navigieren In Den Menüs

    SYSTEMEINSTELLUNGEN Über das Systemeinstellungs-Menü lassen sich diverse Einstellungen vornehmen, mit denen sie Ihr NUMAN One Mini noch besser an Ihre persönlichen Vorlieben anpassen können. Um das Menü zu öffnen wählen Sie SYSTEM > System Settings > und wählen Sie dann eine der Optionen, die im folgenden noch genauer erläutert werden: •...
  • Seite 28: Audio Output

    Drehregler drehen: Durch Drehen des Drehreglers können Sie vorwärts oder rückwärts durch das aktuelle Menü oder die Einstellungen scrollen. BACK-Taste drücken: Durch Drücken der BACK-Taste gelangen Sie in das übergeordnete Menü des aktuellen Untermenüs oder der Einstellung. MENU-Taste drücken: Um zum Hauptbildschirm zurückzukehren. AUDIO OUTPUT Ermöglicht die Auswahl, ob der Ton direkt vom Gerät ausgegeben wird oder über den SPDEIF-Ausgang an der Rückseite des Geräts.
  • Seite 29: Zeit Und Datum Einstellen

    Höhen: Benutzen Sie den Drehregler, um einen Wert zwischen -7 und +7 einzustellen. Bass: Benutzen Sie den Drehregler, um einen Wert zwischen -7 und +7 einzustellen. Verstärkung: ON oder OFF. Wenn ON gewählt wurde, werden die Höhen und Tiefen für einen satteren Klang verstärkt.
  • Seite 30 BACKLIGHT Das Gerät verfügt über eine Hintergrundbeleuchtung mit 3 Helligkeitseinstellungen und einem einstellbaren Timer, nach dessen Ablauf das Licht heruntergedimmt wird. • Timer: Licht On | 10 | 20 | 30 | 45 | 60 | 90 | 120 | 180 •...
  • Seite 31: Fehlermeldungen Und Fehlerbehebung

    FEHLERMELDUNGEN UND FEHLERBEHEBUNG FEHLERMELDUNGEN IM DAB-MODUS: Fehlermeldung Beschreibung Service not Das Radio hat keinen DAB-Empfang. available (DAB) Signal Error Das DAB-Signal wurde unterbrochen No DAB Station Der aufgelistete Sender wurde nicht gefunden. (No Name) Der aktuelle Sender übermittelt keinen Namen. No stations found Es sind keine DAB Sender verfügbar.
  • Seite 32: Allgemeine Fehlermeldungen

    ALLGEMEINE FEHLERMELDUNGEN: Fehlermeldung Beschreibung Update failed Kein Softwareupgrade möglich. Time is not set Es ist aktuell keine Zeit eingestellt. Time is not saved Alle Zeiteinstellungen werden verloren gehen. Alarm not saved Alle Alarmeinstellungen werden verloren gehen. Invalid date Das eingegebene Datum ist ungültig. FEHLERSUCHE UND FEHLERBEHEBUNUG Problem Ursache...
  • Seite 33: Entsorgung Und Konformitätserklärung

    ENTSORGUNG UND KONFORMITÄTSERKLÄRUNG HINWEISE ZUR ENTSORGUNG Befi ndet sich die linke Abbildung (durchgestrichene Mülltonne auf Rädern) auf dem Produkt, gilt die Europäische Richtlinie 2002|96|EG. Diese Produkte dürfen nicht mit dem normalen Hausmüll entsorgt werden. Informieren Sie sich über die örtlichen Regelungen zur getrennten Sammlung elektrischer und elektronischer Gerätschaften.
  • Seite 34 We are very pleased you’ve chosen to purchase a NUMAN product. A spectrum of pure sound, fun and satisfaction! Before using your product, please take some time to read through the user manual to become familiar with all the great features this product has to offer.
  • Seite 35 CONTENTS Technical Data and Packing Content ..................... 36 Safety Instructions ..........................37 Product Description .......................... 39 Screens .............................. 41 Use and Operation ..........................44 DAB Radio Mode ..........................46 FM Radio Mode ..........................52 AUX und BT Mode ..........................54 Alarms, Snooze and Sleeptimer .......................
  • Seite 36: Technical Data And Packing Content

    TFT Display Functions and connections: FM with RDS, Bluetooth, DAB | DAB+, AUX PACKING CONTENT 1x NUMAN Mini One 1x Power adapter DC 9 V 1.5 A 1x Use manual IMPORTANT HINT ON CHANGING THE BATTERIES To charge the battery you may need to put On the switch located inside the battery compartment. Put the switch to OFF if not used the battery for a long time).
  • Seite 37: Safety Instructions

    SAFETY INSTRUCTIONS Read all the safety and operating instructions carefully and retain them for future reference. • To reduce the risk of fire or electric shock, do not expose this apparatus to rain or moisture. The apparatus shall not be exposed to dripping or splashing and that objects filled with liquids, such as vases, shall not be placed on apparatus.
  • Seite 38 • Do not install near any heat sources, such as radiators, heat registers, stoves or other appliances that produce heat. • Protect the power cord from being walked on or pinched, particularly at plugs and the point where they exit from the product.
  • Seite 39: Product Description

    DC power in (9 V) Mini USB socket for software update (only for service) Aux in (to connect external media like iPod) Line out (to connect to an external amplifier) Headphones out HOW TO USE THE SCROLL (TOP) Turn to scroll through a menu or station list. The chosen option is highlighted in reverse text (dark characters on a white background).
  • Seite 40 Select | Volume | Mute | Snooze | Power Sleeptimer Changing the source Alarm 1 or 2 View more information Menu | Menu back Save the favorite station Tune- | Previous Tune+ | Next Select Play | Pause (in different mode) Controls on the cover (top) Display on/off...
  • Seite 41: Screens

    After one second, NUMAN Mini One enters the selected mode and tries to start playing the last station or track that was playing in that mode. If this is not possible, NUMAN Mini One tries to connect to the selected...
  • Seite 42 MENUS NUMAN Mini One has basically three types of menu. Use the Select control to step through and select options. A scroll bar on the right of the screen shows if there are further options above or below those visible.
  • Seite 43 In addition, each mode menu has two final options: System settings > Main menu > The [>] indicates options leading to further menus. The System settings menu allows access to system settings and information such as time, language and soft- ware update.
  • Seite 44: 12/24 Hour Display

    USE AND OPERATION QUICKSTART GUIDE NUMAN Mini One is easy to use. To play DAB or FM radio, all you need is a power source (a 220-240 V mains supply). 1. Place NUMAN Mini One on a suitable shelf or table.
  • Seite 45: Auto-Update

    AUTO-UPDATE Auto-update works with data sent over DAB, FM. The clock is only updated when in a corresponding mode, so it is best to select a mode you use regularly. MANUAL SET If you set No update, the wizard now prompts you to set the time and date manually. The date and time are displayed as dd-mm-yyyy and hh:mm.
  • Seite 46: Dab Radio Mode

    SCANNING FO STATIONS The first time you use NUMAN Mini One, or if the station list is empty, the radio automatically performs a full scan to see what stations are available. You may also need to start a scan manually to update the list of sta- tions for one of the following reasons: •...
  • Seite 47 To remove stations that are listed but unavailable select Menu > Prune invalid. PRESETS NUMAN Mini One has 10 preset stores for DAB stations. To store a station in a preset store: Press and hold preset until the display shows a list of the Preset stores numbered 1 to 10 these are displayed as either Empty or with the currently stored station name.
  • Seite 48: Manual Tune

    MANUAL TUNE As well as the normal method of scanning, you can also manually tune to a particular channel / frequency. This can be useful for adjusting your antenna to achieve the best possible reception and scanning a particular chan- nel to update the station list.
  • Seite 49: Now Playing Information

    When a channel/frequency is selected NUMAN Mini One also scans for any DAB stations on the selected frequency and updates the station list with any new stations found. To listen to any stations found, return to the Now playing screen and select the required station from the station list as normal.
  • Seite 50 Full screen version of the slideshow image: Normal now playing screen:...
  • Seite 51: Dynamic Range Compression (Drc)

    To view further information Press Info. Each time you press Info , the next set of information is displayed, cycling through: DLS text, DL Plus informa- tion (this is only displayed if broadcast by the station), programme type, ensemble name, channel number/fre- quency, signal strength, power status (Mains/Battery), and date.
  • Seite 52: Selecting Stations

    Press Select .NUMAN Mini One scans up through the FM band frequencies, showing the current frequency on the screen display. A scan stops when a signal is found. NUMAN Mini One can be set to stop at each station or only at stations with a strong signal.
  • Seite 53: Scan Settings

    NOW PLAYING INFORMATION While FM radio is playing, the screen shows its frequency, or if RDS information is available, station name and any further ‘RadioText’ information. If no information is available, just the frequency and a No RadioText mes- sage is shown. To view further information about the broadcast press Info.
  • Seite 54: Aux Und Bt Mode

    Aux In mode plays audio from an external source such as an MP3 player. To play audio with Aux In mode: • Turn the volume low on both NUMAN Mini One and the audio source device. • Connect the external audio source to the Aux In 3.5 mm stereo socket.
  • Seite 55: Alarms, Snooze And Sleeptimer

    Setting menu. ALARMS Note: Alarms will only function when the NUMAN Mini One unit is On (mains or battery power) or in Standby mode (Mains power only). Attempting to enter Standby mode when powered only by battery will turn the NU- MAN Mini One unit Off.
  • Seite 56 TO SET ALARMS Press Alarm and use the Select control button to select the required Alarm 1 or 2 and press Select To accept the displayed alarm settings press Alarm. To exit alarm setting mode, press Menu or Back (alternatively, the Alarm display will timeout and automatically return to the Now Playing screen after a short time).
  • Seite 57 Last played station or one of the preset stations (if set). • Duration – 15 | 30 | 45 | 60 | 90 | 120 minutes. If the alarm is not cancelled NUMAN Mini One returns to standby after this time period.
  • Seite 58: Sleep Timer

    SLEEPTIMER To set the sleep timer while the radio is playing Press Sleep. You can choose the sleep delay time in minutes from: Sleep Off | 15 | 30 | 45 | 60 | 90 | 120. Use select control button to cycle through the options (or press Sleep repeatedly) then press Select to choose the displayed option.
  • Seite 59: System Settinngs

    SYSTEM SETTINGS The System Settings allow you to tailor the NUMAN Mini One with a variety of options to suit you. To access sys- tem settings from any mode Select Menu > System Settings >, then choose from the various options as described in the menu as below.
  • Seite 60: Audio Output

    Select control button: cycles forwards and backwards through the current menu or setting options. Pressing Back: jumps back to the parent menu of the currently displayed menu or setting. Pressing Menu: to return to the Now Playing screen AUDIO OUTPUT Presents the option to direct audio output to the built in speakers (Speakers) or the SPDIF port on the back of the unit (SPDIF).
  • Seite 61: Time And Date

    Treble – (Use the select control button to choose a bias value between -7 and +7) Bass – (Use the select control button to choose a bias value between -7 and +7) Loudness – On or Off. (When On, low-level high and low frequency sounds are boosted to give a ‘fuller’ sound.) TIME AND DATE The time and date can be updated manually or automatically.
  • Seite 62: Backlight

    BACKLIGHT The NUMAN Mini One has a backlight with three brightness settings, and adjustable timeout (this is the time delay, in seconds, after which the display switches to the Dim level). There are three settings: • Timeout - Light On | 10 | 20 | 30 | 45 | 60 | 90 | 120 | 180 •...
  • Seite 63: Error Messages And Troubleshooting

    EROOR MESSAGES AND TROUBLESHOOTING IN DAB MODE: Message Description Service not No DAB reception available (DAB) Signal Error The DAB signal has been interrupted. No DAB Station The listed station cannot be found. (No Name) The current station does not broadcast an identity name. No stations found No DAB stations are available –...
  • Seite 64 GENERAL MESSAGES: Message Description Update failed Software upgrade failed Time is not set No time value is currently set on this platform. Time is not saved Any changes made to the time settings will be lost. Alarm not saved Any changes made to the Alarm settings will be lost. Invalid date The entered value does not match a valid date.
  • Seite 65: Disposal And Declaration Of Conformity

    DISPOSAL AND DECLARATION OF CONFORMITY HINTS ON DISPOSAL According to the European waste regulation 2002/96/EC this symbol on the product or on its packaging indicates that this product may not be treated as household waste. Instead it should be taken to the appropriate collection point for the recycling of electrical and electronic equip- ment.
  • Seite 66: Aux Y Modo Bt

    Nos alegramos de que haya escogido un producto NUMAN. Le deseamos que disfrute de la música. Tómese el tiempo necesario para leer este manual y conocer todas las posibilidades y funciones de su nuevo aparato. Conserve este manual en un lugar seguro para poder poder consultarlo posteriormente.
  • Seite 67: Alarmas, Posposición Y Temporizador De Apagado

    CONTENIDO Datos técnicos y contenido del envío ....................68 Indicaciones de seguridad ........................ 69 Descripción del aparato ........................71 Indicadores del display ........................73 Puesta en marcha y configuración básica ..................76 Modo radio DAB ..........................78 Modo radio FM ........................... 84 AUX y modo BT ..........................
  • Seite 68: Datos Técnicos Y Contenido Del Envío

    Display TFT Funciones y conexiones: FM con RDS, Bluetooth, DAB | DAB+, AUX CONTENIDO DEL ENVÍO 1x NUMAN Mini One 1x Fuente de alimentación DC 9 1.5 A 1x Manual de ususario INDICACIONES IMPORTANTES SOBRE LA CARGA DE LA BATERÍA Para poder cargar las baterías, coloque el interruptor en ON que se encuentra en el compartimento de la batería.
  • Seite 69: Indicaciones De Seguridad

    INDICACIONES DE SEGURIDAD Lea atentamente todas las indicaciones antes de su uso y conserve este manual para consultas posteriores. • No utilice la radio cerca de agua o vapor. Asegúrese de que no se vierta agua en el aparato y no coloque sobre él ningún objeto que contenga agua, como jarrones.
  • Seite 70 • Coloque el cable de alimentación de tal manera que nadie tropiece y que no quede doblado, especialmente en el enchufe y en el lugar en el que el cable sale del aparato. • Si el aparato está averiado, deberá repararlo. No intente reparar el aparato usted mismo. Si abre o retira las cubiertas, podrían producirse una tensión peligrosa u otro riesgo.
  • Seite 71: Descripción Del Aparato

    Conexión para la fuente de alimentación | Entrada DC (9 V) Conexión mini USB para actualización de software (solo personal de servicio) Conexión AUX Conexión line out Conexión para auriculares CÓMO UTILIZAR EL REGULADOR SITUADO EN LA PAR- TE SUPERIOR DEL APARATO Gire el regulador para navegar por un menú...
  • Seite 72 Regulador: Selección| Volumen | Posponer| Silencio | Encender / apagar Ajustar temporizador de apagado Seleccionar fuente musical Función de alarma | Despertador Información adicional Menú | Retroceder un nivel en el menú Guardar emisora Búsqueda de emisoras | Botón regresar Búsqueda de emisoras | Botón avanzar Reproducir | Pausar (en varios modos) Control desde la carcasa (parte superior)
  • Seite 73: Indicadores Del Display

    Standby: la pantalla standby muestra el tiempo, la hora y las alarmas activas. Modo: cuando pulse el botón SOURCE para elegir entre los distintos modos, el NUMAN Mini One muestra una pantalla separada para cada modo. Tras unos segundos, se iniciará el modo seleccionado y el aparato intentará...
  • Seite 74 MENÚS El NUMAN Mini One dispone de tres tipos de menús. Utilice el regulador giratorio y seleccione una opción. Una barra lateral le muestra que bajo las opciones de selección visibles, existen otras disponibles Cada modo cuenta con su propio menú que contiene determinadas opciones. El modo FM tiene, por ejemplo, 2...
  • Seite 75 Adicionalmente, cada modo tiene 2 opciones finales: Ajustes del sistema > y Menú principal > El símbolo [>] muestra que existe un submenú. Los ajustes del sistema permiten el acceso a todos los ajustes importantes del sistema como la hora, el idioma y la actualización de software. Los menús con más opciones que no se ajustan a una pantalla cuentan con una barra situada en el lateral derecho.
  • Seite 76: Puesta En Marcha Y Configuración Básica

    PUESTA EN MARCHA Y CONFIGURACIÓN BÁSICA INICIO RÁPIDO El NUMAN Mini One puede ponerse en marcha con facilidad. Para escuchar la radio DAB o FM, necesitará una toma de corriente (220 V). 1. Coloque el aparato en una superficie estable.
  • Seite 77 CONFIGURACIÓN AUTOMÁTICA DE LA HORA En la actualización automática se envían los datos a través de DAB, FM o internet. La actualización funciona solamente cuando la radio se encuentre en el modo correspondiente. Por ello, seleccione un modo que utilice regularmente (por ej.
  • Seite 78: Modo Radio Dab

    MODO RADIO DAB En el modo DAB la radio recibe DAB y DAB+ y muestra información sobre la emisora y sobre las pistas repro- ducidas. Para acceder al modo DAB, pulse SOURCE hasta mostrar la pantalla DAB o seleccione: MENU > Main menu >...
  • Seite 79 Para eliminar emisoras indeseadas con señal deficiente, seleccione: Menu > Prune invalid. MEMORIZAR Y ACCEDER A LAS EMISORAS En el NUMAN Mini One podrá guardar hasta 10 emisoras favoritas. Guardar emisora: mantenga pulsado el botón PRESET hasta que el display muestre la lista con los espacios de memoria 1-10 que están vacíos u ocupados con una emisora.
  • Seite 80 AJUSTAR MANUALMENTE LAS EMISORAS Junto con la búsqueda autómatica, puede buscar determinadas emisoras y frecuencias de manera manual. Esto puede ser interesante si ajusta la antena para tener mejor calidad de recepción y desea buscar una emiso- ra en concreto. Ajuste manual de emisoras: Pule MENU >...
  • Seite 81: Slideshow

    Si selecciona una emisora | frecuencia, el NUMAN Mini One escanea también todas las emisoras DAB de la frecuencia seleccionada y actualiza la lista de emisoras con las nuevas que ha localizado. Para escuchar mejor una emisora encontrada, regrese a la pantalla principal y seleccione la emisora deseada de la lista.
  • Seite 82 Vista completa de la pantalla slideshow: Vista normal:...
  • Seite 83 Para acceder a más información, pulse INFO. Cada vez que pulsa el botón, se mostrará esta información en el orden siguiente: Texto DLS > Información DL Plus (solo aparece cuando se transmite desde la emisora) > tipo de programa > información sobre el intérprete > número de emisora | frecuencia > fortaleza de la señal > tipo de alimentación (fuente de alimentación | batería) >...
  • Seite 84: Buscar Emisora

    50 kHz. GUARDAR EMISORAS El NUMAN One Mini puede guardar hasta 10 emisoras. La memoria de las emisoras funciona del mismo modo descrito para el modo de radio DAB.
  • Seite 85: Ajustes De Audio

    INFORMACIÓN SOBRE LA PISTA QUE SUENA ACTUALMENTE Mientras se reproduce una emisora FM, el monitor muestra, siempre que se haya transmitido una señal RDS, el nombre de la emisora e información relativa a la emisión. Si no se transmite ninguna señal RDS, el monitor muestra la frecuencia actual.
  • Seite 86 • Pulse SOURCE hasta que el monitor muestre AUX. • Ajuste el volumen en el NUMAN Mini One y, si fuera necesario, en el dispositivo externo. El monitor muestra que el NUMAN Mini One se ha conectado a un dispositivo externo.
  • Seite 87 ALARMAS, POSPOSICIÓN Y TEMPORIZADOR DE APAGADO Junto con la hora y el calendario, el aparato ofrece dos alarmas diferentes con función posposición. Además, puede configurar un temporizador de apagado que apague el dispositivo después de un periodo determinado de tiempo. Como señal puede seleccionar para ambas alarmas el zumbador o una fuente de audio.
  • Seite 88 AJUSTAR ALARMA Pulse en Alarma y utilice el regulador para seleccionar la alarma 1 o 2. Pulse el regulador para confirmar los ajustes de la alarma. Para abandonar la configuración de la alarma, pulse MENU. De lo contrario, de la pantalla de la alarma se regresa transcurrido un tiempo de nuevo a la pantalla principal.
  • Seite 89 última emisora escuchara o una de las emisoras memorizadas. • Duración - 15 | 30 | 45 | 60 | 90 | 120 Minutos. Si la alarma no se desactiva, el NUMAN One Mini entrará en modo standby automáticamente transcurrido el tiempo seleccionado.
  • Seite 90: Temporizador De Apagado

    TEMPORIZADOR DE APAGADO Para configurar el temporizador de apagado mientras el aparato está encendido, pulse SLEEP. Seleccione una de las siguientes opciones: Off, 15, 30, 45 y 60 minutos. Para ello, utilice el regulador o pulse varias veces SLEEP. Pulse el regulador para confirmar los ajustes de la alarma. Cuando confirme la selección, el display regresa de nuevo a la pantalla principal.
  • Seite 91: Navegar En Los Menús

    AJUSTES DEL SISTEMA A través del menú de ajustes del sistema puede realizar diversos ajustes con los que ajustar el NUMAN One Mini según sus preferencias personales. Para abrir el menú, seleccione SYSTEM > System Settings > y seleccio- ne una de las opciones que se indican a continuación: •...
  • Seite 92: Audio Output

    Girar el regulador: girando el regulador puede avanzar o retroceder por el menú actual o los ajustes. Pulsar el botón BACK: pulsando el botón BACK accederá al menú superior del submenú o ajuste actual. Pulsar el botón MENU: para regresar a la pantalla principal. AUDIO OUTPUT Permite elegir si el sonido se reproduce directamente desde el aparato o desde una salida SPDEIF situada en la parte trasera del aparato.
  • Seite 93: Hora Y Fecha

    Agudos: Utilice el regulador para ajustar un valor entre -7 y +7. Graves: Utilice el regulador para ajustar un valor entre -7 y +7. Amplificación: ON O OFF. Si selecciona ON, se intensifican los agudos y los graves para un sonido más satura- HORA Y FECHA El tiempo puede configurarse manual o automáticamente.
  • Seite 94: Backlight

    BACKLIGHT El aparato dispone de una iluminación de fondo con 3 tonos de brillo y un temporizador ajustable para determi- nar cuándo debe atenuarse la luz. • Temporizador: Luz On | 10 | 20 | 30 | 45 | 60 | 90 | 120 | 180 •...
  • Seite 95: Mensajes De Error Y Resolución De Problemas

    MENSAJES DE ERROR Y RESOLUCIÓN DE PROBLEMAS MENSAJES DE ERROR EN MODO DAB: Mensaje de error Descripción Service not La radio no cuenta con señal DAB. available (DAB) Signal Error La señal DAB se ha interrumpido No DAB Station No se ha encontrado la emisora listada. (No Name) La emisora actual no dispone de nombre.
  • Seite 96: Detección Y Resolución De Problemas

    MENSAJES GENERALES DE ERROR: Mensaje de error Descripción Update failed No hay actualización de software disponible. Time is not set No se ha configurado la hora. Time is not saved La configuración de la hora se ha perdido. Alarm not saved Se han perdido los ajustes de la alarma.
  • Seite 97: Indicaciones Para La Retirada Del Aparato

    RETIRADA Y DECLARACIÓN DE CONFORMIDAD INDICACIONES PARA LA RETIRADA DEL APARATO Si el aparato lleva adherida la ilustración de la izquierda (el contenedor de basura tachado) entonces rige la normativa europea, directiva 2012/19/UE. Este producto no debe arrojarse a un contenedor de basura común.
  • Seite 98 Nous sommes heureux que vous ayez choisi cet article NUMAN. Nous vous souhaitons beaucoup de joie et de plaisirs musicaux ! Veuillez prendre un petit moment pour lire ce mode d’emploi afin de prendre connaissance de toutes les possibilités et fonctions de votre nouvel appareil.
  • Seite 99 SOMMAIRE Fiche technique et contenu de l’emballage .................. 100 Consignes de sécurité ........................101 Aperçu de l’appareil ......................... 103 Affichages ............................105 Mise en marche et réglages de base ..................... 108 Mode radio DAB ..........................110 Mode radio FM ..........................116 Modes AUX et BT ..........................
  • Seite 100: Fiche Technique Et Contenu De L'emballage

    Fonctions et prises : FM avec RDS, Bluetooth, DAB | DAB+, AUX CONTENU DE L’EMBALLAGE 1 x NUMAN Mini One 1 x bloc d’alimentation DC 9 V 1,5 A 1 x manuel de l’utilisateur REMARQUES IMPORTANTES SUR LE CHARGEMENT DE LA BATTERIE Pour recharger les batteries, mettre l’interrupteur se trouvant dans le compartiment des batteries sur ON.
  • Seite 101: Consignes De Sécurité

    CONSIGNES DE SÉCURITÉ Lire attentivement ce mode d’emploi et le conserver en lieu sûr pour pouvoir s’y référer ultérieurement. • Ne pas utiliser la radio à proximité d’eau ou de vapeur. Veiller à ne pas faire tomber de gouttes d’eau sur l’appareil et ne pas poser d’objet contenant de l’eau dessus, comme par exemple un vase.
  • Seite 102 • Disposer le câble de sorte à ce que personne ne trébuche dessus et à ce qu’il se torde pas, particulièrement au niveau de la fiche et à l’endroit où il sort de l’appareil. • Faire réparer l’appareil s’il est défectueux. Ne pas essayer de le réparer soi-même. L’ouverture ou le retrait des couvercles de protection expose l’utilisateur à...
  • Seite 103: Aperçu De L'appareil

    Bloc d’alimentation | Entrée DC (9 V) Entrée mini-USB pour la mise à jour logiciel (seulement par le personnel technique) Prise AUX Prise Line-out Prise casque UTILISATION DU BOUTON ROTATIF SUR LE DESSUS DU BOÎTIER Tourner le bouton rotatif pour parcourir le menu ou une liste.
  • Seite 104 Bouton rotatif : Sélection | Volume | Silencieux | Réveil différé | Activation et désactivation Réglage du minuteur d’endormissement Sélection de la source Fonction de réveil | Réveil Informations supplémentaires Menu | Revenir au menu précédent Mémoriser une station Recherche de station | Touche arrière Recherche de station | Touche avant Lecture | Pause (dans les différents modes) Panneau de commande du boîtier (dessus)
  • Seite 105: Affichages

    : lorsque la touche SOURCE est utilisée pour passer d’un mode de lecture à l’autre, le NUMAN Mini One af- fiche un écran distinct pour chaque mode. Après une seconde, le mode sélectionné est démarré et l’appareil ten- te de diffuser la dernière station ou le dernier titre écouté(e) dans ce mode. Si cela n’est pas possible, l’appareil tente de se connecter à...
  • Seite 106 MENUS Le NUMAN Mini One dispose de 3 sortes de menus. Utiliser le bouton rotatif pour parcourir le menu et sélecti- onner une option. La barre de défilement à droite montre s’il existe des options supplémentaires au-dessus et en-dessous des options visibles.
  • Seite 107 Chaque mode propose deux options finales : Paramètres système > Menu principal > Le symbole [>] indique qu’un sous-menu est disponible. Les paramètres système permettent d’accéder à tous les paramètres importants comme l’heure, la langue et la mise à jour logicielle. Les menus ne pouvant contenir à...
  • Seite 108: Démarrage Rapide

    MISE EN MARCHE ET PARAMÈTRES DE BASE DÉMARRAGE RAPIDE La mise en marche du NUMAN Mini One est facile. Pour écouter la radio DAB ou FM, il y a besoin d’une simple prise électrique (220 V). 1. Placer l’appareil sur une surface plane.
  • Seite 109: Réglage Automatique De L'heure

    RÉGLAGE AUTOMATIQUE DE L’HEURE Lors de la mise à jour automatique, des données sont transmises par DAB, FM ou internet. La mise à jour fonc- tionne uniquement si la radio se trouve dans le mode correspondant. Ainsi, sélectionner un mode fréquemment utilisé...
  • Seite 110: Rechercher Une Station

    MODE RADIO DAB En mode DAB, la radio reçoit DAB et DAB+ et affiche des informations sur la station et sur le morceau en cours de lecture. Pour activer le mode DAB, appuyer sur SOURCE jusqu’à ce que DAB s’affiche ou sélectionner : MENU >...
  • Seite 111 Pour retirer de la liste des stations dont la réception est mauvaise, sélectionner : MENU > Prune invalid. SAUVEGARDER ET DIFFUSER UNE STATION Le NUMAN Mini One permet de sauvegarder jusqu’à 10 stations préférées. Sauvegarder une station : rester appuyer sur la touche PRESET jusqu’à ce que l’écran affiche la liste des em- placements de sauvegarde 1-10, qu’ils soient vides ou qu’ils se sont vu attribuer une station.
  • Seite 112 RÉGLAGE MANUEL D’UNE STATION En plus de la recherche automatique, il est possible de rechercher manuellement une station et une fréquence en particulier. Cela s’avère notamment utile pour réajuster l’antenne et trouver la meilleure fréquence de récepti- on possible ou rechercher une station spécifique. Réglage manuel de station : appuyer sur MENU >...
  • Seite 113: Slideshow

    Lorsqu’une station | fréquence est sélectionnée, le NUMAN Mini One recherche toutes les stations DAB asso- ciées à la fréquence sélectionnée et actualise la liste des stations avec les nouvelles stations détectées. Pour écouter une station détectée, revenir à l’écran principal et sélectionner la station souhaitée dans la liste.
  • Seite 114 Aperçu en plein écran de l’écran diaporama : Aperçu normal :...
  • Seite 115 Pour afficher plus d’informations, appuyer sur INFO. Chaque nouvelle pression sur la touche permet d’afficher des informations supplémentaires dans l’ordre suivant : Texte DLS > Informations DL Plus (fournies uniquement si transmises par la station) > Type d’émission > Informations sur les interprètes > Numéro de la station > Force du signal >...
  • Seite 116: Recherche De Station

    à chaque station à signal fort. Une alternative consiste à utiliser le bouton rotatif de l’appareil pour rechercher manuellement des stations par paliers de 50 kHz. SAUVEGARDER UNE STATION Le NUMAN Mini one peut sauvegarder jusqu’à 10 stations. La sauvegarde de stations fonctionne de la même manière qu’en mode radio DAB.  ...
  • Seite 117: Paramètres De Recherche

    INFORMATIONS SUR LE TITRE EN COURS D’ÉCOUTE Lorsqu’une station FM est diffusée, l’écran affiche, dès lors qu’un signal RDS est transmis, le nom de la station et les informations de diffusion. Si aucun signal RDS n’est transmis, l’écran affiche la fréquence actuelle. Pour afficher des informations supplémentaires, appuyer sur INFO.
  • Seite 118: Modes Aux Et Bt

    • Brancher le périphérique sur la prise AUX 3,5 mm avec un câble AUX. • Appuyer sur SOURCE jusqu’à ce que AUX apparaisse à l’écran. • Régler le volume sur le NUMAN Mini One et, si nécessaire, sur le périphérique. L’écran indique que le NUMAN Mini One est connecté avec un appareil périphérique.
  • Seite 119: Réveil, Réveil Différé Et Minuteur D'endormissement

    RÉVEILS, RÉVEIL DIFFÉRÉ ET MINUTEUR D’ENDORMISSEMENT En plus de l’heure et du calendrier, l’appareil propose deux réveils différents avec fonction de réveil différé. Il est également possible de régler un minuteur d’endormissement qui éteint l’appareil après un temps déterminé. Le signal sonore pour les deux réveils est soit le buzzer soit la source audio.
  • Seite 120: Réglage Du Réveil

    RÉGLAGE DU RÉVEIL Appuyer sur Alarm et utiliser le bouton rotatif pour sélectionner les réveils 1 ou 2. Appuyer sur le bouton pour confirmer le réglage du réveil. Pour quitter le réglage du réveil, appuyer sur MENU. Sinon, l’aperçu du réveil bas- cule automatiquement vers l’écran principal après un certain temps.
  • Seite 121 écoutée et une des stations sauvegardées. • Durée – 15 | 30 | 45 | 60 | 90 | 120 minutes. Si le réveil n’est pas activé, le NUMAN Mini One passe automatiquement en mode veille après la durée sélectionnée. •...
  • Seite 122 MINUTEUR D’ENDORMISSEMENT Pour régler la mise en veille programmée, appuyer sur SLEEP. Sélectionner alors une des options suivantes : désactivé, 15, 30, 45, 60 minutes. Pour cela, utiliser le bouton rotatif ou appuyer plusieurs fois de suite sur la touche SLEEP. Puis appuyer sur le bouton rotatif pour confirmer le réglage. Une fois la sélection confirmée, l’appareil bascule de nouveau à...
  • Seite 123: Navigation Dans Les Menus

    PARAMÈTRES SYSTÈME Le menu des paramètres système permet d’effectuer divers réglages pour adapter encore mieux le NUMAN Mini One à ses préférences personnelles. • Sleep (endormissement) • Alarm (réveil) • Equalizer (égaliseur) • Time | Date (Heure | Date) • Backlight (rétroéclairage) •...
  • Seite 124: Audio Output

    Tourner le bouton rotatif : tourner le bouton rotatif pour faire défiler le menu visible ou les paramètres en avant ou en arrière. Appuyer sur la touche BACK : appuyer sur la touche BACK pour accéder au menu racine du sous-menu ou paramètre actuel.
  • Seite 125: Réglage De La Date Et De L'heure

    Aigus : utiliser le bouton rotatif pour sélectionner une valeur entre -7 et +7. Basses : utiliser le bouton rotatif pour sélectionner une valeur entre -7 et +7. Amplification : ON ou OFF. Si ON a été sélectionné les aigus et les basses sont amplifiées pour un son puissant. DATE ET HEURE Il est possible de régler l’heure manuellement ou automatiquement.
  • Seite 126 RÉTROÉCLAIRAGE L’appareil est équipé d’un rétroéclairage comportant 3 niveaux de luminosité et un minuteur réglable pour que la lumière s’estompe après un temps donné. • Minuteur : Lumière On | 10 | 20 | 30 | 45 | 60 | 90 | 120 | 180 •...
  • Seite 127: Messages D'erreur Et Résolution Des Problèmes

    MESSAGES D’ERREUR ET RÉSOLUTION DES PROBLÈMES MESSAGES D’ERREUR EN MODE DAB Messages d’erreur Description Service not La radio ne capte pas le DAB available (DAB) Signal Error Le signal DAB a été coupé No DAB Station La station listée n’a pas été détectée. (No Name) La station actuelle ne transmet aucun nom.
  • Seite 128: Identification Et Résolution Des Problèmes

    MESSAGES D’ERREUR PRINCIPAUX Messages d’erreur Description Update failed Pas de mise à jour du logiciel possible. Time is not set L’heure n’a pas encore été réglée. Time is not saved Tous les réglages de l’heure seront perdus. Alarm is not saved Tous les réglages de réveil seront perdus Invalid date La date saisie est incorrecte.
  • Seite 129: Information Sur Le Recyclage Et Déclaration De Conformité

    RECYCLAGE ET DÉCLARATION DE CONFORMITÉ INFORMATION SUR LE RECYCLAGE Vous trouverez sur le produit l’image ci-contre (une poubelle sur roues, barrée d’une croix), ce qui indique que le produit se trouve soumis à la directive européenne 2012/19/UE. Renseignez- vous sur les dispositions en vigueur dans votre région concernant la collecte séparée des appareils électriques et électroniques.
  • Seite 130 Siamo felici che abbiate scelto un prodotto NUMAN. Vi auguriamo buon ascolto e buon divertimento! Prendetevi un po´ di tempo per consultare il manuale e scoprire tutte le funzioni offerte dal vostro nuovo dispositivo. Vi preghiamo di conservare il manuale in un luogo sicuro per consultazioni future.
  • Seite 131 INDICE Dati tecnici e consegna ........................132 Avvertenze di sicurezza ........................133 Descrizione del prodotto ......................... 135 Schermate ............................137 Messa in funzione e impostazioni di base ..................140 Modalità Radio DAB ......................... 142 Modalità Radio FM ........................... 148 Modalità AUX e BT ........................... 150 Sveglia, Snooze e Sleep timer ......................
  • Seite 132: Dati Tecnici E Consegna

    Display TFT Funzioni e collegamenti: FM con RDS, Bluetooth, DAB | DAB+, AUX CONSEGNA 1x NUMAN Mini One 1x alimentatore DC 9V 1.5 A 1x manuale di istruzioni AVVERTENZA IMPORTANTE PER CARICARE LE BATTERIE Per caricare le batterie, posizionare su ON l´interruttore posto nel vano batterie. In caso di inutilizzo prolunga- to, posizionare l´interruttore su OFF.
  • Seite 133: Avvertenze Di Sicurezza

    AVVERTENZE DI SICUREZZA Leggere tutte le avvertenze prima dell´uso e conservare il manuale per consultazioni future. • Non utilizzare il dispositivo vicino ad acqua o a vapore. Assicurarsi che non goccioli acqua sul dispositivo e non collocare sopra di esso recipienti contenenti acqua, come ad esempio vasi. •...
  • Seite 134 • Sistemare il cavo di alimentazione in modo che nessuno vi possa inciampare e che non venga piegato soprattutto vicino alla spina e nel punto in cui il cavo fuoriesce dal dispositivo. • Far riparare il dispositivo se è rotto. Non tentare mai di riparare il dispositivo da soli. Aprire o rimuovere i coperchi comporta il rischio di scosse elettriche e di altri pericoli.
  • Seite 135: Descrizione Del Prodotto

    Attacco alimentazione | Ingresso DC (9V) Attacco mini USB per aggiornamento software (solo per scopi di servizio) (nur Servicepersonal) Attacco AUX Attacco Line Out Attacco cuffie UTILIZZARE LA MANOPOLA SUPERIORE Ruotare la manopola per sfogliare un menu o una lista. L´opzione selezionata appare con una scritta scura su uno sfondo chiaro.
  • Seite 136 Manopola: Select | Volume | Snooze | Disattivazione audio | Accensione e spegnimento Impostare lo Sleep timer Selezionare la fonte musicale Funzione sveglia | sveglia Ulteriori informazioni Menu | tornare indietro nel menu Memorizzare i canali Ricerca dei canali | tasto indietro Ricerca dei canali | tasto avanti Riproduzione | Pausa (in modalità...
  • Seite 137: Schermate

    SCHERMATE Sullo schermo compaiono diversi menu, finestre di dialogo e schermate. Se il testo è troppo lungo, appare prima tagliato e dopo qualche secondo inizia a scorrere in modo da poter leggere per intero. Ci sono i seguenti tipi di schermate: •...
  • Seite 138 MENU NUMAN Mini One dispone di 3 tipi di menu. Utilizzare la manopola e selezionare un´opzione. Un diagramma indica che sotto le opzioni visibili ce ne sono altre a disposizione. Ogni modalità dispone del proprio menu che a sua volta contiene determinate opzioni. Il menu FM ad esempio...
  • Seite 139 Inoltre ogni modalità dispone di due opzioni finali: Impostazioni di sistema > Menu Principale > Il simbolo [>] indica che è presente un sottomenu. Le impostazioni di sistema permettono l´accesso a tutte le impostazioni di sistema importanti come ora, lingua e Software Update. I menu con più...
  • Seite 140: Messa In Funzione E Impostazioni Di Base

    MESSA IN FUNZIONE E IMPOSTAZIONI DI BASE AVVIO RAPIDO Utilizzare NUMAN Mini One è semplicissimo. Per ascoltare la Radio FM o DAB, è necessaria solo una presa (220 V). 1. Collocare il dispositivo su una superficie piana. 2. Distendere l´antenna.
  • Seite 141: Impostazione Automatica Dell`ora

    IMPOSTAZIONE AUTOMATICA DELL`ORA Con l´Auto Update i dati vengono inviati tramite DAB, FM oppure Internet. L´aggiornamento funziona solo se la radio si trova nella modalità corrispondente. Selezionare pertanto una modalità che si utilizza regolarmente (ad es. modalità FM). IMPOSTAZIONE MANUALE DELL`ORA Se si seleziona “No Update”, viene richiesto di inserire l´ora e la data manualmente.
  • Seite 142: Ricerca Dei Canali

    MODALITA` RADIO DAB In modalità DAB la radio riceve DAB e DAB+ e indica le informazioni sul canale e sul brano da riprodurre. Per ac- cedere alla modalità DAB, premere SOURCE fino a quando sullo schermo appare DAB oppure selezionare MENU >...
  • Seite 143 Per cancellare dalla lista i canali con scarsa ricezione, selezionare Menu > Prune invalid. MEMORIZZARE I CANALI E ACCEDERVI Con NUMAN Mini One si possono memorizzare fino a 10 canali preferiti. Memorizzare i canali: tenere premuto il tasto PRESET fino a quando sul display compare la lista delle postazi- oni di memoria (1-10) vuote o già...
  • Seite 144 IMPOSTARE I CANALI MANUALMENTE Oltre alla scansione automatica si possono cercare determinati canali e frequenze manualmente. Regolare l´antenna e trovare la frequenza di ricezione migliore oppure per cercare un canale in particolare. Impostazione manuale dei canali: premere MENU > Manual tune e utilizzare la manopola per cercare un canale in particolare o una frequenza.
  • Seite 145 Quando si seleziona un canale | una frequenza, NUMAN Mini One esegue la scansione anche di tutti i canali DAB sulla frequenza selezionata e aggiorna la lista con nuovi canali. Per ascoltare uno dei canali trovati, tornare allo schermata principale e selezionare il canale desiderato dalla lista.
  • Seite 146 Immagine a schermo intero della schermata Slideshow: Visualizzazione normale:...
  • Seite 147 Per accedere ad ulteriori informazioni, premere INFO. Ogni volta che si preme il tasto appare un´ulteriore informazione: DLS-Text > Informazioni DL Plus (appaiono solo se trasmesse dal canale) > Tipo di programma > Informazioni sull´interprete > numero canale | frequenza > potenza segnale > status alimentazione (corrente | batteria) >...
  • Seite 148: Modalità Radio Fm

    In alternativa utilizzare la manopola sul dispositivo, per cercare i canali manualmente a intervalli di 50 kHz. MEMORIZZARE I CANALI NUMAN One Mini memorizza fino a 10 canali. La memorizzazione dei canali funziona allo stesso modo come descritto nella modalità DAB Radio.
  • Seite 149: Impostazioni Audio

    INFORMAZIONI SUL BRANO ATTUALE Durante la riproduzione di un canale FM, sullo schermo appaiono il nome le informazioni sul canale appena viene trasmesso un segnale RDS. In caso di mancato segnale RDS, sullo schermo appare la frequenza attuale. Per accedere ad ulteriori informazioni, premere INFO. Ogni volta che si preme un tasto, appaiono ulteriori infor- mazioni nella sequenza seguente: RDS Radiotext >...
  • Seite 150: Modalità Aux E Bt

    Collegare il dispositivo esterno con un cavo AUX all´attacco AUX da 3,5 mm. • Premere SOURCE fino a quando AUX compare sullo schermo. • Regolare il volume del NUMAN Mini One e se necessario sul dispositivo esterno. Lo schermo indica che NUMAN Mini One è collegato ad un dispositivo esterno.
  • Seite 151: Sveglia, Snooze E Sleep Timer

    SVEGLIE, SNOOZE E SLEEP TIMER Oltre all´ora e al calendario, il dispositivo offre due sveglie differenti con funzione snooze. Inoltre può essere impostato uno sleep timer che spegne il dispositivo allo scadere di un determinato tempo. Come segnale per entrambe le sveglie può...
  • Seite 152: Impostare La Sveglia

    IMPOSTARE LA SVEGLIA Premere Alarm e utilizzare la manopola per selezionare Alarm 1 o Alarm 2. Premere la manopola per conferma- re l´impostazione della sveglia. Per uscire dall´impostazione della sveglia, premere MENU. Altrimenti il dispositi- vo dopo un po´ di tempo torna alla schermata principale. Il menu sveglia offre le seguenti impostazioni.
  • Seite 153: Funzione Snooze

    • Durata – 15 | 30 | 45 | 60 | 90 | 120 minuti. Se non si spegne la sveglia, NUMAN One Mini passa automaticamente in modalità Standby allo scadere del tempo. •...
  • Seite 154 SLEEP TIMER Per impostare lo Sleep Timer mentre il dispositivo è acceso, premere SLEEP. Selezionare una delle opzioni se- guenti: off, 15, 30, 45, 60 minuti. Utilizzare la manopola e premere ripetutamente SLEEP. Premere la manopola per confermare la selezione. Una volta confermata la selezione, il display torna alla schermata principale.
  • Seite 155: Navigare Nei Menu

    IMPOSTAZIONI DI SISTEMA Il menu delle impostazioni di sistema consente di personalizzare la radio NUMAN One Mini. Per accedere al menu, selezionare SYSTEM > System Settings > e selezionare una delle seguenti opzioni: • Sleep • Alarm • Equalizer • Time | Date (ora | data) •...
  • Seite 156 Ruotare la manopola: ruotando la manopola è possibile sfogliare il menu attuale o le impostazioni. Premere il tasto BACK: premendo il tasto BACK si accede al menu superiore del sottomenu attuale o dell´impostazione. Premere il tasto MENU: per tornare alla schermata principale. AUDIO OUTPUT Consente di scegliere se emettere l´audio direttamente dal dispositivo oppure tramite l´uscita SPDEIF sul retro del dispositivo.
  • Seite 157: Impostare L`ora E La Data

    Alti: utilizzare la manopola per impostare un valore compreso tra -7 e +7. Bassi: utilizzare la manopola per impostare un valore compreso tra -7 e +7. Loudness: ON/OFF, se si seleziona ON, i suoni alti e bassi vengono rafforzati per un suono più pieno. DATA E ORA L´ora può...
  • Seite 158: Standby Automatico

    BACKLIGHT Il dispositivo è dotato di retroilluminazione con 3 impostazioni e un timer impostabile allo scadere del quale la luce si affievolisce. • Timer: Luce On | 10 | 20 | 30 | 45 | 60 | 90 | 120 | 180 •...
  • Seite 159: Messaggi Di Errore E Risoluzione Dei Problemi

    MESSAGGI DI ERRORE E RISOLUZIONE DEI PROBLEMI MESSAGGI DI ERRORE IN MODALITA` DAB: Messaggio di errore Descrizione Service not available Assenza di ricezione DAB. (DAB) Signal Error Il segnale DAB è stato interrotto. No DAB Station I canali elencati non sono stati trovati. (No name) Il canale attuale non trasmette il nome.
  • Seite 160 MESSAGGI DI ERRORE GENERALI: Messaggio di errore Descrizione Update failed Non è disponibile nessun aggiornamento del software. Time is not set Nessun orario impostato. Time is not saved Tutte le impostazioni dell´ora non sono salvate Alarm not saved Tutte le impostazioni della sveglia non sono salvate Invalid date La data inserita non è...
  • Seite 161: Smaltimento E Dichiarazione Di Conformità

    SMALTIMENTO E DICHIARAZIONE DI CONFORMITA´ SMALTIMENTO Se sul prodotto è presente la fi gura a sinistra (il cassonetto dei rifi uti mobile sbarrato), si applica la direttiva europea 2002/96/CE. Questi prodotti non possono essere smaltiti con i rifi uti normali. Informarsi sulle disposizioni vigenti in merito alla raccolta separata di dispositivi elettrici ed elettronici.
  • Seite 162 Chal-Tec GmbH Wallstraße 16 10179 Berlin, Germany...
  • Seite 163 Chai-Tee GrnbH Chai-Tee GmbH Wallstr.16I10179 Berlin Deutschland www.chal-tec.com www.electronic-star.de EU-Konformitatserklarung Wir, die CHAL-TEC GmbH Wallstra�e 16 10179 Berlin erklaren hiermit, dass der nachfolgend bezeichnete Funkanlagentyp: Tragbare Radios mit WLAN Artikelnr. 10030809, 10030810, 10030811 & 10030812 allen folgenden einschlagigen Bestimmungen entspricht: RED-Richtlinie 2014/53/EU;...

Inhaltsverzeichnis