Werbung
Quicklinks
TABLE OF CONTENTS
1. Features
2. Installation
3. Operation
4. Faults
5. DIP switch settings
6. Warranty
7. Technical Details (second page)
USER'S MANUAL
1. Features
WhisperPower generator powered
• Converter ( 24.0 VDCà13.6V DC )
• Charger ( VRLA, GEL, AGM, Traction, Li-ion )
automatic battery charger
• Dimmer 24.0 VDCà [4.0 ... 12.0 VDC] )
• Dimmer ( 24.0 VDCà [8.0 ... 24.0 VDC] )
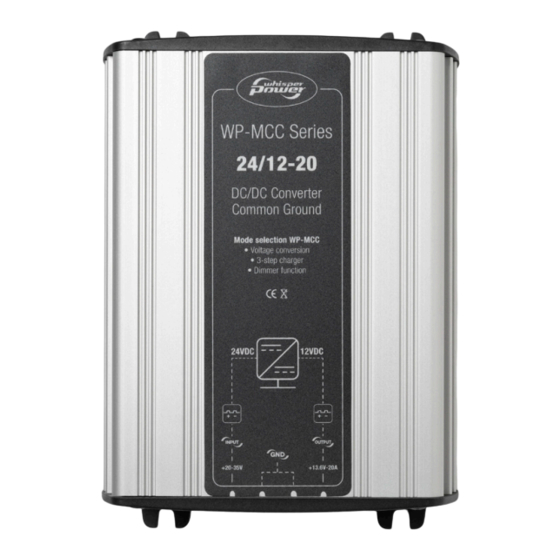
WP-MCC 24/12-20
2. Installation
(1)
Connect the positive (+) of the load to the "OUT+" of the MCC
24/12-20.
the MCC 24/12-20.
input (+) of the MCC 24/12-20.
power to the input (–) of the MCC 24/12-20.
Take care!
sensor can be connected/disconnected at any time. As a result the
MCC 24/12-20 will simply carry on working.
3. Operation
The MCC 24/12-20 can function as 4 different products: converter,
dimmer 12V, dimmer 24V and charger. New out of the box it will
function as a standard converter. By changing the position of the dip
switches this can be changed by the user. Refer to the chapter "Dip
Multi purpose DC/DC converters,
switch settings" for more information.
common ground
Converter
The moment the MCC 24/12-20 is connected, the output will
immediately carry 13.6V.
LED
Converter is active
Converter is inactive
Converter has a fault
Remote
The converter can be switched off by connecting the Remote input (R) to
the "IN–" of the MCC 24/12-20.
Output current
If the output voltage gets below 4.0V for more than 1 second – for example
if it is overloaded or short-circuited – the maximum current is set to 5.0A.
As soon as the voltage rises above 4.0V once more, the maximum current
will again be set to 20.0A.
Dimmer 12V
In the Dimmer 12V setting the output voltage of the MCC 24/12-20
can be set from 4.0V to 12.0V.
The dimmer will be active the moment the MCC 24/12-20 – with the
Step down and voltage
right dip switch settings – is connected to the power supply.
LED
stabilizing, 3-step 12V battery
Dimmer is active
charger light dimmer function
Dimmer is inactive
Dimmer has a fault
Remote
When the Remote input (R) is connected to the "IN–" for more than 1
second, the dimmer will start to operate. The output voltage will slowly
decrease until 4.0V is reached. The dimmer will now remain at 4.0V for 1
second and then slowly increase again to 12.0V. If during this process the
connection between the "IN–" and the Remote is broken, the voltage that is
carried at that moment on the output will remain.
If the remote input is connected to the "IN–" for a short period of time (less
than 1 second), the dimmer will be inactive: 0.0V is carried on the output.
If this is repeated, the dimmer becomes active once more: the voltage that
was last set will be carried on the output.
Dimmer 24V
In the Dimmer 24V setting the output voltage of the MCC 24/12-20
can be set from 8.0V to 24.0V.
The dimmer will be active the moment the MCC 24/12-20 – with the
right dip switch settings – is connected to the power supply.
LED
Dimmer is active
Dimmer is inactive
Dimmer has a fault
Remote
When the Remote input (R) is connected to the "IN–" for more than 1
second, the dimmer will start to operate. The output voltage will slowly
decrease until 8.0V is reached. The dimmer will now remain at 8.0V for 1
second and then slowly increase again to 24.0V. If during this process the
(2)
Connect the negative (–) of the load to the "OUT -" of
connection between the "IN–" and the Remote is broken, the voltage that is
(3)
Connect the positive (+) of the power to the
carried at that moment on the output will remain.
(4)
Connect the negative (–) of the
If the remote input is connected to the "IN–" for a short period of time (less
than 1 second), the dimmer will be inactive: 0.0V is carried on the output. If
this is done again, the dimmer becomes active once more: the voltage that
was last set will be carried on the output.
The remote input switch and the external temperature
Charger
For charging a battery the MCC 24/12-20 makes use of a three-step
WARNING!
:
load protocol. The voltages in the below description apply to a VRLA
The product should only be connected by skilled fitters/
battery. For the voltages of the other types of batteries, the relevant
mechanics, who are aware of the regulations for working
table should be consulted.
with high battery voltages.
The use of poor quality connection materials and/or
MODE
DESCRIPTION
insufficient diameter cables may result in damage to the
Start
The MCC 24/12-20 will always start in Bulk mode.
product. A short circuit between the positive and negative
Bulk
The bulk voltage is 14.40V and is not temperature
terminals of the battery may cause severe damage to
compensated.
If the battery voltage is equal to or higher than 14.40V (bulk
your system. Always use fuses.
voltage), a minimum bulk timer of 2 minutes will be started.
After this time the charger goes into Absorption mode.
If the battery voltage is equal to or higher than 13.25V (float
voltage), a maximum bulk timer of 8 hours will be started.
After this time the charger goes into Absorption mode.
Absorption
The absorption voltage is 14.25V and is temperature
compensated.
If the measured output current gets below 6% of the
maximum current for 1 minute, then the minimum
absorption timer of 15 minutes will have to be set. As soon
as this is finished, the charger will enter Float mode. (The
maximum current is 20.0A, 6% of this is 1.2A.)
When starting the Absorption mode, the maximum
absorption timer of 4 hours is set. As soon as this is
finished, the charger will enter Float mode.
Float
The float voltage is 13.25V and is temperature
LED is green.
compensated.
LED is red.
If the battery voltage is lower than 12.80V, then the charger
LED flashes red.
enters Bulk mode.
When the Float mode is started, a maximum float timer
of 228 hours will start. As soon as this has finished, the
charger enters (periodic) Bulk mode for 85 minutes.
Charging graph
2 min
minimun bulk time:
minimun absorption time
Bulk voltage
Absorption
voltage
Float voltage
12.08V
Max. current
6% of
Max. current
Current
maximum bulk time maximum absorption time:
8 hours
Voltage
LED is green. Flashes with a duty cycle of
50%. Period time is variable from 2 sec.
Battery types and associated (charger) voltage values
at 4.0V to 0.5 sec. at 12.0V.
LED is red.
LED flashes red.
BATTERY TYPE
BULK
VRLA
14.40V
GEL
14.40V
AGM
14.40V
Traction
14.60V
Li-ion
14.40V
*) Refer to the paragraph "Temperature compensation" for further explanation
and a graphical representation of the temperature compensation
Temperature safety
If the external temperature reaches above +55°C or below -20°C, the
charger will have a fixed output of 11.5V, irrespective of the mode the
charger is in at that moment.
Temperature compensation
The absorption and float voltages of the charger have to be
LED is green. Flashes with a duty cycle of
temperature compensated. If the external temperature sensor is not
50%. Period time is variable from 2 sec.
connected, it is assumed that the external temperature is 25°C.
at 8.0V to 0.5 sec. at 24.0V.
Two rules apply for the temperature compensation.
LED is red.
1. The temperature compensation occurs with -30mV/°C (with
LED flashes red.
0mV at +25°C).
2. The absorption and float voltages never go above the bulk
voltage.
LED
Charger in Bulk
LED flashes green 1x.
Charger in Absorption
LED flashes green 2x.
Charger in Float
LED is green.
Charger inactive
LED is red.
Charger has a fault
LED flashes red.
Remote
The charger can be switched off by connecting the Remote input (R) to the
"IN–" of the MCC 24/12-20.
4. Faults
For all modes there are four different variables that can cause a fault
situation.
Cause
Input voltage
Input voltage below
18.0V or above 35.0V
for more than 0.5 sec.
Output voltage
Output voltage below
2.0V for 0.5 sec.
Internal temperature Temperature on the
PCB above +75°C for
0.5 sec.
External temperature (Any connected) external
temperature below
-30°C or above +65°C
for 0.5 sec.
NB: If a fault is reset whilst another is still active, the MCC 24/12-20
will not become active. This occurs the moment all faults have been
resolved.
5. DIP SWITCH SETTINGS
The dip switches are used to apply settings to the MCC 24/12-
20. Dip switch 1 and 2 are responsible for setting 1 of the 4 main
functions. If the user chooses to use the MCC 24/12-20 as charger,
then the other three dip switches can be used to set the type of
battery. When the DIP switch settings are changed, the MCC 24/12-
20 will switch off its output. It will take another ±15 seconds after
the last made change before the selected mode will be activated.
This period is needed to, for example, prevent any overvoltage on the
output.
Operation
Dip switch settings
1
2
3
Converter
off
off
N/A
15 min
Dimmer 12V
off
on
N/A
Dimmer 24V
on
on
N/A
off
on
Charger
on
off
off
on
off
NB: If a dip switch setting is made that is not in the above table, then
periodic
enters periodic bulk after:
bulk time:
4 hours
228 hours 85 min
the output will not output any voltage and turn the LED red.
Examples:
DIP SWITCH SETTINGS
SELECTED MODES
Charger voltages
ON
OFF
1, 2, 3, 4, 5
Converter
ABSORPTION
FLOAT
14.25V
13.25V
1, 4
2, 3, 5
Charger for AGM
14.25V
13.80V
battery
14.25V
13.80V
1, 2, 3
4, 5
Dimmer 24V
14.45V
13.25V
14.40V
13.30V
1, 3, 5
2, 4
Nothing
Temperature compensated*
1
6.WARRANTY
Faulty units returned to us will be repaired or replaced free of charge
without quibble. Usually, repaired faulty items are dispatched within
48 hours at being received. We have no control over the way the units
are installed, the type of electrical system the units are installed on
and the condition of such electrical systems, neither can we control
the kind of load that is applied and the operating environment on
which the units are used. So our guarantee is limited to the replacing
of a failed unit, and we will not pay for any consequential damage.
This device complies with the EU directive 2004/108/EC.
The type plate is located on the top of the device.
1. Eigenschaften
• Wandler ( 24,0 VDC à 13,6 VDC )
• Ladegerät ( VRLA, GEL, AGM, Traktion, Li-Ion )
• Dimmer ( 24,0 VDC à [4,0 ... 12,0 VDC] ))
• Dimmer ( 24.0 VDCà [8.0 ... 24.0 VDC] )
2. Installation
(1)
Verbinden Sie den Pluspol (+) des Stromabnehmers mit dem
„OUT+" des MPC20.
(2)
Verbinden Sie den Minuspol (–) des
Stromabnehmers mit dem „OUT-" des MPC20.
Verbinden Sie den
(3)
Pluspol (+) der Stromversorgung mit dem Input (+) des MPC20.
Verbinden Sie den Minuspol (–) der Stromversorgung mit dem Input
(–) des MPC20.
Achtung!
Der Input-Schalter der Fernsteuerung und der externe
Temperatursensor können jederzeit angeschlossen/abgekoppelt
werden. Der MPC20 funktioniert dann normal weiter.
Warnhinweise
:
Reset
Das Produkt darf nur von fachkundigen Installateuren/
Input voltage between
18.5V and 34.5V for
Monteuren angeschlossen werden, die die Vorschriften
0.5 sec.
für das Arbeiten mit hohen Batteriespannungen kennen.
30 seconds after
Bei Gebrauch von schlechtem Anschlussmaterial und/
activation.
oder zu dünnen Drähten kann das Produkt beschädigt
Temperature on the
werden. Kurzschluss zwischen dem Plus- und
PCB below +70°C for
Minusanschluss der Batterie kann Ihr System schwer
0.5 sec.
beschädigen. Gebrauchen Sie immer Sicherungen.
External temperature
above -25°C and below
+60°C for 0.5 sec.
3. Funktion
Der MPC20 hat die Funktionen von 4 verschiedenen Produkten:
Wandler, 12 V-Dimmer, 24 V-Dimmer sowie Ladegerät. Neu aus der
Verpackung funktioniert er als Standard-Wandler. Durch die Änderung
der Position der DIP-Schalter kann der Nutzer die verschiedenen
Funktionen einstellen. Siehe für mehr Informationen das Kapitel „DIP-
Schalter Einstellungen".
Wandler
Sobald der MPC20 angeschlossen wird, ist die Spannung am
Ausgang sofort 13,6 V.
LED-Anzeige
Wandler ist aktiv
LED-Anzeige ist grün
Wandler ist inaktiv
LED-Anzeige ist rot
Wandler hat eine Störung
LED-Anzeige blinkt rot
Remote (Fernsteuerung)
Type of
Der Wandler kann ausgeschaltet werden, indem der
battery
4
5
Fernsteuerungseingang (R) mit dem „IN–" des MPC20 verbunden wird.
N/A
N/A
N/A
Ausgangsstrom
N/A
N/A
N/A
Falls die Ausgangsspannung länger als 1 Sekunde unter 4,0 V abfällt – z.
N/A
N/A
N/A
B. bei zu schwerer Belastung oder bei Kurzschluss – wird die maximale
off
off
VRLA
Stromstärke auf 5,0 A gesetzt. Sobald die Spannung wieder über 4,0 V
off
off
GEL
ansteigt, wird die maximale Stromstärke wieder auf 20,0 A gesetzt.
on
off
AGM
on
off
Traction
off
on
Li-ion
12V Dimmer
Im 12-V-Dimmerstand kann die Ausgangsspannung des MCP20 von
4,0 V bis auf 12,0 V eingestellt werden.
Der Dimmer wird sofort aktiv, wenn der MPC20 – mit den
richtigen Einstellungen der DIP-Schalter – an die Stromversorgung
angeschlossen wird.
COMMENT
Dip 3 to 5 have no
effect on the operation
LED-Anzeige
LED-Anzeige ist grün. Blinkt mit einem
Tastverhältnis von 50 %. Die Periodenzeit
Dimmer ist aktiv
ist variabel von 2 Sekunden bei 4,0 V bis
Dip 3 to 5 have no
zu 0,5 Sekunde bei 12,0 V.
effect on the operation
The MCC 24/12-20
Dimmer ist inaktiv
LED-Anzeige ist rot
will not output any
voltage and the red
LED will light up.
Dimmer hat eine Störung
LED-Anzeige blinkt rot
Remote (Fernsteuerung)
Wenn der Remote Eingang (R) länger als 1 Sekunde mit dem „IN–"
verbunden wird, schaltet sich der Dimmer ein. Die Ausgangsspannung
wird langsam immer niedriger werden, bis 4,0 V erreicht ist. Der Dimmer
wird jetzt 1 Sekunde auf 4,0 V bleiben, um danach die Spannung wieder
langsam auf 12,0 V zu erhöhen. Wenn während dieses Vorgangs die
Verbindung zwischen dem „IN–" und der Fernsteuerung (R) unterbrochen
wird, wird die Spannung, die der Ausgang in diesem Moment hat,
beibehalten.
Wenn der Remote-Eingang kurz (kürzer als 1 Sekunde) mit dem
„IN–" verbunden wird, wird der Dimmer inaktiv sein: der Ausgang hat dann
0,0 V. Wenn dieser Vorgang wiederholt wird, wird der Dimmer wieder aktiv:
der Ausgang hat dann wieder die zuletzt eingestellte Spannung.
24V Dimmer
Im 24-V-Dimmerstand kann die Ausgangsspannung des MCP20 von
8,0 V bis auf 24,0 V eingestellt werden.
Der Dimmer wird sofort aktiv, wenn der MPC20 – mit den
richtigen Einstellungen der DIP-Schalter – an die Stromversorgung
angeschlossen wird.
LED-Anzeige
LED-Anzeige ist grün. Blinkt mit einem
(4)
Dimmer ist aktiv
Tastverhältnis von 50 %. Die Periodenzeit
ist variabel von 2 Sekunden bei 8,0 V bis
zu 0,5 Sekunde bei 24,0 V.
Dimmer ist inaktiv
LED-Anzeige ist rot
Dimmer hat eine Störung
LED-Anzeige blinkt rot
Remote (Fernsteuerung)
Wenn der Remote Eingang (R) länger als 1 Sekunde mit dem „IN–"
verbunden wird, schaltet sich der Dimmer ein. Die Ausgangsspannung
wird langsam immer niedriger werden, bis 8,0 V erreicht ist. Der Dimmer
wird jetzt 1 Sekunde auf 8,0 V bleiben, um danach die Spannung wieder
langsam auf 24,0 V zu erhöhen. Wenn während dieses Vorgangs die
Verbindung zwischen dem „IN–" und der Fernsteuerung (R) unterbrochen
wird, wird die Spannung, die der Ausgang dann hat, bei behalten.
Wenn der Remote-Eingang kurz (kürzer als 1 Sekunde) mit dem "IN–"
verbunden wird, wird der Dimmer inaktiv sein: der Ausgang hat dann 0,0
V. Wenn dieser Vorgang wiederholt wird, wird der Dimmer wieder aktiv: der
Ausgang hat dann wieder die zuletzt eingestellte Spannung.
Ladegerät
Zum Laden einer Batterie gebraucht der MPC20 ein dreistufiges
Ladeprotokoll. Die Spannungswerte in nachstehender Beschreibung
gelten für eine VRLA-Batterie. Für die Spannungswerte der anderen
Batterietypen muss die betreffende Tabelle zurate gezogen werden.
BETRIEBSART
BESCHREIBUNG
Start
Der MPC20 beginnt immer im der Bulk-Betriebsart.
Bulk
Die Bulk-Spannung ist 14,40 V und ist nicht
temperaturkompensiert. Wenn die Batteriespannung
14,40 V (Bulk-Spannung) oder höher ist, wird ein
Minimum-Bulk-Timer von 2 Minuten gestartet. Nach
dieser Zeit schaltet das Ladegerät auf die Absorptions-
Betriebsart um.
Wenn die Batteriespannung 13,25 V (Float-Spannung)
oder höher ist, wird ein Maximum-Bulk-Timer von
8 Stunden gestartet. Nach dieser Zeit schaltet das
Ladegerät auf die Absorptions-Betriebsart um.
Absorption
Die Absorptionsspannung ist 14,25 V. Diese wird
temperaturkompensiert.
Wenn der gemessene Ausgangsstrom 1 Minute unter 6 %
der maximalen Stromstärke kommt, muss der Minimum-
Absorptions-Timer von 15 Minuten gestartet werden.
Sobald dieser abgelaufen ist, muss das Ladegerät auf die
Float-Betriebsart umschalten. (Die maximale Stromstärke
ist 20,0 A, 6 % davon ist 1,2 A.) Beim Starten der
Absorptions-Betriebsart wird der Maximum-Absorptions-
Timer von 4 Stunden gestartet. Sobald dieser abgelaufen
ist, muss das Ladegerät auf die Float-Betriebsart
umschalten.
Float
Die Float-Spannung ist 13,25 V. Diese wird
temperaturkompensiert. Wenn die Batteriespannung
niedriger als 12,80 V ist (temperaturkompensiert), dann
schaltet das Ladegerät auf die Bulk-Betriebsart um.
Wenn die Float-Betriebsart gestartet wird, wird ein
Maximum-Float-Timer von 228 Stunden gestartet. Sobald
dieser abgelaufen ist, schaltet das Ladegerät für 85
Minuten in die (periodische) Bulk-Betriebsart.
WhisperPower BV
Kelvinlaan 82, 9207 JB Drachten, The Netherlands
Tel: +31 (0) 512 571 550, Fax: +31 (0) 512 571 599
info@whisperpower.com, www.whisperpower.com
Werbung

Verwandte Anleitungen für Whisper Power WP-MCC 24/12-20


Inhaltszusammenfassung für Whisper Power WP-MCC 24/12-20
- Seite 1 Im 24-V-Dimmerstand kann die Ausgangsspannung des MCP20 von When the Remote input (R) is connected to the “IN–” for more than 1 • Dimmer ( 24,0 VDC à [4,0 … 12,0 VDC] )) WP-MCC 24/12-20 2. Installation 8,0 V bis auf 24,0 V eingestellt werden.
- Seite 2 5. DIP-SCHALTER-EINSTELLUNGEN 3. FUNCIONAMENTO MODO DESCRIPCIÓN 4. Fallas Wiring diagram / Schaltplan / Diagrama de cableado Ladegrafik Inicio El MCC 24 / 12-20 siempre comenzará en modo masivo. Die DIP-Schalter werden gebraucht, um Einstellungen am MPC20 El MCC 24 / 12-20 puede funcionar como 4 productos diferentes: Para todos los modos, hay cuatro variables diferentes que pueden vorzunehmen.