Herunterladen Inhalt Inhalt Diese Seite drucken
Inhaltsverzeichnis

Werbung

Verfügbare Sprachen

Verfügbare Sprachen

Originalbetriebsanleitung
Translation of the original
Operating instructions
Traduction du
Mode d'emploi original
Traduzione delle Istruzioni
per l'uso originali
APF 1240
APF 1250
APF 1850

Werbung

Inhaltsverzeichnis
loading

Inhaltszusammenfassung für Ammann APF 1240

  • Seite 1 Originalbetriebsanleitung Translation of the original Operating instructions Traduction du Mode d‘emploi original Traduzione delle Istruzioni per l‘uso originali APF 1240 APF 1250 APF 1850...
  • Seite 3: Eg-Konformitätserklärung

    La documentazione tecnica sara’ conservata dalla persone sopra menzionate Ammann Verdichtung GmbH Josef-Dietzgen-Straße 36 D-53773 Hennef Tel. +49 (0) 2242 / 88 02-0 Fax +49 (0) 2242 / 88 02-59 Geschäftsführer: Bernd Holz, Christian Stryffeler | HRB 1949 Amtsgericht Siegburg | info.avd@ammann-group.com www.ammann-group.com...
  • Seite 4 La documentazione tecnica sara’ conservata dalla persone sopra menzionate Ammann Verdichtung GmbH Josef-Dietzgen-Straße 36 D-53773 Hennef Tel. +49 (0) 2242 / 88 02-0 Fax +49 (0) 2242 / 88 02-59 Geschäftsführer: Bernd Holz, Christian Stryffeler | HRB 1949 Amtsgericht Siegburg | info.avd@ammann-group.com www.ammann-group.com...
  • Seite 5 Beachten Sie zusätzlich auch die entsprechenden, in Ihrem Land gültigen Vorschriften und Richtlinien. Die Ammann Verdichtung GmbH haftet nicht für die Funktion der Maschine bei Handhabung, die nicht der üblichen Benutzung ent- spricht, sowie bei nicht bestimmungsgemäßer Verwendung der Maschine.
  • Seite 6: Inhaltsverzeichnis

    Inhalt Table of contents Sicherheitsbestimmungen ....3 Safety regulations ..... . . 31 Technical data .
  • Seite 7 Table des matières Indice Consignes de sécurité ..... 61 Norme di sicurezza ..... . 89 Caratteristiche tecniche .
  • Seite 8: Sicherheitsbestimmungen

    1. Sicherheitsbestimmungen Diese Ammann-Maschine ist dem heutigen Stand und den gel- Sicherheitshinweise in der Betriebsanleitung tenden Regeln der Technik entsprechend gebaut. Dennoch In der Betriebsanleitung werden folgende Benennungen bzw. können von dieser Maschine Gefahren für Personen und Sach- Zeichen für besonders wichtige Angaben benutzt:...
  • Seite 9 1. Sicherheitsbestimmungen Starten in geschlossenen Räumen, Tunneln, Stollen oder tiefen Ersatzteile müssen den vom Hersteller festgelegten technischen Gräben Anforderungen entsprechen. Deshalb nur Original Ersatzteile ver- wenden. Motorabgase sind lebensgefährlich! Vor Arbeiten an Hydraulikleitungen sind diese drucklos zu machen. Deshalb ist bei Betrieb in geschlossenen Räumen, Tunneln, Stollen Unter Druck austretendes Hydrauliköl kann schwere Verletzungen oder tiefen Gräben sicherzustellen, dass ausreichend gesundheit- verursachen!
  • Seite 10: Technische Daten

    2. Technische Daten 01331030.cdr APF 1240 (H) APF 1250 (H) APF 1850 (H) APF 1240 (Y) APF 1850 1. Abmessungen 400 mm 500 mm 500 mm 400 mm 500 mm 540 mm 523 mm 615 mm 540 mm 615 mm...
  • Seite 11: Geräuschangabe

    2. Technische Daten APF 1240 (H) APF 1250 (H) APF 1850 (H) APF 1240 (Y) APF 1850 Antriebsart über Fliehkraftkupplung und Keilriemen 4. Vortriebsgeschwindigkeit 0 – 20 m/min 5. Vibration Rüttelkraft 12 kN 18 kN 12 kN 18 kN Rüttelfrequenz...
  • Seite 12: Bedienung

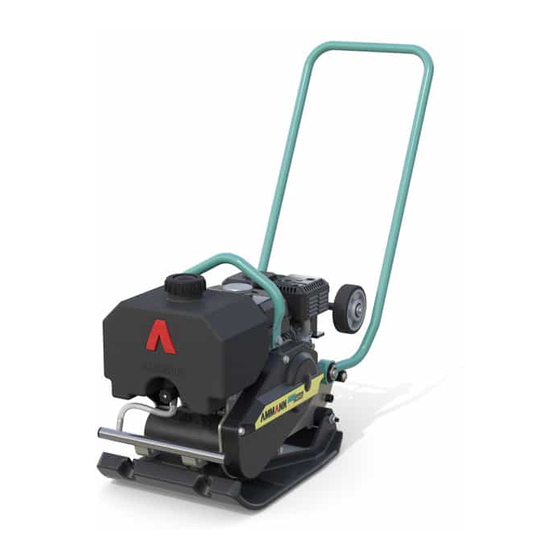
    3. Bedienung 3.1 Beschreibung Die APF 1240/1250/1850 ist eine Vibrationsplatte, die nach dem Schleppschwingsystem arbeitet. Das heißt, dass sich die Platte nur in Vorwärtsrichtung bewegt. Der Motor treibt über Fliehkraftkupplung und Keilriemen den Vi- brator an. Das Gerät dient zur Verdichtung von Sand, Kies (evtl. Grobkies), Magerbeton, Bitumen-Kies (mittel- u.
  • Seite 13: Vor Der Inbetriebnahme

    3. Bedienung 3.2 Vor der Inbetriebnahme Persönliche Schutzausrüstung (insbesondere Schallschutzmittel und Sicherheitsschuhe) benut- zen. Gefahr von Gehörverlust! Gefahr Sicherheitsbestimmungen beachten. Betriebs- und Wartungsanleitung beachten. Die Motor-Betriebsanleitung lesen. Die dort aufge- führten Hinweise zur Sicherheit, Bedienung und Wartung beachten. – Maschine auf ebenem Boden abstellen –...
  • Seite 14: Bedienung Motor - Hatz

    3. Bedienung 3.3 Bedienung Motor — Hatz 3.3.1 Motor starten B1799204.cdr – Startseil mit zunehmender Beschleunigung kraftvoll ziehen (nicht ruckartig reißen) bis der Motor startet. B1799201.cdr – Drehzahlhebel (1) auf «max» stellen. S C S B1799202.cdr – Startergriff (2) leicht ziehen bis Widerstand spürbar wird (I.). –...
  • Seite 15: Nach Anspringen Des Motors

    3. Bedienung 3.3.2 Nach Anspringen des Motors 3.3.3 Motor abstellen – Drehzahlhebel (1) auf Leerlauf stellen. STOP 1 – 2 min. B1799205.cdr B1799206.cdr – Drehzahlhebel (1) auf Leerlauf «min» stellen. – Motor im Leerlauf 1 ... 2 min. warmlaufen lassen. –...
  • Seite 16: Bedienung Motor - Honda

    3. Bedienung 3.4 Bedienung Motor — Honda 3.4.1 Motor starten Zur Vermeidung von Motorschäden durch Ölmangel ist der Motor mit einem Ölwarnsystem ausgerüstet. Ist der Ölstand zu niedrig, schaltet der Motor automatisch Hinweis ab bzw. lässt sich nicht starten (der Motorschalter bleibt in «ON»-Stellung).
  • Seite 17: Motor Abstellen

    3. Bedienung 3.4.2 Nach Anspringen des Motors 3.4.3 Motor abstellen 1 – 2 min. GX 120_013.cdr GX 120_006.cdr – Drehzahlhebel auf Leerlauf stellen. – Gashebel (3) auf Leerlauf stellen. – Motor 1 ... 2 min. warmlaufen lassen. OPEN OPEN GX 120_008.cdr GX 120_007.cdr –...
  • Seite 18: Bedienung Motor - Yanmar

    3. Bedienung 3.5 Bedienung Motor — Yanmar 3.5.1 Motor starten L 40_004.cdr – Dekompressionshebel (4) drücken; der Hebel kehrt beim Zie- hen des Starters selbsttätig in die Ausgangsstellung zurück. L 40_001.cdr – Kraftstoffhahn (1) auf «O» stellen (offen). STOP SLOW L 40_005.cdr –...
  • Seite 19 3. Bedienung 3.5.3 Kaltstart 3.5.4 Motor abstellen Bei kalter Witterung, wenn sich der Motor schwer starten lässt STOP SLOW L 40_006.cdr L 40_007.cdr – Drehzahlhebel (2) auf Leerlauf stellen. – Gummistopfen (5) vom Kipphebeldeckel entfernen und – Motor 2 … 3 Minuten laufenlassen. STOP SLOW RUN L 40_008.cdr...
  • Seite 20: Betrieb

    3. Bedienung 3.6 Betrieb 3.7 Wasserberieselung – Sobald der Motor auf kurzes Gasgeben reagiert, kann die Ma- schine in Betrieb genommen werden. – Gashebel auf Vollgas stellen. Die Maschine nur mit Vollgas betreiben und in Kurzpausen stets auf Leerlauf stellen. Gefahr von Kupplungsschäden durch schleifende Fliehkraft- Achtung kupplung!
  • Seite 21: Fahrwerk

    4. Transport 4.1 Fahrwerk 4.2 Verladen und transportieren Bei Verwendung des Fahrwerks kann die Maschine problemlos Beim Verladen nur tragfähige und standsichere über kürzere Strecken transportiert werden. Verladerampen benutzen. Die Anschlagpunkte (Bügel, Hebeösen) vor der Benutzung auf Beschädigungen und Verschleiß prüfen.
  • Seite 22: Wartung

    5. Wartung – Vor Arbeiten an der elektrischen Anlage Batterie abklem- 5.1 Allgemeine Hinweise men und mit isolierenden Materialien abdecken. Sorgfältige Wartung: – «PLUS»- und «MINUS»-Pol der Batterie nicht vertau- schen. ð höhere Lebensdauer ð – Kurzschlüsse an stromführenden Kabeln unbedingt ver- größere Funktionssicherheit ð...
  • Seite 23: Schmierplan

    5. Wartung 5.3 Schmierplan Wechsel-Intervalle Schmierstelle Menge Schmierstoff Bestell-Nr. [Betriebsstunden] 1. Motor 0.6 l APF 1240 (H) Erstmals nach 20 h, Motorenöl 2-80601100 dann alle 100 h API SG-CE APF 1250 (H) SAE 10W40 0.8 l APF 1240 (Y) Erstmals nach 20 h, dann alle 200 h 0.9 l...
  • Seite 24: Wartung Motor - Hatz

    5. Wartung 5.5.3 Motorölstand prüfen 5.5 Wartung Motor — Hatz Altöl auffangen und umweltfreundlich entsorgen. In dieser Betriebsanleitung sind nur die täglichen Motorwar- Kein Öl im Boden oder der Kanalisation versickern tungsarbeiten aufgeführt. Beachten Sie die Motor-Betriebs- Umwelt lassen. anleitung und die dort aufgeführten Wartungshinweise und -intervalle.
  • Seite 25: Luftfilter Reinigen

    5. Wartung 5.5.5 Luftfilter reinigen Filtereinsatz auswechseln: – bei beschädigtem Filterelement oder Dichtring Achtung – bei rußhaltigem Niederschlag – bei feuchter und öliger Verschmutzung – wenn die Motorleistung nachlässt oder – sich die Abgasfarbe ändert. – mindestens einmal jährlich Motor niemals ohne Luftfiltereinsatz betreiben. B5399018.cdr –...
  • Seite 26: Wartung Motor - Honda

    5. Wartung 5.6.2 Motorölstand prüfen 5.6 Wartung Motor — Honda In dieser Betriebsanleitung sind nur die täglichen Motorwar- Altöl auffangen und umweltfreundlich entsorgen. tungsarbeiten aufgeführt. Beachten Sie die Motor-Betriebs- Kein Öl im Boden oder der Kanalisation versickern anleitung und die dort aufgeführten Wartungshinweise und lassen.
  • Seite 27: Luftfiltereinsatz Reinigen

    5. Wartung 5.6.3 Luftfiltereinsatz reinigen Filtereinsatz auswechseln: – bei beschädigtem Filterelement Achtung – bei feuchter und öliger Verschmutzung – wenn die Motorleistung nachlässt – mindestens einmal jährlich Keinen Schmutz in Luftkanal und Vergaser gelan- gen lassen. Motor niemals ohne Luftfiltereinsatz betreiben. max.
  • Seite 28: Wartung Motor - Yanmar

    5. Wartung 5.7.2 Motorölstand prüfen 5.7 Wartung Motor — Yanmar In dieser Betriebsanleitung sind nur die täglichen Motorwar- Altöl auffangen und umweltfreundlich entsorgen. tungsarbeiten aufgeführt. Beachten Sie die Motor-Betriebs- Kein Öl im Boden oder der Kanalisation versickern anleitung und die dort aufgeführten Wartungshinweise und Achtung lassen.
  • Seite 29: Wartung Des Luftfilters

    5. Wartung 5.7.3 Wartung des Luftfilters Filtereinsatz auswechseln: – bei beschädigtem Filterelement oder Dichtring Achtung – nach zweimaligem Reinigen – bei rußhaltigem Neiderschlag – bei feuchter und öliger Verschmutzung – wenn die Motorleistung nachlässt oder – sich die Abgasfarbe ändert. Motor niemals ohne Luftfiltereinsatz betreiben.
  • Seite 30: Wartung Maschine

    5. Wartung 5.8.5 Keilriemen prüfen, spannen 5.8 Wartung Maschine 5.8.1 Reinigung Die Maschine täglich reinigen. Nach der Reinigung alle Kabel, Schläuche, Leitun- 10 mm gen und Verschraubungen auf Undichtigkeiten, lo- (0.4 in) ckere Verbindungen, Scheuerstellen und sonstige Achtung Beschädigungen überprüfen. Festgestellte Mängel sofort beheben.
  • Seite 31 5. Wartung 5.8.6 Erregergetriebe: Ölstand / Ölwechsel Ölwechsel bei warmem Getriebeöl durchführen. Hinweis B1399107.cdr – Ölablassschraube (1) herausschrauben. Verbrennungsgefahr! Vorsicht beim Ablassen von heissem Öl. Gefahr – Altöl ablassen. Auslaufendes Öl auffangen und umweltfreundlich entsorgen. Umwelt – Neues Öl einfüllen. Ölmenge und -qualität: siehe Schmierplan.
  • Seite 32: Hilfe Bei Störungen

    Keine Funkenbildung ð Kerze auswechseln Funkenbildung ð Kerze einschrauben und Motor versuchen zu starten Wenn der Motor immer noch nicht anspringt, lassen Sie ihn bei einem autorisierten Ammann- oder Honda-Service überprüfen. Motorleistung lässt nach Luftfilter verschmutzt Luftfilter reinigen; ggf. auswechseln Motor läuft, Gerät bewegt sich nicht vorwärts...
  • Seite 33 Translation of the original Operating instructions APF 1240 APF 1250 APF 1850...
  • Seite 35 Also observe the corresponding rules and regulations valid in your country. Ammann Verdichtung GmbH is not liable for the function of the machine when used in an improper manner and for other than the intended purpose. Operating errors, improper maintenance and the use of incorrect operating materials are not covered by the warranty.
  • Seite 36: Safety Regulations

    1. Safety regulations This Ammann machine has been built according to the state Safety information in the operating and maintenance of the art in compliance with the pertinent rules. Neverthe- instructions less, these machines can still constitute a hazard to persons...
  • Seite 37 1. Safety regulations Starting in enclosed spaces, tunnels, mines or deep ditches Work on hydraulic devices must be undertaken only by persons with a special knowledge of hydraulics and the necessary experi- Engine exhaust gas are highly dangerous! ence! For this reason, when operating the machine in enclosed spaces, Do not adjust pressure relief valves.
  • Seite 38: Technical Data

    2. Technical data 01331030.cdr APF 1240 (H) APF 1250 (H) APF 1850 (H) APF 1240 (Y) APF 1850 1. Dimensions 400 mm 500 mm 500 mm 400 mm 500 mm 540 mm 523 mm 615 mm 540 mm 615 mm...
  • Seite 39: Working Surface

    2. Technical data APF 1240 (H) APF 1250 (H) APF 1850 (H) APF 1240 (Y) APF 1850 Drive via centrifugal clutch and V-belt 4. Speed up to 20 m/min 5. Vibration Vibration force 12 kN 18 kN 12 kN 18 kN...
  • Seite 40: Operation

    3. Operation 3.1 Description The APF 1240 / 1250 / 1850 is a forward moving vibratory plate that uses a traction-oscillating system. The engine drives the vibrator via a centrifugal clutch and V-belt. The machine is suitable for the compaction of sand, gravel (pos- sibly coarse gravel), lean concrete, asphaltic bitumen-coated gravel (medium and fine grained) and paving stones.
  • Seite 41: Prior To Use

    3. Operation 3.2 Prior to use Use personal protective equipment (in particular hearing protectors and safety shoes). Risk of loss of hearing! Danger Observe the safety conditions. Observe the operation and maintenance instruc- tions. Read the Engine operating instructions. Observe the Importants on safety, operation and mainte- nance contained in them.
  • Seite 42: Engine Operation - Hatz

    3. Operation 3.3 Engine operation — Hatz 3.3.1 Starting the engine B1799204.cdr – Pull the starting rope with increasing speed, until the motor starts up. B1799201.cdr – Adjust engine speed control lever (1) to full load «max». S C S B1799202.cdr –...
  • Seite 43 3. Operation 3.3.2 If the engine starts 3.3.3 Switching off the engine – Adjust engine speed control lever (1) to idle position. STOP 1 – 2 min. B1799205.cdr B1799206.cdr – Adjust engine speed control lever (1) to idle position. – Allow the engine to warm up for 1 ...
  • Seite 44: Engine Operation - Honda

    3. Operation 3.4 Engine operation — Honda 3.4.1 Starting the engine To prevent engine damage through oil deficiency, the engine is provided with a low oil warning system. If the oil level is too low, the engine switches off automati- Important cally (the engine switch remains in the «ON»-position).
  • Seite 45: Switching Off The Engine

    3. Operation 3.4.2 If the engine starts 3.4.3 Switching off the engine 1 – 2 min. GX 120_013.cdr GX 120_006.cdr – Adjust engine speed control lever (3) to idle position. – Adjust engine speed control lever (3) to idle position. –...
  • Seite 46: Engine Operation - Yanmar

    3. Operation 3.5 Engine operation — Yanmar 3.5.1 Starting the engine L 40_004.cdr – Push down the decompression lever (4); it will return automat- ically when the recoil starter is pulled. L 40_001.cdr – Move fuel tap (1) to «O» (open). STOP SLOW L 40_005.cdr –...
  • Seite 47: Cold-Starting

    3. Operation 3.5.3 Cold-starting 3.5.4 Switching of the engine In cold weather, when the engine is hard to start: STOP SLOW L 40_006.cdr L 40_007.cdr – Adjust engine speed control lever (2) to idle position. – Remove the rubber plug (5) of the rocker arm cover and –...
  • Seite 48: Operation

    3. Operation 3.6 Operation 3.7 Water spray – The vibration plate can be operated as soon as the engine re- acts to brief acceleration. – Move engine speed control lever to full load. Operate vibration plate only at full throttle and dur- ing brief rest periods, always move vibration plate to idle speed otherwise the centrifugal clutch will Attention...
  • Seite 49: Transport

    4. Transport 4.1 Bogie 4.2 Loading and transportation Use the bogie enables the vibration plate to be easily transported Only use sufficiently strong and secure loading over short distances. ramps when loading. Danger Check the contact points (frame, lifting rings) be- fore use for damage and wear.
  • Seite 50: Maintenance

    5. Maintenance – Before commencing work on any electrical equipment, 5.1 General notes disconnect the battery and cover it with insulating mate- Careful maintenance: rials. – Do not exchange «PLUS» and «MINUS» poles on the bat- ð increased service life tery.
  • Seite 51: Lubrication Schedule

    5.3 Lubrication schedule Change intervals Lubrication point Quantity Lubricant Order No. [op. hrs.] 1. Engine 0.6 l APF 1240 (H) First time after 20 h; Engine oil 2-80601100 then every 100 h API SG-CE APF 1250 (H) SAE 10W40 0.8 l APF 1240 (Y) First time after 20 h;...
  • Seite 52: Maintenance Work - Hatz

    5. Maintenance 5.5.3 Checking the engine oil level 5.5 Maintenance work — Hatz Collect old oil and dispose of it in an environment Only the maintenance work which has to be performed daily friendly manner. is included in the Operating Manual. Please refer to the en- Environment gine Operating Manual and to the maintenance instructions Do not permit oil to run onto the floor into the...
  • Seite 53 5. Maintenance 5.5.5 Cleaning the dry air filter Change the filter element: – if the filter element or sealing ring is damaged Attention – if sooty deposits are present – if moist or oily deposits are present – if engine performance reduces or –...
  • Seite 54: Maintenance Work - Honda

    5. Maintenance 5.6.2 Checking the engine oil level 5.6 Maintenance work — Honda Immediately replace damaged seals. Only the maintenance work which has to be performed daily is included in the Operating Manual. Please refer to the en- Collect old oil and dispose of it in an environment gine Operating Manual and to the maintenance instructions friendly manner.
  • Seite 55: Cleaning The Air Filter

    5. Maintenance 5.6.3 Cleaning the air filter Change the filter element: – if the filter element is damaged Attention – if moist or oily deposits are present – if engine performance reduces – minimum once a year Never operate the engine without air filter. Do not allow dust to enter into carburator.
  • Seite 56: Maintenance Work - Yanmar

    5. Maintenance 5.7.2 Checking the engine oil level 5.7 Maintenance work — Yanmar Only the maintenance work which has to be performed daily Immediately replace damaged seals. is included in this operating manual. Please refer to the en- Collect old oil and dispose of it in an environment gine operating manual and to the maintenance instructions Attention friendly manner.
  • Seite 57: Cleaning The Air Filter Element

    5. Maintenance 5.7.3 Cleaning the air filter element Change filter element: • If the filter element or sealing ring is damaged Attention • After cleaning twice • If there are soot-containing deposits • If moist or oily • When engine performance reduces or •...
  • Seite 58: Maintenance Work - Machine

    5. Maintenance 5.8.5 Checking V-belt 5.8 Maintenance work — Machine 5.8.1 Cleaning Clean the machine thoroughly daily. After cleaning, check all cables, hoses, pipes and 10 mm screwed fittings for leaks, loose connections, (0.4 in) chafe marks and other damage. Attention Any faults which are detected should be rectified immediately.
  • Seite 59 5. Maintenance 5.8.6 Exciter: Oil level check / Oil change Oil changes should be carried out with the gear oil warm Important B1399107.cdr – Loose oil drain plug (1) and unscrew. Caution when draining hot oil, risk of scalding! Danger –...
  • Seite 60 5. Maintenance...
  • Seite 61 5. Maintenance...
  • Seite 62: Troubleshooting

    Honda GX 100_10 No spark ð replace plug Spark ð fit plug and attempt to start engine If the engine still does not start, contact an authorised Ammann or Honda Service Centre. Reduced engine performance Air filter clogged Clean air filter; replace if necessary...
  • Seite 63 Traduction du Mode d‘emploi original APF 1240 APF 1250 APF 1850...
  • Seite 65 Les conditions de garantie et de responsabilité des conditions gé- nérales de vente d’Ammann Verdichtung GmbH ne sont pas ex- tensive par les indications susmentionnées. Nous nous reservons le droit à faire des changements en cas de développement technique sans avis.
  • Seite 66: Consignes De Sécurité

    1. Consignes de sécurité Cette machine Ammann a été construite selon l’état actuel de la Indications de sécurité dans les instructions de technique. Son utilisation peut neanmoins constituer un risque fonctionnement et de maintenance de dommages corporels ou des dégâts matèriels importants, Dans les instructions de service, les symboles suivants sont utilisés...
  • Seite 67 1. Consignes de sécurité Démarrage dans des espaces clos, des tunnels, des galeries ou Les pièces de rechange doivent être conformes aux exigences tech- des fossés profonds. niques fixées par le fabricant. Pour cette raison, n’utiliser que des pièces de rechange originales. Les gaz d’échappement du moteur mettent la vie en danger! Avant de travailler sur des conduites hydrauliques, enlever la pres- Pour cette raison, lors du fonctionnement dans des espaces clos,...
  • Seite 68: Caractéristiques Techniques

    2. Caractéristiques techniques 01331030.cdr APF 1240 (H) APF 1250 (H) APF 1850 (H) APF 1240 (Y) APF 1850 1. Dimensions 400 mm 500 mm 500 mm 400 mm 500 mm 540 mm 523 mm 615 mm 540 mm 615 mm...
  • Seite 69 2. Caractéristiques techniques APF 1240 (H) APF 1250 (H) APF 1850 (H) APF 1240 (Y) APF 1850 Entraînement par embrayage centrifuge et courroie trapézoïdale 4. Vitesse avant 0 – 20 m/min 5. Vibration Force vibratoire totale 12 kN 18 kN...
  • Seite 70: Mise En Oeuvre

    3. Mise en oeuvre 3.1 Description La APF 1240 / 1250 / 1850 est une plaque vibrante qui fonc- tionne selon le principe du traîneau vibrant et qui n’avance que dans une seule direction. Le vibrateur sur la plaque vibrante est mû par le moteur, par l’in- termédiaire d’un embrayage centrifuge et d’une courroie trapé-...
  • Seite 71: Avant La Mise En Service

    3. Mise en oeuvre 3.2 Avant la mise en service Utiliser un équipement de protection personnelle (en particulier équipement insonorisant et chaus- sures de sécurité). Risque de perte de l’ouïe ! Danger Respecter les consignes de sécurité. Respecter les instructions de service et de mainte- nance.
  • Seite 72: Fonctionnement Du Moteur - Hatz

    3. Mise en oeuvre 3.3 Fonctionnement du moteur — Hatz 3.3.1 Démarrage du moteur B1799204.cdr – Tirer la corde de démarrage de plus en plus vite jusqu’à ce que le moteur démarre. B1799201.cdr – Placer le levier de vitesse (1) sur pleine charge «max». S C S B1799202.cdr –...
  • Seite 73: Arrêt Du Moteur

    3. Mise en oeuvre 3.3.2 Après le démarrage du moteur 3.3.3 Arrêt du moteur – Placer le levier de vitesse (1) en position de marche à vide. STOP 1 – 2 min. B1799205.cdr B1799206.cdr – Mettre le levier de vitesse en marche à vide «min». –...
  • Seite 74: Fonctionnement Du Moteur - Honda

    3. Mise en oeuvre 3.4 Fonctionnement du moteur — Honda 3.4.1 Démarrer le moteur Pour éviter les problèmes moteur dus au manque d’huile, le moteur est équipé d’un système d’avertis- sement qui indique l’état de la jauge d’huile. Important Si le niveau d’huile est trop faible, le moteur s’ éteint automatiquement et/ou ne peut être démarré...
  • Seite 75 3. Mise en oeuvre 3.4.2 Après le démarrage du moteur 3.4.3 Arrêtez le moteur 1 – 2 min. GX 120_013.cdr GX 120_006.cdr – Placer le levier de régime (3) sur le point mort. – Mettre le levier de gazes (3) au point mort. –...
  • Seite 76: Fonctionnement Du Moteur - Yanmar

    3. Mise en oeuvre 3.5 Fonctionnement du moteur — Yanmar 3.5.1 Démarrer le moteur L 40_004.cdr – Appuyer sur le levier de décompression (4); en tirant le levier, l’amorce retourne automatiquement dans la position de dé- L 40_001.cdr part. – Mettre le robinet de carburant (1) sur «O»...
  • Seite 77: Démarrage À Froid

    3. Mise en oeuvre 3.5.3 Démarrage à froid 3.5.4 Arrêter le moteur Par temps froid, si le moteur a du mal à démarrer STOP SLOW L 40_006.cdr L 40_007.cdr – Mettre le levier de régime (2) au point mort. – Enlever le bouchon de caoutchouc (5) du couvercle amovible –...
  • Seite 78: Fonctionnement

    3. Mise en oeuvre 3.6 Fonctionnement 3.7 Arrosage d’eau – Lorsque le moteur réagit dès qu’on donne un peu de gaz , la machine peut être mise en service. – Mettre le levier de gaz en position «pleine charge». Laisser travailler la machine seulement avec pleine gaz et la mettre toujours en marche à...
  • Seite 79: Transport

    4. Transport 4.1 Essieu pour déplacement 4.2 Transbordement et transport Grâce à cet essieu, la plaque vibrante peut être déplacée sans Lors de transbordements, n’utiliser que des ram- problème sur petites distances. pes de transbordement stables dont la force por- tante est suffisante.
  • Seite 80: Maintenance

    5. Maintenance – Avant des travaux d’installation électrique le câble de la 5.1 Indications générales batterie est à détacher et a couvrir avec du matériel iso- Maintenance soignée: lants. ð Plus grande durée de vie – Ne pas échanger les pôles «PLUS» et «MOINS» de la bat- ð...
  • Seite 81: Tableau De Lubrification

    Lieu de lubrification Quantité Lubrifiant Numéro de l’article ment [h de fct] 1. Moteur 0.6 l APF 1240 (H) 1 fois après le 20 h; Huile moteur 2-80601100 après tous les 100 h API SG-CE APF 1250 (H) SAE 10W40 0.8 l...
  • Seite 82: Travaux De Maintenance - Hatz

    5. Maintenance 5.5.3 Contrôler le niveau d’huile du moteur 5.5 Travaux de maintenance — Hatz Seuls les travaux de maintenance quotidiens du moteur sont Remplacer immédiatement les joints défectueux. mentionnés dans ces instructions de service. Référez-vous Récupérer l’huile usagée et l’éliminer dans le res- aux instructions de service du moteur et aux indications et in- Environnement pect de l’environnement.
  • Seite 83: Nettoyer Le Filtre À Air

    5. Maintenance 5.5.5 Nettoyer le filtre à air Remplacer l’insert filtrant : – en cas d’endommagement de l’élément filtrant Attention ou de la bague d’étanchéité – en présence de dépôts contenant de la suie – en présence d’impuretés humides et huileuses –...
  • Seite 84: Travaux De Maintenance - Honda

    5. Maintenance 5.6.2 Contrôler le niveau d’huile du moteur 5.6 Travaux de maintenance — Honda Seuls les travaux de maintenance quotidiens du moteur Remplacer immédiatement les joints défectueux. sont mentionnés dans ces instructions de service. Réfé- Récupérer l’huile usagée et l’éliminer dans le res- rez-vous aux instructions de service du moteur et aux indi- Environnement pect de l’environnement.
  • Seite 85: Maintenance Du Filtre À Air

    5. Maintenance – Reposer le couvercle du filtre à air et serrer l’écrou à oreilles à 5.6.3 Maintenance du filtre à air fond. Remplacer l’insert filtrant : – en cas d’endommagement de l’élément filtrant Attention – en présence d’impuretés humides et huileuses –...
  • Seite 86: Travaux De Maintenance - Yanmar

    5. Maintenance 5.7.2 Contrôle du niveau d’huile du moteur 5.7 Travaux de maintenance — Yanmar Seuls le travaux de maintenance quotidiens du moteur sont Remplacer immédiatement les joints défectueux. mentionnés dans ces instructions de service. Référez-vous Récupérer l’huile usagée et l’éliminer dans le res- aux instructions de service du moteur et aux indications et Environnement pect de l’environnement.
  • Seite 87 5. Maintenance 5.7.3 Maintenance du filtre à air Remplacer l’insert filtrant : • en cas d’endommagement de l’élément filtrant Attention ou de la bague d’étanchéité • après deux nettoyages • en présence de dépôts contenant de la suie • en présence de salissures humides et huileuses •...
  • Seite 88: Maintenance De La Machine

    5. Maintenance 5.8.5 Contrôler et tendre la courroie trapézoïdale 5.8 Maintenance de la machine 5.8.1 Nettoyage – Nettoyage de l’machine et du moteur quotidien. Après le nettoyage, contrôler tous les câbles, 10 mm tuyaux, conduites et raccords vissés afin de détec- (0.4 in) ter des fuites, des liaisons mal serrées, des points Attention...
  • Seite 89 5. Maintenance 5.8.6 Excitateur: vidange d’huile/niveau d’huile Effectuer la vidange d’huile lorsque l’huile d’engre- nage est chaude. Important B1399107.cdr – Desserrer le bouchon de vidange d’huile (1) et l’enlever. Prudence lors de la vidange d’huile chaude: Risque de brûlure ! Danger –...
  • Seite 90: Aide En Case De Défaillances

    Formation d’étincelle ð visser la bougie et essayer de faire démarrer le moteur Si le moteur ne démarre toujours pas, faites-le vérifier dans un point de service après-vente Ammann ou Honda agréé. La puissance du moteur diminue Filtre à air encrassé...
  • Seite 91 Traduzione delle Istruzioni per l‘uso originali APF 1240 APF 1250 APF 1850...
  • Seite 93 Si prega di osservare anche le norme e regolamenti validi, corrispondenti nel Vostro paese. La ditta Ammann Verdichtung GmbH non risponde per il non fun- zionamento della macchina in caso di comando improprio e anor- male o in seguito a impiego a cui essa non era destinata.
  • Seite 94: Norme Di Sicurezza

    1. Norme di sicurezza Questa macchina Ammann è stata concepita e costruita tenen- Avvertenze di sicurezza contenute presente do conto sia dello stato della tecnica odierna che delle vigenti manualetto delle istruzioni per l’esercizio norme di sicurezza. Tuttavia, anche da questa macchina posso- Indicazioni specifiche relative all’uso economico...
  • Seite 95 1. Norme di sicurezza Non modificare l’impostazione delle valvole di limitazione della pres- La guida della macchina sione. Non si possono bloccare quei comandi costruiti perché si possano re- Scaricare l’olio idraulico quando ha anncora la temperatura d’eserci- golare automaticamente nel caso in cui essi vengano abbandonati. zio.
  • Seite 96: Caratteristiche Tecniche

    2. Caratteristiche tecniche 01331030.cdr APF 1240 (H) APF 1250 (H) APF 1850 (H) APF 1240 (Y) APF 1850 1. Dimensioni 400 mm 500 mm 500 mm 400 mm 500 mm 540 mm 523 mm 615 mm 540 mm 615 mm...
  • Seite 97 2. Caratteristiche tecniche APF 1240 (H) APF 1250 (H) APF 1850 (H) APF 1240 (Y) APF 1850 Tipo di propulsione mediante frizione centrifuga e cinghia trapezoidale 4. Velocità di lavoro max. 20 m/min 5. Vibrazione Forza centrifuga 12 kN 18 kN...
  • Seite 98: Comando

    3. Comando 3.1 Descrizione La APF 1240 / 1250 / 1850 è una vibropiastra, che funziona se- condo il sistema vibrante trascinato, il quale avanza in una sola direzione. Il motore aziona il gruppo di vibrazione mediante una frizione centrifuga e una cinghia trapezoidale.
  • Seite 99: Prima Della Messa In Esercizio

    3. Comando 3.2 Prima della messa in esercizio Usare indumenti ed equipaggiamenti protettivi (in particolare protezioni degli orecchi e scarpe di si- curezza). Pericolo Attenersi alle prescrizioni di sicurezza. Attenersi alle istruzioni per l’uso e la manutenzione. Leggere le istruzioni per l’uso del motore. Attener- si alle istruzioni ivi riportate in fatto di sicurezza, comando e manutenzione.
  • Seite 100: Comando Del Motore - Hatz

    3. Comando 3.3 Comando del motore — Hatz 3.3.1 Avviamento del motore B1799204.cdr – Tirare con velocità crescente la fune finché il motore non si è acceso. B1799201.cdr – Posizionare la leva di regime (1) in posizione «max». S C S B1799202.cdr –...
  • Seite 101 3. Comando 3.3.2 Una volta il motore è in funzione: 3.3.3 Arresto motore – Posizionare la leva di regime su marcia a vuoto. STOP 1 – 2 min. B1799205.cdr B1799206.cdr – Posizionare la leva di regime su marcia a vuoto. –...
  • Seite 102: Comando Del Motore - Honda

    3. Comando 3.4 Comando del motore — Honda Il motore è dotato di un sistema di allarme olio al fine di evitare un guasto al motore a causa di un’insufficienza di olio. Se l’olio tocca un livello critico, il motore si arre- Avvertenza sta automaticamente (l’interruttore del motore però...
  • Seite 103: Arresto Motore

    3. Comando 3.4.2 Quando il motore è avviato 3.4.3 Arresto motore 1 – 2 min. GX 120_013.cdr GX 120_006.cdr – portare la leva di regime (3) in posizione di folle (MIN) e – Portare la leva di regime (3) su folle («MIN»). –...
  • Seite 104: Comando Del Motore - Yanmar

    3. Comando 3.5 Comando del motore — Yanmar 3.5.1 Avviamento del motore L 40_004.cdr – Spingere in basso la leva di decompressione (4). Essa rientre- rà automaticamente con l’estrazione dell’autoavvolgente. L 40_001.cdr – Girare il rubinetto del carburante (1) su «O» (aperto). STOP SLOW L 40_005.cdr –...
  • Seite 105 3. Comando 3.5.3 Avviamento a basse temperature 3.5.4 Arresto motore A basse temperature, quando è difficile avviare il motore, prima dell’avviamento STOP SLOW L 40_006.cdr – Portare la leva di regime (3) in posizione di folle e L 40_007.cdr – lasciarlo riscaldare per ca.
  • Seite 106: Esercizio

    3. Comando 3.6 Esercizio 3.7 Irrigazione con acqua – Si può mettere in esercizio la vibropiastra non appena il moto- re reagisce a un breve colpo di gas. – Portare la leva del comando gas su tutto gas. La macchina deve funzionare solo a tutto gas; du- rante delle pause brevi essa va sempre regolata su regime folle.
  • Seite 107: Trasporto

    4. Trasporto 4.1 Carrello di trasporto 4.2 Caricamento e trasporto Con questo carrello il trasporto della vibropiastra è molto sempli- Per caricare la vibropiastra su un mezzo di tra- ce, almeno per brevi tragitti. sporto usare solo rampe di carico di portata ido- nea e stabili.
  • Seite 108: Manutenzione

    5. Manutenzione – Prima di iniziare i lavori sull’impianto elettrico staccare la 5.1 Indicazioni generali batteria e coprirla con materiale isolante. Una manutenzione accurata garantisce: Non scambiare i poli «PLUS» (+) e «MINUS» (-) della bat- – teria. ð durata utile più lunga, ð...
  • Seite 109: Piano Di Lubrificazione

    Intervalli per il cambio Punti da lubrificare Quantità Lubrificante Numero d’ordine [ore d’esercizio] 1. Motore 0.6 l APF 1240 (H) La prima volta dopo 20 Olio per motori 2-80601100 ore, quindi ogni 100 ore API SG-CE APF 1250 (H) SAE 10W40 0.8 l...
  • Seite 110: Manutenzione Del Motore - Hatz

    5. Manutenzione 5.5.3 Controllo livello olio del motore 5.5 Manutenzione del motore – Hatz Il presente manualetto delle istruzioni per l’uso descrive Sostituire immediatamente le guarnizioni difetto- solo i quotidiani lavori di manutenzione del motore. Vogliate quindi consultare le rispettive istruzioni per l’uso del moto- Ambiente Raccogliere in un recipiente l’olio usato e smaltirlo re ed attenervi sia alle istruzioni che agli intervalli di manu-...
  • Seite 111: Pulizia Del Filtro Dell'aria

    5. Manutenzione 5.5.5 Pulizia del filtro dell’aria La cartuccia filtrante va sostituita: – quando l’elemento filtrante o l’anello di guarni- Attenzione zione è guasto – in caso di deposito di fuliggine – in caso d’imbrattamento umido e oleoso – quando la prestazione del motore diminuisce oppure –...
  • Seite 112: Manutenzione Del Motore - Honda

    5. Manutenzione 5.6.2 Controllo livello olio del motore 5.6 Manutenzione del motore — Honda Il presente manualetto delle istruzioni per l’uso descrive Sostituire immediatamente le guarnizioni difettose. solo i quotidiani lavori di manutenzione del motore. Vogliate Raccogliere in un recipiente l’olio usato e smaltirlo quindi consultare le rispettive istruzioni per l’uso del moto- Ambiente ecologicamente.
  • Seite 113 5. Manutenzione che la sporcizia penetri nel condotto dell’aria che porta al 5.6.3 Pulizia del filtro dell’aria carburatore. La cartuccia filtrante va sostituita: – Collocare l’elemento filtrante in schiuma sull’elemento filtrante in carta, quindi reinstallare il filtro dell’aria assemblato. Accer- –...
  • Seite 114: Manutenzione Del Motore - Yanmar

    5. Manutenzione 5.7.2 Controllo del livello dell’olio 5.7 Manutenzione del motore — Yanmar Le presenti istruzioni per l’uso contengono solo i quotidiani Sostituire immediatamente le guarnizioni difetto- lavori di manutenzione per il motore. Vogliate quindi osser- vare le rispettive istruzioni per l’uso del motore e le avver- Ambiente Raccogliere in un recipiente l’olio usato e smaltirlo tenze di manutenzione e gli intervalli e in esse descritti.
  • Seite 115: Manutenzione Del Filtro Dell'aria

    5. Manutenzione 5.7.3 Manutenzione del filtro dell’aria Si deve sostituire l’elemento filtrante: – quando l’elemento filtrante o l’anello di tenuta Attenzione sono danneggiati, – dopo la seconda pulizia, – in caso di deposito fuligginoso, – in caso di intasamento umido o oleoso –...
  • Seite 116: Manutenzione Della Macchina

    5. Manutenzione 5.8.5 Controllare e tendere la cinghia trapezoidale 5.8 Manutenzione della macchina 5.8.1 Pulizia Pulire la macchina quotidianamente. Terminata la pulizia, si deve controllare la perfetta 10 mm tenuta di tutti i cavi e tubi flessibili, delle tubazioni (0.4 in) e dei collegamenti a vite nonché...
  • Seite 117 5. Manutenzione 5.8.6 Eccitatore: Controllo del livello dell'olio e cam- bio dell’olio Eseguire il cambio dell'olio mentre è ancora caldo. Avvertenza B1399107.cdr – Allentare il tappo a vite e toglierlo (1). Precauzione durante la fuoriuscita dell'olio caldis- simo - Pericolo di bruciature! Pericolo –...
  • Seite 118: Anomalie E Rimedi

    – In caso non sia possibile individuare o eliminare la causa dell'anomalia, contattare il servizio tecnico Ammann. – Per prima cosa esaminare sempre le parti più accessibili o le cause il cui esame risulta essere il più semplice (co- me fusibili, diodi luminosi ecc.).
  • Seite 119: Wartungsteile

    7. Maintenance parts 7. Parti di Manutenzione B3299075.cdr Artikel-Nr. / Order No. / No. piéce / Parte n. Bezeichnung Description Pos. Denominación APF 1240 (H) APF 1250 (H) APF 1240 (Y) APF 1850 APF 1850 (H) Identificazione Luftfilter kpl. Air filter cpl.

Diese Anleitung auch für:

Apf 1250Apf 1850

Inhaltsverzeichnis