Inhaltsverzeichnis
Werbung
Verfügbare Sprachen
Verfügbare Sprachen
Quicklinks
Werbung
Kapitel
Inhaltsverzeichnis
Fehlerbehebung

Verwandte Anleitungen für wortmann MD19MS


Inhaltszusammenfassung für wortmann MD19MS
-
Seite 2: Inhaltsverzeichnis
Contents ◇ Notice............................2 ◇ Safety Information........................2 ◇ Precaution............................2 Package Contents ..........................2 Hardware Installation.........................3 Input ............................3 Control Buttons ..........................3 OSD (On-Screen Display) Menu .......................4 Troubleshooting..........................7 Supported Timing ..........................7 Specification ............................8... -
Seite 3: Notice
◇ Notice ‧ All Information in this manual may change from time to time without prior notice. ‧ To ensure safety operation of this product, please read the following menu carefully before using this product. ◇ Safety Information ‧ Do not place anything wet on the monitor or the power cord. ‧... -
Seite 4: Hardware Installation
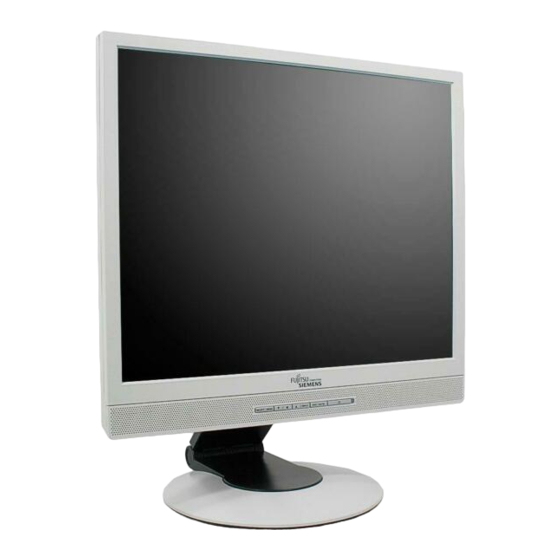
Tilting For viewing clarity, you can tilt the LCD backward (up to 20 degrees). Hardware Installation Be carefully to your LCD monitor, it’s very exquisite but easy to broken. Turn off LCD’s and PC’s power before you set it up. Follow our installation step by step. Input 【1】AC Input:This is for connecting the power cable. -
Seite 5: Osd (On-Screen Display) Menu
OSD MENU 1. Brightness: The adjusting range is from 0 to 100. 2. Contrast: The adjusting range is from 0 to 100. 3. Clock/Phase: Reduces Horizonal-line noise and Vertical-line noise of the image by adjusting (Phase) and (Clock) separately. The adjusting range is from 0 to 100. Phase adjusts the phase of the pixel clock signal. - Seite 6 8. Color Temperature: It contains four color modes including 9300, 7500, 6500, and User mode. 9. Language: there are five languages for your selection, including English, French, German, Spanish, Italian and Russian. 10. OSD Display: to adjust the position of OSD. 11.
- Seite 7 12. VGA / DVI Input: to select input source.
-
Seite 8: Troubleshooting
Troubleshooting Make sure that your monitor is properly installed if you have encountered any trouble using this product. ˙ There is no picture on the screen. Check: 1.Power saving mode. Press any key and move the mouse to deactivate the mode. 2.Signal cable connector pins. -
Seite 9: Specification
Specification Input Signals VGA compatible analog RGB Composite sync supported DVI* DDWG compliant Single Link TMDS Digital Visual Interface (DVI) Compatibility Up to 1280X1024@75Hz(Non-interlaced) Connector D-sub 15-pins DVI* DVI-D Audio* Stereo Phone Jack Power A/C Input Power Voltage Built-in universal power supply: 100-240 VAC, 50/60 Hz Consumption Active <... - Seite 10 Table des matières ◇ Notes ............................2 ◇ Consignes de sécurité .........................2 ◇ Précautions..........................2 Contenu de la boîte ...........................2 Installation du moniteur ........................3 Entrées............................3 Boutons de commande ........................3 Menu OSD (Affichage à l’écran)......................4 Guide de dépannage.........................7 Fréquences supportées........................7 Caractéristiques techniques ......................8...
-
Seite 11: Notes
◇ Notes ‧ Les informations contenues dans ce manuel sont sujettes à des modifications sans préavis. ‧ Pour votre sécurité, veuillez lire attentivement ce manuel avant d’utiliser cet appareil. ◇ Consignes de sécurité ‧ Ne placez aucun objet mouillé sur le moniteur ou sur le cordon d'alimentation. ‧... -
Seite 12: Installation Du Moniteur
Inclinaison Pour une clarté de visualisation, vous pouvez incliner le LCD en arrière (jusqu’à 20 degrés). Installation du moniteur Prenez grand soin de votre moniteur LCD, il est très sophistiqué mais peut facilement être endommagé. Coupez l’alimentation du moniteur LCD et du PC avant de procéder à l’installation. Procédez de la manière suivante: Entrées 【1】AC IN (Entrée AC):Pour brancher le cordon d’alimentation. -
Seite 13: Menu Osd (Affichage À L'écran)
MENU OSD 1. Brightness (Luminosité) : Vous pouvez choisir une valeur entre 0 et 100. 2. Contrast (Contraste) : Vous pouvez choisir une valeur entre 0 et 100. 3. Clock/Phase (Horloge/Phase) : Pour réduire les interférences de ligne horizontale et les interférences de ligne verticale en changeant (Phase) et (Horloge) séparément. - Seite 14 8. Color Temperature (Température des couleurs) : Pour choisir entre les 4 modes de couleur suivant : 9300, 7500, 6500 et Utilisateur. 9. Language (Langue) : Pour choisir entre les 5 langues suivantes : Anglais, Français, Allemand, Espagnol, Italien et Russe. 10.
- Seite 15 12. VGA / DVI Input (Entrée VGA/DVI) : Pour sélectionner la source d’entrée.
-
Seite 16: Guide De Dépannage
Guide de dépannage Vérifiez que votre moniteur est correctement installé si vous rencontrez des problèmes lorsque vous utilisez cet appareil. ‧ Il n’y a aucune image sur l’écran. A vérifier : 1. Mode d’économie d'énergie. Appuyez sur une touche ou bougez la souris pour sortir du mode d’économie d’énergie. -
Seite 17: Caractéristiques Techniques
Caractéristiques techniques Compatible VGA analogique RGB Sync composite supportée Signaux d'entrée Interface visuelle numérique (DVI) conforme DDWG DVI* Lien unique TMDS Jusqu'à 1280x1024@75Hz (non entrelacé) Compatibilité Câble D-Sub 15 fiches DVI* DVI-D Connecteur Audio* Prise Ecouteurs stéréo Alimentation Entrée AC Tension Adaptateur universel intégré... - Seite 18 Inhaltsverzeichnis Hinweise............................2 Sicherheitsinformationen........................2 Vorsichtsmaßnahmen........................2 Lieferumfang .............................2 Installation ............................3 Bedienungselemente.........................3 OSD Bedienmenü (On-Screen Display) ....................4 Problembehebung ..........................7 Unterstützte Anzeigeformate ......................7 Spezifikationen ..........................8...
-
Seite 19: Hinweise
Hinweise • Um einen sicheren Betrieb des Gerätes zu gewährleisten, lesen Sie diese Anleitung bitte sorgfältig durch bevor Sie das Gerät installieren und in Betrieb nehmen. • Änderungen und Irrtümer vorbehalten. Sicherheitsinformationen • Platzieren Sie das Gerät und die Kabel nicht in der Nähe von Feuchtigkeit oder Flüssigkeiten. •... -
Seite 20: Installation
Neigung Sie können den LCD-Bildschirm bis zu 20 Grad nach hinten neigen. Installation Schalten Sie den PC aus und trennen Sie ihn vom Stromnetz bevor Sie das Display anschließen. Eingänge AC IN: Stromanschluss für das Netzkabel. D-SUB: Signalanschluss für das 15-polige VGA-Kabel. DVI: Signalanschluss für das DVI-Kabel.* AUDIO IN:... - Seite 21 OSD-Menü 1. Brightness (Helligkeit): Der Einstellbereich reicht hier von 0 bis 100. 2. Contrast (Kontrast): Der Einstellbereich reicht hier von 0 bis 100. 3. Clock/Phase (Takt/Phase): Vermindert horizontales und vertikales Bildrauschen durch separate Einstellung von Phase und Takt. Der Einstellbereich reicht hier von 0 bis 100. Über die Phase stellen Sie die Phase des Pixeltaktes ein.
- Seite 22 8. Color Temperature (Farbtemperatur): Hier finden Sie vier Voreinstellungen: 9300, 7500, 6500 und Benutzer. 9. Language (Sprache): Sie können unter fünf Sprachen wählen: Englisch, Französisch, Deutsch, Spanisch, Italienisch und Russisch. 10. OSD Display (OSD-Position): Zur Auswahl der Stelle, an der das OSD angezeigt wird. 11.
- Seite 23 12. VGA / DVI Input (VGA/DVI-Eingang): Zur Auswahl der Eingangsquelle.
-
Seite 24: Problembehebung
Problembehebung Bevor Sie sich an den Kundendienst oder Ihren Händler wenden, prüfen Sie beim Auftreten einer Störung wie nachstehend beschrieben. Möglicherweise können Sie die Störung selbst beheben. Läßt sich die Störung nicht beheben, setzen Sie sich bitte mit dem Händler in Verbindung, bei dem Sie diesen LCD-Monitor gekauft haben. -
Seite 25: Spezifikationen
Spezifikationen Eingangssignale VGA compatible analog RGB Composite sync supported DVI* DDWG compliant Single Link TMDS Digital Visual Interface (DVI) Kompatibilität Bis 1280x1024 / 75Hz (Non-interlaced) Anschlüsse D-sub 15-pin VGA DVI* DVI-D Audio* 3,5 mm Stereo Klinkenbuchse Netz AC Eingang Stromversorgung Spannung Internes Netzteil: 100-240 VAC, 50/60 Hz Leistungsaufnahme... - Seite 26 Contenido ◇ Aviso .............................2 ◇ Información de seguridad ......................2 ◇ Precaución............................2 Contenido del paquete ........................2 Instalar el hardware...........................3 Entrada ............................3 Botones de control ..........................3 Menú OSD (On-Screen Display) .......................4 Solucionar problemas........................7 Frecuencias admitidas ........................7 Especificaciones ..........................8...
-
Seite 27: Aviso
◇ Aviso ‧ Toda la información contenida en este manual puede cambiarse periódicamente sin previo aviso. ‧ Para garantizar un funcionamiento seguro del producto, lea la siguiente información atentamente antes de utilizar este producto. ◇ Información de seguridad ‧ No coloque ningún objeto húmedo en el monitor ni en el cable de alimentación. ‧... -
Seite 28: Instalar El Hardware
Inclinación Para mayor claridad de visualización, puede inclinar hacia atrás la pantalla LCD (hasta 20 grados). Instalar el hardware Tenga cuidado con el monitor LCD que, aunque de diseño elegante, es muy fácil de romper. Desconecte la alimentación de la pantalla LCD y de su PC antes de realizar la instalación. Siga los pasos de instalación. -
Seite 29: Menú Osd (On-Screen Display)
MENÚ OSD 1. Brightness (Brillo): el intervalo de ajuste está comprendido entre 0 y 100. 2. Contrast (Contraste): el intervalo de ajuste está comprendido entre 0 y 100. 3. Clock/Phase (Reloj/Fase): reduce el ruido de las líneas horizontales y verticales de la imagen ajustando la fase y el reloj por separado. - Seite 30 8. Color Temperature (Temperatura de color): contiene los cuatro modos de color siguientes: 9300, 7500, 6500 y User mode (Modo de usuario). 9. Language (Idioma): puede seleccionar uno de los cinco idiomas siguientes: inglés, francés, alemán, español, italiano e ruso. 10.
- Seite 31 12. VGA / DVI Input (Entrada VGA/DVI): permite seleccionar la fuente de entrada.
-
Seite 32: Solucionar Problemas
Solucionar problemas Asegúrese de que el monitor está correctamente instalado si ha detectado problemas al utizarlo. ˙ No hay ninguna imagen en la pantalla. Comprobar: 1. Modo de ahorro de energía. Presione cualquier tecla y mueva el ratón para desactivar el modo. 2. -
Seite 33: Especificaciones
Especificaciones RGB analógica compatible con VGA Sincronización compuesta admitida Señales de entrada Interfaz visual digital TMDS de un solo enlace compatible DVI* con DDWG (DVI) Compatibilidad Hasta 1280X1024 a 75 Hz (no entrelazado) D-Sub de 15 contactos DVI* DVI-D Conector Audio* Conector estéreo o de auriculares Alimentación... - Seite 34 Contenuti ◇ Avviso ............................2 ◇ Informazioni sulla sicurezza......................2 ◇ Precauzioni ..........................2 Contenuti della confezione ........................2 Installazione dell’hardware ........................3 Input ............................3 Tasti di controllo ..........................3 Menu OSD (On-Screen Display) .......................4 Risoluzione dei problemi ........................7 Temporizzazioni supportate.......................7 Specifiche............................8...
-
Seite 35: Avviso
◇ Avviso ‧ Tutte le informazioni di questo manuale sono soggette a modifiche periodiche senza preavviso. ‧ Per assicurarsi che il prodotto funzioni correttamente, leggere attentamente le informazioni che seguono prima dell’uso. ◇ Informazioni sulla sicurezza ‧ NON collocare alcun oggetto bagnato sul monitor o sul cavo d'alimentazione. ‧... -
Seite 36: Installazione Dell'hardware
Inclinazione Per rendere la visualizzazione più chiara, è possibile inclinare il monitor LCD verso il retro (fino ad un massimo di 20°). Installazione dell’hardware Deve essere usata un’estrema attenzione nel maneggiare il monitor LCD; di fattura squisita, però molto delicato. Spegnere il monitor LCD ed il PC prima di eseguire l’installazione. Attenersi scrupolosamente a tutti i passaggi dell’installazione. -
Seite 37: Menu Osd (On-Screen Display)
MENU OSD 1. Brightness (Luminosità): la portata della regolazione va da 0 a 100. 2. Contrast (Contrasto): la portata della regolazione va da 0 a 100. 3. Clock/Phase (Frequenza/Fase): riduce i disturbi provocati dalle righe orizzontali e verticali dell'immagine regolando separatamente fase (Phase) e frequenza (Clock). La portata della regolazione va da 0 a 100. - Seite 38 8. Color Temperature (Temperatura colore): contiene quattro modalità che includono: 9300, 7500, 6500 ed User (Utente). 9. Language (Lingua): si può selezionare tra cinque lingue: Inglese, Francese, Tedesco, Spagnolo, Italiano e Russo. 10. OSD Display (Finestra OSD): permette di regolare la posizione della finestra OSD. 11.
- Seite 39 12. VGA / DVI Input (Input VGA/DVI): permette di selezionare l'origine d'input.
-
Seite 40: Risoluzione Dei Problemi
Risoluzione dei problemi Assicurarsi che il monitor sia installato in modo appropriato se si riscontra qualsiasi problema durante l’uso. ˙ Assenza immagine sullo schermo. Controllo: 1. Il monitor è in modalità di risparmio energetico. Premere qualsiasi tasto o muovere il mouse per disattivare la modalità. -
Seite 41: Specifiche
Specifiche Segnali d’input VGA compatibile RGB analogico Sincronia composita supportata DVI* Conforme DDWG, interfaccia DVI Single Link TMDS Compatibilità Fino a 1280 x 1024 a 75Hz x (non-interlacciata) Connettore D-sub 15-pin DVI* DVI-D Audio* Connettore stereo Alimentazione Input CA Voltaggio Alimentatore universale: 100- 240 VAC, 50/60 Hz Alimentazione Consumo... - Seite 42 Содержание ◇ Примечание..........................2 ◇ Информация по технике безопасности ..................2 ◇ Меры предосторожности ......................2 Комплект поставки...........................2 Установка оборудования.........................3 Входы ............................3 Кнопки управления ..........................3 Экранное меню ..........................4 Устранение неполадок ........................7 Поддерживаемые режимы синхронизации..................7 Характеристики..........................8...
-
Seite 43: Примечание
◇ Примечание ‧ Вся информация в настоящем руководстве может периодически подвергаться изменениям без предварительного уведомления. ‧ Перед эксплуатацией этого прибора для обеспечения безопасности необходимо внимательно ознакомиться с приведенным ниже меню. ◇ Информация по технике безопасности ‧ Запрещается устанавливать влажные предметы на монитор или кабель питания. ‧... -
Seite 44: Установка Оборудования
Наклон Для обеспечения четкого просмотра изображения можно наклонить ЖК-монитор назад (до 20 градусов). Установка оборудования Соблюдайте осторожность при обращении с ЖК-монитором, у него прекрасный дизайн, но он хрупкий. Перед установкой отключите питание ЖК-монитора и компьютера. Выполняйте установку пошагово. Входы 【1】Вход питания переменного тока:предназначен для подключения кабеля питания. 【2】Порт... -
Seite 45: Экранное Меню
ЭКРАННОЕ МЕНЮ 1. «Brightness» (Яркость): регулируется в пределах от 0 до 100. 2. «Contrast» (Контрастность): регулируется в пределах от 0 до 100. 3. «Clock/Phase» (Частота и фаза): сокращение горизонтальных и вертикальных линейных помех на изображении посредством отдельной настройки параметров «Phase» (Фаза) и... - Seite 46 позволяет выбирать четыре режима 8. «Color Temperature» (Цветовая температура): цвета, включая «9300», «7500», «6500» и «User» (Пользовательский). 9. «Language» (Язык): доступен выбор из шести языков: английский, французский, немецкий, и спанский, итальянский, русский. 10. «OSD Display» (Отображение меню): настройка положения экранного меню. 11.
- Seite 47 12. «VGA / DVI Input» (Вход VGA и DVI): выбор источника входного сигнала.
-
Seite 48: Устранение Неполадок
Устранение неполадок Если при эксплуатации этого прибора возникли неполадки, убедитесь, что монитор установлен надлежащим образом. ˙ На экране нет изображения. Проверьте. Режим энергосбережения. Нажмите любую кнопку и переместите мышь для отключения этого режима. 2. Контакты разъема сигнального кабеля. Если контакты согнуты или сломаны, обратитесь... -
Seite 49: Характеристики
Характеристики Входные сигналы Аналоговый RGB, совместимый с VGA Поддерживается композитный синхросигнал DVI* Совместимый с DDWG цифровой видеоинтерфейс (DVI) TMDS с одним каналом связи Совместимость ПК До 1680x1050 точек при частоте 60 Гц (прогрессивная развертка) Разъемы D-Sub, 15-контактный DVI* DVI-D Аудио* Гнездо...