Phanteks ECLIPSE P400 Anleitung
Inhaltsverzeichnis
Quicklinks
Inhaltsverzeichnis

Verwandte Anleitungen für Phanteks ECLIPSE P400


Inhaltszusammenfassung für Phanteks ECLIPSE P400
- Seite 1 USER’S MANUAL FU LL VE RSIO N...
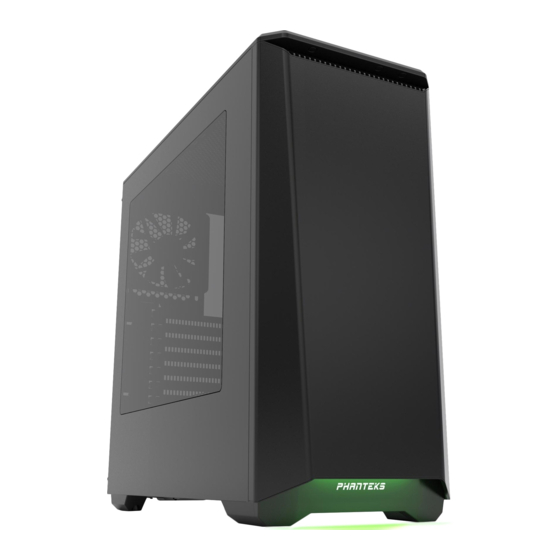
- Seite 2 CAUTION Please take a moment to carefully go through the installation guide. Phanteks will not take responsibility for any damages incurred due to incorrect installation and incorrect usage of this product. Thank you. Phanteks continues its user friendly design chassis with the new Eclipse Series P400.
-
Seite 3: Inhaltsverzeichnis
TABLE OF CONTENTS 1. SPECIFICATIONS CASE SPECIFICATIONS LIQUID COOLING SPECIFICATIONS ..........................................Dimension 210 mm x 465 mm x 470 mm (W x H x D) 120 mm (Radiator) 140 mm (Radiator) EXPLODED VIEW ..........................................8.3 in x 18.3 in x 18.5 in Front Up to 360* Up to 280... -
Seite 4: Exploded View
2. EXPLODED VIEW 1. Chassis 1. Châssis 1. Telaio 1. Chassi 2. Top Panel 2. Filtres de poussière inférieurs 2. Filtri antipolvere inferiori 2. Painel Superior 3. SSD Brackets 3. Support SSD 3. Staffa SSD 3. Suporte do SSD 4. Fans 4. -
Seite 5: Accessories
responsibility for any damages incurred due to incorrect installation and usage of this product. 3. ACCESSORIES 4. I/O PORTS I / O P A N E L Top Dust Filters (P400S only) 1. USB 3.0 1. USB 3.0 1. USB 3.0 1. -
Seite 6: Panel Removal
Lösen Sie zum Abnehmen der Seitenblende unverlierbaren Schrauben Lösen Sie die 4 Rändelschrauben zum Entfernen der seitlichen Blenden. Connects Phanteks’ mulicolor LED strip for Supports up to 10x fans using Y-splitters, Svitare le viti imperdibili per rimuovere il pannello laterale interior lighting. -
Seite 7: Motherboard Installation
6. PANEL REMOVAL 7. MOTHERBOARD INSTALLATION For the front panel, place your hands on the area shown and pull outward. Pour le panneau avant, placez vos mains sur la zone affichée, et tirez vers l’ e xtérieur. Positionieren Sie auch bei der Frontblende Ihre Hände an der angezeigten Stelle und ziehen Sie sie dann nach außen. -
Seite 8: Power Supply Installation
8. POWER SUPPLY INSTALLATION 9. FILTERS REMOVAL To remove the bottom and front filter pull out. Mesh cover on top panel can also be REAR VIEW cleaned. Pour retirer les filtres en bas et à l'avant, tirez dessus. La grille du panneau avant peut aussi être nettoyée. -
Seite 9: Fans Compatibility
10. FAN COMPATIBILITY 11. HARD DRIVE INSTALLATION 3.5” INSTALLATION 2.5” INSTALLATION FAN COMPATIBILITY TABLE 140mm 120mm Front Rear Align the SSD onto the mounting holes and screw in. Place hard drive into tray and push in the arms to lock. Aligner le SSD avec les trous de montage et vissez. -
Seite 10: Hard Drive Cage
12. HARD DRIVE CAGE 13. DROP-N-LOCK SSD BRACKET HDD BRACKET REMOVAL SSD INSTALLATION Slide in the SSD and screw in from the side to lock in place. To remove, unscrew the 4x screws on the midplate and the 4x screws on the bottom of the case. Para remover, solte os 4x parafusos na placa do meio e os 4x parafusos na parte inferior do gabinete. -
Seite 11: Watercooling Installation
14. WATERCOOLING INSTALLATION 14. WATERCOOLING INSTALLATION 120 MM FORM FACTOR RADIATORS WATERCOOLING RADIATOR COMPATIBILITY *Caution: Supported Radiator size and thickness varies depending on your setup. Radiator Size Front Rear *Avertissement : Les tailles de radiateur et les épaisseurs supportées varient en fonction de votre Taille de radiateur Avant Arrière... - Seite 12 Step 1. Unscrew the side screw (A) to open top cover. Schritt 3: Befestigen Sie die Halterung mit Rändelschrauben von der Rückseite kommend. Step 2. Place the pwm board (without top cover) onto the mounting area of the Phanteks chassis. Fase 1. Rimuovere il coperchio dell'HDD svitando le viti m3 Step 3.
-
Seite 13: Services And Support
16. SERVICES AND SUPPORT If you have any questions or concerns, please visit Phanteks’ website for technical support. We consider customer support, satisfaction and feedback an essential element of our overall marketing effort. Please feel free to contact our support team. Thank you! Contact Us at: www.phanteks.com...