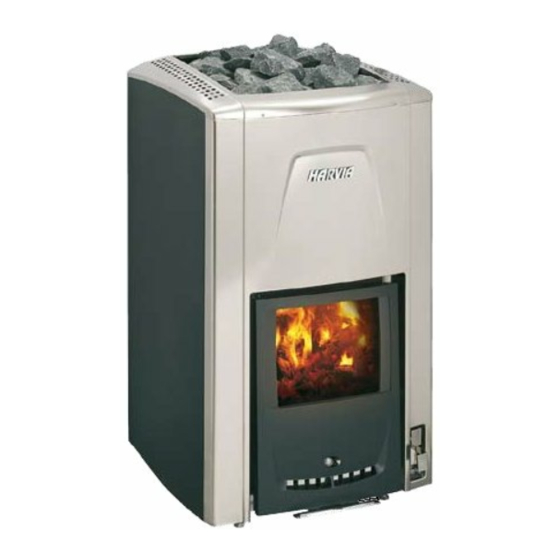
Inhaltszusammenfassung für Harvia 20 GF
- Seite 1 HARVIA 20 GF Instructions for Installation and Use of Woodburning Stove Anleitung für Montage und Gebrauch des holzbeheizten Saunaofens 03112010...
-
Seite 2: Inhaltsverzeichnis
1.1. Technische Daten..........3 1.2. Stove Parts ............3 1.2. Ofenteile ............. 3 1.3. Operating Principle of the Harvia 20 GF Stove ..4 1.3. Betriebsprinzip des Harvia 20 GF -Ofens ....4 2. InStRUCtIonS FoR USe ..........5 2. BeDIenUnGSAnLeItUnG ..........5 2.1. -
Seite 3: Harvia 20 Gf
1. HARVIA 20 GF 1. HARVIA 20 GF 1.1. technical Data 1.1. technische Daten Rated output .........18 kW Nennleistung .........18 kW Sauna room volume .......8–18 m m Volumen der Saunakabine ..... 8–18 m Stone quantity ......max. 40 kg Steinmenge ......... max. 40 kg Width ......... -
Seite 4: Operating Principle Of The Harvia 20 Gf Stove
A shows a regular stove and Curve B to Harvia nungstemperatur in Relation zur Heizdauer. Kurve A 20 GF stove. In the latter the burning time of the zeigt einen normalen Ofen und Kurve B den Harvia material is long, the burning process is smooth and 20 GF -Ofen. -
Seite 5: Instructions For Use
2. InStRUCtIonS FoR USe 2. BeDIenUnGSAnLeItUnG Read the instructions carefully before using Lesen Sie die Anweisungen vor der Inbetrieb- the stove. nahme des ofens aufmerksam durch. 2.1. Warnings 2.1. Warnungen Staying in the hot sauna for long periods of ein langer Aufenthalt in einer heißen Sauna •... -
Seite 6: Sauna Stones
area. You can keep a small amount of burning Bewahren Sie das Brennmaterial in einem separa- material in the vicinity of the stove as long as its ten Lagerbereich auf. Eine kleine Menge an Brenn- temperature does not exceed 80 °C. material können Sie in der Umgebung des Ofens aufbewahren, so lange die Temperatur dort 80 °C Do not burn the following materials in the stove:... -
Seite 7: Sauna Water
Empty the ash box. Leeren Sie den Aschekasten. Place the firewood and kindling into the firing Legen Sie das Brennholz und das Anmachholz chamber. in die Brennkammer. Prime the control automation. Feuern Sie die Steuerautomatik an. Fire the kindling and close the door. Zünden Sie das Anmachholz an und schließen If necessary, increase the air input. -
Seite 8: Troubleshooting
Due to large variation in temperature, the Beispiel 2–3 Mal pro Woche benutzen, müssen • sauna stones disintegrate in use. Therefore, die Kanäle einmal im Monat gereinigt werden. they should be rearranged at least once a year Abbildung 4. or even more often if the sauna is in frequent Aufgrund der großen Wärmeänderungen wer- •... -
Seite 9: Sauna Room
3. SAUnA RooM 3. SAUnAkABIne 3.1. effects that Heating the Stove has on effects that Heating the Stove has on 3.1. Aufheizen der Saunakabine the Sauna Room Helle Böden werden durch Asche, Steinpartikel und Light-coloured floor materials will become dirty from aus dem Ofen fallende Metallsplitter verunreinigt. -
Seite 10: Instructions For Installation
400 mm. Die Platte sollte sich auf einer Unter- surface to keep the floor material dry. You lage leicht über der Bodenoberfläche befinden, can also use the Harvia protective sheath and um Bodenmaterial trocken zu halten. Sie kön- bedding ( 4.1.4.). -
Seite 11: Safety Distances
4.1.2. Safety Distances 4.1.2 Sicherheitsabstände See figure 8. Siehe Abbildung 8. Ceiling. The minimum safety distance between Dach. Der Mindest-Sicherheitsabstand zwi- the stove and the ceiling is 1200 mm. schen Ofen und Dach beträgt 1200 mm. Masonry walls. Leave 50 mm between the Gemauerte Wände. -
Seite 12: Harvia Protective Sheath And Bedding
Hitze des Ofens (Abbildung 10). Schutz- sheath and bedding have been approved for use mantel und -platte wurden mit den Ofenmodellen together with the Harvia M3 and Harvia 20 stoves. Harvia M3 und Harvia 20 sicherheitsgeprüft und The surface temperature of the assembly does not getestet. -
Seite 13: Installing The Stove
4.2. Installing the Stove 4.2. Montage des ofens 4.2.1. Adjustable Legs 4.2.1. Verstellbare Füße des ofens The adjustable legs enable the stove to be installed Die verstellbaren Füße dienen zur sicheren Installati- firmly on an inclined floor. The adjustable range is on auf schiefer Grundfläche. - Seite 14 Connecting the stove to a masonry flue via the Anschluss des ofens an einen gemauerten Rauchfang upper connection opening (figure 12) über die obere Anschlussöffnung (Abbildung 12) You will need an angled smoke pipe (45° or 90°) Für den oberen Anschluss wird ein Winkelofenrohr for the upper connection ( ( 4.4.).
-
Seite 15: Connecting The Stove To A Harvia Steel Chimney
4.2.3. Connecting the Stove to a Harvia Steel 4.2.3. Anschluss des ofens an einen Harvia-edel- Chimney stahlschornstein A CE-marked Harvia steel chimney can be used Zur Abführung der Verbrennungsgase kann ein CE- to remove combustion gases. Its smoke pipes are geprüfter Harvia-Stahlschornstein verwendet wer-... -
Seite 16: Accessories
4.4. Accessories 4.4. Zubehör Harvia steel chimney WH�1500. 4.2.3. Harvia-Stahlschornstein WH�1500. 4.2.3. Water heater VL22l. Installed on the top of the Warmwasserbehälter VL22l. Montiert oben upper connection opening. When a protective auf der oberen Anschlussöffnung. Wenn ein sheath or other protection is used that is not...


