Herunterladen Inhalt Inhalt Diese Seite drucken
LENCO DVP-754 Bedienungsanleitung

LENCO DVP-754 Bedienungsanleitung

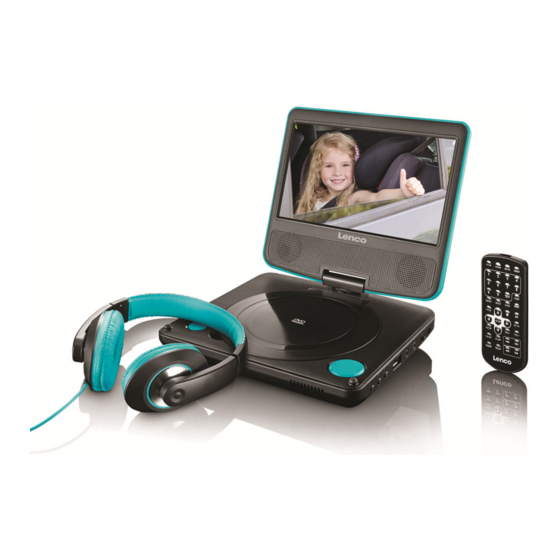
Tragbarer dvd-player
Vorschau ausblenden Andere Handbücher für DVP-754:

Werbung

Verfügbare Sprachen
  • DE

Verfügbare Sprachen

Model: DVP-
754
USER MANUAL PORTABLE DVD
HANDLEIDING DRAAGBARE DVD-SPELER
BEDIENUNGSANLEITUNG TRAGBARER DVD-PLAYER
MODE D'EMPLOI LECTEUR DVD PORTABLE
MANUAL DEL USUARIO DVD PORTÁTIL

Werbung

Inhaltsverzeichnis
loading

Inhaltszusammenfassung für LENCO DVP-754

  • Seite 1 Model: DVP- USER MANUAL PORTABLE DVD HANDLEIDING DRAAGBARE DVD-SPELER BEDIENUNGSANLEITUNG TRAGBARER DVD-PLAYER MODE D’EMPLOI LECTEUR DVD PORTABLE MANUAL DEL USUARIO DVD PORTÁTIL...
  • Seite 2 Index English-----------------------------------------------------------------------------------03 Nederlands-----------------------------------------------------------------------------17 Deutsch--------------------------------------------------------------------------------- 31 Français------------------------------------------------------------------------------- - 46 Español--------------------------------------------------------------------------------- 60 Version: 1.0...
  • Seite 3: Safety Instructions

    English 1. Safety Instructions Before using this product, read and follow all warnings and instructions. ‐ ‐ This device is not intended for use by people (including children) with physical, sensory or mental disabilities, or a lack of experience and knowledge, unless they're under supervision or have received instructions about the correct use of the device by the person who is responsible for their safety;...
  • Seite 4 Never remove the casing of this apparatus. ‐ Never place this apparatus on other electrical equipment. ‐ Do not use or store this product in a place where it is subject to direct sunlight, heat, excessive dust ‐ or vibration. ‐...
  • Seite 5: Identification Of Controls

    2. Identification of Controls Main Unit ▲/ Up/Prev ▼/ Down/Next ◄/VOL- Left/VOL- ►/VOL+ Right/VOL+ PLAY/PAUSE SETUP SOURCE Earphone Socket AV OUT ON/OFF DC IN 9-12V 10. Battery Charging Indicator Illuminates green flashing when the battery is charging. Illuminates green when the battery is fully charged. 11.
  • Seite 6 2. Identification of Controls Remote control unit 1. SOURCE DVD/USB. 2. MUTE Disable Audio output. 3. 0-9 NUMBER BUTTON Selects numbered items in a menu. 4. DISPLAY To display the playtime and status information. 5. 10+ BUTTON In order to select a track 10, for CD, press 10+ button first, then press 0 button; for DVD, press 10+ button, for DVD, select track greater than 10.
  • Seite 7 available. CD/VCD: Press AUDIO repeatedly during playback to hear a different audio channel (Left, Right, Mix, Stereo). 8. PLAY/PAUSE Press PLAY/PAUSE once to pause playback, pressing PLAY/PAUSE second time will resume the playback. 9. STOP When this button is pressed once, the unit records the stopped point, from where playback will resume if PLAY ( ) is pressed after wards.
  • Seite 8 2. Identification of Controls Remote control unit BUTTON Press BUTTON allow skipping back at 5-level speed (X2 -> X4 -> X8 -> X16 -> X32 -> PLAY), press PLAY button return to normal playback. 16. STEP Step the motion in DVD mode. 17.
  • Seite 9 MP3: Press PROGRAM button, it will go back to the file list. Press PROGRAM button again, it will go back to the MP3 folder. 27. ZOOM DVD/VCD: Use ZOOM to enlarge or shrink the video image. 1. Press ZOOM during playback or still playback to activate the Zoom function. The square frame appears briefly in the right bottom of the picture.
  • Seite 10: Setup Menu Setting

    3. SETUP Menu Setting General Setup Page Press SETUP button to get to the setup menu. Use direction buttons     to select the preferred item. After finishing settings, press SETUP again to normal display. The following menu items can be changed: GENERAL: selects the GENERAL PAGE menu.
  • Seite 11 Closed Captions Closed captions are data that are hidden in the video signal of some discs. Before you select this function, please ensure that the disc contains closed captions information and your TV set also has this function. Screen Saver This function is used to turn the screen saver on or off Auto Standby This function is used to select auto standby settings after 3 or 4 hours.
  • Seite 12: Video Setup Page

    3. SETUP Menu Setting Audio Setup Page Downmix This option allows you to set the stereo analog output of your DVD Player. LT/RT: Select this option if your DVD Player is connected to a Dolby Pro Logic decoder. Stereo: Select this option when the output delivers sound from only the two front speakers. Dolby digital The options included in Dolby Digital Setup are: 'Dual Mono' and 'Dynamic'.
  • Seite 13 Preference Page Preference Page TV Type Selecting the color system that corresponds to your TV when AV outputs. This DVD Player is compatible with both NTSC and PAL.
  • Seite 14: Parameters And Specifications

    3. SETUP Menu Setting Preference Page PAL - Select this if the connected TV is PAL system. It will change the video signal of a NTSC disc and output in PAL format. NTSC - Select this if the connected TV is NTSC system. It will change the video signal of a PAL disc and output in NTSC format.
  • Seite 15: Battery Parameters

    5. Battery Parameters Battery Specifications: Output: 7.4V Charge/Discharge Time: Standard charge time: 3h ~ 4h Storage and work circumstances: 1. Storage circumstances Temperature Humidity 6 months -20°C ~ +45°C 65 ± 20% 1 week -20°C ~ +65°C 65 ± 20% 2.Work circumstances Temperature Humidity...
  • Seite 16: Disposal Of The Old Device

    6. Guarantee Lenco offers service and warranty in accordance with the European law, which means that in case of repairs (both during and after the warranty period) you should contact your local dealer. Important note: It is not possible to send products that need repairs to Lenco directly.
  • Seite 17: Veiligheidsinstructies

    Dutch 1. Veiligheidsinstructies Lees voor het gebruik van dit product alle waarschuwingen en instructies en volg ze op. ‐ ‐ Dit apparaat is niet bestemd voor gebruik door mensen (inclusief kinderen) met fysieke, zintuiglijke of geestelijke gebreken of gebrek aan kennis en ervaring, tenzij zij onder toezicht staan of instructies hebben over het juiste gebruik van het apparaat hebben gekregen van de persoon die verantwoordelijk is voor hun veiligheid;...
  • Seite 18 Verzeker u ervan dat het apparaat in een stabiele positie staat opgesteld. Schade, veroorzaakt door ‐ het gebruik van dit product in een onstabiele positie, of door het niet naleven van waarschuwingen of voorzorgsmaatregelen genoemd in deze handleiding, valt niet onder de garantie. Verwijder nooit de behuizing van dit apparaat.
  • Seite 19 2. Identificatie van bedieningselementen Hoofdeenheid ▲/ Omhoog/Vorige ▼/ Omlaag/Volgende ◄/VOL- Links/VOL- ►/VOL+ Rechts/VOL+ AFSPELEN/PAUZE SETUP SOURCE Hoofdtelefoonuitgang AV UIT ON/OFF DC IN 9-12V 10. Batterieladungsanzeige Blinkt grün, während die Batterie aufgeladen wird. Leuchtet grün, wenn die Batterie vollständig aufgeladen ist. 11.
  • Seite 20 2. Identificatie van bedieningselementen Afstandsbediening 1. SOURCE DVD/USB. 2. MUTE Uitschakelen audio-uitgang. 3. NUMERIEKE TOETSEN 0-9 Voor het selecteren van genummerde onderdelen in een menu. 4. DISPLAY Voor het weergeven van de speelduur en de statusinformatie. 5. 10+ TOETS Om op een CD de 10e track te selecteren, druk eerst op 10+ en druk vervolgens op de knop 0. Druk voor een DVD op de 10+ knop, selecteer voor DVD de track groter dan 10.
  • Seite 21 voor de audio te laten horen. CD/VCD: Druk in afspeelmodus meerdere keren op “AUDIO” om van audiokanaal te wisselen (Links, Rechts, Mix, Stereo). 8. AFSPELEN/PAUZE Druk eenmaal op "AFSPELEN/PAUZE" om het afspelen te pauzeren, druk een tweede keer op "AFSPELEN/PAUZE" om het afspelen te hervatten. 9.
  • Seite 22 2. Identificatie van bedieningselementen Afstandsbediening TOETS Druk op de KNOP om achteruit over te slaan met een snelheid tot 5 niveaus (X2 -> X4 -> X8 -> X16 -> X32 -> AFSPELEN). Druk op de knop AFSPELEN om naar normaal afspelen terug te keren. 16.
  • Seite 23 “PROGRAM” om het programmeermenu te verlaten. MP3: Druk op de PROGRAM-knop om terug te gaan naar de lijst met bestanden. Druk nogmaals op de PROGRAM-knop om terug te gaan naar de MP3-map. 27. ZOOM DVD/VCD: Gebruik “ZOOM” om het videobeeld te vergroten of verkleinen. Druk in afspeel- of pauzemodus op ZOOM om de Zoomfunctie te activeren.
  • Seite 24 3. Instellen instellingenmenu Algemene instellingenpagina Druk de toets SETUP om naar het instellingenmenu te gaan. Gebruik de pijtjestoetsen     om het gewenste onderdeel te selecteren. Druk na de gemaakte instellingen nogmaals op "SETUP" om de normale weergave te hervatten. U kunt de volgende menuonderwerpen instellen: GENERAL (ALGEMEEN): selecteert het GENERAL PAGE (ALGEMENE PAGINA) menu.
  • Seite 25 Closed Captions (Ondertitels) Ondertitels zijn gegevens verborgen in het videosignaal van bepaalde disks. Voordat u deze functie selecteert, dient u te controleren of de disk inderdaad ondertitels bevat en of ook uw TV ingesteld is voor deze functie. Screen Saver (Schermbeveiliging) Deze functie wordt gebruikt om de schermbeveiliging Aan of Uit te zetten Auto Standby (Automatische standby) Deze functie wordt gebruikt om de automatische stand-by in te stellen op 3 of 4 uur.
  • Seite 26: Pagina Video-Instellingen

    3. Instellen instellingenmenu Pagina audio-instellingen Downmix U kunt met deze optie de stereo analoge uitgang van uw DVD-speler instellen. LT/RT: Selecteer deze optie als uw DVD-speler aangesloten is op een Dolby Pro Logic decoder. Stereo: Selecteer deze optie als de uitgang alleen geluid geeft op de twee voorluidsprekers. Dolby digital De Dolby Digital Instelling biedt de volgende opties: 'Dual Mono' ('Dubbel Mono') en 'Dynamic' ('Dynamisch').
  • Seite 27 Voorkeurpagina Voorkeurpagina TV Type (Soort TV) Selecteer het kleurensysteem dat overeenkomt met uw TV wanneer u de AV-uitgangen gebruikt. Deze DVD-speler is voor zowel NTSC als PAL geschikt.
  • Seite 28: Parameters En Specificaties

    3. Instellen instellingenmenu Voorkeurpagina PAL - selecteer deze optie als de aangesloten TV is voorzien van het PAL-systeem. Het wijzigt het videosignaal van een NTSC-disc en voert dit uit in PAL-formaat. NTSC - selecteer deze optie als de aangesloten TV is voorzien van het NTSC-systeem. Het videosignaal van een PAL-disk zal in dit geval in NTSC-formaat worden omgezet.
  • Seite 29 5. Batterijparameters Batterijspecificaties: Uitvoer: 7,4V Laad/Ontlaadtijd: Standaard laadtijd: 3u tot 4u Opslag- en bedrijfscondities: 1. Opslagcondities Temperatuur Vochtigheid 6 maanden -20 °C tot +45 °C 65 ±20% 1 week -20°C ~ +65°C 65 ±20% 2.Bedrijfsomstandigheden Temperatuur Vochtigheid Standaard lading 0°C ~ +45°C 65 ±20% Standaard ontlading -20°C ~ +65°C...
  • Seite 30: Garantie

    6. Garantie Lenco biedt service en garantie aan overeenkomstig met de Europese wetgeving. Dit houdt in dat u, in het geval van reparaties (zowel tijdens als na de garantieperiode), uw lokale handelaar moet contacteren. Belangrijke opmerking: Het is niet mogelijk producten direct naar Lenco te sturen voor reparatie.
  • Seite 31: Sicherheitsanweisungen

    German 1. Sicherheitsanweisungen Lesen und befolgen Sie alle Warnungen und Anweisungen, bevor Sie dieses Produkt verwenden. ‐ ‐ Dieses Gerät ist nicht zur Benutzung durch Personen (auch Kinder) mit physischen, sensorischen oder mentalen Beeinträchtigungen oder ohne ausreichender Erfahrung vorgesehen, es sei denn, sie werden durch eine verantwortliche Person beaufsichtigt oder wurden in die ordnungsgemäße Bedienung des Gerätes durch eine für ihre Sicherheit verantwortlichen Person eingewiesen;...
  • Seite 32 bestimmt. Stellen Sie sicher, dass das Gerät in einer stabilen Position aufgestellt ist. Schäden, die durch ‐ Verwendung dieses Produkts in einer instabilen Position oder durch Nichtbeachtung der anderen in diesem Handbuch enthaltener Warnungen und Vorwarnung entstehen, werden nicht durch die Garantie abgedeckt.
  • Seite 33: Kennzeichnung Der Bedienelemente

    2. Kennzeichnung der Bedienelemente Hauptgerät ▲/ Hoch/Zurück ▼/ Runter/Weiter ◄/VOL- Links/Lautstärke- ►/VOL+ Rechts/Lautstärke+ WIEDERGABE/PAUSE SETUP SOURCE Kopfhörerbuchse AV-OUT ON/OFF DC IN 9-12V 10. Batterijoplaadindicator Knippert groen wanneer de batterij wordt opgeladen. Brandt groen wanneer de batterij volledig is opgeladen. 11. Indicatielampje aan/uit Brandt rood wanneer het apparaat is ingeschakeld.
  • Seite 34 2. Kennzeichnung der Bedienelemente Fernbedienung 1. SOURCE DVD/USB. 2. MUTE Deaktiviert die Audio-Ausgabe. 3. NUMMERNTASTEN 0 - 9 Auswahl eines nummerierten Menüpunkts. 4. DISPLAY Anzeige der Wiedergabezeit und der Statusinformationen. 5. 10+ TASTE Um den Titel 10 auszuwählen, drücken Sie bei einer CD zuerst die Taste 10+ und danach die 0-Taste. Bei einer DVD können Sie durch Drücken der Taste 10+ einen Track größer 10 auf der DVD auswählen.
  • Seite 35 7. AUDIO DVD: Drücken Sie während der Wiedergabe mehrmals die AUDIO-Taste, um in eine andere Audiosprache oder zu einem anderen Audiotrack umzuschalten (falls verfügbar). CD/VCD: AUDIO während der Wiedergabe wiederholt drücken, um einen anderen Tonkanal einzuschalten (Links, Rechst, Mix, Stereo). 8.
  • Seite 36 2. Kennzeichnung der Bedienelemente Fernbedienung -TASTE Das Drücken der -TASTE ermöglicht Ihnen einen Schnellrücklauf in 5 Geschwindigkeitsstufen (2x -> 4x -> 8x -> 16x -> 32x -> WIEDERGABE). Drücken Sie die WIEDERGABE-Taste, um zum normalen Wiedergabemodus zurückzukehren. 16. STEP Schrittweise Wiedergabe im DVD-Modus. 17.
  • Seite 37 PROGRAM MENU (Programmiermenü). Nun können Sie mit den Nummerntasten Titel, Kapitel oder Songnummer direkt eingeben und die PLAY option (Wiedergabeart) wählen. Drücken Sie die PROGRAM-Taste und wählen Sie „clear program“ (Programm löschen) aus, um zur normalen Wiedergabe zurückzukehren. Drücken Sie nochmals die PROGRAM-Taste, um das m Menü zu beenden.
  • Seite 38: Einstellungen Im Setup-Menü

    3. Einstellungen im SETUP-Menü Allgemeine Einstellungen Mit der SETUP-Taste rufen Sie das Einstellungsmenü auf. Verwenden Sie die Richtungstasten     zur Auswahl des gewünschten Elements. Nach Beendigung der Einstellungen drücken Sie erneut SETUP zur Rückkehr in das Normaldisplay. Folgende Menü...
  • Seite 39 Closed Captions (Untertitel für Gehörlose) Diese Daten sind auf einigen Discs im Videosignal verborgen. Vergewissern Sie sich vor Auswahl der Funktion, dass Untertitel für Gehörlose auf der Disc vorhanden sind und dass Ihr Fernseher ebenfalls über diese Funktion verfügt. Screen Saver Mit dieser Funktion aktivieren oder deaktivieren Sie den Bildschirmschoner Auto Standby (Automatische Abschaltung) Mit dieser Funktion wählen Sie die automatische Abschaltung nach 3 oder 4 Stunden aus.
  • Seite 40: Einstellung Setup-Menü

    3. Einstellung SETUP-Menü Audioeinstellunqen Downmix Hier stellen Sie den Stereo-Analogausgang Ihres DVD-Players ein. LT/RT: Wählen Sie diese Option, wenn Ihr DVD-Player an einem Dolby Pro Logic Decoder angeschlossen ist. Stereo: Wählen Sie diese Option aus, wenn der Ausgang lediglich über die beiden Frontlautsprecher erfolgt.
  • Seite 41 Voreinstellungen Voreinstellungen TV Type (TV-Typ) Wählt das Farbsystems aus, das bei der AV-Ausgabe ihrem Fernseher entspricht. Dieser DVD-Player ist kompatibel mit NTSC und PAL.
  • Seite 42: Parameter Und Spezifikationen

    3. Einstellung SETUP-Menü Voreinstellungen PAL - Wählen Sie PAL aus, wenn der angeschlossene Fernseher das PAL-Signal nutzt. Dies ändert das Videosignal eines NTSC-Datenträgers zur Ausgabe im PAL-Format. NTSC - Wählen Sie NTSC aus, wenn der angeschlossene Fernseher das NTSC-Signal nutzt. Das Videosignal eines Datenträgers im PAL-Format wird in das NTSC-Format umgewandelt.
  • Seite 43 5. Akku-Parameter Akku-Spezifikationen: Ausgang: 7,4 V Ladezeit/Entladezeit: Ladezeit: 3 bis 4 Stunden Lager- und Betriebsbedingungen: 1. Lagerung Temperatur Luftfeuchtigkeit 6 Monate -20°C bis + 45°C 65 ± 20 % 1 Woche -20 °C bis +65 °C 65 ± 20 % 2.
  • Seite 44: Garantie

    (sowohl während als auch nach Ablauf der Garantiezeit) sollten Sie deshalb Ihren Einzelhändler kontaktieren. Wichtiger Hinweis: Es ist nicht möglich, das Gerät für Reparaturarbeiten direkt an Lenco zu senden. Wichtiger Hinweis: Falls dieses Gerät von einem nicht autorisierten Kundendienst geöffnet oder darauf zugegriffen wird, erlischt die Garantie.
  • Seite 45 Lenco Benelux BV; Thermiekstraat la, 6361 HB, The Netherlands.
  • Seite 46: Précautions D'emploi

    French 1. Précautions d’emploi Avant d’utiliser ce produit, lisez et suivez bien tous les avertissements et toutes les instructions. ‐ ‐ Cet appareil n’est pas destiné à être utilisé par des personnes (enfants compris) souffrant de handicaps physiques, sensoriels ou mentaux, ou manquant d’expérience et de connaissances, sauf si elles sont sous surveillance ou ont reçu des instructions sur l’utilisation correcte de l’appareil par la personne qui est responsable de leur sécurité...
  • Seite 47 ou précaution contenus dans ce mode d’emploi. Ne retirez jamais le boîtier de l’appareil. ‐ Ne placez jamais cet appareil sur un autre appareil électrique. ‐ N’utilisez et ne rangez pas ce produit au soleil, à la chaleur, à la poussière ou à des vibrations ‐...
  • Seite 48 2. Identification des touches Unité principale ▲/ Haut/Précédent ▼/ Bas/Suivant ◄/VOL- Gauche/Diminuer le volume ◄/VOL- Droite/Augmenter volume LECTURE/PAUSE SETUP SOURCE Prise casque Sortie AV ON/OFF DC IN 9-12V 10. Indicateur de charge de la batterie Il clignote en vert quand la batterie est en cours de charge. S’allume en vert à...
  • Seite 49 2. Identification des touches Télécommande 1. SOURCE DVD/USB. 2. MUTE Désactive la sortie Audio. 3. TOUCHES NUMÉRIQUES DE 0 À 9 Sélectionne les options numérotées dans un menu. 4. DISPLAY Pour afficher des informations sur le temps de lecture et l’état. 5.
  • Seite 50 7. AUDIO DVD : Appuyez plusieurs fois sur AUDIO pendant la lecture pour entendre différentes langues ou pistes audio, si disponibles. CD/VCD : Appuyez plusieurs fois sur AUDIO durant la lecture pour entendre différents canaux audio (Gauche, Droit, Mixte ou Stéréo). 8.
  • Seite 51 2. Identification des touches Télécommande 15. TOUCHE Appuyer sur la touche permet d’effectuer une lecture accélérée vers l’arrière sur 5 niveaux de vitesse (x2 -> x4 -> x8 -> x16 -> x32 -> LECTURE) ; appuyez sur la touche de LECTURE pour revenir à la vitesse normale de lecture.
  • Seite 52 entendre ou visualiser. Appuyez sur la touche PROGRAM. Le menu correspondant apparaît sur l’écran. Sélectionnez les titres, chapitres ou pistes que vous désirez à l’aide des touches numériques. Sélectionnez l’option PLAY pour démarrer la lecture de la liste que vous venez de programmer. Pour reprendre la lecture normale, appuyez sur PROGRAM et sélectionnez l’option vide du programme dans le menu du programme, appuyez sur PROGRAM pour quitter le menu du programme.
  • Seite 53: Menu Configuration

    3. Menu configuration Page Configuration Générale Appuyez sur la touche SETUP pour ouvrir le menu Configuration. Utilisez les touches directionnelles     pour sélectionner les éléments de votre choix. Après avoir terminé les réglages, appuyez de nouveau sur SETUP pour retourner à l’affichage normal. Les éléments suivants du menu peuvent être modifiés : GENERAL (GÉNÉRAL) : affiche la page menu GENERAL (GÉNÉRAL).
  • Seite 54 Closed Captions (Sous-titrages codés) Les sous-titrages sont composés de données qui sont cachées dans le signal vidéo de certains disques. Avant de sélectionner cette fonction, assurez-vous que le disque contient des informations de sous-titrage et que votre téléviseur dispose également de cette fonction. Screen Saver (Économiseur d’écran) Cette fonction active ou désactive l’économiseur d’écran.
  • Seite 55 3. Menu configuration Page Configuration audio Downmix (Mixage réducteur) Cette option permet de régler la sortie analogique stéréo de votre lecteur DVD. LT/RT : Sélectionnez cette option si votre lecteur DVD est connecté à un décodeur Dolby Pro Logic. Stereo (Stéréo) : Sélectionnez cette option lorsque la sortie fournit du son uniquement depuis les deux enceintes avant.
  • Seite 56 Page Préférences Page Préférences TV Type (Type TV) Pour sélectionner le système de couleurs AV qui correspond à votre télé. Ce lecteur DVD est compatible avec les systèmes NTSC et PAL.
  • Seite 57 3. Menu configuration Page Préférences PAL – faites ce choix si vous vous connectez à un téléviseur de système PAL. Le signal vidéo au format NTSC sera converti en format PAL. NTSC – faites ce choix si vous vous connectez à un téléviseur de système NTSC. Le signal vidéo au format PAL sera converti en format NTSC.
  • Seite 58 5. Paramètres de la batterie Spécifications de la batterie : Sortie : 7,4 V Temps de charge/décharge : Temps de charge standard : 3 h à 4 h Conditions de stockage et de fonctionnement : 1. Conditions de stockage Température Humidité...
  • Seite 59: Clause De Non Responsabilité

    à la directive basse tension (2014/35/EU) émises par la commission de la communauté européenne. Par la présente, Lenco Benelux BV, Thermiekstraat la, 6361 HB Nuth, The Netherlands, déclare que ce produit est conforme aux exigences principales et autres clauses applicables de la Directive 1999/5/CE.
  • Seite 60: Instrucciones De Seguridad

    Spanish 1. Instrucciones de seguridad Antes de utilizar este producto, lea y siga todas las instrucciones y advertencias. ‐ ‐ Este aparato no está diseñado para su uso por personas (incluyendo niños) con discapacidades físicas, sensoriales o mentales o con falta de experiencia o conocimientos, salvo que estén bajo la supervisión o hayan recibido formación sobre el uso correcto del dispositivo por parte de una persona responsable de su seguridad;...
  • Seite 61 Asegúrese de que la unidad esté fijada en una posición estable. Los daños provocados por utilizar ‐ este producto en una posición inestable o por no seguir cualquier otra advertencia o precaución incluida en este manual de usuario no estarán cubiertos por la garantía. No retire nunca la carcasa de este aparato.
  • Seite 62: Identificación De Los Controles

    2. Identificación de los controles Unidad principal ▲/ Arriba/Anterior ▼/ Abajo/Siguiente ◄/VOL- Izquierda/VOL- ►/VOL+ Derecha/VOL+ REPRODUCIR/PAUSA SETUP SOURCE Toma del auricular SALIDA AV ON/OFF DC IN 9-12V 10. Indicador de carga de la batería Se ilumina en verde intermitente durante la carga de la batería. Se ilumina de color verde cuando la batería está...
  • Seite 63 2. Identificación de los controles Mando a distancia 1. SOURCE DVD/USB. 2. MUTE Desactivar salida de audio. 3. BOTÓN NUMÉRICO 0-9 Selecciona elementos numerados en un menú. 4. DISPLAY Para mostrar el tiempo de reproducción y la información de estado. 5.
  • Seite 64 una pista de audio, si está disponible. CD/VCD: Pulse AUDIO de forma reiterada durante la reproducción para oír un canal de audio diferente (Izquierdo, Derecho, Mezcla, Estéreo). 8. REPRODUCCIÓN/PAUSA Pulse REPRODUCCIÓN/PAUSA una vez para hacer una pausa en la reproducción; pulsar REPRODUCCIÓN/PAUSA una segunda vez reanudará...
  • Seite 65 2. Identificación de los controles Mando a distancia 15. BOTÓN Pulsar el BOTÓN BUTTON permite saltar hacia atrás al nivel de velocidad 5-l (X2 -> X4 -> X8 -> X16 -> X32 -> REPRODUCCIÓN); pulsar el botón REPRODUCCIÓN vuelve a la reproducción normal. 16.
  • Seite 66 programa en el menú de programas; vuelva a pulsar PROGRAM para salir del menú de programas. MP3: Pulse el botón PROGRAM; volverá a la lista de archivos. Vuelva a pulsar el botón PROGRAM; volverá a la carpeta MP3. 27. ZOOM DVD/VCD: Use ZOOM para aumentar o disminuir la imagen de vídeo.
  • Seite 67 3. Configuración de menú de CONFIGURACIÓN Página de configuración general Pulse el botón SETUP para acceder al menú de configuración. Use los botones de dirección     para seleccionar el objeto preferido. Tras finalizar la configuración, vuelva a pulsar SETUP para volver a la pantalla normal.
  • Seite 68 Closed Captions (Subtítulos) Los subtítulos son datos que están ocultos en la señal de vídeo de algunos discos. Antes de que seleccione esta función, por favor, asegúrese de que el disco contiene subtítulos y que su televisor asimismo dispone de esta función. Screen Saver (Salvapantallas) Esta función se usa para conectar y desconectar el salvapantallas Auto Standby (Modo en espera automático)
  • Seite 69 3. Configuración de menú de CONFIGURACIÓN Página de configuración de audio Downmix (Mezcla fija) Esta opción le permite fijar la salida estéreo analógica de su reproductor DVD. LT/RT: Seleccione esta opción si el reproductor DVD está conectado a un decodificador Dolby Pro Logic.
  • Seite 70 Página de preferencia Página de preferencia TV Type (Tipo de TV) Seleccione el sistema de color que se corresponda con su TV cuando esté en salida AV. Este reproductor de DVD es compatible tanto con NTSC como con PAL.
  • Seite 71: Parámetros Y Especificaciones

    3. Configuración de menú de CONFIGURACIÓN Página de preferencia PAL – Seleccione esta opción si la TV conectada es un sistema PAL. Cambiará la señal de video de un disco NTSC y la salida a formato PAL. NTSC – Seleccione esta opción si la TV conectada es un sistema NTSC. Cambiará la señal de video de un disco PAL y la salida a formato NTSC.
  • Seite 72 5. Parámetros de la batería Especificaciones de la batería: Salida: 7.4V Tiempo de carga/descarga: Tiempo de carga estándar: 3h - 4h Circunstancias de almacenamiento y funcionamiento: Circunstancias Temperatura Humedad almacenamiento 6 meses -20°C ~ +45°C 65±20% 1 semana -20°C ~ +65°C 65±20% 2.Circunstancias de trabajo Temperatura...
  • Seite 73: Exención De Responsabilidad

    6. Garantía Lenco ofrece servicio y garantía en cumplimiento con las leyes de la Unión Europea, lo cual implica que, en caso de que su producto precise ser reparado (tanto durante como después del periodo de garantía), deberá contactar directamente con su distribuidor.

Inhaltsverzeichnis