Werbung
Quicklinks
TENT PACK SACK CONTENTS
• 1 inner tent/fl ysheet combination
• Groundsheet tarp with sandbags to turn it into a beach shelter
• GEAR LOFT (mesh storage for organisational purposes in inner tent)
• 4 fi breglass poles (2 long, 2 short)
• 14 aluminium pegs (e.g. for grass and rocky areas),
6 plastic pegs for sand
• Repair materials and seam sealant in a peg bag
At JACK WOLFSKIN, we are continually improving and upgrading our
products. We, therefore, reserve the right to make changes to individ-
ual components. Diagrams used for pitching instructions may differ
slightly from the actual product.
ZELTPACKSACKINHALT
• 1 Innenzelt-/Außenzelt-Kombination
• Bodenplane mit Sandtaschen für Strandmuschelfunktion
• GEAR LOFT (Netzablage zur Organisation im Innenzelt)
• 4 Fiberglasstangen (2 lange, 2 kurze)
• 14 Aluminiumheringe (z. B. für Wiese und steinigen Untergrund),
6 Plastikheringe für Sand
• Reparaturmaterialien und Nahtdichter im Heringspackbeutel
JACK WOLFSKIN entwickelt seine Produkte ständig weiter. Wir behalten
uns vor, einzelne Komponenten zu verändern. Abbildungen der Auf-
bauanleitung können vom aktuellen Produkt abweichen.
PITCHING THE DOME TENT
We recommend doing a trial run with your new tent, in order to famil-
iarise yourself with all the pitching instructions before embarking on
your fi rst trip. Firstly, choose a suitable location for your tent, removing
all sharp objects which might damage the groundsheet.
You can put the groundsheet tarp to one side whilst pitching the
dome tent. Ensure that all zips are closed when assembling the tent.
Spread the tent out fl at on the ground, and carefully connect all sec-
tions of the pole system, ensuring they lock together fi rmly.
Carefully insert the poles into the external pole sleeves.
1 Firstly, place one of the long poles into the lower sleeve and then
2 the second long pole into the one above. Tension the poles by in-
serting the pointed ends into the respective eyelets at the open pole
sleeve ends.
3 Push the two short ceiling poles into the short pole sleeves near
the air vents, and put the ends of the poles into the eyelets on the
fl ysheet. Also attach the two clips to the poles.
Do not use force if you experience resistance as you are inserting or
tensioning the poles; identify and remedy the problem.
You can open and roll up the entrance area on both sides using the
zips. Each air vent can be opened with a zip. The small stabilisers
shape the opening. Attach the Velcro to the top of the ventilation
area. Ventilation can also be regulated from the inner tent as there is
a zip on both sides.
AUFBAU KUPPELZELT
|
Du solltest dein neues Zelt erst einmal probe-
weise aufbauen und dich vor Antritt der ersten Reise mit allen Aufbau-
schritten vertraut machen. Wähle zunächst einen geeigneten Standort
für dein Zelt aus und entferne dort alle spitzen Gegenstände, die den
Zeltboden beschädigen könnten.
Die beiliegende Bodenplane kannst du für den Aufbau als Kuppelzelt
erst einmal beiseitelegen. Achte darauf, dass während des Aufbaus alle
Reißverschlüsse geschlossen sind. Breite dein Zelt fl ach auf dem Boden
aus und füge die Segmente des Stangenverbunds sorgfältig zusam-
men, sodass diese fest ineinandersitzen.
Führe die Stangen vorsichtig in die außen liegenden Stangenkanäle ein.
1 Führe zuerst eine der langen Hauptstangen in den unteren Kanal,
2 dann die zweite lange Stange in den darüber liegenden ein. Die
beiden Stangen setzt du unter Spannung, indem du die spitzen Stangen-
enden jeweils in die Ösen am offenen Stangenkanalende einsteckst.
3 Schiebe die zwei kurzen Dachstangen in die kurzen Stangenkanäle bei
den Belüftungsöffnungen und stecke die Stangenenden in die Ösen
am Außenzelt. Befestige auch die beiden Clips an den Gestängen.
Wende keine Gewalt an. Wenn ein Widerstand zu spüren ist, während
du die Stangen einführst oder spannst, mach das Problem ausfi ndig
und behebe es.
Den Eingangsbereich kannst du an beiden Seiten mit den Reißver-
schlüssen öffnen und aufrollen. Die beiden Belüftungsöffnungen sind
jeweils mit einem Reißverschluss zu öffnen. Mit den kleinen Stabilisa-
toren bringst du die Öffnungen in Form. Befestige dazu den Klettver-
schluss an der Oberseite der Belüftung. Die Belüftung lässt sich auch
vom Innenzelt aus bedienen, hierzu haben wir auf jeder Seite einen
Reißverschluss im Innenzelt angebracht.
CONTENU DU SAC DE TENTE
• 1 ensemble composé d'une tente intérieure et d'une tente
extérieure
• bâche de sol avec poches à sable pour la version tente de plage
• GEAR LOFT (rangement fi let pour l'organisation de la
tente intérieure)
• 4 arceaux en fi bre de verre (2 longs, 2 courts)
• 14 sardines en aluminium (par ex. pour l'herbe et les sols caillouteux),
6 sardines en plastique pour le sable
• matériel de réparation & produit pour sceller les coutures dans le
sac à sardines
JACK WOLFSKIN développe et améliore ses produits en permanence.
Nous nous réservons le droit de modifi er certains composants. Les il-
lustrations de la notice de montage peuvent différer du produit actuel.
1
2
MONTAGE TENTE COUPOLE
|
Avant d'entamer votre voyage, il est
conseillé tout d'abord de procéder au montage de votre nouvelle tente,
afi n de vous familiariser avec les différentes étapes de montage. Choi-
sissez d'abord un emplacement adapté pour votre tente et enlevez
tous les objets pointus qui pourraient endommager le sol de la tente.
Pour le montage de la tente coupole, vous pouvez dans un premier
temps mettre la bâche de sol fournie de côté. Veillez à ce que tous les
zips soient bien fermés pendant le montage. Étalez votre tente à plat
sur le sol et assemblez soigneusement tous les segments des arceaux,
de manière à ce qu'ils soient bien imbriqués les uns dans les autres.
Glissez à présent les arceaux avec précaution dans les fourreaux exté-
rieurs respectifs.
1 Glissez d'abord un des longs arceaux dans le fourreau inférieur
2 et ensuite le deuxième arceau long dans le fourreau situé au dessus.
Mettez les deux arceaux sous tension en veillant à placer les extrémités
pointues des arceaux dans les œillets correspondants situés à l'extré-
mité ouverte du fourreau.
3 Glissez les deux arceaux de toit courts dans les fourreaux courts près
des orifi ces d'aération et insérez les extrémités des arceaux dans les
œillets de la tente extérieure.
Fixez également les deux clips aux arceaux.
En cas de résistance pendant que vous insérez ou tendez les arceaux,
ne forcez pas, cherchez l'origine du problème pour y remédier.
Les entrées des deux côtés de la tente s'ouvrent et s'enroulent grâce aux
zips. Les deux orifi ces d'aération s'ouvrent par leur zip correspondant.
Les petits stabilisateurs permettent de donner forme aux orifi ces. Pour
cela, fi xez les fermetures velcro sur la partie supérieure des aérations.
Les aérations sont réglables également de l'intérieur de la tente, c'est
pourquoi nous avons équipé chaque côté de la tente intérieure de zips.
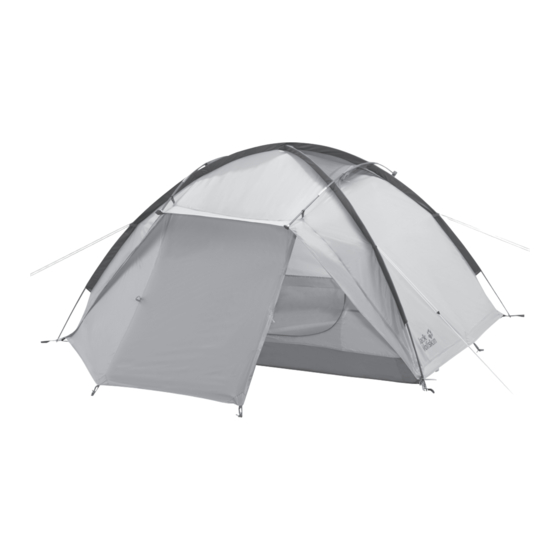
BED & BREAKFAST
BED & BREAKFAST is a fully equipped,
2-person dome tent that can be
turned into a luxurious beach shelter
within moments.
Das BED & BREAKFAST ist ein voll
ausgestattetes 2 Personen Kuppelzelt,
das im Handumdrehen zur luxuriösen
Strandmuschel wird.
2-IN-1 FUNCTION
The 2-person dome tent is very spacious thanks to the two ceiling
poles and the large entrance area. Alongside two fl ysheet vents, the
inner tent features mosquito-combatting and air-permeable materials,
ensuring great air circulation. With GEAR LOFT, you can place all your
belongings in the mesh storage space underneath the dome.
When used as a beach shelter, BED & BREAKFAST provides reliable
protection against the sun with UPV50+, increases privacy, and func-
tions as a wind shield.
GEAR LOFT can also be hung from the ceiling of the beach shelter,
allowing you to lay down using all the space available.
In spite of the beach shelter providing UPF50+ protection against the
sun, we would, nevertheless, still encourage you to use a sun cream
lotion, as sand, in particular, refl ects UV rays in all directions.
2-IN-1-FUNKTION
Das Kuppelzelt für 2 Personen ist dank der zwei
|
Dachstangen und des großen Eingangsbereichs sehr geräumig. Das
Innenzelt ist mit moskitosicheren und luftdurchlässigen Materialien
ausgestattet, die zusammen mit den beiden Belüftungshutzen im Au-
ßenzelt für eine angenehme Luftzirkulation sorgen. In dem GEAR LOFT,
der Netzablage unter der Kuppel, verstaust du deine Habseligkeiten.
Als Strandmuschel bietet das BED & BREAKFAST einen zuverlässigen
Sonnenschutz mit einem UPF50+ und dient auch als Wind- und Sicht-
schutz. Das GEAR LOFT kannst du auch in das Dach der Strandmuschel
hängen, so dient dir die gesamte Fläche als Liegefl äche.
Der individuelle Sonnenschutz sollte trotz der UPF50+ nicht vernach-
lässigt werden, da besonders Sand die UV-Strahlen in unbestimmte
Richtungen refl ektiert.
3
A
SECURING THE TENT WITH PEGS AND GUYLINES
Make sure that all zips are closed, and then anchor your tent at the
four corners with pegs. The special, plastic sand pegs are suitable for
sandy surfaces and the aluminium pegs (A) for grassy and stony sur-
faces. Either dig the sand pegs upright into the sand (B) or dig them
into the sand like an anchor (C) for more support. Peg out the remain-
ing pegs and guylines to make the tent stable in case of a storm. The
guylines should be pegged out in line with the poles and seams of the
dome construction. When wet, the tent material may stretch slightly.
Reguy if necessary.
Firmly tensioning the poles, fl ysheet and guylines is the key to your tent
remaining sturdy and stable against any gusts of wind. Check that the
poles are fi rmly in place, and always tension the fl ysheet and guylines.
Take your time; a few minutes spent checking during assembly will
mean that you can relax if the weather changes!
ABSPANNEN MIT HERINGEN UND LEINEN
|
Stelle sicher, dass alle
Reißverschlüsse geschlossen sind und fi xiere dein Zelt zunächst an den
vier Bodeneckpunkten mit Heringen. Die Aluminiumheringe (A) eignen
sich für Wiese und steinigen Untergrund, die speziellen Sandheringe
aus Plastik eignen sich für sandigen Boden. Die Sandheringe kannst du
hochkant (B), oder für einen bes seren Halt wie einen Anker (C) in den
Sand graben. Spanne das Zelt anschließend mit Hilfe der dafür vorge-
sehenen Abspannleinen und der restlichen Heringe sturmstabil ab. Die
Ausrichtung der Abspannleinen sollte dem Stangen-und Nahtverlauf
der Kreuzkuppel folgen. Bei Nässe kann sich das Zeltmaterial dehnen.
Es muss dann etwas nachgespannt werden.
Die stramme Grundspannung der Stangen, des Überzeltes und der
Abspannleinen ist die Voraussetzung für besten Stand und Sturmsta-
bilität deines Zeltes. Überprüfe den Sitz der Stangen und spanne Über-
zelt und Abspannleinen immer straff aus. Investiere beim Aufbau ru-
hig ein paar Minuten mehr an Zeit und Mühe, dann kannst du beim
nächsten Wolkenbruch ganz entspannt sein.
La BED & BREAKFAST est une tente
coupole entièrement équipée pour
2 personnes qui se transforme en
un clin d'œil en une tente de plage
de luxe.
FONCTION 2-EN-1
|
La tente coupole pour 2 personnes est très spa-
cieuse grâce aux deux arceaux du toit et à la grande zone du vestibule.
La tente intérieure se compose de matériaux empêchant le passage
des moustiques et laissant passer l'air ; en association avec les deux
orifi ces d'aération de la tente extérieure, ils garantissent une agréable
circulation de l'air. Le GEAR LOFT - rangement fi let sous la coupole
vous permet de ranger vos effets personnels.
En version tente de plage, la BED & BREAKFAST offre une protection
contre le soleil effi cace avec un indice de 50+ et sert également de
protection contre le vent et de brise-vue.
Le GEAR LOFT s'utilise également dans la tente de plage, ainsi vous
profi tez de la surface au sol complète pour vous allonger.
Malgré l'indice de protection 50+, la protection individuelle contre le
soleil ne doit pas être négligée, car la réverbération du sable est parti-
culièrement imprévisible.
B
C
HAUBANAGE AVEC SARDINES ET HAUBANS
|
Assurez-vous que
tous les zips soient bien fermés et fi xez ensuite la tente aux quatre
coins au sol à l'aide de sardines. Les sardines en aluminium (A) con vien-
nent pour l'herbe et les sols caillouteux, les sardines spéciales sable en
plastique sont adaptées pour les sols sablonneux. Vous pouvez utiliser
les sardines à sable de manière verticale (B) ou pour une meilleur fi xa-
tion les enterrer dans le sable comme une ancre (C). Puis tendez votre
tente à l'aide des sardines restantes et des haubans prévus à cet effet
de manière à ce qu'elle résiste au vent fort. Les haubans doivent être
fi xés dans l'aligne ment des arceaux et des coutures de la coupole en
croix. En cas d'humidité le matériau de la tente peut se détendre. Il faut
alors légère ment le retendre.
Une forte tension de base des piquets, de la tente extérieure et des
haubans garantira une bonne stabilité et une meilleure résistance aux
intempéries de votre tente.
Vérifi ez le bon maintien des arceaux et tendez toujours fortement la
tente extérieure et les haubans. Mieux vaut prendre quelques minutes
de plus pour le montage, pour être tranquille lorsque le mauvais
temps arrive.
Werbung

Verwandte Anleitungen für Jack Wolfskin BED & BREAKFAST


Inhaltszusammenfassung für Jack Wolfskin BED & BREAKFAST
- Seite 1 En version tente de plage, la BED & BREAKFAST offre une protection At JACK WOLFSKIN, we are continually improving and upgrading our 6 sardines en plastique pour le sable GEAR LOFT can also be hung from the ceiling of the beach shelter, contre le soleil effi...
- Seite 2 été intégrés et interrompent ainsi la bande scellée, avec le scellant à cause irreversible damage to the protective coating on the tent fabric. Suit- sive sunlight for extended periods of time. JACK WOLFSKIN will not assume repair instructions and proof of purchase.