Herunterladen Inhalt Inhalt Diese Seite drucken

Werbung

Verfügbare Sprachen
  • DE

Verfügbare Sprachen

  • DEUTSCH, seite 1
Intenso 7" PHOTOAGENT
V1.1

Werbung

Inhaltsverzeichnis
loading

Inhaltszusammenfassung für Intenso PHOTOAGENT 7

  • Seite 1 Intenso 7” PHOTOAGENT V1.1...
  • Seite 2: Erste Schritte

    Kurzanleitung 7“ Intenso Digitaler Fotorahmen Eine ausführliche Bedienungsanleitung mit der Beschreibung aller Einstellungsmöglichkeiten des Intenso Digitalen Fotorahmens (DF) finden Sie auf unserer Homepage: www.intenso.de Erste Schritte    Verbinden Sie das mitgelieferte Netzteil mit dem Bilderrahmen. Stecken Setzen Sie eine Speicherkarte (SD, MMC oder Setzen Sie ein USB Speichermedium in Sie das andere Ende in die Steckdose.
  • Seite 3: Allgemeine Bedienung

    Allgemeine Bedienung    Halten Sie die [] Aufwärts-Taste gedrückt, Drücken Sie die [],[]Tasten, um einen Um während des Betrachtens eines Fotos um das Hauptmenü aufzurufen. Menüpunkt auszuwählen. Bestätigen Sie oder einer Diashow das Bildervorschaumenü Ihre Auswahl mit der [ ] Taste.
  • Seite 4: Produktspezifikationen

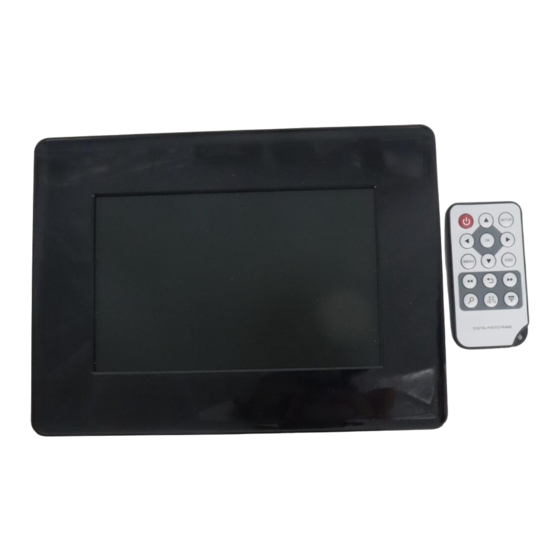
    PRODUKT SPEZIFIKATIONEN Analoges TFT LCD Display Größe: 7 Zoll (168 mm sichtbare Bilddiagonale) Anzeige Anzeigemodus: 16:10 Auflösung: 432*234 Pixel Input: 100~240V AC, 50/60Hz Netzteil Output: 5V 1A DC USB Host 2.0 Device USB port Unterstützt USB Speichermedien Unterstützte SD™ (Secure Digital Card), MMC™ (MultiMedia Card), MS™ (Memory Stick) Speicherkarten Unterstütztes Bildformat JPEG, Maximale Auflösung:8000*8000 Pixel...
  • Seite 5: First Steps

    Brief Instruction 7“ Intenso Digital Photo Frame A comprehensive instruction with a description of all settings of the Intenso Digital Photo Frame (DF) can be found on our homepage: www.intenso.de First Steps    Connect the included power supply to the photo frame. Plug the other end...
  • Seite 6: General Functions

    General Functions    Keep the [] upwards button pressed to go to Push the [],[]buttons to choose a Please press the Play/Pause [ ] button to main menu. menu item. Confirm your selection by invoke the preview menu during the viewing of pressing the [ ] button.
  • Seite 7: Product Specifications

    Do not open the case. Do not try to repair the device yourself but have it repaired by qualified personnel only. Avoid using the device on sandy areas. Fully insert the power supply plug into the opening of the Intenso weather station. This will prevent electrostatic charge. Correctly and safely connect all ports.
  • Seite 8: Guida Introduttiva

    Guida di avvio rapido 7“ Cornice digitale Intenso Le istruzioni per l’uso complete con la descrizione di tutte le opzioni di impostazione della cornice digitale Intenso sono disponibili sulla nostra homepage: www.intenso.de Guida introduttiva    Collegare il cavo di alimentazione in dotazione con la cornice. Inserire...
  • Seite 9: Visualizzazione Delle Foto

    Generale funzionamento    Tenere premuto il tasto “In alto”[] per Premere i tasti [],[]per scegliere un Per richiamare il menu di presentazione delle richiamare il menu principale. punto del menu. Confermare la scelta con foto durante la visualizzazione di una foto o di il tasto [ una presentazione, premere il tasto Play/Pausa Visualizzazione delle foto...
  • Seite 10: Specifiche Del Prodotto

    Le immagini possono essere protette da diritti di terzi. La riproduzione senza licenza potrebbe violare i diritti d‟autore. La preghiamo di non toccare la stazione meteo di Intenso con oggetti metallici durante il funzionamento. La preghiamo di evitare l‟uso di cuscini, sofà e altri oggetti di arredamento che sostengono la fo rmazione di calore visto che sussiste il pericolo che l‟oggetto si surriscaldi.
  • Seite 11: Premières Étapes

    Notice 7“ Cadre photo numérique Vous trouverez un mode d’emploi détaillé contenant la description de toutes les possibilités de réglage du cadre photo numérique Intenso (DF) sur notre site : www.intenso.de Premières étapes    Branchez sur le cadre le câble livré. Connectez l’autre extrémité à la prise.
  • Seite 12: Utilisation Générale

    Utilisation générale    Maintenez la touche [] enfoncée pour Enfoncer les touches [],[], pour Pour afficher le menu de présentation des afficher le menu principal. sélectionner une option du menu. photos lorsque vous regardez une photo ou Confirnez votre sélection par la touche un diaporama, veuillez appuyer sur la touche Play/Pause [ Affichage de photos...
  • Seite 13: Caracteristiques Du Produit

    N'ouvrez pas le boîtier. N'effectuez aucune réparation vous -même. Faites appel à un spécialiste. Evitez les emplacements sablonneux. Branchez la prise du bloc d'alimentation dans l'ouverture de la station -météo Intenso. Vous éviterez ainsi le chargement électrostatique. Reliez toutes les prises correctement et en toute sécurité.
  • Seite 14: Primeros Pasos

    Guía rápida del marco digital de fotos 7“ Intenso Encontrará instrucciones de uso detalladas con la descripción de todas las posibilidades de configuración del marco digital de fotos Intenso (DF) en nuestra página web: www.intenso.de PRIMEROS PASOS   ...
  • Seite 15: Condiciones Generales

    Condiciones generales    Mantenga pulsada la tecla [], para acceder al menú Pulse las teclas [],[], para seleccionar un Para acceder al menú de visualización previa de principal. punto del menú. Confirme su selección con la imágenes mientras mira una foto o una presentación tecla [ de diapositivas, pulse la tecla Play/Pause [ ] para...
  • Seite 16: Especificaciones Sobre El Producto

    Las imágenes pueden estar protegidas por derecho de terceros. La reproducción sin licencia puede violar los derechos de copyright. No toque la estación meteorológica de Intenso con objetos metálicos durante su funcionamiento. Evite su uso sobre cojines, sofás u otros objetos del hogar que favorezcan la formación de calor, ya que existe riesgo de sobrecalentamiento.
  • Seite 17: Primeiros Passos

    Guia rápido da moldura digital de fotografías 7“ Intenso Poderá encontrar instruções de uso detalhadas com a descrição de todas as possibilidades de configuração da moldura digital de fotografias Intenso (DF) na nossa página web: www.intenso.de PRIMEIROS PASSOS  ...
  • Seite 18 Condiciones generales    Mantenha o botão [] pressionado para Pressione os botões [],[] para Para aceder ao menu de visualização prévia aceder ao menu principal. seleccionar um ponto do menu. Confirme de imagens enquanto vê uma fotografia ou a sua selecção com o botão [ uma apresentação de diapositivos, pressione o botão Reproduzir/Pausa [...
  • Seite 19: Cuidados E Manutenção

    Não abrir a caixa. Não tentar reparar o dispositivo sozinho, leve -o antes a reparar por pessoal qualificado apenas. Evitar usar o dispositivo em zonas com areia. Inserir totalmente a tomada de alimentação de energia na abertura da estação meteorológica Intenso. Isto irá evitar carga electrostática.
  • Seite 20: Pierwsze Kroki

    Skrócona instrukcja 7“ Intenso Digital Photo Frame Pełną instrukcję z opisem wszystkich ustawień Intenso Digital Photo Frame (DF) znajdziesz na naszej stronie internetowej: www.intenso.de Pierwsze kroki    Podłącz załączony kabel do źródła prądu. Drugi koniec kabla podłącz do Włóż...
  • Seite 21: Funkcje Podstawowe

    Funkcje podstawowe    Naciśnij Góra [],aby przejść do Menu Wcisnij przyciski [],[], aby wybrać Wciśnij przycisk Play/Pause [ ] aby głównego opcję Menu. Zatwierdź przyciskiem [ wyświetlić poprzednie Menu, podczas oglądania zdjęcia lub pokazu slajdów Przeglądanie zdjęć  ...
  • Seite 22 Prosimy nie otwierać obudowy. Prosimy nie dokonywać prób samodzielnej naprawy. Prosimy zlecać te czynności fachowcom. Prosimy unikać użytkowania w miejscach grożących zapiaszczeniem. Prosimy w sposób całkowity wtykać wtyczkę przyłącza zasilacza sieciowego do otworu stacji pogodowej Intenso. Tylko w ten sposób są Państwo w stanie uniknąć zjawiska ładowania ładunkami elektrostatycznymi.
  • Seite 23: Первые Шаги

    Короткая инструкция пользователя 7“ Интенсо цифровой фоторамки Подробную инструкцию по эксплуатации с описанием всех возможностей настройки цифровой фоторамки Интенсо (ЦФ) Вы найдете на нашей домашней Интернет-странице: www.intenso.de Первые шаги    Соедините приложенный блок питания с фоторамкой. Вставьте Вставьте карту памяти (SD, MMC или MS) в...
  • Seite 24: Общее Управление

    Общее управление    Держите кнопку вверх []нажатой, чтобы Нажмите кнопки [],[], чтобы выбрать Чтобы во время просмотра фотографий или вызвать главное меню. пункт меню. Подтвердите выбор кнопкой слайд-шоу вызвать меню предварительного просмотра фотографий, нажмите на кнопку Play/Pause [ Просмотр...
  • Seite 25: Описание Продукта

    ОПИСАНИЕ ПРОДУКТА Аналоговый TFT LCD Размер дисплея: 7 дюймов (видимая диагональ изображения 168 мм) Изображение Экранный режим: 16:10 Разрешающая способность: 432*234 пикселей Вход: 100~240В AC, 50/60Гц Блок питания Выход: 5В 1A DC Устройство USB Host 2.0 Порт USB Поддерживает носители информации USB SD™...

Inhaltsverzeichnis