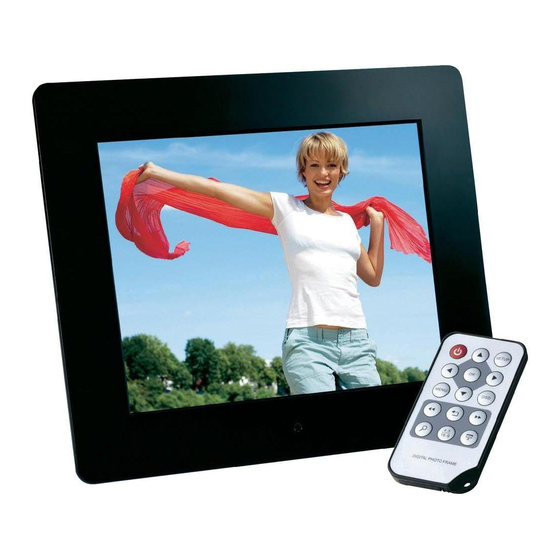
Herunterladen Inhalt Inhalt Diese Seite drucken

Werbung

Verfügbare Sprachen
  • DE

Verfügbare Sprachen

  • DEUTSCH, seite 1
Intenso 8" MEDIAPERFORMER
V1.0

Werbung

Inhaltsverzeichnis
loading

Inhaltszusammenfassung für Intenso MEDIAPERFORMER 8

  • Seite 1 Intenso 8“ MEDIAPERFORMER V1.0...
  • Seite 2 Bedienungsanleitung 8“ Intenso Digitaler Fotorahmen Folgen Sie bitte dieser Anleitung, um über die verschiedenen Funktionen des Intenso Digitalen Fotorahmens informiert zu werden. 1 Power An/Aus 2 Home Taste 3 Aufwärts [ ] Taste  4 Abwärts [ ] Taste ...
  • Seite 3: Anschließen Und Einschalten Des Intenso Digitalen Fotorahmens

    1) Anschließen und Einschalten des Intenso Digitalen Fotorahmens Verbinden Sie das mitgelieferte Netzteil mit dem Digitalen Fotorahmen (DC-IN). Stecken Sie das andere Ende des Netzteils in die Steckdose. Der Digitale Fotorahmen startet nun automatisch. Halten Sie die Power-Taste kurz gedrückt, um ihn auszuschalten oder erneut einzuschalten.
  • Seite 4 Allgemeine Bedienung Hauptmenü Nach dem Einschalten erscheint das Hauptmenü. Im Hauptmenü haben Sie die Auswahl zwischen den verschiedenen Funktionen des Digitalen , Fotorahmens und dem Setup Menü. Drücken Sie die Tasten (Pfeiltasten) auf dem Digitalen Fotorahmen oder auf der Fernbedienung, um einen Menüpunkt auszuwählen. Durch rücken der ▲, ▼...
  • Seite 5 Es werden Ihnen jetzt alle Ordner mit unterstützten MP3 Dateien angezeigt. Wählen Sie den gewünschten Ordner aus, um in das Musik-Vorschaumenü zu gelangen. Navigieren Sie nun zu einer MP3 Datei und bestätigen Sie Ihre Auswahl mit der Play/Pause [ ] Taste, um die gewählte MP3 Datei wiederzugeben.
  • Seite 6 Einstellmöglichkeiten Beschreibung Sprache Wählen Sie die gewünschte Sprache aus. Produkt Information Anzeige der aktuellen Firmware Version. Sollte auf www.intenso.de ein Firmware Update zur Verfügung Firmware Update Allgemeine stehen, können Sie es über diesen Menüpunkt installieren. Einstellungen Werkseinstellungen Gerät wird auf die Werkseinstellungen zurückgesetzt.
  • Seite 7 Datum Einstellen des aktuellen Datums. Einstellen des Formates der Uhrzeit: 12 Stunden (AM / PM) Zeitformat oder 24 Stunden. Uhrzeit Einstellen der aktuellen Uhrzeit. Uhrkorrektur Feinjustierung der Uhr. Kalender | Ein / Aus Schalten Sie den Timer Ein / Aus. Einschaltzei Einstellen der Uhrzeit des automatischen Uhrzeit |...
  • Seite 8: Produktspezifikationen

    Wissen Sie einmal nicht weiter? Unsere Technische Service Hotline beantwortet gerne weitere Fragen: +49 (0) 900 1 50 40 30 für 0,39 €/Min. aus dem deutschen Festnetz. Mobilfunkpreise können abweichen. Viel Spaß mit Ihrem Digitalen Fotorahmen von Intenso! DE - 7...
  • Seite 9 Pflege und Wartung Pflege  Um die Gefahr von elektrischen Stromstößen zu vermeiden, entfernen Sie bitte weder die Schrauben noch das Gehäuse.  Benutzen Sie dieses Gerät nicht in der Nähe von Wasser. Setzen Sie dieses Gerät weder Regen noch Feuchtigkeit aus. Stellen Sie keine Gegenstände in der Nähe des Gerätes ab, die Wasser oder andere Flüssigkeiten speichern.
  • Seite 10 Operating instructions for 8" Intenso Digital Photo Frame Please comply with the following instructions to be informed about the different functions of the Intenso digital photo frame. 1 Power On/Off 2 Home button 3 Play/Pause [ ] Button 4 Up [ ] Button ...
  • Seite 11 Connect and switch on the digital photo frame Connect the Power Adapter supplied with the frame (DC-IN). Plug the other end of the Adapter into the Socket. The photo frame will now start automatically. Hold down the Power button briefly to turn it off or on again. Please note: The plug must be placed next to the device so to be easily accessible.
  • Seite 12 General Operation Main Menu After powering on, the Main Menu appears. In the Main Menu you have the choice between the Different Functions of the Digital Photo , Frame and the Setup Menu. Tap the key (arrow keys) on the photo frame or on the remote control to select the menu points.
  • Seite 13 Playing MP3 files Navigate the main menu to get to the music function. The storage media are displayed online. Depending on the storage medium connected, you may select between SD/MMC and USB. Confirm your selection with the Play/Pause [ ] button. Now all the folders with supported MP3 files are displayed.
  • Seite 14 Settings Description Language Select the desired language. Product Information Displays the current firmware version. Should a firmware update be available at www.intenso.de the update Firmware Update General can be installed through here. Setup Factory Settings Reset the device to the factory settings.
  • Seite 15 Date Set the current date. Time Format Set the time format: 12 Hours (AM / PM) or 24 hours. Time Set the current time. Clock | Clock correction Adjustment details of the clock. Date | On / Off Activate / Deactivate the automatic switching on / off. Timer Turn On Set the time for an automatic power on.
  • Seite 16 Simply call our Technical Service Hotline at: +49 (0) 900 1 50 40 30 for 0.39 €/Min. with calls from the German telephone network. Different rates may apply to calls from mobile phones. Enjoy Intenso’s digital photo frame! GB - 7...
  • Seite 17  Avoid using the device on sandy areas.  Fully insert the power supply plug into the opening of the Intenso weather station. This will prevent electrostatic charge.  Correctly and safely connect all ports. ...
  • Seite 18 Istruzioni d‘uso per foto digitale da 8“ di Intenso La preghiamo di seguire queste istruzioni per essere informata/o riguardo alle diverse funzioni della cornice di foto digitale Intenso. 1 Power Acceso/Spento 2 Home Tasto 3 Tasto Sú [  4 Tasto Giú [ ...
  • Seite 19 Collegare e accendere la Cornice per foto digitali Colleghi l‘adattatore incluso nel volume di consegna con la cornice di foto digitale (DC-IN). Inserisca l’altra estremità dell‘adattatore nella presa. La cornice di foto digitale ora si avvia automaticamente. Tenga premuto brevemente il tasto Power per spegnerla o riaccenderla.
  • Seite 20 Uso generale Menu principale Dopo l’accensione appare il menu principale. Nel menu principale Lei può selezionare tra le diverse funzioni della cornice di foto digitale , e del menu setup. Prema i tasti (tasti a freccia) sulla cornice di foto digitale o sul telecomando per selezionare un punto del menu.
  • Seite 21 Riproduzione di file MP3 Navighi nel menu principale per arrivare alla funzione musica. Le vengono visualizzati i mezzi di memorizzazione collegati. A seconda del mezzo di memorizzazione collegato, può scegliere tra SD / MMC e USB. Confermi la Sua selezione con il tasto Play/Pause [ ]. Ora Le vengono visualizzate tutte le cartelle con i file MP3 sopportati.
  • Seite 22 Descrizione d’impostazione Scelga l’idioma desiderato. Idioma Informazione Visualizzazione della versione firmware attuale. prodotto Se sul sito www.intenso.de dovesse essere disponibile un Aggiornamento aggiornamento del firmware, questo può essere installato mediante Setup firmware questo punto del menu. generale L’apparecchio viene resettato sulle impostazioni da fabbrica.
  • Seite 23 Il titolo selezionato attualmente Ripetere quello attuale viene riprodotto in sequenza infinita. Il titolo selezionato attualmente Riprodurre una volta viene riprodotto 1x. Data Impostazione della data attuale. Impostazione del formato dell’orario: 12 ore (AM / PM) o 24 ore. Formato orario Orario Einstellen der aktuellen Uhrzeit.
  • Seite 24: Specifiche Del Prodotto

    Il nostro numero verde di supporto tecnico risponde volentieri ad altre domande: +49 (0) 900 1 50 40 30 al costo di 0,39 €/min. da rete fissa tedesca. I prezzi delle rete dei cellulari possono variare. Buon divertimento con la Sua Cornice per foto digitali Intenso! IT- 7...
  • Seite 25 Cura e Manutenzione Cura  Per evitare il pericolo di scosse elettriche La preghiamo di non levare viti e/o involucro.  Non usi quest’apparecchiatura vicino all’acqua. Non esponga quest’apparecchiatura a pioggia e/o umidità. Non depositi oggetti che conservano acqua o altri liquidi vicino a quest’apparecchiatura. ...
  • Seite 26: Power On/Off

    Instructions d’utilisation cadre photo numériques 8" Intenso Veuillez suivre les instructions de cette notice pour obtenir toute l'information sur les différentes fonctions du cadre photo numérique d’Intenso. 1 Power On/Off 2 Home 3 Touche En amont [  4 Touche En aval [ ...
  • Seite 27 Connecter et mettre le cadre photo numérique en marche Connectez l’adaptateur secteur fourni à l’écran photo (DC-IN). Branchez l'autre extrémité de l’adaptateur dans la prise. L’écran photo démarre alors automatiquement. Maintenez la touche power brièvement enfoncée pour désactiver ou réactiver l’appareil. Attention: La prise doit se trouver à...
  • Seite 28 Informations de base A propos du menu principal Le menu principal s’affiche automatiquement lorsque vous allumez l’appareil. Dans le menu principal, vous avez le choix entre les différentes fonctions de l’écran photo et , du menu de réglage setup. Appuyez sur les touches (touches de flèche) sur le cadre ou ▲, ▼...
  • Seite 29 Lecture des fichiers MP3 Explorez le Menu principal pour accéder à la fonction Musique. Les supports multimédia connectés sont affichés. Selon le support multimédia qui est connecté, vous avez la possibilité de Sélectionner entre SD / MMC et USB. Validez votre sélection en appuyant sur la touche Lire/suspendre [ ].
  • Seite 30 Affichage de la version actuelle de la microprogrammation. Si une mise à jour devait être disponible sur le site Internet Mise à jour de la www.intenso.de pour la microprogrammation, celle-ci peut être installée microprogrammation Généralités via cette option de menu.
  • Seite 31 fichier Sélection du répertoire pour la lecture de la musique. Ordre de lecture Sélection entre l'ordre de lecture normal et aléatoire. Tous les titres pris en charge sont Lire tous les titres une fois lus une fois. Tous les titres pris en charge sont Répéter tous les titres lus une fois dans une boucle Musique...
  • Seite 32: Specifications Du Produit

    Notre hot-line de service vous les répond : +49 (0) 90 01 50 40 30 pour 0,39 €/min. du fixe allemand. Les prix de la téléphonie mobile peuvent en différer. Nous espérons que l’Intenso cadre photo numérique vous fait plaisir! FR - 7...
  • Seite 33 Soin et Entretien Soin  Pour éviter des décharges électriques n’enlevez ni les vis ni le boîtier.  N’utilisez pas cet appareil à proximité de l’eau. N’exposez pas l’appareil à la pluie ou à l’humidité. Ne posez pas des objets contenant de l’eau ou d’autres liquides à côté de l’appareil. ...
  • Seite 34 Manual de instrucciones del marco digital de fotos 8“ Intenso Por favor obedecer las siguientes instrucciones para informarse sobre las distintas funciones del marco digital Intenso. 1 Power encendido/apagado 2 Home 3 Tecla arriba [  4 Tecla abajo [ ...
  • Seite 35 Conectar y encender el marco digital Conecte la fuente de alimentación suministrada al marco digital (DC-IN). Enchufe el extremo opuesto de la fuente de alimentación a la toma de corriente. El marco digital se inicia de forma automática. Mantenga pulsada brevemente la tecla Power, para apagarlo o volver a encenderlo.
  • Seite 36 Instrucciones generales Menú principal Cuando se enciende el marco digital de fotos aparece el Menú principal. En el Menú principal tiene la posibilidad de elegir entre las diferentes funciones del marco , digital y del menú de configuración (Setup). Pulsar la tecla (teclado de flechas) en el marco digital o en el mando a distancia para seleccionar los puntos de menú...
  • Seite 37 Reproducción de archivos de MP3 Escoja la función „música“ en el menú principal. Se visionarán los diferentes medios de almacenamiento de datos disponibles. Según cual sea la naturaleza del medio de almacenamiento disponible, podrá elegir entre SD/ MMC y USB. Verifique su elección con el botón Play/Pause [ ].
  • Seite 38 Idioma Seleccione el idioma deseado. Información del Muestra la versión de firmware actual. producto Actualización de Si una actualización de firmware está disponible en www.intenso.de Configuración firmware puede instalarla a través de este punto del menú. general Configuración de El aparato recuperará la configuración de fábrica.
  • Seite 39 canciones seleccionadas serán reproducidas de manera continua La canción actual elegida será Repetición de la canción actual reproducida de manera continua La canción elegida será Reproducción única reproducida una única vez Fecha Configuración de la fecha actual. Configuración del formato de la hora: 12 horas (a. m. / p. m.) o 24 Formato de la hora horas.
  • Seite 40 Nuestra línea hotline de servicio técnico le responderá con mucho gusto: +49 (0) 900 1 50 40 30 a 0,39 €/min. desde la red telefónica fija de Alemania. Los precios para la telefonía móvil pueden diferir. ¡Le deseamos que disfrute de su marco digital Intenso! ES - 7...
  • Seite 41 Cuidado y Mantenimiento Cuidado  Para evitar el riesgo de descarga eléctrica no retire ni los tornillos ni la carcasa.  No utilice este aparato cerca del agua. No ponga en contacto al aparato ni con l luvia ni con humedad.
  • Seite 42 Manual de instruções 8“ Intenso Moldura digital Por favor siga as instruções deste manual para informações sobre as várias funções da moldura digital Intenso. 1 Power On/Off 2 Home 3 Tecla para cima [  4 Tecla para trás [ ...
  • Seite 43 Conectar e Ligar a Moldura de Fotos Digitais Conecte o transformador anexado com a moldura digital (DC- IN). Coloque a outra extremidade do transformador na tomada. A moldura digital inicia automaticamente. Mantenha a tecla Power pressionada por um curto espaço de tempo para a desligar ou voltar a ligar.
  • Seite 44 Utilização Geral Menu principal A seguir ao ligar o aparelho, aparece o menu principal. No menu principal pode seleccionar entre diversas funções da moldura digital e do menu de , Setup. Utilize as teclas (teclas das setas) na moldura digital ou no comando para seleccionar um item no menu.
  • Seite 45 Reprodução de ficheiros em MP3 Navegue no menu principal para a função da música. Pode visualizar os meios de memória conectados. Dependendo do meio de memória, pode seleccionar entre SD / MMC e USB. Confirme através de Play/Pause [ ]. Visualizam-se todas as pastas com ficheiros em MP3.
  • Seite 46 Idioma Seleccione o idioma pretendido. Infomações de Visualização da versão actual da Firmware. produto Actualizações de Caso se encontre uma actualização da Firmware sob www.intenso.de, Configura- Firmware esta pode ser instalada através deste ponto no menu. ções Gerais Valores originais Os valores originais do aparelho são repostos.
  • Seite 47 Reproduzir 1x o título Reproduzir uma vez actualmente seleccionado. Data Ajuste da data actual. Formato hora Ajuste do formato da hora: 12 horas (AM / PM) ou 24 horas. Hora Ajuste da hora actual. Ajuste de precisão da Correcção da hora hora.
  • Seite 48: Especificações De Produto

    Nossa Hotline de Assistência Técnica responde com prazer às suas perguntas: +49 (0) 900 1 50 40 30 por 0,39 €/min. de um telefone fixo alemão. Preços de telefonia móvel podem variar. Divirta-se com sua Moldura de Fotos Digitais da Intenso! PT - 7...
  • Seite 49 Cuidado e Manutenção Cuidado  Para evitar o perigo de choques elétricos, não remova parafusos n em a caixa externa.  Não utilize o aparelho próximo à água. Não submeta o aparelho à chuva ou umidade. Não coloque outros objetos que armazenem água ou outros líquidos na proximidade deste aparelho. ...
  • Seite 50 Instrukcja obsługi 8“ Intenso Cyfrowa ramka fotograficzna Prosimy o prześledzenie tej instrukcji, aby poznać różne funkcje Cyfrowej ramki fotograficznej firmy Intenso. 1 Moc włączona/wyłączona 2 Home 3 Do przodu [  4 W dół Klawisz [  5 Play/Pause Klawisz [ ] 6 W prawo Klawisz [ ...
  • Seite 51 Podłączanie i włączanie ramki cyfrowej Połącz dostarczony zasilacz z ramką (DC-IN). Podłącz drugą wtyczkę zasilacza do gniazdka sieciowego. Ramka uruchomi się automatycznie. Wciśnij krótko przycisk Power, aby wyłączyć lub ponownie włączyć. Uwaga: - Gniazdko sieciowe musi znajdować się w pobliżu urządzenia i musi być łatwo dostępne. - Nie otwierać...
  • Seite 52 Obsługa ogólna Menu główne Po włączeniu wyświetlane jest Menu główne W Menu głównym do wyboru są różne funkcje ramki oraz Menu ustawień. Wciśnij przyciski na ramce, aby wybrać punkt menu. Potwierdź wybór naciskając przycisk Play/Pause [ ] na , ramce. Wciśnij przyciski (przyciski strzałek) na ramce lub na pilocie, aby wybrać...
  • Seite 53 Odtwarzanie plików MP3 W Menu głównym należy przejść do funkcji Muzyka. Wyświetlone zostaną podłączone nośniki danych. w zależności od tego, jaki nośnik danych jest podłączony, można wybrać pomiędzy SD / MMC i USB. Wybór należy potwierdzić przyciskiem Play/Pause [ ]. Wyświetlone zostaną...
  • Seite 54 Możliwości Opis ustawienia Język Wybierz język. Wyświetlanie aktualne wersji firmware. Informacja o produkcie Jeśli na stronie internetowej www.intenso.de zostanie udostępniona Aktualizacja aktualizacja firmware, można ją zainstalować wykorzystując ten punkt Ustawienia firmware menu. ogólne Urządzenie może zostać zresetowane do ustawień fabrycznych.
  • Seite 55 Wszystkie obsługiwane utwory zostaną nieskończenie Powtarzanie wszystkich utworów odtwarzane. Aktualnie wybrany plik zostanie Powtórz aktualny nieskończenie odtwarzany. Aktualnie wybrany utwór zostanie Odtwórz raz odtworzony 1 raz. Data Ustawianie aktualnej daty. Format czasu Ustawianie formatu czasu: 12-godzinny (AM / PM) lub 24-godzinny. Czas Ustawianie aktualnego czasu.
  • Seite 56: Specyfikacje Produktu

    Jeżeli chcą Państwo uzyskać więcej informacji, nasza gorąca linia serwisu technicznego z przyjemnością odpowie na Państwa pytania: +49 (0) 900 1 50 40 30 Koszt połączenia 0,39 €/min. z telefonu stacjonarnego w Niemczech. Ceny połączeń z telefonów komórkowych mogą być różne. Życzymy przyjemnego korzystania z ramki cyfrowej Intenso! PL - 7...
  • Seite 57: Użytkowanie I Konserwacja

    UŻYTKOWANIE I KONSERWACJA UŻYTKOWANIE  Aby uniknąć niebezpieczeństwa porażenia prądem elektrycznym, nie należy usuwać ani śrub ani obudowy.  Urządzenia nie używać w pobliżu wody. Nie należy wystawiać ramki cyfrowej na działanie deszczu ani wilgoci. W pobliży urządzenia nie ustawiać żadnych przedmiotów zawierających wodę lub inne substancje płynne.
  • Seite 58 Руководство по эксплуатации 8“ Интенсо цифровой фоторамки В данной инструкции Вы узнаете о различных функциях цифровой фоторамки Интенсо. 1 Включ./Выкл. 2 Home 3 Вверх кнопка [  4 Вниз кнопка [  5 Просмотр кнопка [ ] 6 Вправо кнопка [ ...
  • Seite 59 Подключение и включение цифровой фоторамки Соедините приложенный блок питания с цифровой фоторамкой (DC-IN). Вставьте другой конец блока питания в розетку. цифровой фоторамки включается автоматически. Держите кнопку включения Power на протяжении короткого времени нажатой, чтобы выключить или повторно включить ее. Внимание: Розетка...
  • Seite 60 Общее управление Главное меню После включения прибора появляется главное меню. В Главном меню у Вас есть выбор между разными функциями цифровой фоторамки и меню настройки. Нажмите на кнопки на цифровой фоторамки, чтобы выбрать пункт , меню. Подтвердите Ваш выбор, нажав на кнопку Play/Pause [ ] на цифровой фоторамки.
  • Seite 61 Воспроизведение файлов MP3 Перейдите в главном меню к функции музыка. Появятся подсоединенные устройства памяти. В зависимости от подключенного типа устройства, у вас есть выбор между SD / MMC и USB. Подтвердите ваш выбор, нажав на кнопку Играть/Пауза [ ]. Появляются все папки с поддерживающими файлами MP3. Выберите желаемую папку для...
  • Seite 62 Возможности Описание настройки Язык Выберите необходимый язык. Информация о Индикация настоящей версии микропрограммы. продукте Если на веб-странице www.intenso.de имеется обновление Обновление микропрограммы, его можно установить с помощью данного пункта микропрограммы Общие меню. Заводские настройки Прибор возвращается в состояние заводских настроек.
  • Seite 63 Все поддерживаемые треки Все треки повторить проигрываются беспрерывно. Выбранный трек проигрывается Проиграть выбранное беспрерывно. Выбранный трек проигрывается Проиграть один раз один раз. Дата Настройка даты. Формат времени Настройка формата времени: 12 часов (AM / PM) или 24 часа. Время Настройка времени. Настройка...
  • Seite 64: Описание Продукта

    ОПИСАНИЕ ПРОДУКТА Цифровой дисплей TFT LCD Размер: 8” дюймов (20,32 см видимая диагональ фотографии) Изображение Экранный режим: 4:3 - Раздельная способность: 800*600 пикселей Вход: 100~240В AC, 50/60Гц Блок питания Выход: 5В 1A DC USB Host 2.0 - Поддерживает носители информации USB Порт...
  • Seite 65: Уход И Профилактический Осмотр

    УХОД И ПРОФИЛАКТИЧЕСКИЙ ОСМОТР Уход  Чтобы избежать импульсов тока, на удаляйте на винты ни корпус.  Не используйте данный прибор вблизи воды. Не поддавайте прибор влиянию дождя или влажности. Не ставьте вблизи прибора предметы, которые накапливают воду или другие виды жидкостей.

Inhaltsverzeichnis