Herunterladen Inhalt Inhalt Diese Seite drucken

Werbung

Verfügbare Sprachen
  • DE

Verfügbare Sprachen

USER MANUAL (ENGLISH)---------------------------------------------------------P1-P9
INDICE:
● SAFETY INSTRUCTIONS
● CONTROL AND FUNCTIONS
● SPECIFICATIONS
● OPERATIONS
L-80 USB
Turntable MP3 recorder
For information and support,
www.lenco.eu

Werbung

Inhaltsverzeichnis
loading

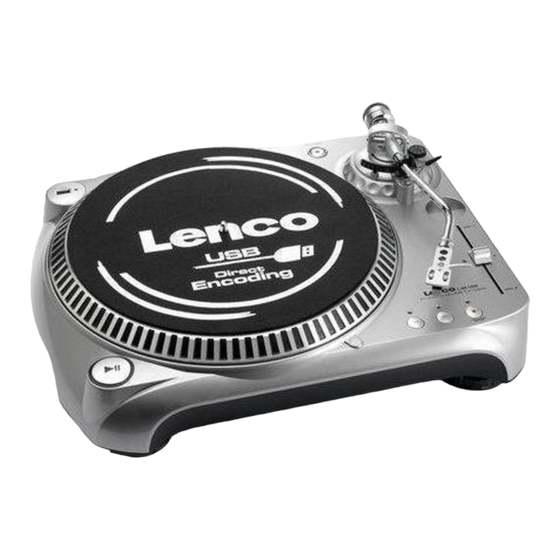
Inhaltszusammenfassung für LENCO L-80 USB

  • Seite 1 L-80 USB Turntable MP3 recorder USER MANUAL (ENGLISH)---------------------------------------------------------P1-P9 INDICE: ● SAFETY INSTRUCTIONS ● CONTROL AND FUNCTIONS ● SPECIFICATIONS ● OPERATIONS For information and support, www.lenco.eu...
  • Seite 2: Safety Instructions

    USER MANUAL L-80 USB SAFETY INSTRUCTIONS 1. Read these Instructions. 2. Keep these Instructions. 3. Heed all Warnings. 4. Follow all Instructions. 5. Do not use this apparatus near water. 6. Clean only with a dry cloth. 7. Do not block any of the ventilation openings. Install in accordance with the manufacture’s instructions.
  • Seite 3 The exclamation point within the equilateral triangle is intended to alert the user to the presence of important operation and maintenance (servicing) instructions in the literature accompanying this appliance. CAUTION To prevent electric shock, do not use this polarized plug with an extension cord, receptacle or other outlet unless the blades can be fully inserted to prevent blade exposure.
  • Seite 4 CONTROL AND FUNCTIONS 1. USB SOCKET USB record only for MP3 format. 2. PLATTER 3. START/STOP BUTTONP Press this button to start or stop the platter. 4. PHONO/LINE SWITCH Switches the output to either Phono or Line level. 5. PLATTER SPEEDS Used to select the desired speed.
  • Seite 5 11. MOTOR OFF/Reverse BUTTON Tap the button to switch Reverse/Forward playback. Press the button more than 1sec. to enable motor off, and the led will be flash. Press the button more than 1sec again to disable motor off. 12. 45 RPM ADAPTOR Place on center spindle for playing 7”...
  • Seite 6 OPERATIONS 1. Push power button to on. 2. Insert target light for illumination the stylus. 3. Place a record on the turntable mat. When playing a 45rpm record with a large center hole; place the 45rpm adapter on the center spindle. 4.
  • Seite 7 SET-UP ASSEMBLY: Before you begin assembly please be sure all parts and accessories have arrived intact. Please use the check list below to identify and order parts and accessories . * Instruction manual * RCA cable * Slipmat * Platter * 45 rpm adaptor * Headshell * AC cord * Counterweight Note:...
  • Seite 8 SET-UP a. Remove the stylus protective cover, if so equipped. Never touch the stylus tip during the adjustment. b. Lower the tonearm lever. c. Release the tonearm clamp and release the tonearm from the arm rest. d. Set the anti-skate adjustment to zero. e.
  • Seite 9 Output terminals Amplifier(Receiver) L (White) L CH R (Red) R CH You can also use a line input by setting the phono / line switch at the rear of the turntable to line. Set the PHONO/LINE switch to “PHONO” Set the PHONO/LINE switch to “LINE”...
  • Seite 10 L-80 USB Plattenspieler mit MP3-Recorder BEDIENUNGSANLEITUNG (DEUTSCH)---------------------------------------------------------P10-P18 ENTHALTEN: ● SICHERHEITSHINWEISE ● KONTROLLE UND FUNKTIONEN ● EIGENSCHAFTEN ● BEDIENUNG Zur Information und Unterstützung, www.lenco.eu...
  • Seite 11: Sicherheitshinweise

    BEDIENUNGSANLEITUNG L-80 USB SICHERHEITSHINWEISE Lesen Sie bitte alle Warn- und Bedienungshinweise sorgfältig durch, bevor Sie dieses Gerät in Betrieb nehmen. • Bewahren Sie diese Bedienungsanleitung für evtl. später auftauchende Fragen sorgfältig auf. • Entfernen Sie bitte nicht die Warnhinweise am Gerät.
  • Seite 12 • Das Gerät sollte von einem autorisiertem Servicetechniker gewartet werden wenn: - Das Stromanschlusskabel oder der Stecker beschädigt wurde oder - Das Gerät heruntergefallen ist oder Flüssigkeit eingedrungen ist oder - Das Gerät Regen ausgesetzt war oder - Das Gerät nicht fehlerfrei arbeitet bzw. Fehler im Betrieb verursacht oder - Das Gerät geworfen wurde oder das Gehäuse sichtbar beschädigt ist ACHTUNG: Um das Risiko eines elektrischen Stromschlags zu minimieren, entfernen Sie bitte keine Gehäusedeckel! Gefährliche Betriebsspannung im Gehäuseinnern kann lebensgefährlich für den...
  • Seite 13: Kontrolle Und Funktionen

    TONARM Statisch ausgewogener S-förmiger Arm mit abnehmbarem System Effektive Armlänge 230.5mm Phono Ausgangs-Level 1.5~3.6mV at 1KHz 5cm/sec (HP-4005) Line Ausgangs-Level 90~216mV aan 1KHz 5cm/sec (HP-4005) Frequenzbereich 20Hz-20KHz Kanal Trennung Mehr als 15 dB Kanal Gleichgewicht Von 2.5dB bis 1KHz ALLGEMEIN Stromkabel AC115/230V, 60/50Hz Stromverbrauch...
  • Seite 14 3. START/STOP KNOPF Diesen Knopf drücken um den Plattenteller zu starten oder zu stoppen 4. PHONO/LINE SCHALTER Schaltet die Ausgabe entweder auf Phono - oder Line-Ebene. 5. PLATTENTELLERGESCHWINDIGKEIT * Den “33” Knopf drücken um die Geschwindigkeit 33 rpm auszuwählen. * Den “45” Knopf drücken um die Geschwindigkeit 45 rpm auszuwählen. 6.
  • Seite 15: Bedienung

    BEDIENUNG 1. Schalten Sie das Gerät mit dem Hauptschalter ein. 2. Montieren Sie die Nadelbeleuchtung, um die Nadel bei Dunkelheit besser erkennen zu können. 3. Legen Sie eine Platte auf den Plattenteller. Wenn Sie eine 7“ Platte mit großer Öffnung in der Mitte spielen möchten, nutzen Sie den 45 RPM Adapter und legen Sie ihn in die Mitte des Plattentellers.
  • Seite 16 SET-UP AUFBAU: Bevor Sie beginnen, stellen Sie schicher, dass alle Teile und Zubehör intakt sind. Bitte verwenden Sie hierfür die aufgeführte Checkliste * Bedienungsanleitung * Anschlusskabel * Splimat * Plattenteller * 45 rpm Adapter * System * Stromkabel * Kontergewicht Hinweis: * Verbinden Sie den Netzstecker erst nach Abschluss der Montage.
  • Seite 17: Installation Des Systems

    SET-UP a. Entfernen Sie die Schutzhülle falls vorhanden und berühren Sie die Nadel nicht. b. Stellen Sie die Tonarm Stütze mit Hilfe des Hebels auf minimale Höhe ein. c. Lösen Sie den Tonarm Halter und nehmen Sie den Tonarm vom Halter herunter. d.
  • Seite 18 Ausgangsanschlüsse Verstärker (Receiver) L (weiss) L Kanal R (rot) R Kanal Sie können auch ein Phono/Line Signal zum Verstärker senden. Nutzen Sie dazu den Ausgangswahlschalter hinten am Gerät. Set the PHONO/LINE switch to “PHONO” Set the PHONO/LINE switch to “LINE” Sollten Sie irgendwann zu späterer Zeit dieses Produkt entsorgen wollen, beachten Sie bitte Folgendes: Elektroschrott sollte nicht mit dem Haushaltsmüll entsorgt werden.
  • Seite 19 L-80 USB Draaitafel MP3 recorder GEBRUIKSAANWIJZING (NEDERLANDS)---------------------------------------------------------P19-P27 INHOUDSTAFEL: ● VEILIGHEIDSVOORSCHRIFTEN ● KNOPPEN EN FUNCTIES ● SPECIFICATIES ● BEDIENING Voor informatie en ondersteuning, www.lenco.eu...
  • Seite 20: Gebruiksaanwijzing

    GEBRUIKSAANWIJZING L-80 USB VEILIGHEIDSVOORSCHRIFTEN 1. Lees deze voorschriften. 2. Bewaar deze voorschriften. 3. Neem alle waarschuwingen in acht. 4. Volg alle voorschriften. 5. Houd dit toestel uit de buurt van water. 6. Maak het enkel schoon met een vochtige doek.
  • Seite 21 Het symbool van de bliksemschicht met pijl in de gelijkzijdige driehoek wijst de gebruiker op de aanwezigheid van niet-geïsoleerde “gevaarlijke spanning” binnenin het toestel, dewelke voldoende groot kan zijn om een risico tot elektrische schok in te houden. Het uitroepteken in de gelijkzijdige driehoek wijst de gebruiker op de aanwezigheid van belangrijke bedienings- en onderhoudsinstructies in de literatuur meegeleverd bij dit toestel.
  • Seite 22 ALGEMEEN Stroomvoorziening AC115/230V, 60/50Hz Stroomverbruik 9 Watt Afmetingen 449 (W) x 370 (D) x 145 (H) mm Gewicht 3.8 Kg OPMEEKING: Ten gevolge van verbeteringen zijn er zonder voorafgaande kennisgeving revisies mogelijk aan de specificaties en ontwerp van dit toestel. KNOPPEN EN FUNCTIES 1.
  • Seite 23: Stroomsnoer Verbindingselement

    7. BLOKKEERSCHROEF VAN DE SYSTEEMDRAGER Bevestig de systeemdrager door deze in het voorste uiteinde van de pick-up arm te schuiven, draai daarna de blokkeerschroef in wijzerzin. 8. SCHUIFKNOP VOOR TOONHOOGTE Gebruik deze om de snelheid van de draaischijf aan te passen. Wanneer u de SCHUIFKNOP VOOR TOONHOOGTE beweegt, zal de indicator voor toonhoogte niet oplichten.
  • Seite 24 BEDIENING 1. Druk op de stroomschakelaar om het toestel aan te zetten. 2. Breng het verlichtingslampje voor de naald in. 3. Plaats een plaat op de draaischijf. Plaats de 45 TPM ADAPTER op de hoofdas indien u een 45tpm plaat met groot gat in het midden afspeelt. 4.
  • Seite 25 SET-UP MONTEREN: Verifieer of alle onderdelen en accessories intact werden geleverd voor u begint met monteren. Gelieve de onderstaande checklist te gebruiken om de onderdelen en accessories te identificeren en ordenen. * Gebruiksaanwijzing * RCA kabel * Slipmat * Draaischijf * 45 tpm adapter * Systeemdrager * AC snoer * Tegengewicht OPMEEKING:...
  • Seite 26 SET-UP 7 Tegengewicht: a. Haal de naald uit haar beschermende verpakking, indien aanwezig. Raak de naald nooit aan tijdens het afstellen. b. Laat de hefboom van de pick-up arm zakken. c. Geef de pick-up arm klem vrij en laat de pick-up arm uit de armsteun gaan. d.
  • Seite 27 Output terminals Versterker(Ontvanger) L (Wit) L CH R (Rood) R CH U kan eveneens met line input werken, door de phone/line schakelaar aan de achterzijde van de draaitafel op line te zetten. Set the PHONO/LINE switch to “PHONO” Set the PHONO/LINE switch to “LINE”...
  • Seite 28 L-80 USB Platine enregistreur MP3 MANUAL D’UTILISATION (FRANÇAIS)---------------------------------------------------------P28-P36 SOMMAIRE: ● INSTRUCTIONS DE SÉCURITÉ ● COMMANDE ET FONCTIONS ● CARACTERISTIQUES ● OPERATIONS Pour information & support technique, www.lenco.eu...
  • Seite 29: Manuel D'utilisation

    MANUEL D’UTILISATION L-80 USB INSTRUCTIONS DE SECURITE 1. Lisez les instructions 2. Gardez précieusement le manuel d’utilisation 3. Respecter tous les avertissements 4. Suivez toutes les instructions 5. N’utilisez pas l’appareil près de l’eau 6. Nettoyez l’appareil avec un chiffon doux 7.
  • Seite 30 ATTENTION Pour empêcher les décharges électriques, ne pas utiliser cette prise polarisée avec une rallonge. Empêcher tout introduction d’objet dans le réceptable pour éviter tout risque d’incident. CARACTERISTIQUES TOURNE DISQUE Type 2-vitesse manuelle Moteur Moteur DC Mode d’entrainement Entrainement courroie Plateau 330mm dia.
  • Seite 31 CONTROLE ET FONCTION 1. PRISE USB USB record uniquement en format MP3. 2. PLATEAU 3. BOUTON START/STOP Appuyez sur ce bouton pour démarrer ou stopper le plateau. 4. INTERRUPTEUR PHONO/LINE Interrupteur de sortie soit au niveau line, soit au niveau phono. 5.
  • Seite 32 11. BOUTON MOTEUR OFF/REVERSE Appuyez sur le bouton pour basculer lecture précédente/suivante. Appuyez sur le bouton plus d’1sec. pour arrêter le moteur et le LED clignotera. Appuyez sur le bouton plus d’1 sec. à nouveau pour réactiver le moteur. 12. ADAPTATEUR 45 RPM Cet adaptateur permet de jouer la norme 7”...
  • Seite 33 OPERATIONS 1. Appuyez le commutateur sur ON 2. Insérez la cible lumière pour éclairer le stylet 3. Placez un disque sur la feutrine. En jouant un disque de 45t/mn avec un grand trou central, placer d’adaptateur de 45t/mn sur l’axe central. 4.
  • Seite 34 ASSEMBLAGE Avant de commencer l’assemblage, soyez sûr que tous appareils et tous les accessories sont arrives intacts. Veuillez contrôler en suivant la liste ci-dessous pour identifier les pieces et les accessories. * Manuel d’utilisateur * câble RCA * Slipmat * Plateau * adaptateur 45 rpm * Tête * AC cord * Contrepoids Remarque : * Ne pas connecter le câble d’alimentation avant l’assemblage complet.
  • Seite 35 SET-UP a. Retirez le couvercle de protection s’il est équipé. Ne jamais toucher au stylet durant l’ajustement. b. Abaisser le bras de levier c. Relâchez le bras de serrage et relâchez le bras de l'accoudoir. d. Réglez l'anti-skate ajustement à zéro. e.
  • Seite 36 Fiches de sortie Amplificateur (Récepteur) L ( Blanc ) Canal gauche R ( Rouge ) Canal droit Vous pouvez aussi utiliser une entrée ligne en définissant le commutateur phono / line à l'arrière de la platine vinyle. Set the PHONO/LINE switch to “PHONO”...
  • Seite 37 L-80 USB Plato giradiscos grabador de MP3 MANUAL DEL USUARIO (ESPAÑOL)---------------------------------------------------------P37-P45 CONTENNIDOS: ● INSTRUCCIONES DE SEGURIDAD ● CONTROLES Y FUNCIONES ● ESPECIFICACIONES ● OPERACIONES Para obtener información y apoyo, www.lenco.eu...
  • Seite 38: Manual Del Usuario

    MANUAL DEL USUARIO L-80 USB INSTRUCCIONES DE SEGURIDAD 1. Lea estas instrucciones. 2. Conserve estas instrucciones. 3. Haga caso de las advertencias. 4. Siga todas las instrucciones. 5. No haga uso de este aparato cerca del agua. 6. Límpielo sólo con un trapo húmedo.
  • Seite 39 El símbolo del rayo circunscrito en un triángulo equilátero pretende alertar al usuario de la presencia de “voltaje peligroso” no aislado en el interior del producto, que podría ser de la suficiente magnitud como para constituir un riesgo de descarga eléctrica. El signo de exclamación circunscrito en un triángulo equilátero pretende alertar al usuario de la presencia de importantes instrucciones de funcionamiento y mantenimiento (reparación) en los impresos que acompaña a este aparato.
  • Seite 40 GENERAL Suministro de corriente AC115/230V, 60/50Hz Consumo eléctrico 9 Vatios Dimensiones 449 (W) x 370 (D) x 145 (H) mm Peso 3,8 Kgs NOTA: Las especificaciones y el diseño están sujetos a posibles modificaciones sin previo aviso debido a mejoras. CONTROLES y FUNCIONES 1.
  • Seite 41 7. ROSCA DE BLOQUEO DEL CABEZAL DE AGUJA Fije el cabezal de aguja acoplándolo en el extremo frontal del brazo del tocadiscos, después gire la rosca de bloqueo en el sentido de las agujas del reloj. 8. CONTROL DESLIZANTE DEL TONO Úselo para cambiar la velocidad del plato.
  • Seite 42 FUNCIONAMIENTO 1. Pulse el botón Power, dejándolo en la posición “on”. 2. Introduzca la luz focal para la iluminación de la aguja. 3. Coloque un disco en la goma del giradiscos. Cuando reproduzca un disco a 45rpm con un agujero grande en el centro, coloque el adaptador de 45rpm en el eje central.
  • Seite 43 PREPARACIÓN MONTAJE: Antes de empezar con el montaje, por favor, asegúrese de que todas las partes y accesorios están intactos. Por favor, use la lista de comprobación de debajo para identificar y pedir partes y accesorios. * Manual de instrucciones * Cable RCA * Goma de deslizamiento * Plato * Adaptador de 45 rpm * Cabezal de la aguja * Cable AC * Contrapeso Nota:...
  • Seite 44 PREPARACIÓN 7 Contrapeso: a. Retire la protección de la aguja, si así viniera presentado. No toque nunca la punta de la aguja durante el ajuste. b. Baje la palanca del brazo tocadiscos. c. Libere la abrazadera del brazo tocadiscos y levante a este de su apoyo. d.
  • Seite 45 Terminales de salida Amplificador(Receptor) L (Blanco) L CH (Izquierda) R (Rojo) R CH (Derecha) También puede usar una entrada LINE seleccionando la opción LINE del interruptor Phono/Line que se encuentra en la parte posterior del plato giradiscos. Set the PHONO/LINE switch to “PHONO”...

Inhaltsverzeichnis