Cisco Spark Room 55 Installationshandbuch

Verwandte Anleitungen für Cisco Spark Room 55


Inhaltszusammenfassung für Cisco Spark Room 55
- Seite 1 Cisco Spark Room 55 Installation Guide: Wall Mount Guide d’installation : fixation murale Guía de instalación: montaje en pared Manual de instalação: montagem na parede Guida per l’installazione: montaggio a parete Installationshandbuch: Wandhalterung...
- Seite 3 We recommend two people working together to mount this system. Follow local regulations. Nous recommandons que deux personnes travaillent ensemble pour installer ce système. Respectez les réglementations locales en vigueur. Recomendamos montar el sistema entre dos personas. Siga las normativas locales.
- Seite 4 × 2 7.5 m [24.6'] 8 m [26.2'] 5 m [16.4'] 8 m [26.2'] 5 m [16.4'] US: 4.5 m [14.8']...
- Seite 5 Provide tools and mounting hardware that suits your wall. Utilisez des outils et du matériel de fixation adaptés au mur où sera installé le système. Utilice herramientas y piezas de montaje que se adapte a su pared. Utilize as ferramentas e as ferragens de montagem adequadas à parede. Utilizzare utensili e materiali di montaggio adatti al tipo di parete.
- Seite 6 Fasten the wall mount bracket so that it can safely support the product. The product with wall mount bracket weighs 35 kg / 77 lb. Choose mounting hardware that suits your wall. Product drawing with dimensions: See page 22. Fixez le support de montage mural pour qu’il puisse accueillir le produit en toute sécurité.
- Seite 7 × 4 > 0.55 m [> 1.8'] 1.05 m [3.5'] × 4 × 4...
- Seite 9 Do not reinstall the cover if the device is to be mounted on the wall. You need the cover only when you mount the device on a floor stand or wheel base. Ne remettez pas le couvercle en place si l'appareil doit être monté au mur. Le couvercle n'est nécessaire que si l'appareil est monté...
- Seite 11 [26.2'] [16.4']...
- Seite 12 This page is intentionally left blank Cette page est volontairement vid / Esta página se ha dejado en blanco intencionadamente / Esta página foi intencionalmente deixada em branco / Questa pagina è stata lasciata vuota intenzionalmente / Diese Seite wurde bewusst leer gelassen...
- Seite 14 77 lb 35 kg You have to keep the cables well off to the sides. If the cables hang straight down, they prevent the screen from entering the bracket safely. The cables may also be damaged. Assurez-vous de placer les câbles sur les côtés. Si les câbles ne sont pas écartés, ils empêchent l'écran de s'insérer correctement dans son support.
- Seite 16 This page is intentionally left blank Cette page est volontairement vid / Esta página se ha dejado en blanco intencionadamente / Esta página foi intencionalmente deixada em branco / Questa pagina è stata lasciata vuota intenzionalmente / Diese Seite wurde bewusst leer gelassen...
- Seite 18 Power (100-240 VAC, 1.8-0.8 A, 50/60 Hz) • Always use the provided power cable. • Keep the power plug and outlet easily accessible in case you need to disconnect the device from power. • This device is designed for connection to TN and IT power systems. Network connectivity: Use either Ethernet LAN, as shown in the illustrations, or Wi-Fi.
- Seite 19 Alimentation (100-240 V CA, 1.8-0.8 A, 50/60 Hz) • Utilisez toujours le câble d’alimentation fourni. • Assurez-vous de pouvoir accéder facilement à la prise électrique au cas où vous auriez besoin de débrancher l’appareil. • Ce matériel a été conçu pour être connecté à des systèmes d'alimentation TN et IT. Connectivité...
- Seite 20 How to remove the screen from the bracket Loosen the cables from the bracket before you lift the screen. Comment enlever l'écran du support Écartez les câbles du support avant de soulever l'écran. Cómo extraer la pantalla del soporte 77 lb Afloje los cables del soporte antes de levantar la pantalla.
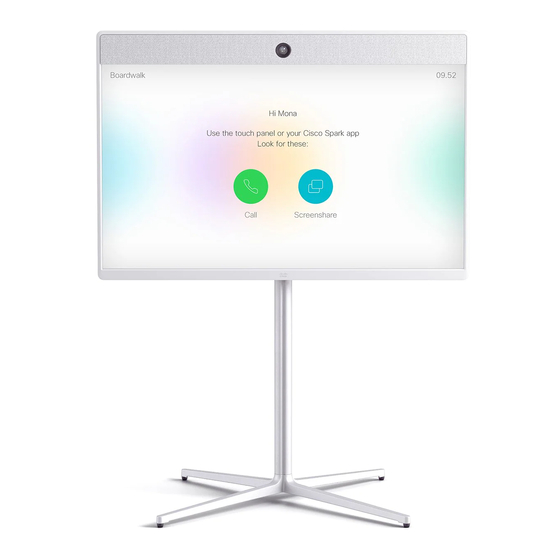
- Seite 22 Cisco Spark Room 55 1. Camera 2. Microphone 3. Loudspeakers 4. Screen 5. Connector panel (behind connector cover) A. HDMI inputs L. Power switch B. HDMI output K. Power C. Microphone inputs J. Factory reset D. Audio line output I. Network E.
-
Seite 23: Factory Reset
1. Camera Caméra / Cámara / Câmara / Videocamera / Kamera 2. Microphone Microphone / Micrófono / Microfone / Microfon / Mikrofon 3. Loudspeakers Haut-parleurs / Altavoces / Altifalantes / Altoparlanti / Lautsprecher 4. Screen Écran / Pantalla / Ecrã / Display / Bildschirm 5. - Seite 24 1245 mm [49.02"] 6.5 mm [0.256"] 200 mm [7.87"]...
- Seite 25 Visit one of these web sites to find more information about the setup, administration and use of this device. Also regulatory compliance and safety information is included. Use the first link if your device is registered to our cloud service, Cisco Spark; otherwise use the second link.
- Seite 28 Cisco e qualquer outra empresa. (1110R) Cisco e il logo Cisco sono marchi o marchi registrati di Cisco e/o dei relativi affiliati negli Stati Uniti e in altri paesi. Per visualizzare l’elenco di marchi Cisco, visitare il sito Web all’indirizzo: www.cisco.com/go/trademarks.