Herunterladen Diese Seite drucken

Werbung

Verfügbare Sprachen
  • DE

Verfügbare Sprachen

  • DEUTSCH, seite 11

Werbung

loading

Inhaltszusammenfassung für AGPtek RP23B

  • Seite 2 Content English 01/08 Deutsch 09/17 Italiano 18/26 Español 27/35 Français 36/44 日本語 45/55...
  • Seite 3  Plug earphone into the jack on earphone Quick Guide jack of the device then slide the power switch up to turn on/off the player.  Each time you tap the button / , it will bring you to one of its 6 different functions, including Recordings, Music, FM Radio, Set, and Folder view.
  • Seite 4 Parts and Controls Micro USB interface Enter button Next button Speaker Volume up 10. Microphone Volume down 11. Menu button/Back Previous button 12. Power switch button Display 13. SD card slot Recording button 14. 3.5 mm earphone jack...
  • Seite 5 Slide the power switch to turn on/off the player. Power On/OFF  When the witch button is in on position, hold the enter button for about 3 seconds and then it will fall into sleep mode, hold it again to wake up the player. ...
  • Seite 6  Volume adjust Tap the +/- button on left side of the player to adjust the volume, and then tap the enter button to ensure.  Return 1. Return to the main screen: tap the M button on right side of the player continually to back to the main playing screen.
  • Seite 7 you need. 3. Repeat settings Hold the button M> ““Repeat settings” > “Replay Mode” to access to its function, and the icon for A-B indication will appear on playing screen.  Starting time for replay is confirmed while tapping the icon (B is flashing) ...
  • Seite 8 into the mp3 player. If your computer cannot recognize the player, the enclosed Micro USB lead may has problem please use another Micro USB lead to connect it to your PC. While there is “FM radio” icon on main screen, tap the enter FM Radio button to access to the radio playing interface.
  • Seite 9 the value. Tap the enter button to save. Choose your language.  FM background, choose to play FM in the background or not.  Refer to the information of the device.  Format the device or do factory setting according to your need.
  • Seite 10 Capacity included in the package) Case Zinc alloy Battery capacity 3.7V; 260 mAh Recording 10-15 meters distance Charge time 2 hours(5V 500mA) Windows98/ME/2K/XP/SP2/Vista/Li nux6.2/Mac os 10.3, USB 2.0 port If you have any questions, please feel free to contact support@agptek.com.
  • Seite 11  Stecken Kopfhörer Kurzanleitung Kopfhörerbuchse des Geräts ein. Und dann schieben Sie den EIN/AUS Schalter auf der linken Seite, um das Gerät ein-/auszuschalten.  Klicken Sie die Taste , um zu einer der 6 verschiedenen Funktionen (Musik, Aufnahmen, UKW-Radio, EBook, Ordneransicht und Einstellen) gelangen.
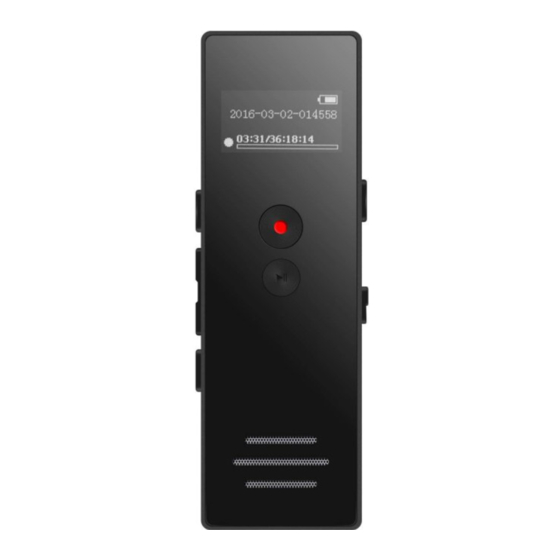
  • Seite 12 Tasten 1. Mikro-USB Schnittstelle 8. Bestimmen Taste 2. Nächste/Vorlauf 9. Lautsprecher 3. Volume + 10. Mikrofon 4. Volume - 11. Menütaste / Zurück 5. Vorherig/Rücklauf 12. Netzschalter 6. Bildschirm 13. SD Kartenslot 7. Aufnahme 14. 3.5 mm Kopfhörer Jack...
  • Seite 13 Schieben Sie den Netzschalter, um den Player ein- oder Ein-/Ausschalten auszuschalten.  Wenn den Netzschalter in der Position ON ist, halten Sie die Bestimmen-Taste für etwa 3 Sekunden lange gedrückt. Das Produkt geht in den Ruhezustand. Halten Sie die Taste erneut gedrückt, um den Player zu aktivieren.
  • Seite 14 Bestimmen Taste mit dem Symbol "Now playing".  Vorlauf/Rücklauf; Nächste/Vorherig Wenn es sich um Musikwiedergabe handelt: Halten Sie gedrückt, um die Lied schneller Rücklauf/Vorlauf. Klicken Sie um vorheriges / nächstes Lied zu spielen; Klicken Sie die Taste um das Lied ab zuspielen oder anzuhalten. ...
  • Seite 15  Klicken Sie die Taste noch einmal, um die Endzeit B einzustellen(B blinkt).  Klicken Sie die Taste noch einmal. Und das Audio von Zeit A bis B wird automatisch wiederholt. (Stellen Sie den Wiedergabeabschnitt an Ihren Bedarf ein).  Klicken Sie die Taste noch einmal um die normalen Wiedergabe zurückgehen.
  • Seite 16 Sie können es einfach durch ein USB Kabel mit Ihrem Computer verbinden. Das Gerät wäre als ob es eine Festplatte, dann können Sie die Musik vom PC auf dem MP3-Player durch Drag-and-Dor-Methode um die Daten übertragen. Wenn Ihr Computer den Player nicht erkennt, probieren Sie anderes Micro-USB-Kabel, Ihren...
  • Seite 17 auswählen.(Hinweis: Nach Sie die Vorstellung Frequenzkanal einstellen, können Sie die Funktion benutzen)  Wenn es sich um Radiowiedergabe-Schnittstelle handelt: 1. Klicken Sie auf die Taste , um den Frequenzkanal manuell einzustellen. Halten Sie die Taste lange gedrückt, um sie automatisch anzupassen, und klicken Sie die Taste noch einmal, um dies sicherzustellen.
  • Seite 18  Stellen Sie Sleep-Timer und Displayeinstellungen ein, klicken Sie die Taste um es zu speichern.  Stellen Sie "Datum und Uhrzeit" ein. Klicken Sie die / Tasten, um die Funktion auszuwählen. Klicken Sie auf +/-, um die Zahlenwerts einzustellen. Klicken Sie die Bestimmen Taste, um Ihre Einstellungen zu speichern.
  • Seite 19 8 GB, unterstützt bis zu 64 GB Kapazität TF-Karte (nicht Lieferumfang enthalten) Hülle Zinklegierung Batteriekapazität 3.7V; 260 mAh Aufzeichnungs- 10-15 Meter abstand Ladezeit 2 Stunden(5V 500mA) Windows98/ME/2K/XP/SP2/Vista/Li nux6.2/Mac os 10.3, USB 2.0 port Wenn Sie Fragen haben, wenden Sie sich bitte an support@agptek.com.
  • Seite 20  Collegare l'auricolare al jack sulla presa per Guida veloce auricolari del dispositivo, quindi far scorrere l'interruttore di accensione verso l'alto per accendere / spegnere il lettore.  Ogni volta che si tocca il pulsante / , si passerà a una delle sue 6 diverse funzioni, tra cui le registrazioni, la musica, la radio FM, l'impostazione e la visualizzazione delle cartelle.
  • Seite 21 Parti e controlli Micro interfaccia USB Pulsante accedere Pulsante precedente Altoparlante Volume + 10. Microfono Volume - 11. Pulsante menu / Indietro Pulsante successivo 12. Pulsante interruttore Schermo 13. Slot per scheda SD Pulsante di registrazione 14. Auricolari da 3,5 mmjack...
  • Seite 22 Fai scorrere l'interruttore di accensione per accendere / Accensione / Spegnimento spegnere il lettore.  Quando il pulsante interruttore è in posizione, tieni premuto il pulsante Invio per circa 3 secondi e poi cadrà nella modalità di sospensione, tienilo di nuovo in posizione per riattivare il lettore.
  • Seite 23 viene rilevato alcun suono. Mentre c'è l'icona "Musica" sulla schermata principale, toccare il pulsante entrare per accedere alla sua funzione. Ascolta la tua musica Quindi puoi riprodurre i tuoi file musicali come "Tutti i brani", "Artisti" e "Album".  Imposta volume Toccare il pulsante +/- sul lato sinistro del lettore per regolare il volume, quindi toccare il pulsante entrare assicurarsi.
  • Seite 24 verrà visualizzato un elenco correlato, tra cui "Modalità riproduzione", "Impostazioni audio", "Impostazioni ripetizione",¨Segnalibri¨ e "Elimina". 1. Modalità riproduzione Tenere premuto il tasto M> "Modalità riproduzione"> "Ripeti" / "Casuale". Selezionare in base alle proprie esigenze. 2. Impostazioni audio Tenere premuto il pulsante M> "Impostazioni audio"> "Equalizzatore"...
  • Seite 25 quindi scegli da 1 a 10 secondi toccando il pulsante +/-.  Resume la riproduzione 1. Mentre la musica è ancora in riproduzione nel backstage, quindi spegni il pulsante di scorrimento, inizierà a suonare da dove l'hai lasciato la prossima volta che lo accendi. 2.
  • Seite 26 1. Toccare il pulsante per regolare manualmente la stazione; tieni premuto per regolare automaticamente e poi toccalo di nuovo per assicurarlo. 2. Toccare il pulsante M per tornare all'ultimo grado.  Interfaccia di riproduzione radio, tieni premuto il pulsante M per accedere al relativo sottomenu, quindi un elenco correlato verrà...
  • Seite 27  Formattare il dispositivo o eseguire le impostazioni di fabbrica in base alle proprie esigenze. Mentre c'è l'icona "Vista cartella" sulla schermata principale, Vista cartelle toccare il pulsante Invio per accedere alla sua funzione. Seleziona i tuoi file e riprodurre. ...
  • Seite 28 8 GB, supporto fino a una scheda TF da Capacità 64 GB (non inclusa nella confezione) Materiale Zinc alloy Capacità della 3.7V; 260 mAh batteria Distanza 10-15 metri registrazione Tempo di ricarica 2 ore(5V 500mA) Windows98/ME/2K/XP/SP2/Vista/Li nux6.2/Mac os 10.3, USB 2.0 port avete domande, esitate contattare support@agptek.com.
  • Seite 29  Enchufe los auriculares en el enchufe de la toma de auriculares del dispositivo y luego Guía rápida deslice el interruptor de alimentación hacia arriba para encender / apagar el reproductor.  Cada vez que toque el botón , lo llevará...
  • Seite 30 Botones y Controles Micro USB interfaz Botón entrar Botón siguiente Altavoz Volumen + 10. Micrófono Volumen - 11. Botón menú/ Volver Botón anterior 12. Botón Interruptor Pantalla 13. Ranura para tarjetas SD Botón grabar 14. 3.5 mm enchufe de auriculares...
  • Seite 31 Deslice el interruptor para encender / apagar el reproductor. Encendido/Apagado  Cuando el interruptor esté en posición de encendido, mantenga presionado el botón entrar por 3 segundos y luego pasará al modo de reposo, manténgalo presionado para despertar al reproductor. ...
  • Seite 32 pulse el botón entrar para acceder a su función. Luego puede reproducir sus archivos de música como "Todas las canciones", "Artistas" y "Álbumes".  Ajuste de volumen Pulse el botón +/-del lado izquierdo del reproductor para ajustar el volumen y pulse el botón entrar para asegurarse. ...
  • Seite 33 "Repetir"/"Aleatorio". Seleccione según su necesidad. 2. Ajustes de sonido Mantenga pulsado el botón M > "Ajustes de sonido" > "Ecualizador"/"Velocidad variable". Para el equalizador, usted puede elegir diverso estilo de la música, tal como "Roca", "Funk" y etc. Para la velocidad variable, usted puede fijar la velocidad como usted necesita.
  • Seite 34 reproducir desde donde usted se fue la próxima vez que lo encienda. 2. Mientras que la música todavía está reproduciendo en el fondo, y está en la interfaz que reproduce de la música, sostenga el botón entrar por 3 segundos para apagarlo así que reproducirá...
  • Seite 35 2. Pulse el botón M para volver al último grado.  Mientras está en la interfaz de reproducción de radio, mantenga pulsado el botón M para acceder a su submenú y, a continuación, aparecerá una lista relacionada en la pantalla. 1.Guardar la estación que reproduce ahora a presintonización o borrar el presintonización como usted necesita.
  • Seite 36 principal, presione el botón Entrar para acceder a su función. Selecciona tus archivos y reproduce.  No se puede encender el reproductor Ayuda y solución de problemas - Revise si la batería se ha agotado, quizás pueda conectar el reproductor con la computadora e intente de nuevo después de la carga.
  • Seite 37 Material Aleación de zinc Capacidad de la 3.7V; 260 mAh batería Distancia 10-15 metros grabación Tiempo de carga 2 horas(5V 500mA) Windows98/ME/2K/XP/SP2/Vista/L inux6.2/Mac os 10.3, USB 2.0 port Si tiene alguna pregunta, no dude en ponerse en contacto con support@agptek.com.
  • Seite 38  Branchez les écouteurs sur la prise de Guide rapide casque et puis faites glisser l'interrupteur d'alimentation vers le haut pour allumer / éteindre le dictaphone .  Chaque fois que vous appuyez sur le bouton , il vous amène à l'une de ses 6 fonctions différentes, compris...
  • Seite 39 Boutons et Contrôles 1. Port Micro USB 8. Bouton Entrer 2. Bouton précédent 9. Haut-parleur 3. Volume + 10. Microphone 4. Volume - 11. Menu/Rentrer 5. Bouton suivant 12. L'interrupteur 6. Écran d'alimentation 7. Bouton 13. Slot de carte SD d'enregistrement 14.
  • Seite 40 Faites glisser l'interrupteur d'alimentation pour allumer / Allumer/Eteindre éteindre le dictaphone .  Lorsque l'interrupteur d'alimentation est en position on, maintenez le bouton Entrer (8)pendant environ 3 secondes, puis il passera en mode veille, maintenez-le à nouveau pour réveiller le dictaphone . ...
  • Seite 41 Trouvez "Musique" sur l'écran principal, appuyez sur le Lire la musique bouton Entrer pour accéder à sa fonction. Vous pouvez ensuite lire vos fichiers musicaux sous "Tous les titres", "Artistes" et "Albums".  Ajuster le volume Appuyez sur le bouton +/- sur le côté gauche du lecteur pour régler le volume, puis appuyez sur le bouton Entrer pour assurer.
  • Seite 42 une liste connexe s'affichera, y compris “Mode de lecture”, “Réglages du son”, “Paramètres de répétition” et “Supprimer ”. 1. Mode de lecture Maintenez bouton > “Mode lecture” > “Répéter ”/”Aléatoire ”. Sélectionnez en fonction de votre besoin. 2. Réglages du son Maintenez le bouton M >...
  • Seite 43 Appuyez sur “Paramètres de répétition” > “Nombre de fois de répétitions”, puis choisissez de 1 à 10 en appuyant sur le bouton +/-. Appuyez sur “Paramètres de répétition” > “Intervalle Re-lecture”, puis choisissez de 1 à 10 secondes en appuyant sur le bouton +/-.
  • Seite 44 bouton Entrer pour accéder à sa fonction.  Appuyez sur le bouton Entrer pour choisir parmi les stations préréglées.  Pendant l'écoute de la radio 1. Appuyez sur le bouton pour ajuster la station manuellement; maintenez-le pour ajuster automatiquement, puis appuyez à nouveau pour l'assurer. 2.
  • Seite 45  FM background: Choisissez de lire FM en arrière-plan ou non.  Informations : Consultez les informations de l'appareil.  Formatez l'appareil ou effectuez les Réglages d'usine en fonction de vos besoins. Trouvez " Affiche. dossiers " sur l'écran principal, appuyez sur Affiche.
  • Seite 46 TF (non inclus dans l'emballage) Matériaux Alliage de zinc Capacité 3.7V; 260 mAh batterie Distance 10-15 mètres d'enregistrement Temps de charge 2 heures(5V 500mA) Windows98/ME/2K/XP/SP2/Vista/Li nux6.2/Mac os 10.3, port USB 2.0 Si vous avez des questions, n'hésitez pas à contacter support@agptek.com.
  • Seite 47 AGPtEK RP23B ボイスレコーダー取扱説明書 ご使用の前に 1.◎AGPtEK RP23B ボイスレコーダーをお買い上げ頂きまして、 ありがとうございました。 ◎正しく安全にお使いいただくため、ご使用の前に必ず取扱説 明書をよくお読みください。 ◎お読みになったあとはいつでも見られる所に大切に保管してく ださい。 ◎商品について何か問題やご意見があれば、遠慮なく、 support@agptek.com に連絡してください。お客様のご意見をお待 ちしています。 2.より安心して楽しむため、データをバックアップすることをお勧めい たします。万が一、突発的な状況が発生するかもしれません。お客 様の誤操作やハードウェア損傷による、メモリ内容消失については、 当社は責任を負いかねますので、予めご了承ください。 3.不当な修理や改造による故障及び損傷が生じた場合、無料 での修理、交換や返品はいたしかねます。予めご了承ください。 商品特徴 ①、イヤホンを差し込み、電源スイッチをオン/オンにして、レコーダー の電源をオン/オフにします。 ②、 /ボタンをクリックすると、録音、音楽、FM ラジオ、設定、フォル...
  • Seite 48 ダビューなどの 5 つ機能間に移動します。 ③、 ボタンをタップして、その機能に入ります。 充電について 1.マイクロ USB ケーブルで本製品とパソコンを接続して、充電します。 (本製品に「充電&転送」と「充電&再生」が表示され、自由に選 択してください)。 2. 5V / 500mA 充電アダプター(別売)を使用して充電する事 もできます。 各部名称...
  • Seite 49 1. USB 2.0:ファイル転送/充電 2. : 短く押し:前の曲、長く押し:早く戻り 3. (+):音量上げ 4. (-):音量下げ 5. : 短く押し:次の曲、長く押し:早く送り 6. OLED スクリーン 7. 録音ボタン:1 回押すと録音が始まります。再度 1 回押すと、 自動的に録音ファイルが保存されます。 8. :再生/一時停止/OK にする/電源オン・オフ 9.スピーカー 10.録音マイク 11.M ボタン:再生中に、M ボタンを長押すと、サブメニューに入りま す。再生モード/サウンド設定/リピート設定/削除の選択肢が有りま す。短く押すと、前の界面に戻ります。 12.電源スイッチ:電源オン/オフ(オン(上)/オフ(下) 13.マイクロ SD カード端子(最大 64GB に対応可能) 14.3.5mm イヤホンジャック ご注意:設定されたバックライト時間により、バックライトが自動的...
  • Seite 50 電源スイッチにスライドして、本製品の電源をオン/オフします。 1、スイッチボタンがオンの状態で、 ボタンを約 3 秒間押し続けると、 スリープモードに入ります。 ボタンをもう一度押し続けると、本製品 が起動します。 2、本製品の電源を完全に切るには、スイッチボタン(主電源)を オフ状態にしてください。 本製品の電源を入れることができない場合は、スライダスイッチが 「ON」の位置にあることを確認してください。 ● 録音 メイン界面に「録音」機能を見つけて、 ボタンをクリックしてその機 能に入ります。録音ライブラリ、ストレージ(SD カードがある場合) 、 録音源、録音フォーマット、AVR 設定等の選択肢があります。 1.AVR 設定:AVR モードをオン/オフします。 注:AVR モードをオンすれば、録音ボタンをクリックすると、サウンドが 検出された場合は自動的に録音を開始し、サウンドが検出されない 場合は録音を停止します。 録音ボタン:1 回押すと録音始まります。再度 1 回押すと、自動的に 録音ファイルが保存されます。「保存しました」の提示語が出ています。 2.録音ライブラリ すべてご保存された録音ファイルが見つけます。 3.録音源...
  • Seite 51 マイク/ライン入力/電話の録音等の選択肢があります 4.録音フォーマット 録音フォーマット:MP3/PCM 録音ビット: : 32kbps/64kbps/128kbps : 512kbps/768kbps/1024kbps/1536kpbs (ビットレートが高 いほど、より高音質になります。) ● 音楽 音楽機能に入ります。 を操作するより、すべての曲/アーテ ィスト/アルバム等の間で移動できます。 1.音量調節:側面の+/- ボタンを操作するより、音量上げ/音 量下げにします。 2、戻る ①.メイン画面戻る:本製品の右側にある M ボタンをクリックして、メ インの再生画面に戻ります。 ②.音楽再生画面に戻る:メイン画面で「再生中」というアイコンを 選択して、 ボタンをクリックして(音楽再生中のみサポートしま す)、再生中の界面に入ります。 3. ボタン:音楽再生/一時停止を操作します。 4. :再生中に長押しすると曲を巻き戻し、短く押すと前の曲に...
  • Seite 52 移動します。 :再生中に長押しすると曲を早送り、短く押すと次の曲に移 動します。 5.再生中に M ボタンを長押すと、サブメニューに入ります。 再生モード: ボタンを押す> "再生モード"> "リピート" / "シャッフ ル"選択肢があります。 サウンド設定: ボタンを押す> "サウンド設定"> "イコライザー" / " 変速再生"選択肢があります。イコライザーでは、 "ロック"、 "ファン ク"、"ピップホップ"などの音楽スタイル間に選択できます。変速再生 の場合、再生速度を自由に設定できます。 リピート設定:リピートモード/再読回数/再読間隔等の選択肢があ ります リピートモード→AB モードにします。A が打つ場合、 ボタンをちょっ と押し、始まりにします。それから、B が打つと、 ボタンをちょっと押 し、終わりにします。では、ご設定するピースが聞かれます。再度 ボタンを押し、通常再生モードに戻ります。 または ボタンを操作し選択します。 ボタンを押して、決定しま す。 6.レジューム再生(記憶再生)...
  • Seite 53 ①.音楽はバックグラウンドで再生している場合は、電源スイッチボタ ンより電源をオフにすると、次回は前回の再生位置から始まります。 ②.音楽は再生中には、再生界面で ボタンを約 3 秒間押し続け て電源を切ると、次回は前回の再生位置から始まります。 7.転送 同梱の Micro USB ケーブルで本製品をパソコンに接続します。音 楽ファイルを本体中へ直送転送できます。パソコンが本製品を認識 できない場合、USB ケーブルの接続が問題があるかもしれないで す。他の USB ケーブルにチェンジして見てください。 ● FM ラジオ メイン画面に「FM ラジオ」を見つけて、 ボタンをクリックすると、ラジ オ再生界面に入ります。 1、 ボタンをクリックすると、プリセットされている放送局の中から選 択できます。 2、ラジオ再生中 ①. ボタンを操作するより、放送局を手動で調整する事は可 能です。 ②. M ボタンをクリックして前の画面に戻ります。 3、ラジオは再生中に、M ボタンを長押してサブメニューに入ります。 自動チューニング、手動チューニング、周波数範囲、プリセット、プリセ...
  • Seite 54 ットに保存、プリセットをクリア、FM ラジオ録音を開始、FM ラジオ等 の選択肢があります。 ①.放送局をプリセットに保存や削除等ことは対応可能(30 個ほど 放送局のプリセットが利用できます。) ②.自動チューニング:自動的に放送局が捜索します。 4、周波数範囲 ご注意:使える前に FM 受信周波数を日本の FM 周波数に合わ せてください。 操作方法:サブメニュで→周波数範囲→日本周波段ように設定し てください。 ●設定 1.スリープタイマー 「オフ」「スリープタイマーを設定」の 2 つの選択肢があります。 スリープタイマーを設定: 1-99 分の間に設定できます。/ボタンで設 定した時間より、レコーダーは自動的に電源オフとなります。 2.表示設定 ブライトネス/バックライトタイマー/スクリーンセーバー等の選択肢があ ります。 3.日時 時刻の設定:...
  • Seite 55 時刻形式の設定:12 時間/24 時間 時刻の設定:HH MM(H はアワー、M は分の意味です。)/ ボ タンで数字を設定します。+または-ボタンで H/M 間に切り替えま す。 日付の設定: 日付形式の設定/日付の設定 YYYY DD(Y は年、M は月、D は日の意味です。)/ ボタンで数字を設定します+または-ボタンで Y/M/D 間に変更しま す。 4.Language・言语/情報/デバイスをフォーマット/工場出荷時設 定 5.FM バックグラウンド再生:バックグラウンドで FM を再生するかど うかを選択できます。 ● フォルダビュー メイン画面に「フォルダビュー」を見つけて、 ボタンをクリックしてその 機能に入ります。 ファイルを選択して再生します。 故障排除 1、電源起動できません 電源不足しているかどうかを確認してください。コンピュータまたは電 源アダプタを接続してからまた電源起動してみてください。 2、音が聞こえない...
  • Seite 56 が正しく挿入されていることを確認してください。 3、パソコンからファイル転送できません 正しく接続されているかどうかを確認してください。 メモリの容量がいっぱいであるか確認してください。 USB ケーブルが不具合かどうかを確認してください。...
  • Seite 57 内 蔵 8 GB, マ イ ク ロ SD カ ー ド は 最 大 容量 64GB 拡張可能 (別売) バッテリー 3.7V; 260 mAh 録音距離 10-15 m 充電時間 2 時間(5V 500mA) USB 2.0, Windows98/ME/2K/XP/SP2/Vista/Li nux6.2/Mac os 10.3 ご不明な点がございましたら、support @ agptek.com までご連 絡ください。...