Werbung
Quicklinks
LTC 131x, LTC 132x
LTC 141x, LTC 142x
Instructions for use
EN
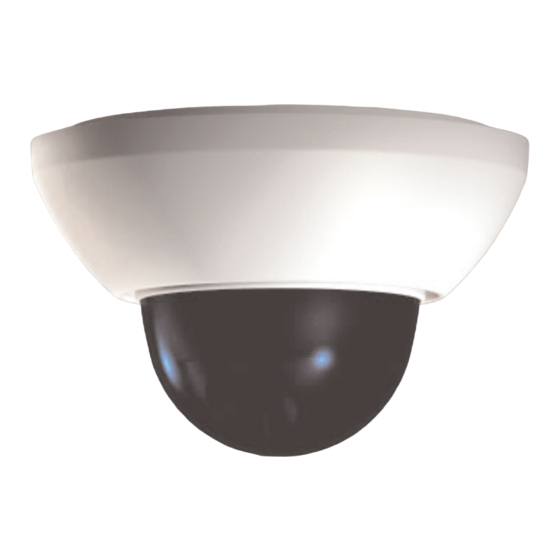
FlexiDome-I/FlexiDome-II Series Fixed Dome Cameras
Guide de l'utilisateur
FR
FlexiDome-I/FlexiDome-II Series Fixed Dome Cameras
Bedienungsanleitung
DE
FlexiDome-I/FlexiDome-II Series Fixed Dome Cameras
Manual de instrucciones
ES
FlexiDome-I/FlexiDome-II Series Fixed Dome Cameras
Handleiding
NL
FlexiDome-I/FlexiDome-II Series Fixed Dome Cameras
Manuale d'istruzioni
IT
FlexiDome-I/FlexiDome-II Series Fixed Dome Cameras
Manual de instruções
PT
FlexiDome-I/FlexiDome-II Series Fixed Dome Cameras
3122 165 22501 03-08 © Bosch Security Systems 2003
Data subject to change without notice.
IMPORTANT SAFEGUARDS
1.
Read Instructions: All the safety and operating instructions should be read
before the unit is operated.
2. Retain Instructions: The safety and operating instructions should be retained
for future reference.
3. Heed Warnings: All warnings on the unit and in the operating instructions
should be adhered to.
4. Follow Instructions: All operating and use instructions should be followed.
5. Cleaning: Unplug the unit from the outlet before cleaning. Do not use liquid
cleaners or aerosol cleaners. Use a damp cloth for cleaning.
6. Power Sources: This unit should be operated only from the type of power
source indicated on the marking label. If you are not sure of the type of power
supply you plan to use, consult your appliance dealer.
7.
Power-Cord Protection: Power-supply cords should be routed so that they are
not likely to be walked on or pinched by items placed upon or against them,
paying particular attention to cords and plugs, convenience receptacles, and
the point where they exit from the appliance.
8. Power Line: An outdoor system should not be located in the vicinity of
overhead power lines or other electric light or power circuits, or where it can
fall into such power lines or circuits.
9. Overloading: Do not overload outlets and extension cords as this can result in
a risk of fire or electric shock.
10. Object and Liquid Entry: Never push objects of any kind into this unit
through openings as they may touch dangerous voltage points or short-out
parts that could result in a fire or electrical shock. Never spill liquid of any
kind on the unit.
11. Servicing: Do not attempt to service this unit yourself as opening or removing
covers may expose you to dangerous voltage or other hazards. Refer all
servicing to qualified service personnel.
12. Damage Requiring Service: Unplug the unit from the outlet and refer
servicing to qualified service personnel under the following conditions.
If liquid has been spilled, or objects have fallen into the unit.
If the unit has been exposed to train or water.
If the unit does not operate normally by following the operating instructions. Adjust
only those controls that are covered by the operating instructions, as an improper
3
1
2a
Pull Dome cover
to remove
Mounting screws
2b
5
0
0
120
Horz; 120
Vertical;
Use a screwdriver to
PCB
360
0
Rotation
release clip
BNC
Power
4 DIP
switches
(4) LL
(3) NC
(2) WB
(1) BLC
(6a)
(6b)
Fig. 1
V-phase Adjust
adjustment of other controls may result in damage and will often require extensive
work by a qualified technician to restore the unit to its normal operation.
If the unit has been dropped or the cabinet has been damaged.
When the unit exhibits a distinct change in performance - this indicates a need for
service.
13. Replacement Parts: When replacement parts are required, be sure the service
technician has used replacement parts specified by the manufacturer or have
the same characteristics as the original part. Unauthorized substitutions may
result in fire, electric shock or other hazards.
14. Safety Check: Upon completion of any service or repairs to this unit, ask the
service technician to perform safety checks to determine that the unit is in
proper operating condition.
FCC INFORMATION
This equipment has been tested and found to comply with the limits for a Class B
digital device, pursuant to Part 15 of the FCC Rules. These limits are designed to
provide reasonable protection against harmful interference in a residential
installation. This equipment generates, uses and can radiate radio frequency
energy and, if not installed and used in accordance with the instructions, may
cause harmful interference to radio communications. However, there is no
guarantee that interference will not occur in particular installation. If this
equipment does cause harmful interference to radio or television reception, which
can be determined by turning the equipment off and on, the user is encouraged to
try to correct the interference by one or more of the following measures:
Reorient or relocate the receiving antenna.
I
Increase the separation between the equipment and receiver.
I
Connect the equipment into and outlet on a circuit different form that to
I
which the receiver is connected.
Consult the dealer or an experienced radio/ TV technician for help.
I
Shielded interface cables and A.C. power cord, if any, must be used in order to
comply with emission limits.
Changes or modification not expressly approved by the party responsible for
compliance could void the user's authority to operate the equipment.
1
STANDARD PACKAGE INCLUDED
- Screw (for flush mount) x 2 pcs and plugs (5 mm)
- Dome Camera unit x 1
- Installation Instruction x 1
Recommend for Indoor Application Only
2. INSTALLATION (Refer to Fig. 1)
When you unpack the Flexidome camera, the physical default position of the
camera is that the top of the image is correspondant to the camera 'Bosch' logo side.
Before starting the installation, remove the tinted dome by pulling it off and put it in a safe
place to avoid stains and scratches
Mounting the Unit:
The unit has two cable entries for:
• Cables' route is through the surface like false ceiling or in a wall (bottom entry)
• Cables' route is on the surface like concrete wall (side entry)
2.1 Open the mounting plate (1) by pushing the side tab (2b). You can remove the
mounting plate by unhooking from the tab (2a).
2.2 Using the mounting plate (1) as template, drill holes for camera mount and
cables entry as appropriate.
2.3 Connect "power cable*" to the terminal block (POWER); and coaxial cable
(with male BNC connector) to the video connector (BNC).
* For recommended power supply units see "Accessories".
2.4 Locate cables into the appropriate routing clip (6a bottom entry) (6b side entry).
2.5 Set the Dip switchs (4). (ON/OFF)
(4) LL
Line Lock
(3) NC
Not Connected
(2) WB
White Balance (OFF stores current WB setting)
(1) BLC
Back Light Compensation
2.6 V-phase: Potentiometer to adjust the LineLock phase (only if LL is ON).
2.7 Fit the camera onto the mounting plate, by hooking the clip (2a), and then
ensuring the tab (2b) clicks into it's location.
2.8 Adjust the viewing direction of the ball camera (5) and ensure that the picture
display on the monitor is level .
2.9 Click the tinted dome in place and if necessary clean its surface with a soft
cloth.
SAFETY PRECAUTIONS
CAUTION: TO REDUCE THE RISK OF ELECTRICAL SHOCK, DO NOT
OPEN COVERS. NO USER SERVICEABLE PARTS INSIDE. REFER
SERVICING TO QUALIFIED SERVICE PERSONNEL.
This label may appear on the bottom of the unit due to space limitations.
The lightning flash with an arrowhead symbol, within an equilateral
triangle, is intended to alert the user to the presence of un-insulated "
dangerous voltage" within the product's enclosure that may be of
sufficient magnitude to constiuce a risk of electric shock to persons.
The exclamation point within an equilateral triangle is intended to alert
the user to presence of important operating and maintenance (servicing)
instructions in the literature accompanying the appliance.
Attention: Installation should be performed by qualified service personnel
only in accordance with the National Electrical Code or applicable local
codes.
Note: The image sensors in modern CCD cameras are highly sensitive and require
special care for proper performance and extended lifetime. Please follow the
guidelines to get optimum results of your camera:
Do not expose to direct sunlight or bright spotlights in operating and non-
I
operating conditions.
Avoid bright lights in the field of view of the camera.
I
- These bright lights will cause a "smearing" effect, which is visible as white
lines above and below the highlight.
- Bright lights may cause bleaching of the sensor's color filters. This will be
visible as colored spots in the picture and is irreversible.
3
SPECIFICATIONS
Models:
Flexidome 1 - Standard resolution models
Flexidome 11 - High resolution models
FlexiDome 1
FlexiDome 11
Lens
TV System
Monochrome
LTC 1311/10
LTC 1321/10
2.1 mm f/2.0
CCIR
LTC 1312/10
LTC 1322/10
3 mm f/2.0
CCIR
LTC 1313/10
LTC 1323/10
6 mm f/2.0
CCIR
LTC 1311/20
LTC 1321/20
2.1 mm f/2.0
EIA
LTC 1312/20
LTC 1322/20
3 mm f/2.0
EIA
LTC 1313/20
LTC 1323/20
6 mm f/2.0
EIA
Color
LTC 1411/10
LTC 1421/10
2.1 mm f/2.0
PAL
LTC 1412/10
LTC 1422/10
3 mm f/2.0
PAL
LTC 1413/10
LTC 1423/10
6 mm f/2.0
PAL
LTC 1411/20
LTC 1421/20
2.1 mm f/2.0
NTSC
LTC 1412/20
LTC 1422/20
3 mm f/2.0
NTSC
LTC 1413/20
LTC 1423/20
6 mm f/2.0
NTSC
For all models: Supply voltage: 12 to 28 Vac or Vdc; Power < 2 W.
Weight: 0.4 kg (0.9 lb).
Environmental
Temperature:
Operating: -10
0
C to +45
0
C (+14
0
F to +113
0
F).
0
0
0
0
Storage: -25
C to +70
C (-4
F to +158
F).
Humidity: 0% to 93% relative, noncondensing.
Accessories
TC1323 Power Supply: : Input 120 VAC, 60 Hz, Output 24 VAC 60 Hz 10VA
Werbung

Verwandte Anleitungen für Bosch LTC 1311/10


Inhaltszusammenfassung für Bosch LTC 1311/10
- Seite 1 ‘Bosch’ logo side. Before starting the installation, remove the tinted dome by pulling it off and put it in a safe...
- Seite 2 Nach dem Auspacken der Minidome-Kamera ist in der Standardeinstellung des farbige Punkte auf dem Bild zur Folge und ist irreversibel. Kamerabilds im oberen Teil des Bildes das Bosch-Logo zu sehen. BEI DER WARTUNG AN DAFÜR QUALIFIZIERTES PERSONAL. Bevor Sie mit dem Einbau beginnen, die getönte Kuppel durch Ziehen entfernen.
- Seite 3 RIESGO DE CHOQUE retirarla imagen de la cámara es con la parte superior de la imagen en el lado del logotipo de Bosch. ELECTRICO INO ABRIR1! No la exponga a la luz solar directa ni a focos potentes cuando la utilice o mientras esté...
- Seite 4 - As luzes fortes podem provocar o branqueamento dos filtros de cor dos da imagem da câmara é com a parte superior da imagem ao lado do logótipo da 'Bosch'. SUBSTITUIÇÃO PELO CLIENTE, DEVE PARA ISSO DIRIGIR-SE AOS sensores, resultando em manchas coloridas na imagem. Este efeito é...