LILIMO DC.KD2BKB.NBE Aufbauanleitung
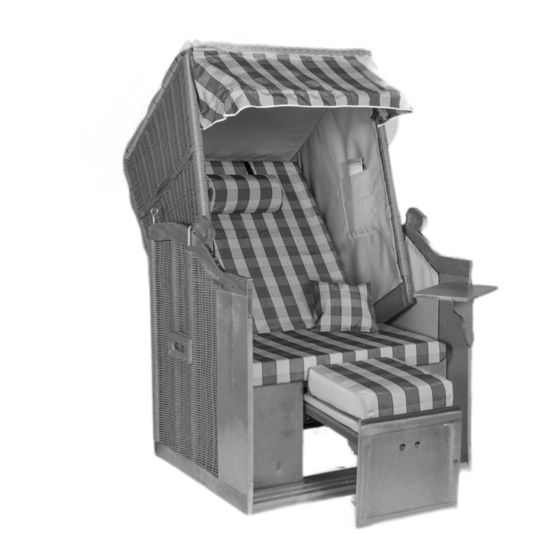
Strandkorb
bansin series

Inhaltszusammenfassung für LILIMO DC.KD2BKB.NBE
- Seite 1 AUFBAUANLEITUNG ASSEMBLY INSTRUCTIONS STRANDKORB / BEACHCHAIR BANSIN- / BANSIN-SERIES TYP: DC.KD2BKB.NBE DC.KD2BKB.AGR DC.KD2BKB.SOG DC.KD2BKB.NBU © 2018 LILIMO® GMBH & Co.KG, Stand 01.2018 Seite 1...
-
Seite 2: Aufbauhinweise
„easy to care for up to 40°” cleaned in the washing machine. • To take care of the wood you can treat this, if necessary, at least once a year, with a wood stain. © 2018 LILIMO® GMBH & Co.KG, Stand 01.2018 Seite 2... - Seite 3 Seat supporting slates (T) Sitzbankleisten mit Bohrung (S) Side Connector (S) Fußbrett (D) Footpanel (D) Seitenteile Unterkorb (BL/BR) Lower sideparts (BL/BR) Fußbank 2-teilig, bestehend aus Front (EF) & Rahmen (ER) Footrest © 2018 LILIMO® GMBH & Co.KG, Stand 01.2018 Seite 3...
- Seite 4 Upper side parts (GL/GR) Rückwand Oberkorb oben (H) Rear upper part (H) Rückwand Oberkorb unten (I) Rear lower part (I) Dach Oberkorb (J) Roof (J) Stützbügel 3-teilig (L) Supportbracket (L) © 2018 LILIMO® GMBH & Co.KG, Stand 01.2018 Seite 4...
- Seite 5 Anz. Rückenpolster (M) Back Rest (M) Sitzpolster (W) Seat padding (W) Nackenrolle mit Fliesband (N) Bolster (N) Auflagekissen Foot cushion Wurfkissen (O) Pillows (O) Markisenstange mit Markise (JA) Awning (JA) © 2018 LILIMO® GMBH & Co.KG, Stand 01.2018 Seite 5...
- Seite 6 4 x 25mm Wood screws (S5) Verstellgriffe Oberkorb (K) 1 Set Adjustable handle (K) Führungsschienen Fußbank (F) Guide rails footrest (F) U-Profile Halter mit Schrauben und Hutmuttern (T) U-Profiles support bracket (T) © 2018 LILIMO® GMBH & Co.KG, Stand 01.2018 Seite 6...
- Seite 7 At the beginning, please connect the front panel (C) with the lower box (A). Make us of the connecting struts (T) with tongue and groove. Please take care of the marked arrows. © 2018 LILIMO® GMBH & Co.KG, Stand 01.2018 Seite 7...
- Seite 8 Die Sitzleisten verschrauben Sie bitte mit dem Schraubentyp S5, an dem Unterkasten und der Frontseite. Achten Sie bitte darauf, dass die Frontseite senkrecht steht. Please make sure that the front panel is vertical. © 2018 LILIMO® GMBH & Co.KG, Stand 01.2018 Seite 8...
- Seite 9 Regarding the two marked holes, please us two screws of type S2. Das Fußbrett (D) wird mit jeweils 2 Schrauben vom Typ S4 montiert. The footboard (D) is mounted with 2 screws of type S4. © 2018 LILIMO® GMBH & Co.KG, Stand 01.2018 Seite 9...
- Seite 10 Ende hinten ist. At the back of the footrest you find two rings for the guide rails (F). Please insert the guide rail, that the curved end is on the rear side. © 2018 LILIMO® GMBH & Co.KG, Stand 01.2018 Seite 10...
- Seite 11 S5 at the bar. Die Fusskissen (EC) der Fußbänke lassen sich in einem spitzen Winkel ganz einfach einlegen. The Foot cushion (EC) of the footrests can be easily inserted at an acute angle. © 2018 LILIMO® GMBH & Co.KG, Stand 01.2018 Seite 11...
- Seite 12 Holzleisten mit zwei Schrauben vom Typ S4. Optionally you can connect the two back walls together. Please drill two holes for this purpose and connect both seat supporting slates with two S4 screws © 2018 LILIMO® GMBH & Co.KG, Stand 01.2018 Seite 12...
- Seite 13 (D). Please stuck one plastic clamp around the awning rod and screw the screw at the marked point from the insinde into the upper side part. © 2018 LILIMO® GMBH & Co.KG, Stand 01.2018 Seite 13...
- Seite 14 Löchern auf der Schiene am Unterkorb befindet. Please hold the upper part against the lower part, that the pre-assembled plate is located in the middle of two holes on the rail of thelower part © 2018 LILIMO® GMBH & Co.KG, Stand 01.2018 Seite 14...
- Seite 15 Bitte verwenden Sie die abgebildeten Teile für diesen Montageschritt. Stützbügel (L) U-Profile Halter mit Schrauben und Hutmuttern (T) For the next assembly step, please use the shown parts. Supportbracket (L) U-Profiles support bracke (T) © 2018 LILIMO® GMBH & Co.KG, Stand 01.2018 Seite 15...
- Seite 16 Afterwards, please screw the support bracket with screws and cap nuts (T) into the U-Profiles. Wichtig: Achten Sie bitte darauf, dass der Stützbügel frei beweglich ist. IMPORTANT: Please be aware that the support bracket is freely movable. © 2018 LILIMO® GMBH & Co.KG, Stand 01.2018 Seite 16...
- Seite 17 Die Tischhalter verschrauben Sie bitte zusammen mit den Tischplatten. Hierfür werden jeweils 4 Schrauben vom Typ S5 verwendet. Now connect, with each 4 srews of typ S5, the table top and the table holder. © 2018 LILIMO® GMBH & Co.KG, Stand 01.2018 Seite 17...
- Seite 18 Klettbändern und legen die Wurfkissen (O) in den Strandkorb. In the end please attach die bolsters (N) to the Velcro tape an place the pillow (O) in the beachchair. © 2018 LILIMO® GMBH & Co.KG, Stand 01.2018 Seite 18...
- Seite 19 AUFBAUANLEITUNG / ASSEMBLY INSTRUCTIONS NOTIZEN DEUTSCH / ENGLISH NOTES © 2018 LILIMO® GMBH & Co.KG, Stand 01.2018 Seite 19...
- Seite 20 If you have questions, please contact our customer service: By phone please dial +49 (421) 3330090 or electronically by e-mail service@lilimo.eu LILIMO® ist ein eingetragenes Warenzeichen. LILIMO® is a registered Trademark. © 2018 LILIMO® GMBH & Co.KG, Stand 01.2018 Seite 20...