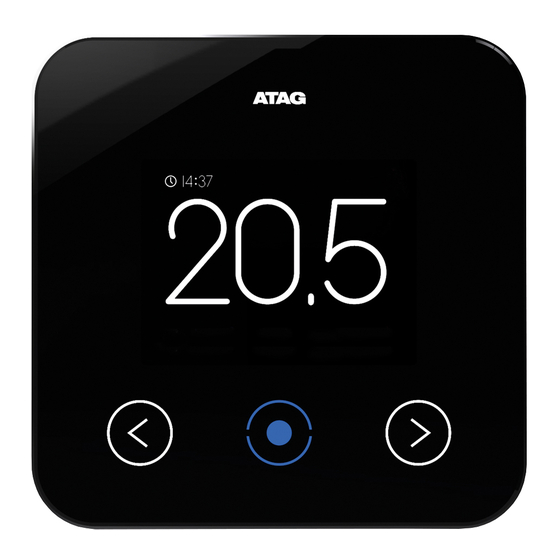
Atag One Montageanleitung
Vorschau ausblenden
Andere Handbücher für One:
- Schnellstartanleitung (28 Seiten) ,
- Gebrauchsanweisung (24 Seiten) ,
- Montageanleitung (24 Seiten)
Inhaltszusammenfassung für Atag One
- Seite 1 Handleiding voor de installateur Installation manual Montageanleitung für den Installateur Instructions de l’installation Istruzione d’installazione...
- Seite 2 De thermostaat mag niet beïnvloed worden door zonlicht, een kunstmatige lichtbron, warm- Voor aansluiting van de ATAG One op ketels van de ATAG tebron of door sterk variërende A-, E- en Q-Serie vanaf 2010 (m.u.v. Q-solar) is een Boiler luchtstromen.
- Seite 3 Schroef de muurplaat van de ATAG One (op de plaats van de oude thermostaat) tegen de muur. Schakel de netspanning naar de cv-ketel uit. Sluit de ATAG One aan op de ketel. Indien van toepas- sing: zie hiervoor het aansluitschema bij de BCU voor voeding en thermostaataansluiting.
- Seite 4 4. Ga naar INSTELLINGEN-WIFI van uw smartphone/ tablet. Selecteer ATAG One XXXXX en wacht tot het vinkje wordt getoond. 5. De blauwe toets op de One thermostaat licht op. 6. Ga terug naar One-app: Druk op ZOEKEN; ZOEKEN De One thermostaat toont gedurende stap 7: Verbinden met One app om je netwerk instellingen te configureren.
-
Seite 5: Batterij Vervangen
(art.nr. AA02304U) te vervangen. Volg daarvoor onderstaande aanwijzingen: 1. Trek de ATAG One aan de onderzijde naar voren en til deze van de haken aan de grondplaat. (NB: niet recht van de muur trekken. Dit kan de grondplaat beschadigen!) 2. - Seite 6 - Safety and Warranty Document light, heat or by widely varying air currents. For connecting the ATAG One to boilers of the ATAG A-, E- en Q-Serie since 2010 (excl. Q-solar) a Boiler Connec- tion Unit (BCU: art. nr. AA02204U) is required.
- Seite 7 BCU for connecting the power supply and thermostat cables. Place the battery in ATAG One. Hook and click the ATAG One to the base plate and switch on the power supply to the boiler. 2. ATAG One thermostat:...
- Seite 8 4. Go to SETTINGS-WIFI on your smart phone/tablet. Select ATAG One XXXXX and wait until the check mark is displayed. 5. The blue button on the One thermostat will light up. 6. Return to One-app: Press SEARCH; SEARCH During step 7 the One thermostat will show: Connect to...
-
Seite 9: Battery Replacement
This will damage the base plate!) 2. The battery is on the back side of the ATAG One. Place your finger in the half round spacing, press the clamp to the outside and lift the battery from its place. - Seite 10 - Sicherheits- und Gewährleistungsdokument Der Thermostat darf nicht durch starkes künstliches oder Sonnen- Zum Betrieb des ATAG One mit Kesseln der ATAG A-, E- licht, große Wärme sowie stark wechselnde Luftströmungen en Q-Serie ab 2010 (exkl. Q-solar) ist zusätzlich eine Boi- beeinträchtigt werden.
- Seite 11 Anschlussschema bei der BCU-Einheit. Setzen Sie die Batterie an der dafür bestimmten Stelle in das Gehäuse ein. Haken Sie den ATAG One an der Oberseite in die Grundplatte ein und klicken Sie ihn anschließend an der Unterseite in Pfeilrichtung (siehe Abb.) ein. Stellen Sie die Netzspannung zum Heizkessel wieder her.
- Seite 12 4. Gehen Sie im Menü Ihres Smartphones/Tablet-PCs zum Menüpunkt WLAN-EINSTELLUNGEN-WIFI. Wählen Sie ATAG One XXXXX und warten Sie, bis das Häkchen erscheint. 5. Die blaue Taste am ATAG One Thermostat leuchtet auf. 6. Kehren Sie zur ATAG One-App zurück: Wählen Sie die Schaltfläche VERBINDEN.
-
Seite 13: Batterie Ersetzen
Sie Ihren Unternehmensnamen sowie Ihre Telefonnummer. Kehren Sie durch Betätigung der Schaltfläche Standard-Ausleseschirm des Thermostates zurück. Die Batterie befindet sich auf der Rückseite des ATAG One. Wenn es Batterie ersetzen notwendig ist, die Batterie (Teilnr. AA02304U) zu ersetzen, gehen Sie wie... - Seite 14 Pour le raccordement de l’ATAG One sur des chaudières des artificielle, ni par une source de séries A, E et Q à partir de 2010 (à l’exception de la Q Solar) chaleur ni par des courants d’air...
- Seite 15 1. Installez ATAG One : Vissez la base de montage de l’ATAG One (à la place de l’ancien thermostat) contre le mur. Coupez la tension vers la chaudière. Raccordez l’ATAG One à la chaudière. Si d’application : voir le schéma de raccordement à BCU.
- Seite 16 5. La touche bleue sur le thermostat One s’illumine. 6. Retournez à One-app : Appuyez sur CONNECTER CONNECTER Lors de l’étape 7, le thermostat One affiche : Connecter à One en utilisant One app pour configurer vos reglages reseau 7. Allez à Réglages (...
- Seite 17 Remettez le thermostat à l’affichage standard en sélectionnant ( La pile se trouve à l’arrière de l’ATAG One. Pour la remplacer Remplacer pile , veuillez suivre les indications ci-dessous : (Nr. AA02304U) 1.
- Seite 18 - Istruzioni di sicurezza e garanzia ficiale, una fonte di calore o dalle correnti d’aria molto variabile. Per collegare l’ATAG One delle caldaie della ATAG A, E e Q-Se- ries a partire dal 2010 (escl Q-solar) un Boiler Connection Unit (BCU: Nr. AA02204U) è necessario.
- Seite 19 1. Installazione di ATAG One: Fissa la piastra di montaggio di ATAG One (al posto del vecchio termostato) alla parete. Scollega la tensione di rete alla caldaia dell’impianto di riscaldamento. Collega ATAG One alla caldaia. Se applicabile: a tale fine vedi lo schema di collegamento nel BCU per il collegamento dell’alimentazione e del termostato.
- Seite 20 4. Vai su IMPOSTAZIONI-WIFI del tuo smartphone/tablet. Seleziona ATAG One XXXXX e attendi che compaia il segno di spunta. 5. Il tasto blu del termostato One si illumina. 6. Ritorna a One-app: Premi CONTINUA CONTINUA Durante la fase 7 la termostato mostrerà: Connettera...
- Seite 21 Riporta il termostato alla schermata di lettura standard selezionando La batteria si trova sulla parte posteriore del termostato di ATAG One. Se Sostituzione della batteria necessario la batteria (Nr. AA02304U) deve essere sostituita. A tale fine...
- Seite 24 Wijzigingen voorbehouden. Changes reserved. E.& O. E. Änderungen und Irrtümer vorbehalten. Modifications reservée. Modifiche riservate.


