Inhaltsverzeichnis
Werbung
Verfügbare Sprachen
Verfügbare Sprachen
Quicklinks
Werbung
Inhaltsverzeichnis

Verwandte Anleitungen für Siemens EP716IB21E


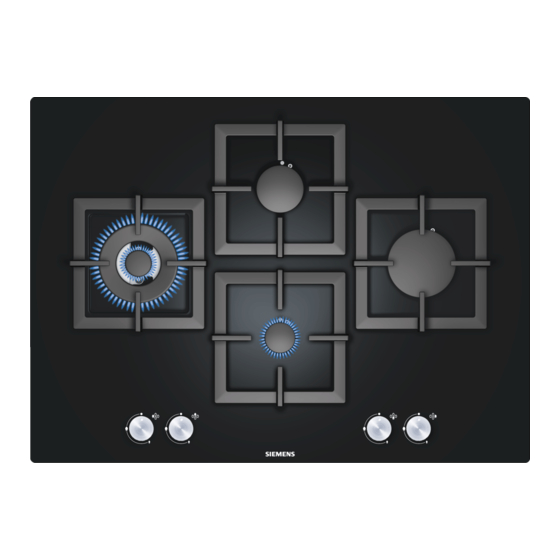
Inhaltszusammenfassung für Siemens EP716IB21E
- Seite 1 *9000549641* 9000549641 K Ø Montageanleitung é Installatievoorschrift Ú Installation instructions ë Instrukcja montażu Û Instrucciones de montaje ì Instruções de montagem Þ Notice de montage î Инструкция по монтажу â Istruzioni per il montaggio ô Montaj kılavuzu...
-
Seite 3: Sicherheitshinweise
Bestimmungen und Richtlinien eingebaut werden. Das Gerät darf nicht an einen Schornstein oder eine Abgasanlage ange- schlossen werden. Ø Montageanleitung Sicherheitshinweise Das Netzkabel muss am Einbaumöbel gut befestigt werden, Lesen Sie die Gebrauchsanweisung für das Gerät, bevor Sie es damit es nicht mit heißen Teilen des Backofens oder des Koch- installieren und benutzen. -
Seite 4: Einbau Des Geräts
Die Schnittstellen müssen sauber und genau sein, weil man Beim Anschluss, egal welcher Art, darf der Krümmer nicht ■ die Schnittkante an der Oberfläche sieht. Die Stabilität der bewegt oder verdreht und so aus seiner werkseitigen Position Möbel muss auch nach den Schnittarbeiten gewährleistet gebracht werden. -
Seite 5: Safety Precautions
Für den Wiedereinbau des Geräts folgen Sie den Ausbauan- On wood work surfaces, varnish the cutting surfaces with a weisungen in umgekehrter Reihenfolge. special glue. This protects them from moisture which could collect under the work surface. Um die Dichtheit zu gewährleisten, müssen alle Knebeldichtun- gen eingesetzt werden. -
Seite 6: Indicaciones De Seguridad
This appliance is type “Y”: the supply cable can only be únicamente tendrá validez en caso de que se respete el uso changed by the Technical Assistance Service and not the user. para el que fue diseñado. The cable type and minimum cross-section must be respected. Antes de la instalación, debe comprobar que las condiciones de distribución local (naturaleza y presión del gas) y el reglaje Changing the gas type... -
Seite 7: Indications De Sécurité
En encimeras de azulejos, si es necesario, subir las superficies B) Reglaje de los grifos: de apoyo con listones resistentes a la temperatura y al agua. Coloque los mandos en la posición de mínimo. Verifique el funcionamiento y la posición del aparato. Retire los mandos de los grifos. -
Seite 8: Avant L'installation
Avant l'installation Lissez la colle de silicone avant qu'elle ne forme une couche à l'aide d'une raclette ou avec les doigts humidifiés de savon. Cet appareil correspond à la classe 3, selon la norme EN 30-1- Laissez la colle de silicone sécher avant d'utiliser l'appareil. 1 pour les appareils à... -
Seite 9: Indicazioni Di Sicurezza
B : desserrez les vis by-pass jusqu'à obtenir la sortie correcte Preparazione del mobile (fig. 1-2) de gaz des brûleurs: vérifiez, en réglant le bouton de Eseguire un taglio delle dimensioni necessarie nella superficie commande entre le maximum et le minimum, que le brûleur ne di lavoro secondo il modo di installazione desiderata: normale s'éteint pas et qu'aucun retour de flamme n'est généré. -
Seite 10: Veiligheidsaanwijzingen
È necessario intercalare la guarnizione di tenuta (034308) in funzionamento dell'apparecchio dato che impediscono dotazione fra l'uscita del collettore e il raccordo del gas. l'introduzione di liquidi e sporcizia all'interno dell'apparecchio. Si deve evitare il contatto del tubo con parti mobili dell'unità Non smontare mai l'asse del rubinetto (Fig. -
Seite 11: Uitbouw Van De Kookplaat
scheidingsstuk van niet-ontvlambaar materiaal (bv. metaal of Elektrische aansluiting (Afb. 5) gelaagd hout) op 10 mm van de basis van de kookplaat. Zo Controleer of het voltage en het vermogen van het apparaat wordt toegang vermeden tot de onderzijde hiervan. Indien het compatibel zijn met de elektrische installatie. -
Seite 12: Przed Zainstalowaniem
Ilustracje przedstawione w niniejszej Instrukcji montażu służą Instalacja urządzenia wyłącznie jako przykład. Wskazówka: Podczas montażu płyty grzewczej używać rękawic Producent nie ponosi jakiejkolwiek odpowiedzialności w ochronnych. przypadku, gdy zalecenia zawarte w niniejszej instrukcji nie A) Instalacja zwykła (rys. 3a) są przestrzegane. W zależności od modelu urządzenia, uszczelka samoprzylepna Wszystkie czynności związane z instalacją, regulacją... -
Seite 13: Indicações De Segurança
Urządzenia wyposażone we wtyczkę można podłączać wyłącznie do puszek z gniazdkiem posiadających prawidłowo zainstalowane uziemienie. ì Instruções de montagem Indicações de segurança Należy pamiętać o wielobiegunowym wyłączniku odcinającym Leia as instruções do aparelho antes de proceder à sua zasilanie z przynajmniej 3-milimetrowym odstępem stykowym (nie dotyczy podłączenia za pomocą... -
Seite 14: Instalação Do Aparelho
Instalação do aparelho Este aparelho é do tipo “Y”: o cabo de entrada não pode ser mudado pelo utilizador, só o Serviço de Assistência Técnica Nota: Utilize luvas de proteção para montar a placa de deve fazê-lo. Deve sempre respeitar-se a secção mínima e o cozinhar. -
Seite 15: Монтаж Прибора
Для адаптации прибора к другому виду газа рекомендуем подтекание. Если прокладка не установлена на фабрике, связаться с нашим сервисным центром. приклейте ее к нижнему краю варочной панели. Перед проведением любых действий необходимо перекрыть Чтобы закрепить варочную панель в тумбе: подачу газа и электроэнергии к данному электроприбору. 1. -
Seite 16: Güvenlik Önerileri
сервисный центр. Необходимо учитывать тип кабеля и его Bu cihaz evde kullanım için tasarlanmıştır, ticari veya минимальное сечение. profesyonel amaçlarla kullanılamaz. Bu cihaz yat veya karavanlara kurulamaz. Garanti sadece tasarım amacına uygun Адаптация к другому виду газа kullanılması durumunda geçerlidir. Если... - Seite 17 Ocak ile pişirme tezgahı arasındaki boşluğu tercih ettiğiniz Esnek bir kauçuk conta ile birlikte bulunur. Bu contaya bir renkte uygun bir silikon yapıştırıcı ile doldurunuz. tornavidanın ucu ile basarak ayar vanasına giden yolu açınız. Contayı asla sökmeyiniz. Bilgi: Eğer doğal taştan yüzeyler üzerinde uygun olmayan bir Düz uçlu tornavida ile by-pass vidasını...