
Verwandte Anleitungen für Panasonic HFS100300E


Inhaltszusammenfassung für Panasonic HFS100300E
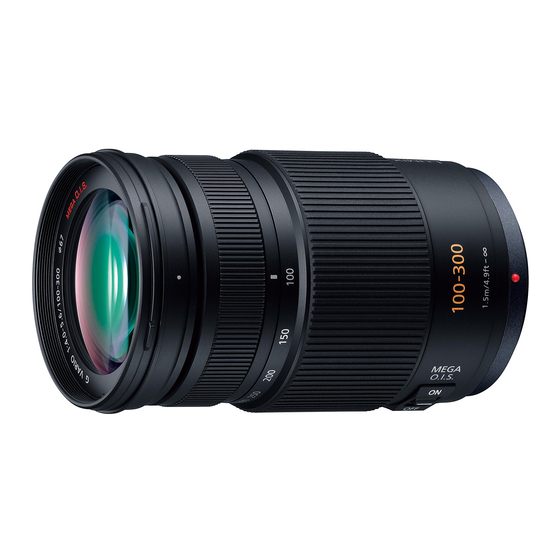
- Seite 1 Operating Instructions INTERCHANGEABLE LENS FOR DIGITAL CAMERA H-FS100300 Model No. Before use, please read these instructions completely. VQT2Z59-1...
-
Seite 2: Inhaltsverzeichnis
Contents The lens can be used with a digital camera compatible with the lens mount standard for the Information for Your Safety........2 “Micro Four Thirds System”. Precautions............4 Four Thirds ≥ It cannot be mounted on the mount Supplied Accessories ..........5 specification camera. - Seite 3 ENGLISH -If you see this symbol- Information on Disposal for Users of Waste Electrical & Electronic Equipment (private households) This symbol on the products and/or accompanying documents means that used electrical and electronic products should not be mixed with general household waste. For proper treatment, recovery and recycling, please take these products to designated collection points, where they will be accepted on a free of charge basis.
-
Seite 4: Precautions
∫ About Condensation (Fogging of the Precautions Lens) ∫Lens Care ≥ Condensation occurs when there are differences ≥ Sand and dust can damage the lens. Make in temperature and humidity as described below. sure that no sand or dust gets inside the lens Condensation can cause the lens to become dirty or the terminals when using the lens on a and lead to mold and malfunctioning, so exercise... -
Seite 5: Supplied Accessories
Supplied Accessories Attaching/Detaching the Lens [Inspection to be performed when you unpack ≥ Refer also to the camera’s operating instructions for attaching and detaching the lens. the unit] When removing the unit from its packing box, check ∫ Attaching the Lens that the main unit and the supplied accessories are ≥... - Seite 6 ∫Detaching the Lens ∫ Attaching the Lens Hood ≥ Check that the camera is turned off. (Supplied Accessory) Press the lens release Insert the lens hood into the lens, and button D while turning turn in the direction of the arrow until it stops.
- Seite 7 ≥ You cannot attach a conversion lens or adaptor to 2 Reverse the lens hood and then attach it this lens. A filter may be used, but attaching any in the same way as shown previously. other element may cause damage to the lens. ≥...
-
Seite 8: Names And Functions Of Components
Names and Functions of 4 [O.I.S.] switch When the lens is attached to the camera the Components stabilizer function is set to activate if the [O.I.S.] switch is set to [ON]. ≥ We recommend setting the [O.I.S.] switch to [OFF] when using a tripod. -
Seite 9: Cautions For Use
Cautions for Use – In locations with high temperatures and humidity levels or where the changes in temperature and humidity are acute Take care not to drop or knock the lens. Also – In locations with high concentrations of sand, take care not to put a lot of pressure on the lens. -
Seite 10: Troubleshooting
Do not use benzine, thinner, alcohol or other similar cleaning agents to clean the lens glass or exterior cabinet. ≥ Using solvents can damage the lens or cause the paint to peel. ≥ Wipe off any dust or fingerprints with a soft, dry cloth. -
Seite 11: Specifications
Specifications INTERCHANGEABLE LENS FOR DIGITAL CAMERA “LUMIX G VARIO 100 – 300 mm/F4.0 – 5.6/MEGA O.I.S.” Focal length f=100 mm to 300 mm (35 mm film camera equivalent: 200 mm to 600 mm) Aperture type 7 diaphragm blades/circular aperture diaphragm Aperture range F4.0 (Wide) to F5.6 (Tele) Minimum aperture value... -
Seite 12: Informationen Für Ihre Sicherheit
Inhalt ≥ Wenn die Kamera durch elektromagnetische Felder anderer Geräte gestört wird und Informationen für Ihre Sicherheit.........12 Fehlfunktionen auftreten, schalten Sie die Kamera Vermeidung von Störungen ........15 aus. Nehmen Sie den Akku heraus und/oder Beiliegendes Zubehör ..........16 trennen Sie das Netzteil ab. Setzen Sie den Akku Objektiv ansetzen/abnehmen ........16 dann wieder ein und/oder stecken Sie das Netzteil Bezeichnungen und Funktionen der... - Seite 13 DEUTSCH ≥ Four Thirds™ und die für Four Thirds verwendeten Logos sind Markenzeichen oder eingetragene Markenzeichen der Olympus Imaging Corporation in Japan, den USA, der EU und anderen Ländern. ≥ Das G MICRO SYSTEM ist ein Digitalkamerasystem aus der LUMIX-Reihe mit Wechselobjektiven auf Grundlage des Micro-Four-Thirds-Standards.
- Seite 14 -Bedeutung des nachstehend abgebildeten Symbols- Benutzerinformationen zur Entsorgung von elektrischen und elektronischen Geräten (private Haushalte) Entsprechend der grundlegenden Firmengrundsätzen der Panasonic-Gruppe wurde ihr Produkt aus hochwertigen Materialien und Komponenten entwickelt und hergestellt, die recycelbar und wieder verwendbar sind. Dieses Symbol auf Produkten und/oder begleitenden Dokumenten bedeutet, dass elektrische und elektronische Produkte am Ende ihrer Lebensdauer vom Hausmüll...
-
Seite 15: Vermeidung Von Störungen
∫ Hinweise zu Kondensation (Beschlagen Vermeidung von Störungen des Objektivs) ∫Objektivpflege ≥ Kondensation entsteht, wenn sich ≥ Sand und Staub können das Objektiv Umgebungstemperatur oder Luftfeuchte wie unten beschädigen. Achten Sie darauf, dass kein beschrieben ändern. Da Kondensation zu Flecken Sand oder Staub auf Objektiv oder Anschlüsse auf dem Objektiv, Pilzbefall und Fehlfunktionen gelangt, wenn Sie die Kamera im Freien, z.B. -
Seite 16: Beiliegendes Zubehör
Beiliegendes Zubehör Objektiv ansetzen/abnehmen [Kontrollen, die beim Entfernen der Verpackung ≥ Informationen zum Aufsetzen und Abnehmen des Objektivs finden Sie auch in der des Geräts vorzunehmen sind] Bedienungsanleitung der Kamera. Prüfen Sie beim Entnehmen des Gerätes aus seinem Karton, ob das Hauptgerät und sein beiliegendes Zubehör ∫... -
Seite 17: Gegenlichtblende Aufsetzen (Mitgeliefertes Zubehör)
• Überprüfen Sie, ob das Objektiv richtig ∫ Gegenlichtblende aufsetzen aufgesetzt ist. (Mitgeliefertes Zubehör) ∫Das Objektiv abnehmen Setzen Sie die Gegenlichtblende so in ≥ Stellen Sie sicher, dass die Kamera ausgeschaltet ist. das Objektiv ein, dass die kürzeren Vorsprünge oben und unten sitzen, und Halten Sie die Objektiventriegelung drehen Sie die Gegenlichtblende in gedrückt D und drehen Sie das Objektiv... -
Seite 18: Filter Aufsetzen
≥ Der Filter lässt sich eventuell nicht mehr 2 Drehen Sie die Gegenlichtblende um und abnehmen, wenn er zu fest angezogen wird. setzen Sie sie wie oben beschrieben Gehen Sie daher vorsichtig vor. wieder auf. ≥ Der Objektivdeckel kann auch aufgesetzt werden, ≥... -
Seite 19: Bezeichnungen Und Funktionen Der Einzelnen Kamerateile
Bezeichnungen und 4 [O.I.S.]-Schalter Wenn der [O.I.S.] Schalter bei aufgesetztem Objektiv auf Funktionen der einzelnen [ON] gestellt ist, wird die Bildstabilisatorfunktion aktiviert. Kamerateile ≥ Es empfiehlt sich, den [O.I.S.]-Schalter auf [OFF] zu stellen, wenn Sie ein Stativ verwenden. ≥ In folgenden Fällen ist die Stabilisatorfunktion unter Umständen nicht wirksam. -
Seite 20: Vorsichtsmaßnahmen
Vorsichtsmaßnahmen – Wo Wasser das Gerät benässen kann – Wo Erschütterungen vorhanden sind – In einem Fahrzeug Achten Sie darauf, das Objektiv nicht fallen zu lassen ≥ Weiter Informationen finden Sie auch in der und keinen starken Stößen auszusetzen. Üben Sie Bedienungsanleitung der Kamera. -
Seite 21: Spezifikationen
Spezifikationen WECHSELOBJEKTIV FÜR DIGITALE KAMERA “LUMIX G VARIO 100 – 300 mm/F4.0 – 5.6/MEGA O.I.S.” Brennweite f=100 mm bis 300 mm (Kleinbild-Äquivalent: 200 mm bis 600 mm) Blende 7 Blendenlamellen/runde Öffnungsblende Blendenwerte F4.0 (Weitwinkel) bis F5.6 (Tele) Minimale Blende Objektivaufbau 17 Elemente in 12 Gruppen (1 ED-Linse) Schärfebereich 1,5 m bis ¶... -
Seite 22: Précautions À Prendre
Table des matières L’objectif peut être utilisé de pair avec un appareil photo numérique compatible avec la monture Précautions à prendre ......... 22 d’objectif standard prise en charge par le système Précautions ............24 “Micro Four Thirds System”. Accessoires fournis ..........25 ≥... - Seite 23 FRANÇAIS -Si vous voyez ce symbole- Informations relatives à l’évacuation des déchets, destinées aux utilisateurs d’appareils électriques et électroniques (appareils ménagers domestiques) Lorsque ce symbole figure sur les produits et/ou les documents qui les accompagnent, cela signifie que les appareils électriques et électroniques ne doivent pas être jetés avec les ordures ménagères.
-
Seite 24: Précautions
∫ À propos de la condensation (Objectif Précautions embué) ∫Entretien de l’objectif ≥ Il y a formation de condensation lorsque la ≥ Le sable et la poussière peuvent endommager température et l’humidité changent comme suit. La l’objectif. Aussi, convient-il de protéger et condensation peut salir l’objectif, entraîner de la l’objectif et les contacts de la monture contre moisissure et des problèmes de fonctionnement. -
Seite 25: Accessoires Fournis
Accessoires fournis Fixation/Retrait de l’objectif [La vérification doit être effectuée lorsque vous ≥ Pour les instructions sur la mise en place et le sortez l’appareil de l’emballage] retrait de l’objectif, reportez-vous au manuel En retirant l’appareil de son emballage, vérifiez la d’utilisateur de l’appareil photo. - Seite 26 • N’essayez pas de fixer l’objectif lorsque vous le ∫ Fixation et détachement du capuchon tenez en angle par rapport au boîtier, car la d’objectif monture de l’objectif risquerait d’être éraflée. ≥ Faites attention de ne • Vérifiez que l’objectif est fixé correctement. pas perdre le capuchon d’objectif.
- Seite 27 ∫ Fixation de filtres ∫Rangement temporaire du parasoleil ≥ Un effet de vignetage peut survenir en utilisant 2 ou 1 Tournez le parasoleil dans le sens de la plus protecteurs MC (en option: DMW-LMCH67) ou flèche pour le retirer. filtres PL (en option: DMW-LPL67), ou en utilisant des protecteurs et/ou des filtres épais.
-
Seite 28: Noms Et Fonctions Des Composants
Noms et fonctions des 4 Commutateur [O.I.S.] (S.O.I.) Lorsque l’objectif est fixé à l’appareil photo, la composants fonction de stabilisation optique de l’image est activée si le commutateur [O.I.S.] (S.O.I.) est réglé sur [ON] (en marche). ≥ Nous vous conseillons de régler le commutateur [O.I.S.] (S.O.I.) sur [OFF] (NON) lorsque vous utilisez un trépied. -
Seite 29: Précautions D'utilisation
Précautions d’utilisation – Dans des endroits ayant des niveaux de température et d’humidité élevés ou dans des endroits où les changements de température et Prenez soin de ne pas faire tomber ni de cogner d’humidité sont prononcés l’objectif. De plus ne mettez pas trop de pression –... -
Seite 30: Dépannage
≥ Ne désassemblez ni ne tentez de modifier l’objectif. N’utilisez pas de benzène, d’alcool ni aucun autre produit nettoyant similaire pour nettoyer l’appareil. ≥ L’emploi de solvants peut endommager l’objectif ou faire s’écailler la peinture. ≥ Essuyez toute poussière ou traces de doigts avec un chiffon doux et sec. -
Seite 31: Spécifications
Spécifications OBJECTIF INTERCHANGEABLE POUR APPAREIL PHOTO NUMÉRIQUE “LUMIX G VARIO 100– 300 mm/F4.0 – 5.6/MEGA O.I.S.” Distance focale f=100 mm à 300 mm (Équivalent à un film de 35 mm: 200 mm à 600 mm) Type d’ouverture 7 lamelles de diaphragme/diaphragme à ouverture ronde Plage d’ouverture F4.0 (Grand-angle) à... -
Seite 32: Información Para Su Seguridad
Indice ≥ Si la cámara queda afectada negativamente por un equipo electromagnético y deja de funcionar Información para su seguridad ......32 correctamente, apague la cámara y quite la Prevención contra las averías ......35 batería y/o el adaptador de CA conectado. Luego Accesorios suministrados ........ - Seite 33 ESPAÑOL ≥ El logotipo Four Thirds™ y Four Thirds son marcas comerciales o marcas comerciales registradas de Olympus Imaging Corporation, en Japón, Estados Unidos, la Unión Europea y otros países. ≥ G MICRO SYSTEM es un sistema de cámara digital con objetivo intercambiable de LUMIX basado en el estándar Micro Four Thirds System.
- Seite 34 -Si ve este símbolo- Información sobre la eliminación para los usuarios de equipos eléctricos y electrónicos usados (particulares) La aparición de este símbolo en un producto y/o en la documentación adjunta indica que los productos eléctricos y electrónicos usados no deben mezclarse con la basura doméstica general.
-
Seite 35: Prevención Contra Las Averías
∫ Acerca de la condensación Prevención contra las averías (Empañamiento del objetivo) ∫Atención del objetivo ≥ La condensación ocurre cuando se encuentra una ≥ La arena y el polvo pueden dañar el objetivo. diferencia en la temperatura y humedad como se Cuando usa el objetivo en una playa, tenga describe abajo. -
Seite 36: Accesorios Suministrados
Accesorios suministrados Unir y quitar el objetivo [Controles a realizar cuando va a desembalar la ≥ Se refiera también a las instrucciones de funcionamiento de la cámara para unir y separar el objetivo. unidad] ∫ Unión del objetivo Al quitar la unidad de su embalaje, compruebe que se ≥... - Seite 37 ∫Separación del objetivo ∫ Unión de la visera del objetivo (Accesorio suministrado) ≥ Compruebe que la cámara esté apagada. Inserte la visera del objetivo con las partes Pulse el botón de cortas arriba y abajo, luego gírela en la desenganche del dirección de la flecha hasta que dispare.
- Seite 38 ∫ Unión de los filtros 2 Vuelque la visera del objetivo y, luego, ≥ Puede tener lugar viñeteado si usa 2 o más únala de la misma manera que la protectores MC (opcionales: DMW-LMCH67) o mostrada anteriormente. filtros PL (opcionales: DMW-LPL67), o bien si usa ≥...
-
Seite 39: Nombres Y Funciones De Los Componentes
Nombres y funciones de 4 Interruptor [O.I.S.] Cuando a la cámara está unido el objetivo, está los componentes ajustada la función estabilizadora para ver si el interruptor [O.I.S.] está ajustado en [ON]. ≥ Le recomendamos que ajuste el interruptor [O.I.S.] a [OFF] cuando usa un trípode. ≥... -
Seite 40: Precauciones Para El Uso
Precauciones para el uso – Donde haya vibraciones – Dentro de un vehículo ≥ Se refiera también a las instrucciones de Tenga cuidado de no hacer caer el objetivo ni le funcionamiento de la cámara digital. choque contra. Asimismo tenga cuidado de no ≥... -
Seite 41: Especificaciones
Especificaciones ÓPTICA INTERCAMBIABLE PARA CÁMARA DIGITAL “LUMIX G VARIO 100 – 300 mm/F4.0 – 5.6/MEGA O.I.S.” Longitud focal f=100 mm a 300 mm (Igual a una cámara de película de 35 mm: de 200 mm a 600 mm) Tipo de abertura 7 aspas de diafragma/Diafragma de apertura circular Gama de abertura F4.0 (Granangular) a F5.6 (Teleobjetivo) -
Seite 42: Informazioni Per La Sua Sicurezza
Indice ≥ Se il funzionamento della fotocamera digitale è disturbato da apparecchi elettromagnetici, Informazioni per la sua sicurezza ......42 spegnere la fotocamera e rimuovere la batteria e/ Prevenzione guasti ..........45 o l’adattatore CA collegato. Quindi inserire Accessori in dotazione.......... 46 nuovamente la batteria e/o ricollegare l’adattatore Installazione/Rimozione dell’obiettivo .... - Seite 43 ITALIANO ≥ Four Thirds™ e il logo Four Thirds sono marchi o marchi registrati di Olympus Imaging Corporation, in Giappone, negli Stati Uniti, nell’Unione Europea e in altri paesi. ≥ G MICRO SYSTEM è un sistema di fotocamera digitale LUMIX del tipo a più obiettivi basato sullo standard Micro Four Thirds System.
- Seite 44 -Se vedete questo simbolo- Informazioni per gli utenti sullo smaltimento di apparecchiature elettriche ed elettroniche obsolete (per i nuclei familiari privati) Questo simbolo sui prodotti e/o sulla documentazione di accompagnamento significa che i prodotti elettrici ed elettronici usati non devono essere mescolati con i rifiuti domestici generici.
-
Seite 45: Prevenzione Guasti
∫ Informazioni sulla condensa Prevenzione guasti (Appannamento dell’obiettivo) ∫Custodia dell’obiettivo ≥ La condensa si forma quando si verificano ≥ Sabbia e polvere possono danneggiare differenze di temperatura e umidità come quelle l’obiettivo. Evitare che sabbia o polvere descritte sotto. La condensa può causare penetrino all’interno dell’obiettivo o dei l’appannamento dell’obiettivo e portare alla terminali quando si utilizza l’obiettivo su una... -
Seite 46: Accessori In Dotazione
Accessori in dotazione Installazione/Rimozione dell’obiettivo [Controlli da effettuare quando si disimballa l’unità] Quando si estrae il flash dalla confezione, controllare ≥ Consultare anche le istruzioni per l’uso della che siano presenti l’unità principale e gli accessori in fotocamera per informazioni sulla procedura di dotazione. - Seite 47 • Non tentare di installare l’obiettivo tenendolo ∫ Installazione del paraluce diagonalmente rispetto al corpo della fotocamera, (Accessorio in dotazione) per evitare di graffiare il supporto dell’obiettivo. Inserire il paraluce sull'obiettivo e • Controllare che l’obiettivo sia installato correttamente. ruotarlo nella direzione della freccia ∫Disinstallazione dell’obiettivo finché...
-
Seite 48: Installazione Dei Filtri
≥ Su questo obiettivo non è possibile installare una 2 Rovesciare il paraluce, quindi installarlo lente o adattatore di conversione. È possibile come illustrato in precedenza. utilizzare un filtro, ma collegare qualsiasi altro ≥ Quando si riprendono elemento può danneggiare l’obiettivo. immagini con il flash e il paraluce è... -
Seite 49: Nomi E Funzioni Dei Componenti
Nomi e funzioni dei 4 Interruttore [O.I.S.] Quando l’obiettivo è installato sulla fotocamera la componenti funzione di stabilizzazione è attivata se l’interruttore [O.I.S.] è posizionato su [ON]. ≥ Si consiglia di posizionare l’interruttore [O.I.S.] su [OFF] quando si utilizza un treppiede. ≥... -
Seite 50: Precauzioni Per L'uso
Precauzioni per l’uso ≥ Quando si prevede di non utilizzare l’unità per un periodo prolungato, si consiglia di porvi accanto un disseccante (silica gel). In caso contrario Fare attenzione a non lasciar cadere o a non potrebbero verificarsi dei malfunzionamenti dovuti urtare l’obiettivo. -
Seite 51: Specifiche
Specifiche LENTI INTERCAMBIABILI PER FOTOCAMERA DIGITALE “LUMIX G VARIO 100 – 300 mm/F4.0 – 5.6/MEGA O.I.S.” Lunghezza focale f=100 mm a 300 mm (equivalente per fotocamera con pellicola da 35 mm: 200 mm a 600 mm) Tipo di apertura 7 lamelle diaframma/diaframma con apertura circolare Gamma dell’apertura F4.0 (Grandangolo) a F5.6 (Teleobiettivo) Valore minimo dell’apertura... -
Seite 52: 安全注意事項
目錄 安全注意事項 安全注意事項 ........52 使本產品遠離磁性設備 (如微波爐 、 電視 、 視訊遊戲設 故障預防 ........54 備 、 無線電發射機 、 高壓線等) 。 提供的附件 ........55 ≥ 請勿在移動電話附近使用相機,否則會影響圖片和 取下鏡頭 ........ 56 安裝 元件的名稱及功能 ......58 聲音質量。 使用時的注意事項 ......59 ≥ 如果相機由於受帶磁設備影響而不能正常工作,請 故障排除 ........59 先將其關閉,取出電池和... - Seite 53 中 文 ≥ G MICRO SYSTEM 是 LUMIX 的鏡頭互換式數位相機 - 如果看到此符號的話 - 系統,基於微型 4/3 系統 (Micro Four Thirds System) 歐盟以外國家的棄置資訊 標準。 本符號只適用於歐盟國家。 ≥ 說明書中列印的其他名稱、公司名稱和產品名稱都 如欲丟棄本產品,請聯絡當地 是有關公司的商標或註冊商標。 政府單位或經銷商,洽詢正確 的棄置方法。 進口廠商 : 台松電器販賣股份有限公司 地址 : 新北市中和區員山路 579 號 電話 :(02)2223-5121 VQT2Z59...
-
Seite 54: 故障預防
∫ 關於水汽凝結 (鏡頭的霧化) 故障預防 ≥ 當周圍環境溫度和濕度如下變化時,會發生水汽凝 ∫鏡頭保養 結。 水汽凝結可能會使鏡頭變髒,產生霉菌及發生 ≥ 沙子及塵土會損壞鏡頭 。 在沙灘等地方使用鏡頭 故障,因此在下列情況時請注意: 時 , 請勿讓沙子或塵土進入到鏡頭或端子中 。 – 在寒冷的天氣裡將相機從室外帶到室內時 ≥ 此鏡頭不防水 。 如果水滴濺到鏡頭上 , 請用乾布擦 – 將相機帶到開著空調的車內時 拭鏡頭 。 – 空調等設備的冷風直接吹向鏡頭時 ≥ 請勿用力按壓鏡頭。 – 在潮濕的地方 ≥ 當鏡頭表面有污垢 (水、油和手印等)時,相片 ≥ 要防止水汽凝結,請將相機放在塑膠袋中,直到相 可能會受到影響。... -
Seite 55: 提供的附件
提供的附件 [ 請在打開包裝取出本裝置時進行檢查 ] 當從其包裝盒中取出本裝置時 , 請檢查是否包含主機 及其提供的附件 , 還要檢查它們的外觀和功能 , 以確保 它們在配送和運輸過程中沒有損壞 。 如果發現有問題 , 請在使用本產品前連繫您的銷售商 。 產品號碼截至 2010 年 10 月為準 。 此後可能會有變更 。 VFC4601 VYC1016 VYF3375 VFC4605 鏡頭儲藏袋 鏡頭遮光罩 鏡頭蓋 鏡頭後蓋 (購買時 , 鏡頭後蓋和鏡頭蓋安在可互換鏡頭 上 。 ) VQT2Z59... -
Seite 56: 安裝 / 取下鏡頭
安裝 / 取下鏡頭 ∫ 取下鏡頭 ≥ 檢查相機是否關閉。 ≥ 安裝及取下鏡頭的方法也請參閱相機的使用說明 在按下 D 鏡頭釋放按鈕的 書。 同時 , 盡可能朝箭頭方向轉 ∫安裝鏡頭 動鏡頭以將其取下 。 ≥ 檢查相機是否關閉。 • 請蓋上鏡頭後蓋 , 這樣就不會 劃傷鏡頭支座觸點 。 1 轉動鏡頭後蓋將其取 • 將機身蓋安裝到相機上 , 以防 下。 止污物或灰塵進入機身內部 。 A: 鏡頭後蓋 ∫ 安裝和取下鏡頭蓋 ≥... - Seite 57 ∫安裝鏡頭遮光罩 (提供的附件) 2 倒轉鏡頭遮光罩,然後用前面所示的相同方 將鏡頭遮光罩插入鏡頭 , 朝箭頭指示的方向轉 法進行安裝。 ≥ 在安裝了鏡頭遮光罩的情況下 動直到停止為止 。 用閃光燈拍攝時,由於鏡頭遮 光罩可能使照片閃光燈變暗, 因此螢幕的下面部分可能會變 暗 (暈影效果) ,並且閃光燈 的控制可能會失效。 ≥ 當在暗處使用 AF 輔助燈時, E: 對準標記 請取下鏡頭遮光罩。 ∫ 安裝濾鏡 ∫暫時存放鏡頭遮光罩 ≥ 如果使用 2 個以上的 MC 保護鏡 1 朝著箭頭方向轉動鏡頭遮光罩以卸下。 (另購件 : DMW-LMCH67)或 PL 偏光鏡 (另購件...
-
Seite 58: 元件的名稱及功能
元件的名稱及功能 1 鏡頭表面 2 對焦環 用手動對焦拍攝時 , 轉動進行對焦 。 3 變焦環 想要拍攝較大 (遠攝) 或較寬 (廣角) 圖片時 , 請轉動 變焦環 。 (相當於 35 mm 菲林相機 : 200 mm 至 600 mm) 4 [O.I.S.] 開關 將鏡頭安裝到相機上時 , 如果 [O.I.S.] 開關設定為 [ON] , 則將啟動穩定器功能 。 ≥... -
Seite 59: 使用時的注意事項
≥ 準備長時間不使用本裝置時,建議在存放時放入一 使用時的注意事項 些乾燥劑 (矽膠) 。 否則,可能會由於發霉等原因 而導致性能出現故障。 建議在使用前先檢查本裝置 請務必小心 , 切勿跌落或撞擊鏡頭 。 還要務必小心 , 切 是否能夠正常運行。 勿在鏡頭上施加過多壓力 。 ≥ 請勿讓鏡頭與橡膠或塑料製品長時間接觸。 ≥ 請注意不要讓裝有鏡頭的包跌落,因為這樣可能會損 ≥ 請勿觸摸本裝置的電觸點。 這樣做可能會導致本裝 壞鏡頭。相機可能會停止正常操作,可能無法繼續拍 置發生故障。 攝圖片。 ≥ 請勿拆卸或改裝本裝置。 在相機周圍使用殺蟲劑或其他揮發性的物質時 , 請勿 請勿使用汽油 、 稀釋劑 、 酒精或其他類似的清潔劑清潔 使其接觸到鏡頭 。 本裝置... - Seite 60 規格 數位相機用可替換鏡頭 “LUMIX G VARIO 100 – 300 mm/F4.0 – 5.6/MEGA O.I.S.” f=100 mm 至 300 mm 焦距 (相當於 35 mm 菲林相機 : 200 mm 至 600 mm) 7 片控光片 / 圓形虹膜光圈 光圈類型 F4.0 (廣角) 至 F5.6 (遠攝) 光圈範圍 最小光圈值 17 件...
-
Seite 61: Информация Для Вашей Безопасности
РУССКИЙ ЯЗЫК Информация для вашей Содержание безопасности Информация для вашей безопасности ....61 Правила эксплуатации ...........63 Принадлежности, входящие в комплект ....64 Храните прибор вдали от источников Установка/Снятие объектива ........65 электромагнитного излучения (например, Названия и функции составных частей ....67 микроволновых печей, телевизоров, Предосторожности... - Seite 62 ≥ На иллюстрациях цифровой камеры в данных инструкциях по эксплуатации в качестве примера показан DMC-GH2. ≥ Внешний вид и спецификации продуктов, описанные в данном руководстве, могут отличаться от фактических приобретенных продуктов ввиду более поздних улучшений. ≥ Micro Four Thirds™ и знаки логотипа Micro Four Thirds являются...
-
Seite 63: Правила Эксплуатации
∫ О конденсации (Запотевании Правила эксплуатации объектива) ∫Уход за объективом ≥ Конденсация происходит при разнице в ≥ Песок и пыль могут привести к повреждению температуре и влажности, как описано ниже. объектива. При использовании объектива на Конденсация может привести к загрязнению пляже... -
Seite 64: Принадлежности, Входящие В Комплект
Принадлежности, Номера изделий правильны по состоянию на октябрь 2010 г. Они могут изменяться. входящие в комплект [Комплектность необходимо проверять при распаковке устройства] При изъятии устройства из оригинальной упаковки проверьте наличие основного VFC4601 VYC1016 VYF3375 VFC4605 устройства и его комплектующих, а также Сумка... -
Seite 65: Установка/Снятие Объектива
Установка/Снятие объектива • Убедитесь, что объектив установлен правильно. ≥ Информацию об установке и снятии объектива ∫ Снятие объектива см. также в инструкциях по эксплуатации камеры. ≥ Убедитесь, что камера выключена. ∫Установка объектива ≥ Убедитесь, что камера выключена. Чтобы снять объектив, нажмите... - Seite 66 ∫Присоединение бленды объектива 2 Разверните бленду обратной стороной (Принадлежность в комплекте) и закрепите, как указано выше. Вставьте бленду в объектив и ≥ При съемке со вспышкой с поворачивайте ее в направлении использованием бленды нижняя часть снимка может стрелки до блокировки. быть...
-
Seite 67: Названия И Функции Составных Частей
Названия и функции 4 Переключатель [O.I.S.] Если объектив прикреплен к камере, функция составных частей стабилизатора установлена на активацию, если переключатель [O.I.S.] установлен на [ON]. ≥ При использовании штатива рекомендуется устанавливать переключатель [O.I.S.] в положение [OFF]. ≥ Функция стабилизатора может работать неэффективно... -
Seite 68: Предосторожности При Использовании Фотокамеры
Предосторожности при – Под воздействием прямых солнечных лучей или на пляже летом использовании фотокамеры – В местностях с высокой влажностью воздуха и высокими температ урами, или с резкими Старайтесь не ронять и не ударять объектив. перепадами температ уры и влажности Также... -
Seite 69: Устранение Неисправностей
≥ Не оставляйте объектив в контакте с Устранение неисправностей резиновыми или пластиковым продуктами на При включении и выключении камеры продолжительный период времени. слышен звук. ≥ Не прикасайтесь к электрическим контактам ≥ Звук возникает в результате движения устройства. Это может вызвать сбой в его работе. диафрагмы... -
Seite 70: Технические Характеристики
Технические характеристики СМЕННЫЙ ОБЪЕКТИВ ДЛЯ ЦИФРОВОЙ ФОТОKAMEРЫ “LUMIX G VARIO 100 – 300 mm/F4.0 – 5.6/MEGA O.I.S.” Фокусное расстояние f=100 мм до 300 мм (Эквивалент 35 мм пленочной камеры: от 200 мм до 600 мм) Тип диафрагмы 7 лепестки диафрагмы / диафрагма с круглым отверстием Диапазон... - Seite 71 Установленный производителем в порядке п. 2 ст. 5 федерального закона РФ “О защите прав потребителей” срок службы данного изделия равен 7 годам с даты производства при условии, что изделие используется в строгом соответствии с настоящей инструкцией по эксплуатации и применимыми техническими стандартами. VQT2Z59...
- Seite 72 Pursuant to at the directive 2004/108/EC, article 9(2) Panasonic Testing Centre Panasonic Marketing Europe GmbH VQT2Z59-1 Winsbergring 15, 22525 Hamburg, Germany F0910HH1051 ( 8000 ) Panasonic Corporation Web Site: http://panasonic.net Panasonic Corporation 2010...