protech Sonic 400 Anleitung
T0379
INSTRUCTION MANUAL • GEBRUIKSAANWIJZING • ANLEITUNG • INSTRUCTIONS DE MONTAGE
WARNING !
This R/C kit and the model you
2
31 dm
will build is not a toy.
LET OP !
Deze bouwdoos van een ra-
diobestuurd vliegtuig is geen
speelgoed.
890 g.
ACHTUNG !
Ein Dieser Bausatz
ferngesteuertes Modell
ist kein Spielzeug.
ATTENTION !
Ce modèle R/C à assembler n'est
pas un jouet.
Inhaltsverzeichnis

Verwandte Anleitungen für protech Sonic 400


Inhaltszusammenfassung für protech Sonic 400
- Seite 1 T0379 INSTRUCTION MANUAL • GEBRUIKSAANWIJZING • ANLEITUNG • INSTRUCTIONS DE MONTAGE WARNING ! This R/C kit and the model you 31 dm will build is not a toy. LET OP ! Deze bouwdoos van een ra- diobestuurd vliegtuig is geen speelgoed.
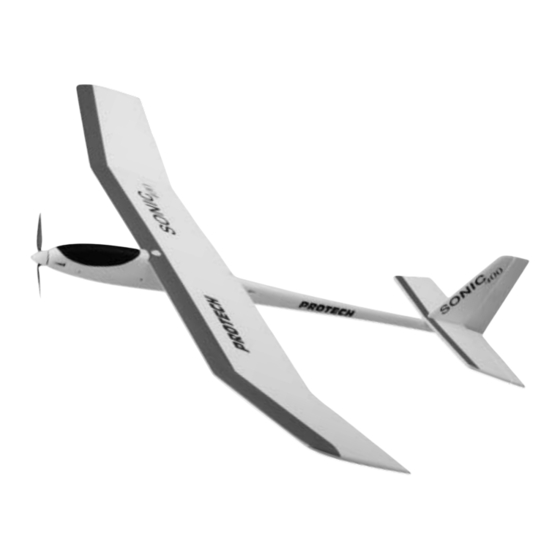
- Seite 2 Lengte: 1480 mm Length: 1480 mm Länge: 1480 mm Longueur: 1480 mm Spanwijdte: 990 mm Wing span: 990 mm Spannweite: 990 mm Envergure: 990 mm Vleugelopp.: 31 dm Wing area: 31 dm Tragfl ügelinhalt: 31 dm Surface alaire: 31 dm Vleugelbel.: 28,7 g/dm Wing loading:...
- Seite 3 Tools & items / Gereedschap & benodigdheden / Werkzeuge und erforderliches / Outils et équipements MICRO #S1705 Micro Receiver Powerpack 7,2V-1400mAh #PRO5.40 or #PRO5.35 Weight: Torque: 24Ncm Electronic speedcontroller Speed: 0,14s / 60° Tamiya connectors #PL111 Dimension: 29x25x13mm #PRO.18MPC • DC 12V Input voltage •...
-
Seite 4: Important Safety Notes
Important Safety Notes. Be sure to read right through the instructions covering assembly and operation of your model before you at tempt to operate it for the fi rst time. You alone are respon- sible for the safe operation of your radio-con trol led model. Young people should only be permitted to build and fl y these mod els under the instruction and su per vi sion of an adult who is aware of the hazards involved in this activity. -
Seite 5: Wichtige Sicherheitshinweise
Wichtige Sicherheitshinweise Vor dem Versuch der ersten Inbetriebnahme muß die gesamte Betriebs- und Montageanleitung sorgfältig gelesen werden. Sie alleine sind verantwortlich für den sicheren Betrieb Ihres RC-Flugmodells. Bei Jugendlichen muß der Bau und Betrieb von einem Erwachsenen, der mit den Gegebenheiten und möglichen Gefahren eines RC-Flugmodells vertraut ist, verantwortlich überwacht werden. - Seite 6 Assembling the wing / Monteren van de vleugel Montieren von die Fläche / Assemblage de l'aile 9 cm Fig. 1 Fig. 2 Fig. 3 Fig. 5 Fig. 4 Glue the 3 wing parts with epoxy Verlijm de 3 vleugeldelen met Verkleben Sie die 3 Flachen mit Assemblez les 3 panneaux d'aile glue.
- Seite 7 Installing the rudder / Montage van het richtingsroer / Montierung des Seitenruder / Montage de la gouverne de direction DO NOT USE Fig. 9 Fig. 10 Fig. 11 DO NOT USE the 2 pre-drilled GEBRUIK de voorgeboorde Die bereits gebohrte Bohrüngen NE PAS UTILISER les 2 trous holes on the rudder.
- Seite 8 Installing the clevises / Monteren van de kwiklinks / Montierung von Gabelköpfen /Installation des chapes Fig. 14 Fig. 15 Screw the plastic clevises onto Schroef de plastieken kwiklinks op Schrauben Sie beide Kunststoff Installez les chapes en plastique the metal push rods and bend de metalen stuurstangen en buig Gabelköpfen auf die Gestängen sur les commandes et connectez-...
- Seite 9 Checking the propeller / Kontroleren van de propeller / Überprufung von Luftschraube / Vérifi cation de l'hélice Fig. 21 Before running the motor, check Voor u de motor de eerste keer Vor Sie den Motor zum ersten Contrôlez au moyen de la clé the propeller with the provided gebruikt moet u controleren of Mal benutzen mußen Sie den...
- Seite 10 Installing the receiver / Installeren van ontvanger / Anbringen vom Empfänger / Installation du récepteur Fig. 26 Fig. 27 Fig. 28 Fix some foam in the fuselage. Steek een beetje schuimrubber Bringen Sie ein wenig Schaum- Installez de la mousse dans le Connect the servos and the in de romp.
- Seite 11 Installing the canopy / Installeren van de cockpitvenster Installierung von Kabinenhaube / Installation de la verrière Fig. 32 Fig. 33 Fig. 34 Install the canopy pushing the Bevestig het cockpitvenster op de Installieren Sie die Kabinenhaube Installez la verrière en introduisant guide, at the back of the canopy, romp, met behulp van de pen aan auf dem Rumpf mit Hilfe...
- Seite 12 Decals / Decals / Dekorbogen / Décoration Fig. 75 Rudder defl ection / Roeruitslagen Ruderausschlägen / Débattements 30 mm 30 mm 10 mm 10 mm...
- Seite 13 Center of gravity / Zwaartepunt Schwerpunkt / Centre de gravité 65mm...
- Seite 14 Parts list / Onderdelenlijst Ersatzteilen / Pièces détachées T0303.3 T0379.4 T0303.1 T0303.5 T0379.7 T0379.2 ME40061...
-
Seite 15: Important Safety Instructions
Attention / Opgelet / Attention / Achtung IMPORTANT SAFETY INSTRUCTIONS • Don’t fl y facing the sun because you could be blinded and loose control. Always wear a cap and sunglasses for pro tec - tion. • Keep propeller away from face, eyes and fi ngers. •... - Seite 16 Flying instructions / Vlieginstructies / Instructions pour le vol / Fluganleitung Choose an open fl ying area away from buildings, roads, powerli- nes, trees and water. Kies een open plaats voor het vliegen, verwijdert van gebouwen, wegen, elektriciteitskabels, bomen en water. Choisissez un endroit bien dégagé...
- Seite 17 Attention / Opgelet / Attention / Achtung INTERFERENCE Before fl ying you should always check to see if other planes in the area are on the same frequency, as this will cause transmitter interference between the planes and cause accidents. ZENDERSTORINGEN Voor het vliegen, moet U steeds kontroleren of er andere model- len in de buurt niet dezelfde frekwentie hebben, daar dit zenders-...
- Seite 18 Almost ready to fl y electric powered glider with ailerons T0316 Wing span: 2040 mm Length: 1040 mm Wing area: 37,2,0 dm Power: MEGAX 600 Flying weight: 1350 g Almost ready to fl y electric powered aircraft T0368 Wing span: 1225 mm Length: 830 mm...
- Seite 19 Notes...
- Seite 20 All you need is inside … The PROTECH CATALOG 144 Full colour pages Ask your local R/C model shop ® is a registered trademark PROTECH P.O.-Box 60 • B-2250 Olen Tel.: +32 (0)14 25 92 83 Fax: +32 (0)14 25 92 89 info@protech.be...